|
PEQUEÑA FILOSOFA

english version

Here you find the original of this tutorial:

This tutorial was written with CorelX19 and translated with CorelX17, but it can also be made using other versions of PSP.
Since version PSP X4, Image>Mirror was replaced with Image>Flip Horizontal,
and Image>Flip with Image>Flip Vertical, there are some variables.
In versions X5 and X6, the functions have been improved by making available the Objects menu.
In the latest version X7 command Image>Mirror and Image>Flip returned, but with new differences.
See my schedule here
italian translation here
french tanslation here
your versions here
For this tutorial, you will need:
Tubes of yours.
The rest of the material here
Thanks for the material
Main tube (not supplied) is by Mtfp (mtfp_516_Alice).
The image used for the misted found in Internet.
The rest of the material is by Yedralina
(The links of the tubemakers here).
Plugins:
consult, if necessary, my filter section here
Mehdi - Wavy Lab 1.1 here
L&K's - L&K's Pia here

You can change Blend Modes according to your colors.
In the newest versions of PSP, you don't find the foreground/background gradient (Corel_06_029).
You can use the gradients of the older versions.
The Gradient of CorelX here
Copy the preset Preset_MeshWarping001_DefMalla-©Yedralina in the Presets Folder.
1. Set your foreground color to #828eac,
and your background color to #c7daef.

Set your Foreground color to a Foreground/Background Gradient, style Linear.

Open Image Alpha pequenafilosofa-©Yedralina.
Window>Duplicate, or on the keyboard shift+D, to make a copy.
Close the original.
The copy, that will be the basis of your work, is not empty, but contains the selections saved on the alpha channel.
2. Effects>Plugins>Mehdi - Wavy Lab 1.1
This filters creates gradients with the colors of your palette.
The first is your background color, the second is your foreground color.
Keep the last two colors created by the filter.

3. Effects>Plugins>L&K's - L&K's Pia

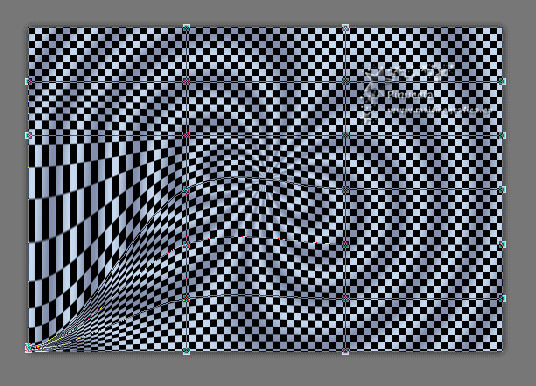
4. Activate the Mesh Warp Tool 
Open the presets menu and select the preset Preset_MeshWarping001_DefMalla-©Yedralina

Result

******
The preset, created with Corel19, works also with the previous versions.
However, if you have problems, you can do this:
Pull the lateral nodes 1, 2 and 3 down
(to show you the nodes, I made it before the Lek plugin)

Begin with the left nodes

and you'll get this

Repeat with the right nodes


*****
M Key to deselect the Tool.
5. Effects>Reflection Effects>Rotating Mirror.

6. Layers>New Raster Layer.
Selections>Load/Save Selection>Load Selection from Alpha Channel.
The selection #1 is immediately available. You just have to click Load.

7. Selections>Modify>Inside/Outside Feather.

Flood Fill  the selection with your gradient. the selection with your gradient.
8. Selections>Modify>Inside/Outside Feather, same settings.
9. Open your landscape misted and go to Edit>Copy.
Go back to your work and go to Edit>Paste into Selection.
Selections>Select None.
10. Effects>Reflection Effects>Rotating Mirror.

Reduce the opacity of this layer to 80%.
11. Layers>New Raster Layer.
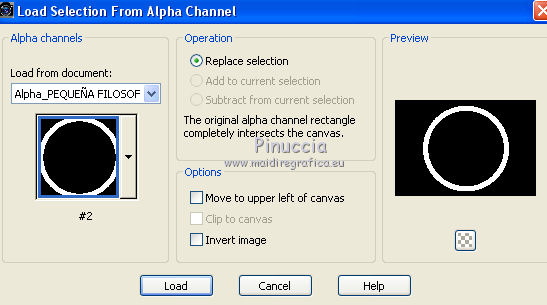
Selections>Load/Save Selection>Load Selection from Alpha Channel.
Open the selection menu and load the selection #2.

12. Effects>Plugins>Mehdi - Wavy Lab 1.1., same settings.
13. Layers>New Raster Layer.
Selections>Load/Save Selection>Load Selection from Alpha Channel.
Open the selection menu and load the selection #3.

Flood Fill  the selection with your gradient. the selection with your gradient.
14. Edit>Paste into Selection (the misted is always in memory).
of course, you can use a different tube;
for my example I used the same image, but processed with different masks
15. Layers>New Raster Layer.
Effects>3D Effects>Cutout.

Selections>Select None.
16. Layers>Merge>Merge Down - 2 times.
17. Objects>Align>Top
If you are working with a previous version that has not available the Objects menu,
use the Move Tool 

18. Effects>3D Effects>Drop Shadow, color black.

19. Activate the bottom layer.
Layers>Duplicate.
Image>Flip.
20. Effects>Geometric Effects>Perspective vertical.

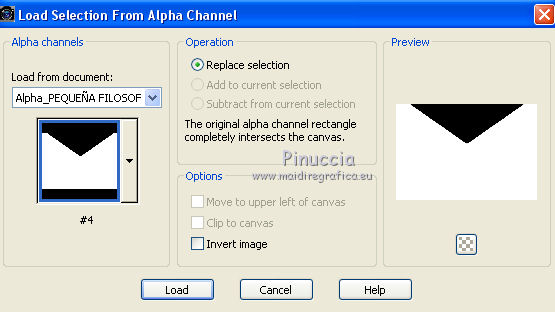
21. Selections>Load/Save Selection>Load Selection from Alpha Channel.
Open the selection menu and load the selection #4.

Press CANC on the kayboard 
Image>Flip.
22. K key on the keyboard to activate the Pick Tool 
mode Scale 
pull the top central node

down until 540 pixels.

M Key to deselect the Tool.
23. Activate the top layer.
Open your main tube and go to Edit>Copy.
Go back to your work and go to Edit>Paste as new layer.
Image>Resize, if it is necessary, resize all layers not checked.
Place  the tube where your like. the tube where your like.
Effects>3D Effects>Drop Shadow, at your choice.
24. Image>Add borders, 1 pixel, symmetric, color black.
Image>Add borders, 3 pixels, symmetric, light color.
Image>Add borders, 1 pixel, symmetric, color black.
25. Selections>Select All.
Image>Add borders, 40 pixels, symmetric, whatever color (I used the light color).
Selections>Invert.
Effects>Plugins>Mehdi - Wavy Lab 1.1., same settings.
Selections>Invert.
Effects>3D Effects>Drop Shadow, color black.

26. Image>Add borders, 1 pixel, symmetric, color black.
Image>Add borders, 3 pixels, symmetric, light color.
Image>Add borders, 1 pixel, symmetric, color black.
27. Selections>Select All.
Image>Add borders, 10 pixels, symmetric, light color.
Selections>Invert.
Effects>Plugins>L&K's - L&K's - Pia, same settings.
Selections>Invert.
Effects>3D Effects>Drop Shadow, color black.

28. Open the text Text_Alicia©Yedralina and go to Edit>Copy.
(in the material, there is the font used for this text).
Go back to your work and go to Edit>Paste as new layer.
Move  the texte at the bottom right. the texte at the bottom right.
Effects>3D Effects>Drop Shadow, at your choice.
29. Sign your work on a new layer.
30. Image>Add borders, 1 pixel, symmetric, color black.
31. Image>Resize, 950 pixels width, resize all layers checked.
Save as jpg.

If you have problems or doubts, or you find a not worked link, or only for tell me that you enjoyed this tutorial, write to me.
24 August 2018
|


