|
STEAMPUNK 3


Thanks Gerrie for your invitation to translate your tutorials.

This tutorial was created with PSPX2 and translated with PSPX7, but it can also be made using other versions of PSP.
Since version PSP X4, Image>Mirror was replaced with Image>Flip Horizontal,
and Image>Flip with Image>Flip Vertical, there are some variables.
In versions X5 and X6, the functions have been improved by making available the Objects menu.
In the latest version X7 command Image>Mirror and Image>Flip returned, but with new differences.
See my schedule here
 Italian translation qui Italian translation qui
 French translation here French translation here
 Your versions ici Your versions ici
For this tutorial, you will need:

For the tubes thanks DecadantSteampunk, Animabelle
(you find here the links to the material authors' sites)

consult, if necessary, my filter section here
Filters Unlimited 2.0 here
&<Background Designers IV> - sf10 Square Bump (to import in Unlimited) here
Mehdi - Sorting Tiles here
Graphics Plus - Cross Shadow here
AAA Frames - Foto Frame / AAA Filters - Custom here
Filters Graphics Plus can be used alone or imported into Filters Unlimited.
(How do, you see here)
If a plugin supplied appears with this icon  it must necessarily be imported into Unlimited it must necessarily be imported into Unlimited

You can change Blend Modes according to your colors.
In the newest versions of PSP, you don't find the foreground/background gradient (Corel_06_029).
You can use the gradients of the older versions.
The Gradient of CorelX here

Open the mask in PSP and minimiser it with the rest of the material.
1. Set your foreground color to #f0d36b,
and your background color to #a04c30.

If you use other colors, colorize the image
with the codes of Hue and Saturation of you background color.

In newer versions, finding these values is a bit more complicated:
open the color palette and click on Slider,
in the menu that opens select HSL Slider
Compared to older versions of the PSP, the Hue is always slightly different,
almost always higher.

In any case, in the instructions relating to the Colorize Effect,
it is always suggested to adjust the settings according to the color you want to obtain.
Set your foreground color to a Foreground/Background Gradient, style Radial.

2. Open a new transparent 900 x 600 pixels.
Selections>Select All.
Open the image roses-66527_960_720 
Edit>Copy.
Go back to your work and go to Edit>Paste into Selection.
Selections>Select None.
3. Layers>Duplicate.
Adjust>Blur>Radial Blur.

4. Effects>Plugins>Filters Unlimited 2.0 - &<Background Designers IV> - sf10 Square Bumps, default settings.

5. Effects>Plugins>Mehdi - Sorting Tiles.

6. Layers>New Mask layer>From image
Open the menu under the source window and you'll see all the files open.
Select the mask TD_Mask_Steampunk

7. Layers>Merge>Merge All.
8. Image>Canvas Size - 950 x 700 pixels.

9. Activate your Magic Wand Tool 

and click in the border to select it .
Flood Fill  the selection with your Gradient. the selection with your Gradient.
10. Effects>Plugins>Graphics Plus - Cross Shadow.

Repeat this Effect another time.
11. Effects>Plugins>AAA Frames - Foto Frame.

12. Repeat Effects>Plugins>AAA Frames - Foto Frame, width 17

Selections>Select None.
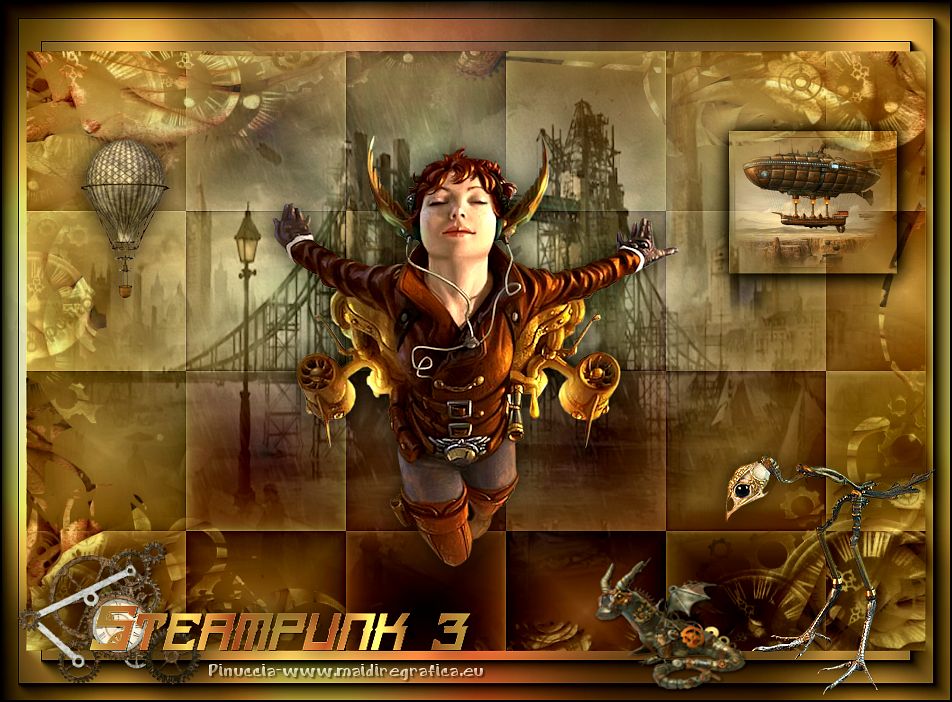
13. Open the misted Tubes Exclusifs Animabelle 
Erase the watermark and go to Edit>Copy.
Go back to your work and go to Edit>Paste as new layer.
Move  the tube a little higher, as in my example. the tube a little higher, as in my example.
Reduce the opacity of this layer to 73%, or according your colors.

14. Open the main tube Steampunk(138) 
Edit>Copy.
Go back to your work and go to Edit>Paste as new layer.
Don't move it.
Effects>3D Effects>Drop Shadow, at your choice.
15. Open the tube STP18 
Edit>Copy.
Go back to your work and go to Edit>Paste as new layer.
Move  the tube at the bottom right. the tube at the bottom right.
Effects>3D Effects>Drop Shadow, at your choice.
16. Open the tube deco3 
Edit>Copy.
Go back to your work and go to Edit>Paste as new layer.
Move  also this tube at the bottom right. also this tube at the bottom right.

Effects>3D Effects>Drop Shadow, at your choice.
17. Open the tube Steampunk(64) 
Edit>Copy.
Go back to your work and go to Edit>Paste as new layer.
Move  the tube at the upper left. the tube at the upper left.
Effects>3D Effects>Drop Shadow, at your choice.
18. Open the image plaatje Gerrie 
Edit>Copy.
Go back to your work and go to Edit>Paste as new layer.
Move  this image at the upper right. this image at the upper right.

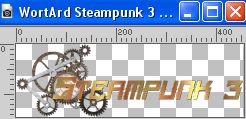
20. Open the wordart WortArd Steampunk 3  (or write your text) (or write your text)
Edit>Copy.
Go back to your work and go to Edit>Paste as new layer.
Move  the text at the bottom left. the text at the bottom left.
Effects>3D Effects>Drop Shadow, at your choice.
21. Sign your work on a new layer.
22. Image>Add borders, 1 pixel, symmetric, color black.
23. Effets>Plugins>AAA Filters - Custom - click on Landscape and ok
(or according to your color)

24. Image>Resize, if you want, and save as jpg.
For the tubes of this version thanks Renée.


If you have problems or doubts, or you find a not worked link, or only for tell me that you enjoyed this tutorial, write to me.
3 April 2023

|

