|
LOVE IS THE KEY THAT OPENS YOUR HEART


Thanks Gerrie for your invitation to translate your tutorials.

This tutorial was created with PSPX2 and translated with PSPX, PSPX2, PSPX3, but it can also be made using other versions of PSP.
Since version PSP X4, Image>Mirror was replaced with Image>Flip Horizontal,
and Image>Flip with Image>Flip Vertical, there are some variables.
In versions X5 and X6, the functions have been improved by making available the Objects menu.
In the latest version X7 command Image>Mirror and Image>Flip returned, but with new differences.
See my schedule here
 Italian translation qui Italian translation qui
 French translation here French translation here
 Your versions ici Your versions ici
For this tutorial, you will need:

For the tubes thanks MMDesignz and Jet
(you find here the links to the material authors' sites)

consult, if necessary, my filter section here
Filters Unlimited 2.0 here
Graphics Plus - Cross Shadow here
Tramages - Tow the line here
Mura's Seamless - Emboss at Alpha here
Nik Software - Color Efex Pro here
Filters Graphics plus, Tramages and Mura's Seamless can be used alone or imported into Filters Unlimited.
(How do, you see here)
If a plugin supplied appears with this icon  it must necessarily be imported into Unlimited it must necessarily be imported into Unlimited

You can change Blend Modes according to your colors.
In the newest versions of PSP, you don't find the foreground/background gradient (Corel_06_029).
You can use the gradients of the older versions.
The Gradient of CorelX here

Open the mask in PSP and minimize it with the rest of the material.
1. Choose two colors of your tube,
Set your foreground color with the light color: for me #d7c0bb,
and your background color with the dark color: for me #770c16.

Set your foreground color to a Foreground/Background Gradient, style Linear.

2. Open a new transparent image 650 x 550 pixels.
Flood Fill  the transparent image with your gradient. the transparent image with your gradient.
3. Set your foreground color to Color.
Layers>New Raster Layer.
Flood Fill  the layer with your foreground color. the layer with your foreground color.
4. Layers>New Mask layer>From image
Open the menu under the source window and you'll see all the files open.
Select the mask Mask_Heart1.

Layers>Merge>Merge Group.
5. Effects>Plugins>Mura's Seamless - Emboss at Alpha, default settings.

6. Open the tube MMDesignz_Cr054139  . .
Image>Resize, to 595 pixels width, resize all layers checked.
Erase the watermark and go to Edit>Copy.
Go back to your work and go to Edit>Paste as new layer.
7. K key to activate your Pick Tool 
and set Position X: -20,00 and Position Y: 150,00.

Reduce the opacity of this layer to 87%.
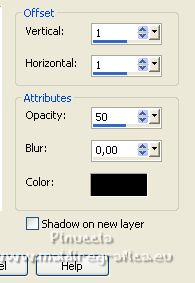
8. Effects>3D Effects>Drop shadow, color black.

9. Open the tube jet-man-drawing-augustus-2007 
Edit>Copy.
Go back to your work and go to Edit>Paste as new layer.
Set Position X: 370,00 and Position Y: 159,00.

M key to deselect the Tool.
10. Effects>3D Effects>Drop Shadow, same settings.
11. Image>Add borders, 2 pixels, symmetric, color black.
Image>Add borders, 50 pixels, symmetric, background color #770c16.
12. Activate your Magic Wand Tool 

and click in the last border to select it.
13. Effects>Plugins>Graphics Plus - Cross Shadow.

14. Effects>Plugins>Tramages - Tow the line, default settings.

15. Image>Miroir.
Selections>Invert.
16. Effects>3D Effects>Drop Shadow, color black.

Edit>Repeat Drop Shadow.
Selections>Select None.
17. Open Wordart-Valentines3 
Edit>Copy.
Go back to your work and go to Edit>Paste as new layer.
Place  the tube to your liking. the tube to your liking.
18. Effects>3D Effects>Drop shadow, color white.

19. Open the tube que key 
Edit>Copy.
Go back to your work and go to Edit>Paste as new layer.
Place  the tube to your liking. the tube to your liking.

20. Effects>3D Effects>Drop Shadow, color black.

21. Sign your work on a new layer.
Layers>Merge>Merge All.
22. Effetts>Plugins>Nik Software - Color Efex Pro - Tonal Contrast.

23. Edit>Copy
Open Animation Shop and go to Edit>Paste>Paste as new animation.
24. Edit>Duplicate, and repeat until you have an animation composed by 15 frames.
Click on the first frame to select it.
Edit>Select All.
25. Open the animazione SimoneAni221, also composed by 15 frames.
Edit>Select All.
Edit>Copy.
26. Activate your work and go to Edit>Paste>Paste in the selected frame.
Place the animation to your liking.
27. Check your result clicking on View  and save as gif. and save as gif.
For the tube of this version thanks Tocha


If you have problems or doubts, or you find a not worked link, or only for tell me that you enjoyed this tutorial, write to me.
14 January 2023

|

