|
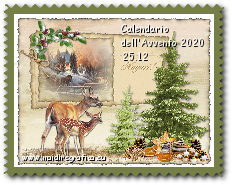
CHRISTMAS FAWNS
 english version english version

This tutorial was translated with PSPX7 but it can also be made using other versions of PSP.
Since version PSP X4, Image>Mirror was replaced with Image>Flip Horizontal,
and Image>Flip with Image>Flip Vertical, there are some variables.
In versions X5 and X6, the functions have been improved by making available the Objects menu.
In the latest version X7 command Image>Mirror and Image>Flip returned, but with new differences.
See my schedule here
 Traduzione italiana here Traduzione italiana here
 Traduction française here Traduction française here
 Your versions here Your versions here
Material here
Filtres:
if you have a doubt about plugins, see my section plugins here
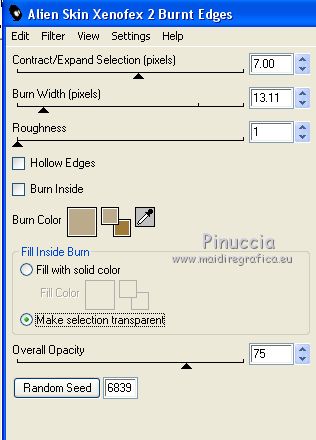
Alien Skin Xenofex 2.0 - Burnt Edges qui


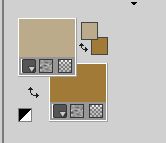
1. Set your Foreground color to #baab8b,
and set your Background color to #a17a37.
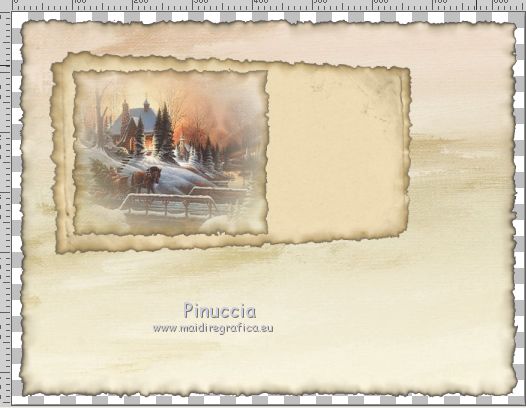
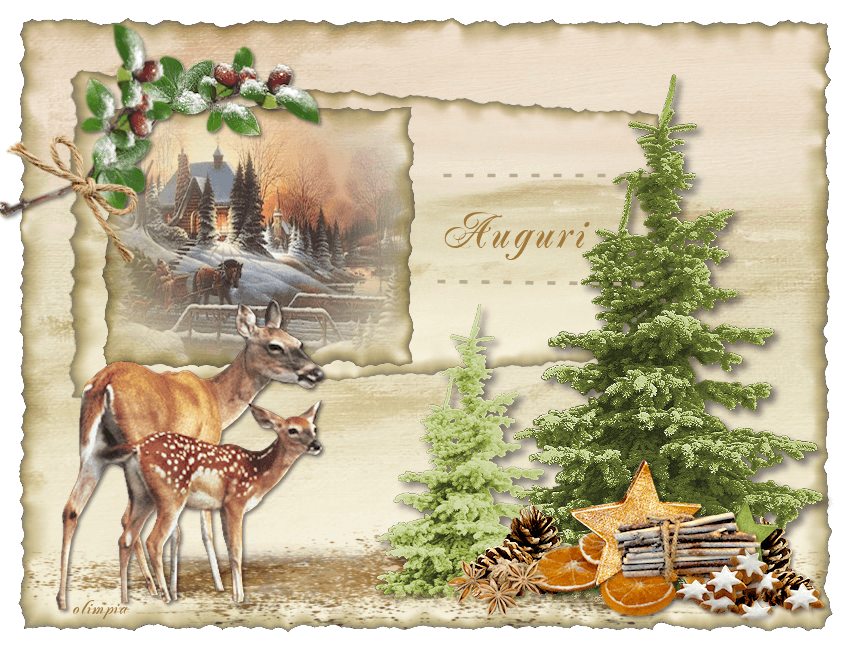
1. Open a new transparent image 850 x 650 pixels.
Selections>Selectionner tout.
Open the image "background" and go to Edit>Copy.
Go back to your work and go to Edit>Paste into Selection.
Selections>Select None.
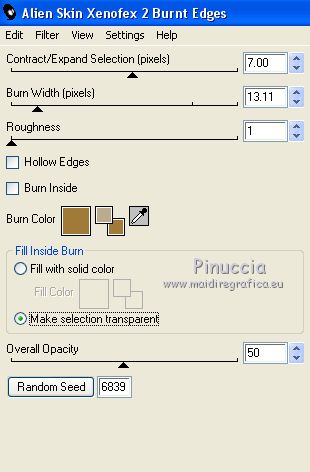
3. Effects>Plugins>Alien Skin Xenofex 2 - Burnt Edges
Setting: Subtle
Burn color: foreground color #bbab8b
4. Layers>New Raster Layer.
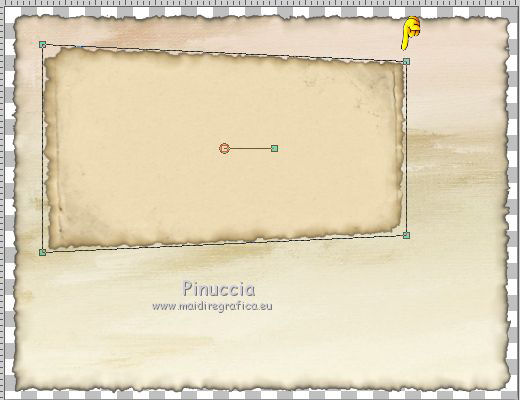
Selection Tool 
(no matter the type of selection, because with the custom selection your always get a rectangle)
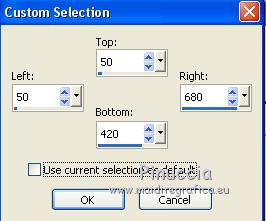
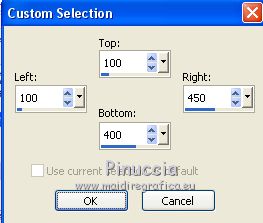
clic on the Custom Selection 
and set the following settings.
Open the image "sfondo" and go to Edit>Copy.
Go back to your work and go to Edit>Paste into Selection.
Selections>Select None.
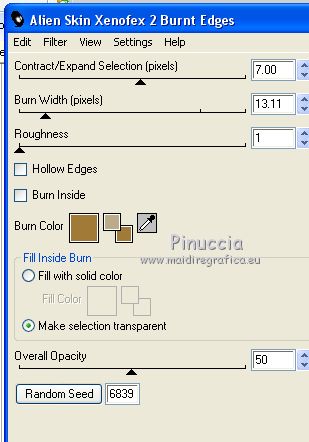
Repeat Effects>Plugins>Alien Skin Xenofex 2 - Burnt Edges, same settings.
but background color and Overall Opacity to 50
5. Activate your Pick Tool  , ,
mode Perspective 
Push the top right knot down
(the opposite node will move symmetrically)
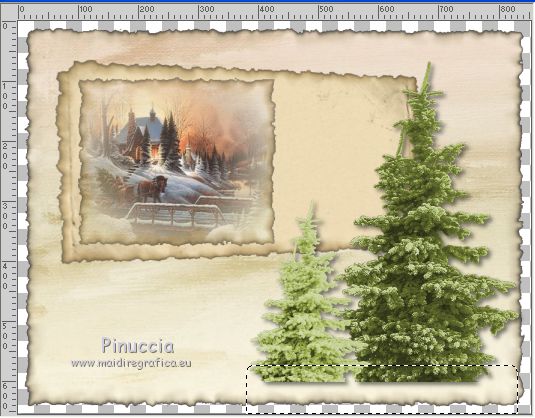
6. Activate your background layer.
Custom Selection
Selections>Promote Selection to layer.
Layers>Arrange>Bring to top.
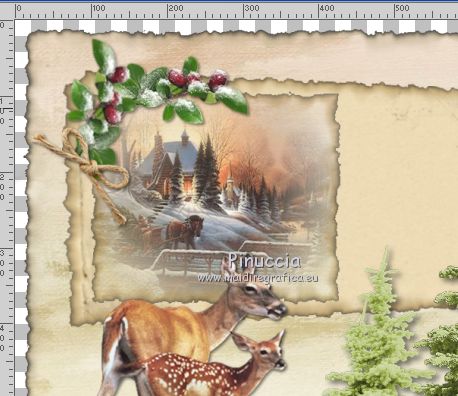
Open the landscape winter 3 and go to Edit>Copy.
Go back to your work and go to Edit>Paste into Selection.
Selections>Select None.
Effects>Plugins>Alien Skin Xenofex 2 - Burnt Edges, same settings.
Place  correctly the painting, correctly the painting,
in the center of the previous one
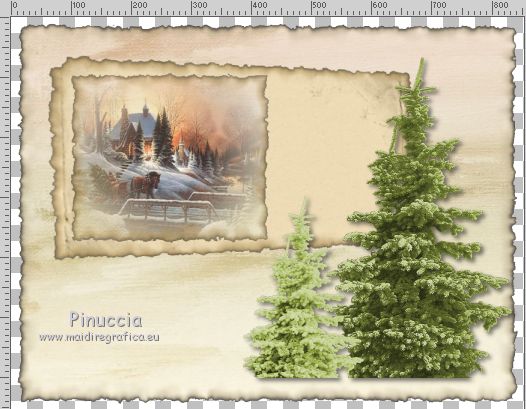
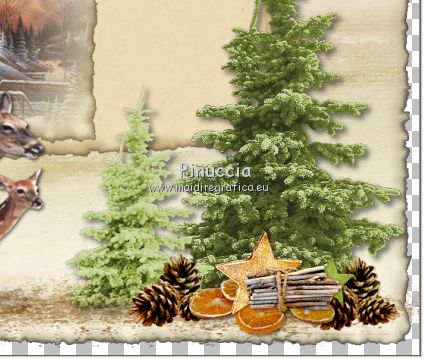
7. Open the trees tubes and go to Edit>Copy.
Go back to your work and go to Edit>Paste as new layer.
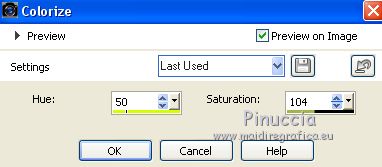
Adjust>Hue and Saturation>Colorize
Move the tube at the bottom right.
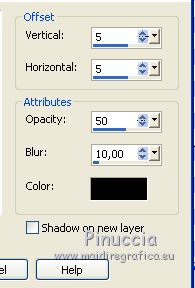
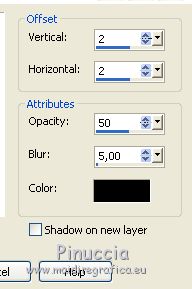
Effects>3D Effects>Drop Shadow, color black.
Activate your Selection Tool 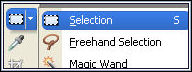 , rectangle, feather 30, , rectangle, feather 30,
and draw a small rectangle at the base of the trees
Press CANC on the keyboard 
Selections>Select None.
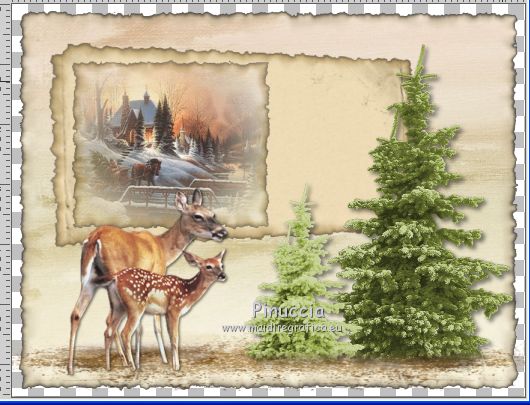
8. Open the tube of the fawns and go to Edit>Copy.
Go back to your work and go to Edit>Paste as new layer.
Image>Resize, to 70%, resize all the layers not checked.
Move the tube at the bottom left.
Effects>3D Effects>Drop Shadow, color black.
9. Open the tube p-SA21Hw2uCR-... and go to Edit>Copy.
Go back to your work and go to Edit>Paste as new layer.
Move the tube at the bottom left.
Layers>Arrange>Move Down - 2 times (under the trees layer)
Layers>Duplicate.
Image>Mirror.
if necessary, activate your Erase Tool 
and erase the traces of the tubes on the trasparent background.
10. Activate your top layer.
Open the tube of the pinecones and go to Edit>Copy.
Go back to your work and go to Edit>Paste as new layer.
Image>Resize, to 25%, resize all the layers not checked.
Adjust>Sharpness>Sharpen.
Effects>3D Effects>Drop Shadow, at your choice.
Layers>Duplicate
Move the two tubes at the bottom right.
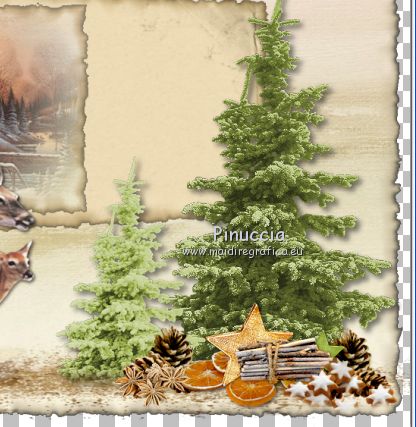
11. Open the tube HappyChristmas_by_Mago74 cz1 and go to Edit>Copy.
Go back to your work and go to Edit>Paste as new layer.
Image>Resize, to 80%, resize all the layers not checked.
Adjust>Sharpness>Sharpen.
Move the tube between the pinecones, at the bottom right.
Effects>3D Effects>Drop Shadow, at your choice.
12. Open cookies and go to Edit>Copy.
Go back to your work and go to Edit>Paste as new layer.
Image>Resize, to 80%, resize all the layers not checked.
Adjust>Sharpness>Sharpen.
Move the tube under the trees, at the bottom right.
Effects>3D Effects>Drop Shadow, at your choice.
13. Open beautiful reender (42), and go to Edit>Copy.
Go back to your work and go to Edit>Paste as new layer.
Image>Resize, to 30%, resize all the layers not checked.
Adjust>Sharpness>Sharpen.
Effects>3D Effects>Drop Shadow, at your choice.
Move the tube under the trees, at the bottom left.
14. Open the tube of the small branches (my elaboration of a scrap element found on the net).
Edit>Copy.
Go back to your work and go to Edit>Paste as new layer.
Move the tube at the upper left.
Effects>3D Effects>Drop Shadow, at your choice.
15. Open the tube of the ribbon and go to Edit>Copy.
Go back to your work and go to Edit>Paste as new layer.
Image>Resize, to 30%, resize all the layers not checked.
Image>Free Rotate, 45 degrees to right.

Move the ribbon at the upper left, under the branches.
16. Activate your Pen Tool  , ,
line style Dot
and draw a line with your foreground color on the free space of the picture,
where the text will be written
Layers>Convert to Raster Layer.
Layers>Duplicate, and move the line down.
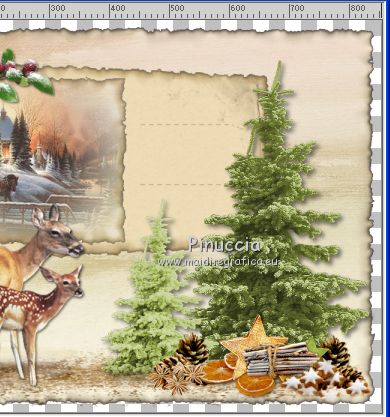
17. Activate your Text tool  , choose a font , choose a font
(io used the font Jacoba, background color #ad8e53)
and write your text between the lines.
Effects>3D Effects>Drop Shadow, at your choice.
18. Sign your work on a new layer.
Layers>Merge>Merge visible.
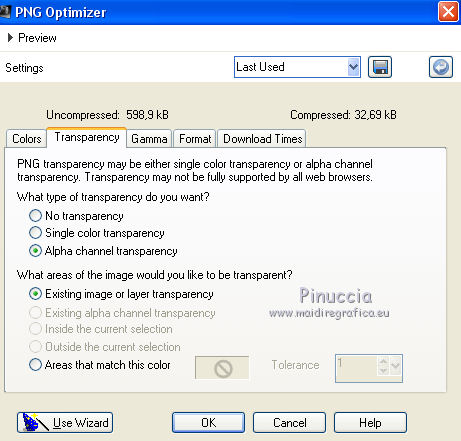
Save as png to keep the transparence of your background
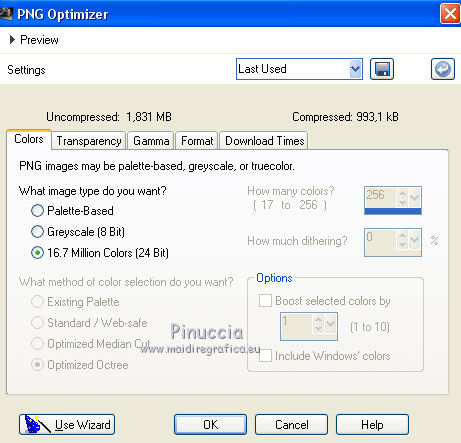
File>Export>PNG Optimizer
per ridurre il peso dei files in formato png, uso il sito Tinypng

Version with not signed tubes

Thank to the friends who tested my tutorial
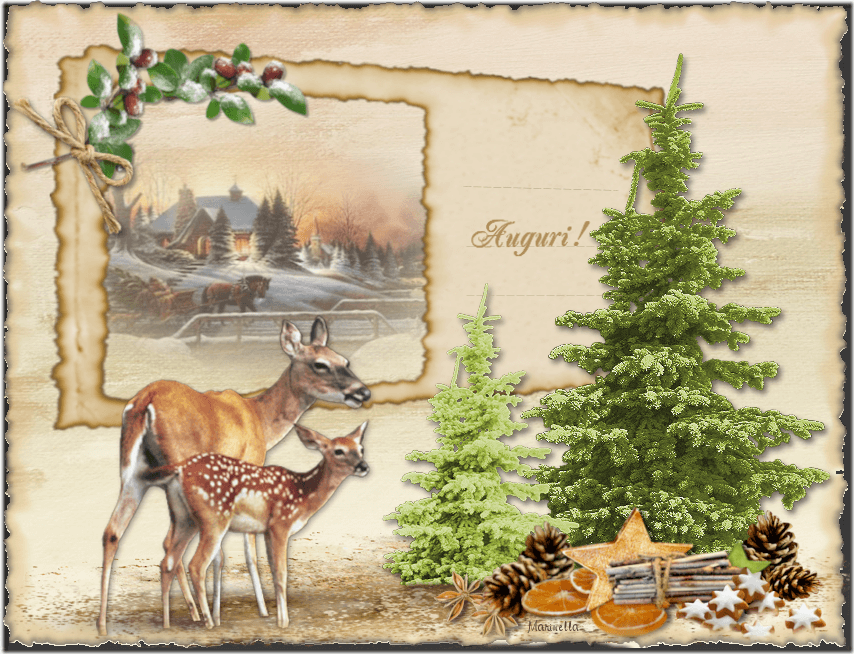
Marinella
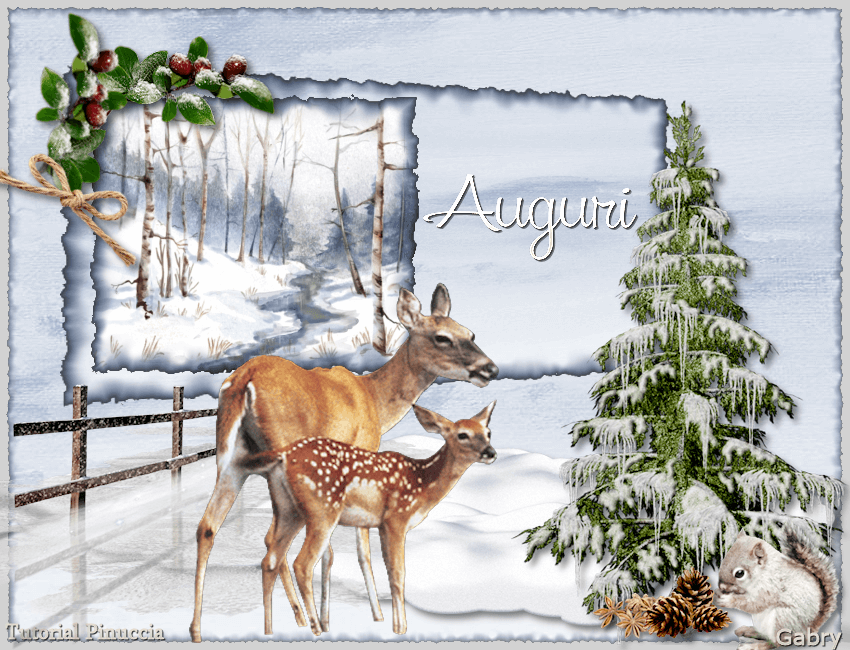
Gabry

Olimpia

If you have problems or doubt, or you find a not worked link, or only for tell me that you enjoyed this tutorial, write to me.
10 November 2020
|

