|
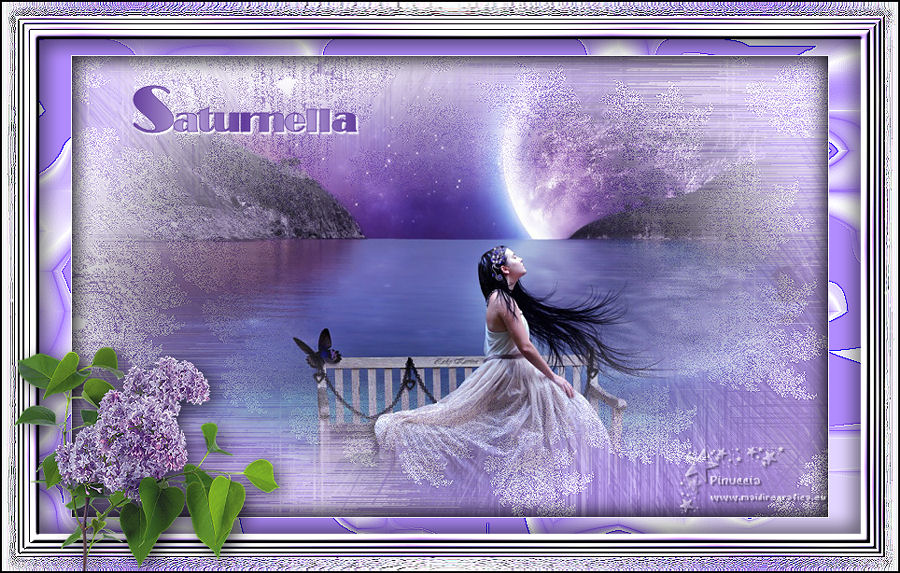
SATURNELLA


Thanks Evalynda for the invitation to translate your tutorials

This tutorial was written with PSPX8 and translated with PSPX7 and PSPX3, but it can also be made using other versions of PSP.
Since version PSP X4, Image>Mirror was replaced with Image>Flip Horizontal,
and Image>Flip with Image>Flip Vertical, there are some variables.
In versions X5 and X6, the functions have been improved by making available the Objects menu.
In the latest version X7 command Image>Mirror and Image>Flip returned, but with new differences.
See my schedule here
italian translation here
For this tutorial, you will need:
Material here
Thanks for the landscape Silvie.
(The links of the tubemakers here).
Plugins:
consult, if necessary, my filter section here
Mehdi - Wavy Lab 1.1. here
Filter Factory Gallery N - Yage here
Filters Unlimited 2.0 here
Filters Factory Gallery can be used alone or imported into Filters Unlimited.
(How do, you see here)
If a plugin supplied appears with this icon  it must necessarily be imported into Unlimited it must necessarily be imported into Unlimited

You can change Blend Modes according to your colors.
In the newest versions of PSP, you don't find the foreground/background gradient (Corel_06_029).
You can use the gradients of the older versions.
The Gradient of CorelX here
Open the image "frac mm81", that you'll use as mask, in PSP and minimize it with the rest of the material.
Set your foreground color to dark color #613c9b,
and your background color to light color #b18cfe.

1. Open a new transparent image 900 x 550 pixels.
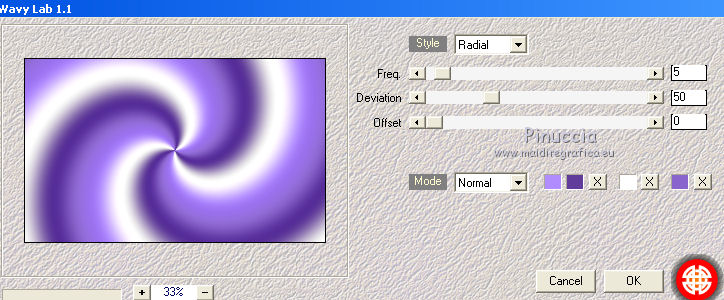
Effects>Plugins>Mehdi - Wavy Lab.1.1.
This filter creates gradients with the colors of your Materials palette:
the first is your background color, the second is your foreground color.
Of the last two colors created by the filter change the third color to white #ffffff.
Adjust>Blur>Gaussian Blur, radius 50.

Effects>Texture Effects>Fur.

2. Set your foreground color to white
Layers>New Raster Layer.
Flood Fill  the layer with color white. the layer with color white.
Layers>New Mask layer>From image
Open the menu under the source window and you'll see all the files open.
Select the image frac mm81.

Image>Resize, to 90%, resize all layers not checked.
Effects>Edge Effects>Enhance.
Layers>Merge>Merge Group.
3. Open the landscape tube and go to Edit>Copy.
Go back to your work and go to Edit>Paste as new layer.
Don't move it: is in the right place.
Layers>New Raster Layer.
Selection Tool 
(no matter the type of selection, because with the custom selection your always get a rectangle)
clic on the Custom Selection 
and set the following settings.

Selections>Invert.
4. Keep your foreground color to white.

and set your foreground color to a Foreground/Background Gradient, style Linear.
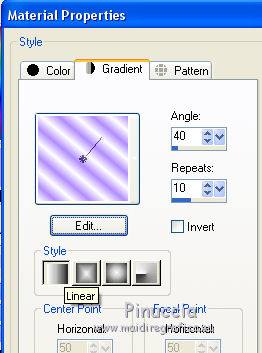
Flood Fill  the selection with your gradient. the selection with your gradient.
5. Effects>Plugins>Filter Factory Gallery N - Yage

If you use the plugin in Unlimited, your result will be different
(see the version at the bottom of the tutorial)

Effects>Edge Effects>Enhance More.
Effects>3D Effects>Buttonize, dark color #613c9b.

Effects>3D Effects>Drop Shadow, color black.

Repeat Drop Shadow, vertical and horizontal -5.
6. Selections>Select All.
Selection>Modify>Contract - 10 pixels.
Selections>Invert.
Flood Fill  the selection with your Gradient. the selection with your Gradient.
Effects>3D Effects>Inner Bevel

Effects>3D Effects>Drop Shadow, last settings.

Repeat Drop Shadow, positive settings
7. Selections>Select All.
Image>Add borders, 30 pixels, symmetric, color white.
Selections>Invert.
Change the Gradient settings

Flood Fill  the selection with your gradient. the selection with your gradient.
Effects>Artistic Effects>Enamel

Adjust>Sharpness>Sharpen More.
8. Effects>Distortion Effects>Punch.
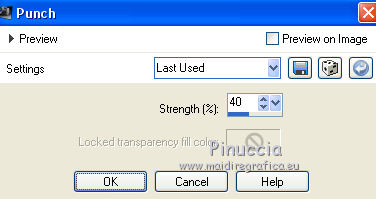
Repeat this Effect two more times (in total 3).
Effects>Edge Effects>Enhance.
Selections>Select None.
9. Open the flower tube and go to Edit>Copy.
Go back to your work and go to Edit>Paste as new layer.
Image>Resize, to 75%, resize all layers not checked.
Move  the tube at the bottom left. the tube at the bottom left.
Adjust>Sharpness>Sharpen.
Effects>3D Effects>Drop Shadow, color black.

10. Open the tube titre and go to Edit>Copy.
Go back to your work and go to Edit>Paste as new layer.
Move  the text at the upper left. the text at the upper left.
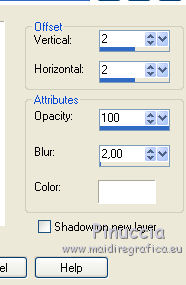
Effects>3D Effects>Drop Shadow, color white.
Sign your work.
Image>Add borders, 2 pixels, symmetric, color black.
Image>Resize, 900 pixels width, resize all layers checked.
Save as jpg.
Version with Factory Gallery imported in Unlimited

Version with tubes by A PSP Devil and Fly


Your versions. Thanks

Marygraphics

If you have problems or doubts, or you find a not worked link, or only for tell me that you enjoyed this tutorial, write to me.
11 June 2019
|

