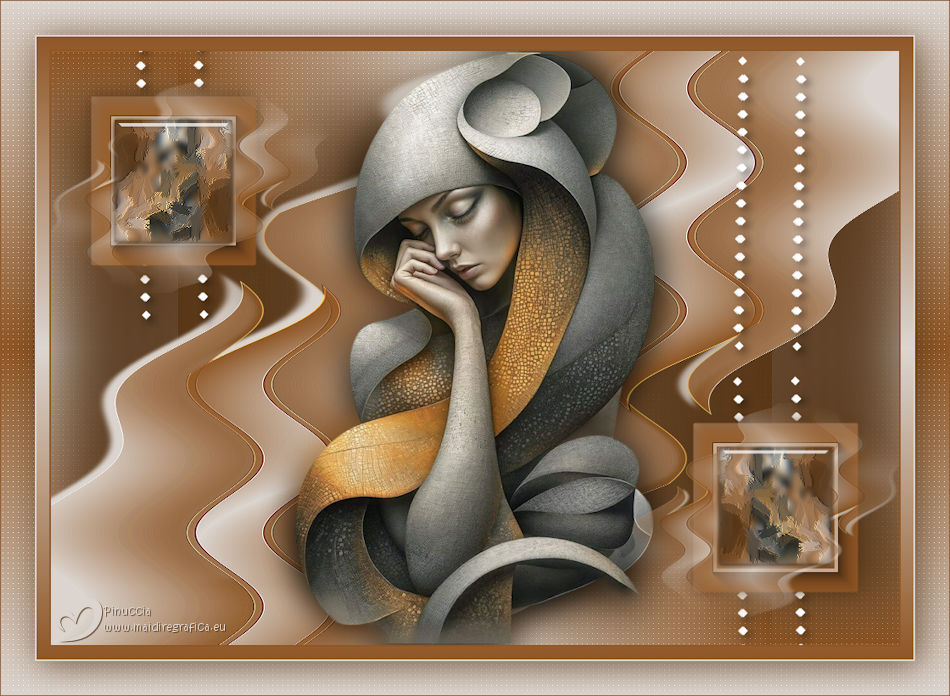
|
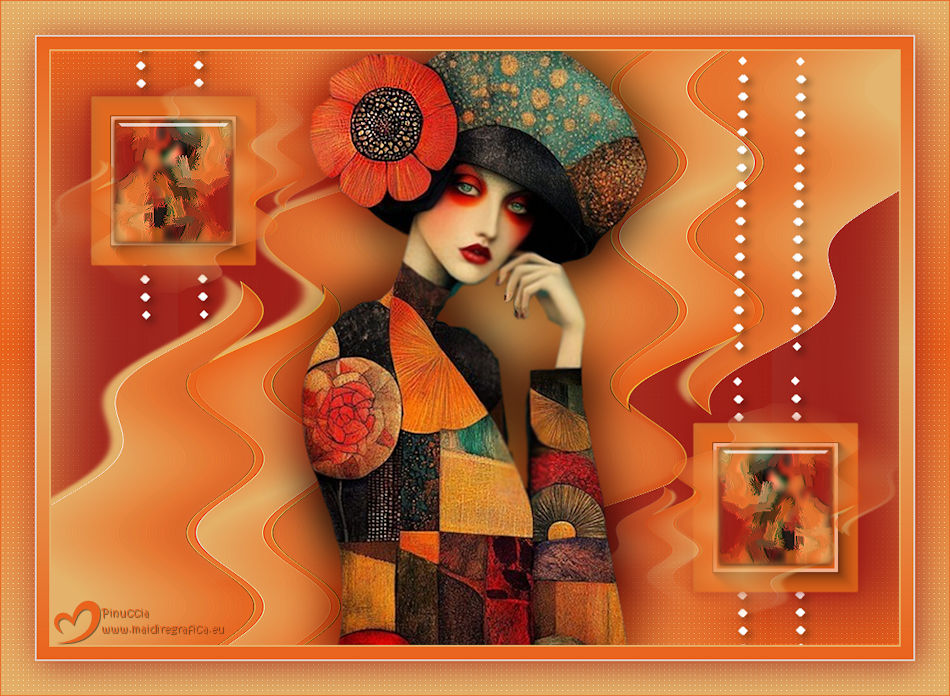
CONFUSION


Thanks Yedralina for your invitation to translate your tutorials into english

This tutorial was written with PSP2020 and translated with PSPX9, PSPX8 and PSP2020, but it can also be made using other versions of PSP.
Since version PSP X4, Image>Mirror was replaced with Image>Flip Horizontal,
and Image>Flip with Image>Flip Vertical, there are some variables.
In versions X5 and X6, the functions have been improved by making available the Objects menu.
In the latest version X7 command Image>Mirror and Image>Flip returned, but with new differences.
See my schedule here
 italian translation here italian translation here
 french translation here french translation here
 your versions here your versions here
For this tutorial, you will need:

Thanks for the tubes Renée.
(The links of the tubemakers here).

consult, if necessary, my filter section here
Alien Skin Eye Candy 5 Impact - Glass here
Carolaine and Sensibility - CS-LDots here
AAA Frames - Foto Frame here

You can change Blend Modes according to your colors.
In the newest versions of PSP, you don't find the foreground/background gradient (Corel_06_029).
You can use the gradients of the older versions.
The Gradient of CorelX here
Copy the preset  in the folder of the plugin Alien Skin Eye Candy 5 Impact>Settings>Glass. in the folder of the plugin Alien Skin Eye Candy 5 Impact>Settings>Glass.
One or two clic on the file (it depends by your settings), automatically the preset will be copied in the right folder.
why one or two clic see here

Copy the Selection in the Selections Folder.
Open the mask in PSP and minimize it with the rest of the material.
Set your foreground color to #8d5824,
and your background color to #dcd5cf.
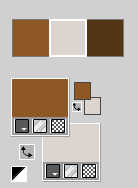
Color 3 #533417
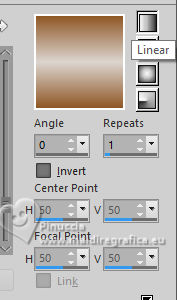
Set your foreground color to a Foreground/Background Gradient, style Linear.
1. Open a new transparent image 1000 x 700 pixels.
Flood Fill  the transparent image with your Gradient. the transparent image with your Gradient.
2. Layers>Duplicate.
Image>Free Rotate - 90 degrees to right.

Layers>Merge>Merge Down.
3. Layers>Duplicate.
Image>Resize, to 60%, resize all layers not checked.
4. Effects>Image Effects>Seamless Tiling.

Effects>Edge Effects>Enhance More.
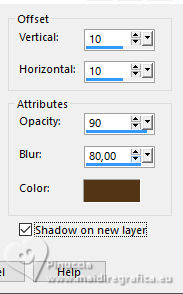
5. Effects>3D Effects>Drop Shadow, color 3 #533417,
shadow on new layer checked.
6. Stay on the shadow's layer.
Adjust>Blur>Gaussian Blur - radius 30.

Activate again your top layer, Copy of Raster 1.
7. Effects>Geometric Effects>Skew.
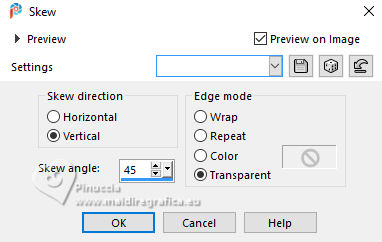
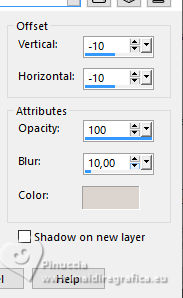
Effects>3D Effects>Drop Shadow, background color,
shadow on new layer not checked.
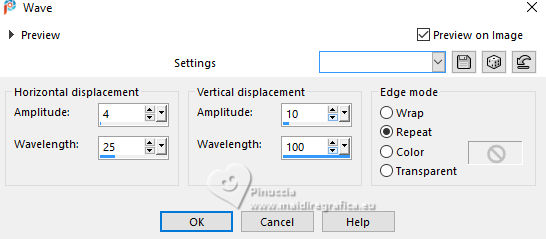
8. Effects>Distortion Effects>Wave
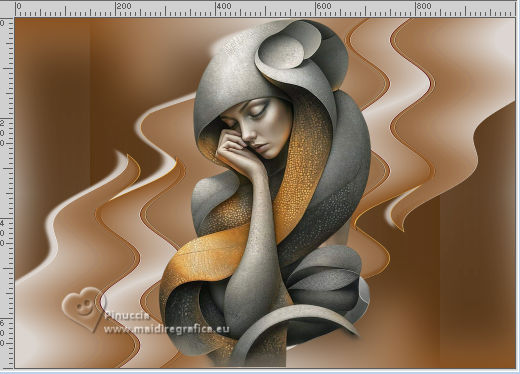
9. Open your main tube Renee-TUBES-Fevrier-2025-33 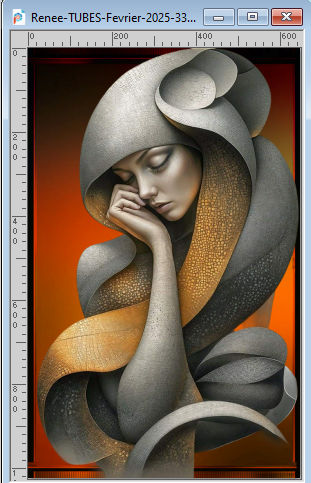
Edit>Copy.
Go back to your work and go to Edit>Paste as new layer.
Image>Resize, if necessary - for the supplied tube to 68%, resize all layers not checked.
Don't move it
10. Layers>Duplicate.
Adjust>Blur>Gaussian Blur - radius 20

Layers>Arrange>Move Down.
Change the Blend Mode of this layer to Multiply.
11. Edit>Copy Special>Copy Merged
Edit>Paste as new layer and minimize this image.
12. Go back to your work.
Activate your top layer.
13. Layers>New Raster Layer.
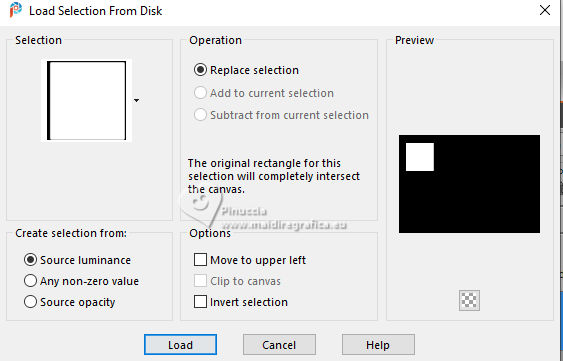
Selections>Load/Save Selection>Load Selection from disk.
Look for and load the selection ©Yedralina_Sel0888
Set your foreground color to Color

Flood Fill  the selection with your dark foreground color. the selection with your dark foreground color.
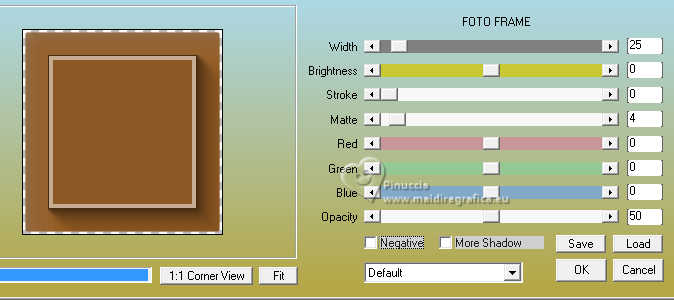
14. Effects>Plugins>AAA Frames - Foto Frame.
Selections>Select None.
15. Layers>Duplicate.
K key to activate your Pick Tool 
Position X: 756,00 - Position Y: 437,00.

M key to deselect the Tool.
Layers>Merge>Merge Down.
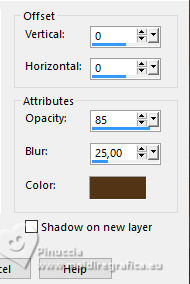
Effects>3D Effects>Drop Shadow, color 3 #533417.
Activate again the layer Copy of Raster 1.
16. Layers>Duplicate.
Layers>Arrange>Bring to top.
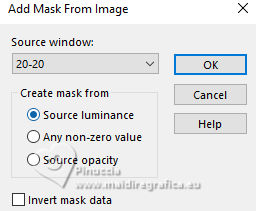
Layers>New Mask layer>From image
Open the menu under the source window and you'll see all the files open.
Select the mask 20-20
Layers>Merge>Merge Group.
Image>Resize, 2 times to 60%, resize all layers not checked.
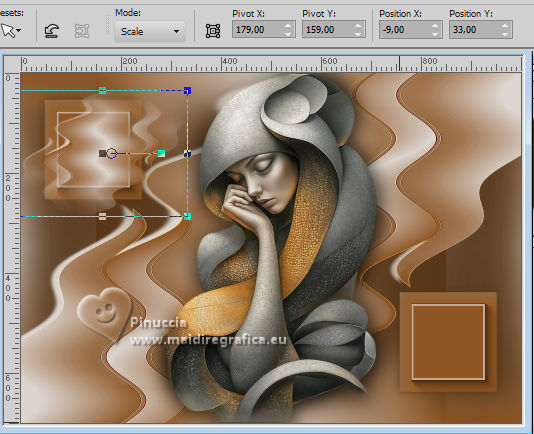
17. K key to activate your Pick Tool 
Position X: -9,00 - Position Y: 33,00.
M key to deselect the Tool.
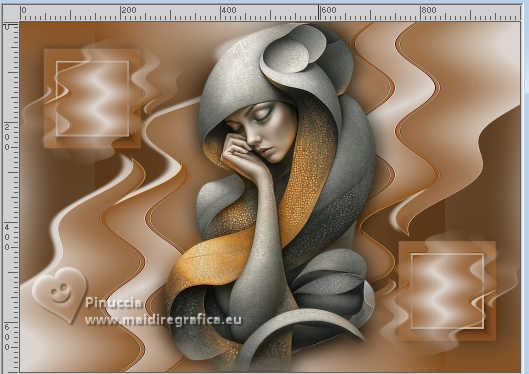
18. Layers>Duplicate.
Image>Mirror>Mirror Horizontal.
Image>Mirror>Mirror Vertical (Image>Flip).
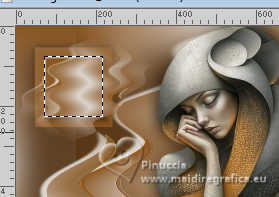
19. Activate again the layer Raster 3.
Activate your Magic Wand Tool 

Click in the left frame to select it.
20. Layers>New Raster Layer.
Layers>Arrange>Bring to Top.
Activate the image minimized at step 11 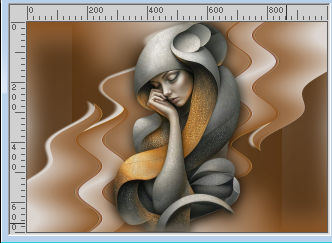
Edit>Copy.
Go back to your work and go to Edit>Paste into Selection.
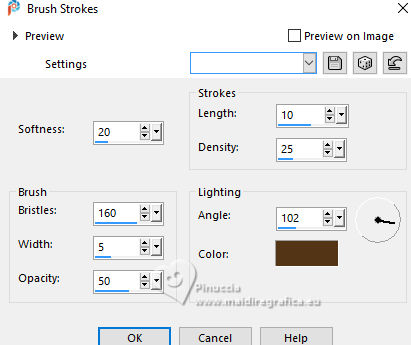
21. Effects>Art Media Effects>Brush Strokes - color 3 #533417.
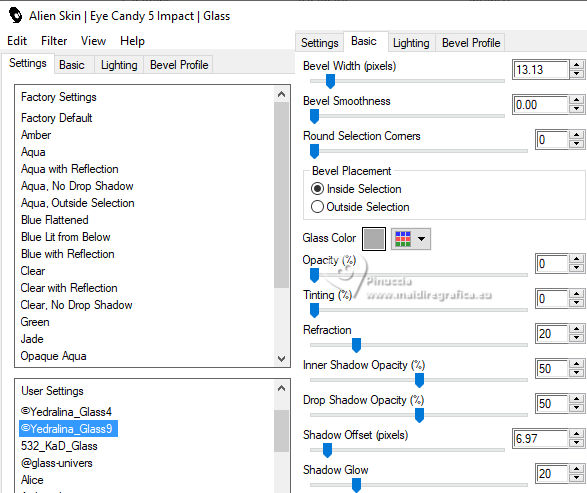
22. Effects>Plugins>Alien Skin Eye Candy 5 Impact - Glass
select the preset Glass 9 and ok.
Selections>Select None.
23. Layers>Duplicate.
Image>Mirror>Mirror Horizontal.
Edit>Cut - to cut and keep the image in memory.
24. Activate the layer Raster 3,
and select the bottom right frame with your Magic Wand Tool 
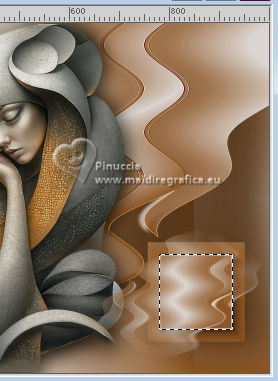
Activate again your top layer - now empty after cutting the image of the previous step.
Edit>Paste into Selection.
Selections>Select None.
25. Activate the layer Copy of Raster 1 - the third layers from the bottom.
Open the tube Deco00353©Yedralina 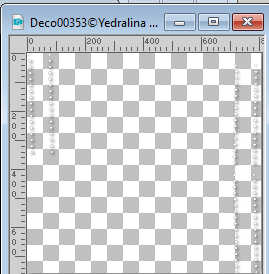
Edit>Copy.
Go back to your work and go to Edit>Paste as new layer.
Don't move it
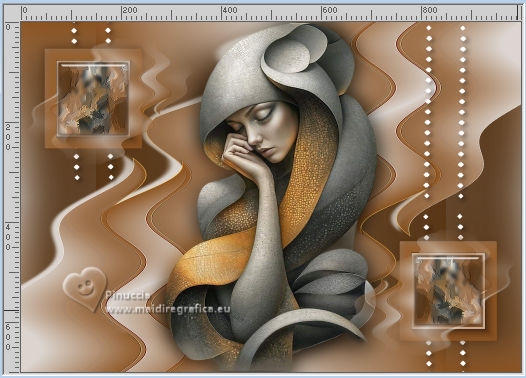
26. Activate your bottom layer, Raster 1.
Effects>Plugins>Carolaine and Sensibility - CS-LDots, default settings.
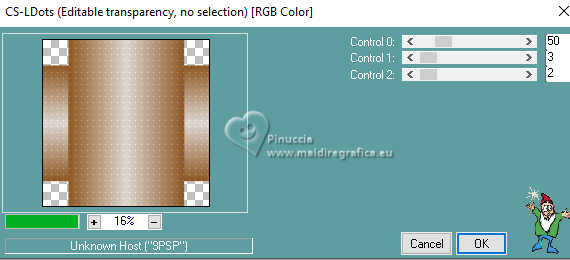
Adjust>Sharpness>Sharpen.
27. Image>Add borders, 2 pixels, symmetric, background color.
Selections>Select All.
Image>Add borders, 15 pixels, symmetric, whatever color.
Selections>Invert.
Set your foreground color to Gradient.
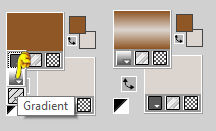
Flood Fill  the selection with your Gradient. the selection with your Gradient.
Selections>Select None.
Image>Add Borders, 2 pixels, symmetric, background color.
28. Selections>Select All.
Image>Add borders, 40 pixels, symmetric, whatever color.
Selections>Invert.
29. Invert the colors of your Gradient.
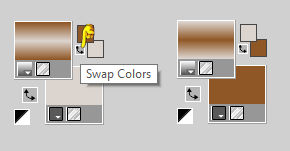
Flood Fill  the selection with your Gradient. the selection with your Gradient.
30. Effects>Plugins>Carolaine and Sensibility - CS-LDots, default settings.
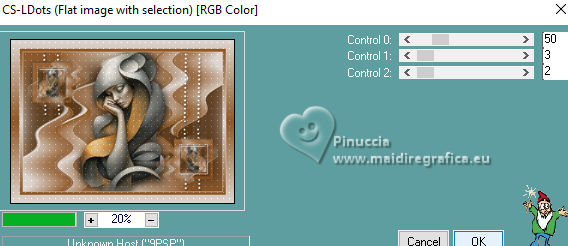
Adjust>Sharpness>Sharpen More.
31. Selections>Invert.
Effects>3D Effects>Drop Shadow, color 3 #533417
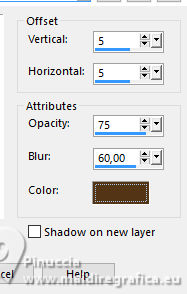
Selections>Select None.
32. Image>Add Borders, 1 pixel, symmetric, dark color (now as background color).
33. Image>Resize, 1000 pixels width, resize all layers checked.
Sign your work on a new layer.
Layers>Merge>Merge All and save as jpg.
For the tubes of these versions thanks
Renée
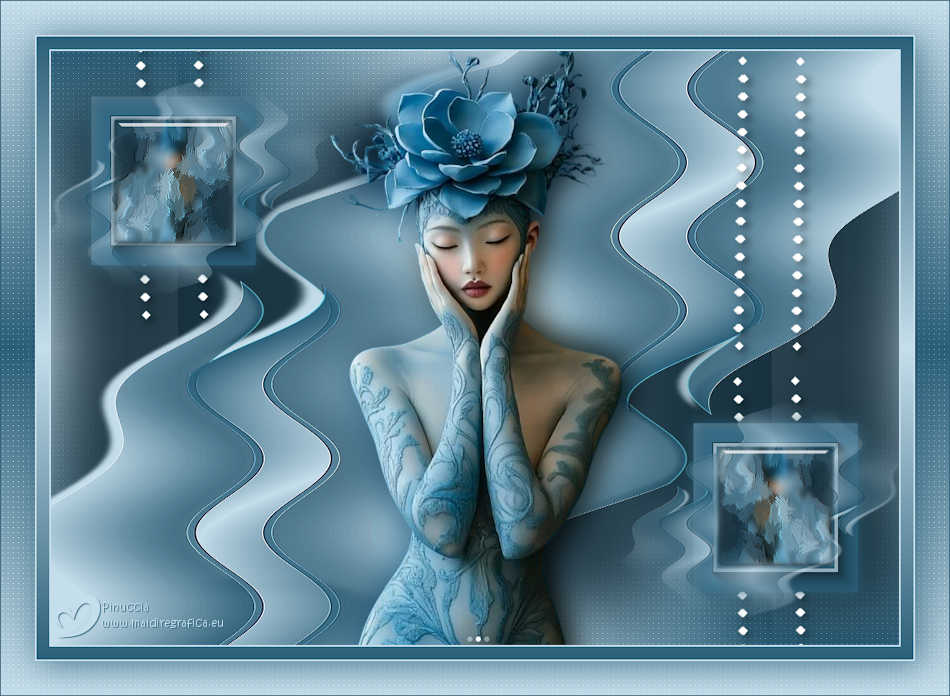
Luz Cristina

If you have problems or doubts, or you find a not worked link, or only for tell me that you enjoyed this tutorial, write to me.
6 April 2025

|

