|
3-ADVIENTO 2024 - ALEGRIA


Thanks Yedralina for your invitation to translate your tutorials into english

This tutorial was written with PSP2020 and translated with PSPX9 and PSP2020, but it can also be made using other versions of PSP.
Since version PSP X4, Image>Mirror was replaced with Image>Flip Horizontal,
and Image>Flip with Image>Flip Vertical, there are some variables.
In versions X5 and X6, the functions have been improved by making available the Objects menu.
In the latest version X7 command Image>Mirror and Image>Flip returned, but with new differences.
See my schedule here
 italian translation here italian translation here
 french translation here french translation here
 your versions here your versions here

For this tutorial, you will need:

Thanks for the tubes Coraline and Mentali and for the mask Narah.
(The links of the tubemakers here).

consult, if necessary, my filter section here
Filters Unlimited 2.0 here
Graphics Plus - Cross Shadow here
VanDerLee - Unplugged-X here
Toadies - What are you, Blast'em here
Mura's Meister - Perspective Tiling here
Alien Skin Eye Candy 5 Impact - Perspective Shadow here
Simple - Top Left Mirror here
Simple - Left Right Wrap (bonus) here
RCS Filter Pak 1.0 - RCS-Triple Exposure here
Filters Graphics Plus, Toadies, RCS Filter Pak and Simple can be used alone or imported into Filters Unlimited.
(How do, you see here)
If a plugin supplied appears with this icon  it must necessarily be imported into Unlimited it must necessarily be imported into Unlimited


You can change Blend Modes according to your colors.
In the newest versions of PSP, you don't find the foreground/background gradient (Corel_06_029).
You can use the gradients of the older versions.
The Gradient of CorelX here
Copy the preset  in the folder of the plugin Alien Skin Eye Candy 5 Impact>Settings>Shadow. in the folder of the plugin Alien Skin Eye Candy 5 Impact>Settings>Shadow.
One or two clic on the file (it depends by your settings), automatically the preset will be copied in the right folder.
why one or two clic see here

Copy the preset Emboss 5 in your Presets Folder.
Copy the selection in the Selections Folder.
Open the mask in PSP and minimize it with the rest of the material.
Set your foreground color to #6f2e67,
and your background color to #97c1a2.
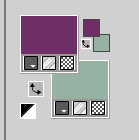
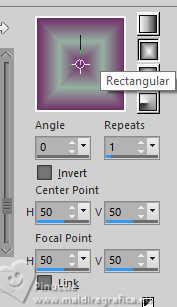
Set your foreground color to a Foreground/Background Gradient, style Rectangulair.
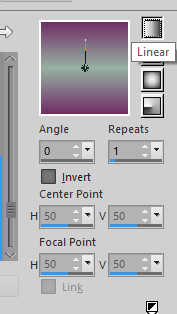
Set your background color to a Foreground/Background Gradient, style Linear.
1. Open a new transparent image 950 x 650 pixels,
Flood Fill  the transparent image with yur foreground Rectangular Gradient. the transparent image with yur foreground Rectangular Gradient.
2. Layers>New Raster Layer.
Flood Fill  the layer with your background Linear Gradient. the layer with your background Linear Gradient.
Image>Resize, to 50%, resize all layers not checked.
3. Effects>Plugins>Simple - Left Right Wrap.
Cet effect works without window; result
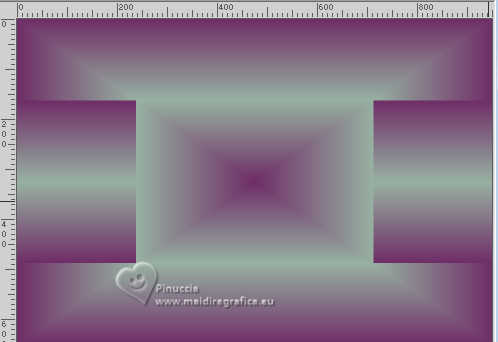
Effects>Image Effects>Seamless Tiling - Side by Side.

4. Effects>3D Effects>Drop Shadow, foreground color.
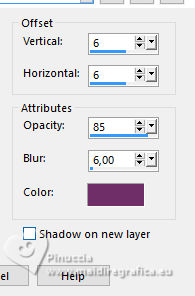
Effects>Reflection Effects>Rotating Mirror, default settings.

Effects>3D Effects>Drop Shadow, same settings.
Effects>Edge Effects>Enhance More.
5. Effects>Plugins>Graphics Plus, default settings.
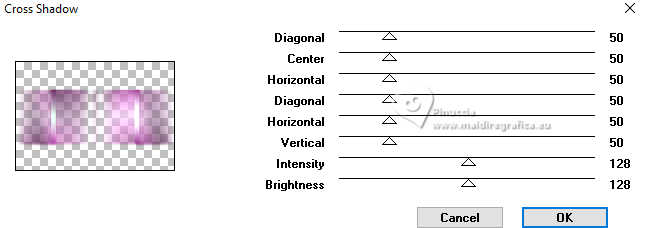
6. Layers>New Raster Layer.
Effects>Plugins>VanDerLee - Unplugged-X - 45° Rectangle
color white.
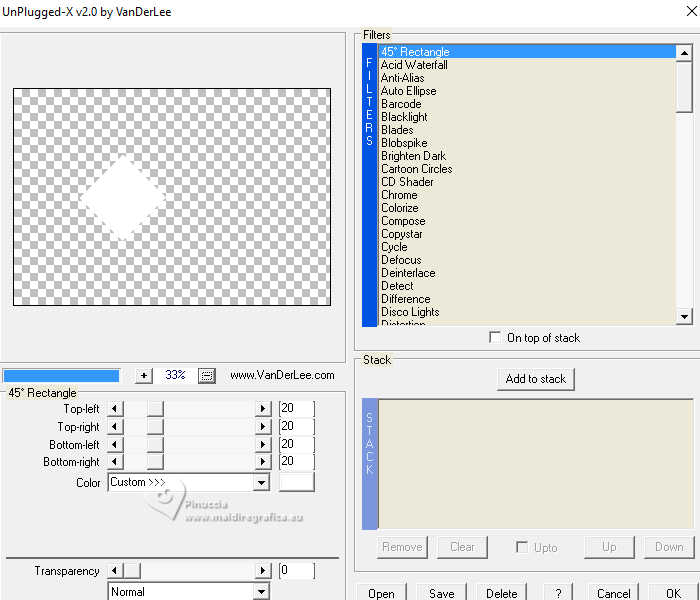
7. Activate your Magic Wand Tool  , tolerance and feather 0, , tolerance and feather 0,
and click in the rhombus to select it.
Selections>Modify>Contract - 20 pixels.
Flood Fill  the selection with your Rectangular Gradient. the selection with your Rectangular Gradient.
Selections>Modify>Contract - 4 pixels.
Press CANC on the keyboard 
Selections>Select None.
8. Effects>Plugins>Simple - Top Left Mirror.
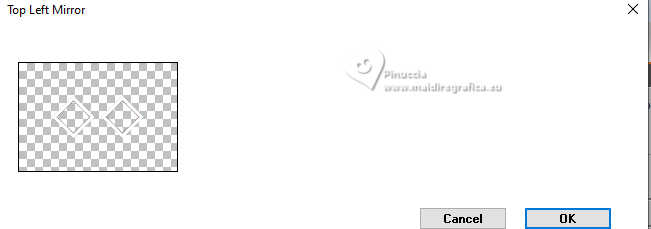
Effects>Plugins>Filters Unlimited 2.0 - Toadies - What are you.
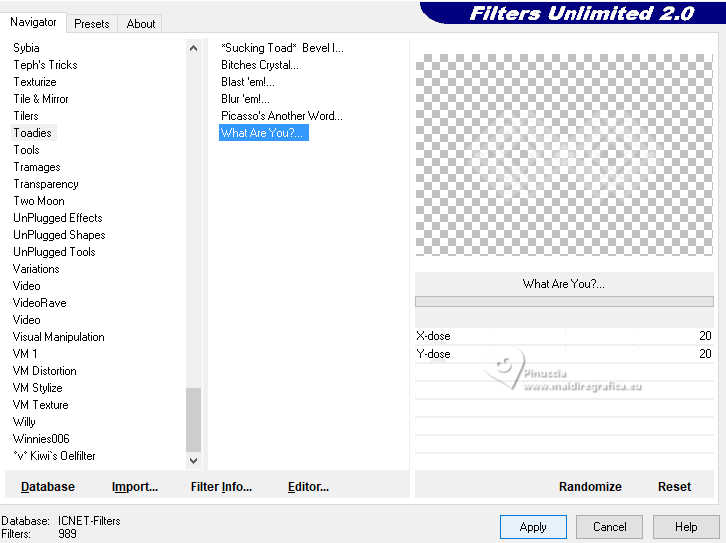
Objects>Align>Top.
9. Layers>Duplicate.
Image>Mirror>Mirror Vertical.
Layers>Merge>Merge Down.
Optional: Effects>3D Effects>Drop Shadow, same settings.
Effects>Distortion Effects>Punch.
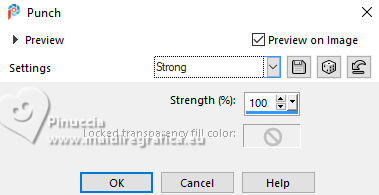
10. Effets>Effets d'image>Mosaïque sans jointures, default settings.

Layers>Arrange>Move Down.
Effects>3D Effects>Drop Shadow, same settings.

Change the Blend Mode of this layer to Overlay.
11. Activate your background layer, Raster 1.
Selections>Load/Save Selection>Load Selection from Disk.
Look for and load the selection ©Yedralina_Sel 147
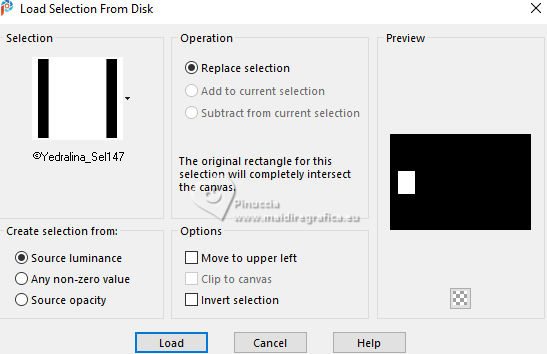
Selections>Promote Selection to Layer.
Layers>Arrange>Bring to Top.
12. Selections>Modify>Contract - 20 pixels.
Flood Fill  the selection with your Linear Gradient. the selection with your Linear Gradient.
Selections>Modify>Contract - 4 pixels.
Press CANC on the keyboard.
Selections>Select None.
13. Effects>Plugins>Graphics Plus - Cross Shadow, default settings.
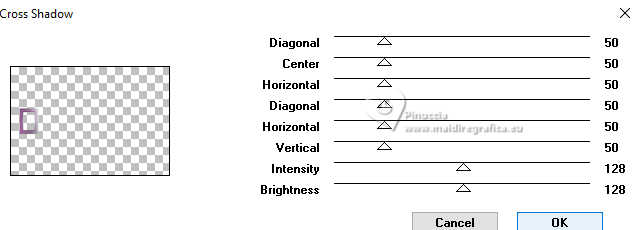
Effects>Reflection Effects>Rotating Mirror.

Layers>Merge>Merge Visible to New Layer.
in the old versions of PSP:
Edit>Copy Special>Copy Merged
Edit>Paste as new layer
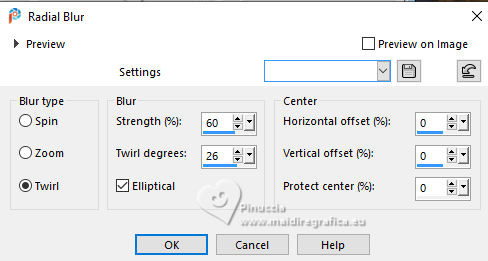
14. Adjust>Blur>Radial Blur.
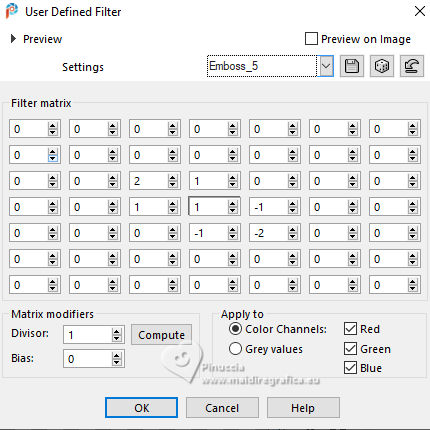
Effects>User Defined Filter - select the preset Emboss 5 and ok.
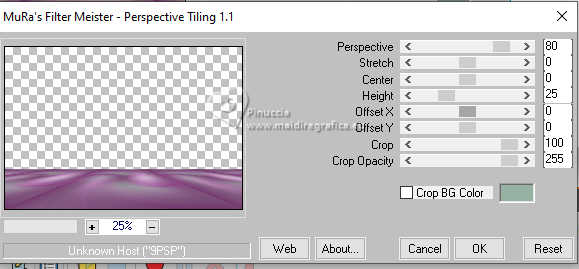
Effects>Plugins>Mura's Meister - Perspective Tiling.
Effects>Reflection Effects>Rotating Mirror.

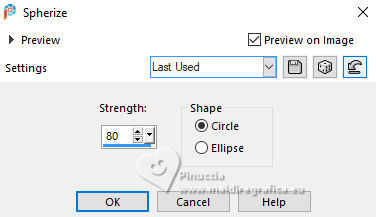
15. Effects>Geometric Effects>Spherize.
Activate again your Magic Wand Tool  , tolerance 0, feather 60 , tolerance 0, feather 60
and click in the transparent zone to select it.
Press +/-6 times CANC on the keyboard.
don't forget to set again the feather to 0
16. Layers>Merge>Merge Visible to New Layer
Effects>Geometric Effects>Circle.

Image>Resize, to 45%, resize all layers not checked.
17. Effects>Plugins>Alien Skin Eye Candy 5 - Perspective Shadow
select the preset EC5_DS4-©Yedralina
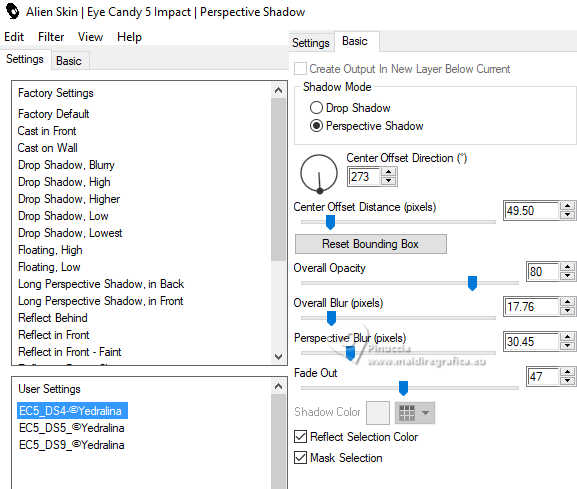
K key to activate your Pick Tool 
Position X: 45,00 - Position Y: 285,00.

M key to deselect the Tool.
Adjust>Sharpness>Sharpen More.
18. Your tag and the layers.
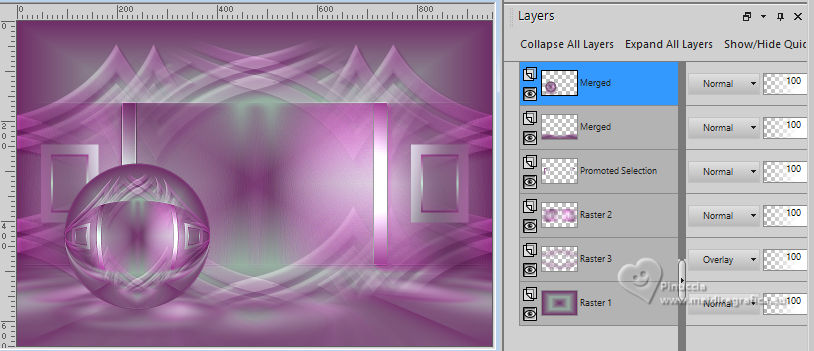
19. Activate the layer Raster 2.
Objects>Align>Top,
or Pick Tool 
Position X and Y 0,00

20. Now activate the layer below, Raster 3.
Adjust>Blur>Radial Blur.
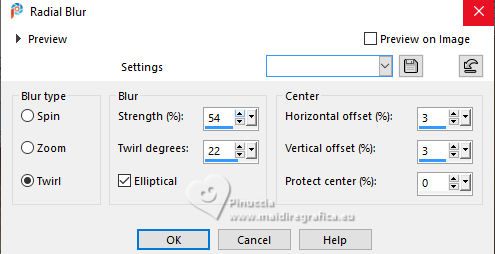
Effects>User Defined Filter - Emboss 5

21. Open the misted mentali-misted2776 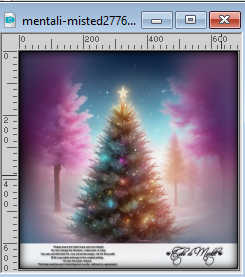
Edit>Copy.
Go back to your work and go to Edit>Paste as new layer.
Image>Resize, if necessary, for the supplied tube I didn't it.
Reduce the opacity of this layer +/- 70%, according to your tube.
22. Image>Add borders, 2 pixels, symmetric, background color.
Image>Add borders, 2 pixels, symmetric, foreground color.
Selections>Select All.
23. Image>Add borders, 60 pixels, symmetric, whatever color.
Selections>Invert.
Flood Fill  the selection with your Linear Gradient. the selection with your Linear Gradient.
Effects>Plugins>Filters Unlimited 2.0 - RCS Filter Pak 1.0 - RCS-Triple Exposure, default settings.
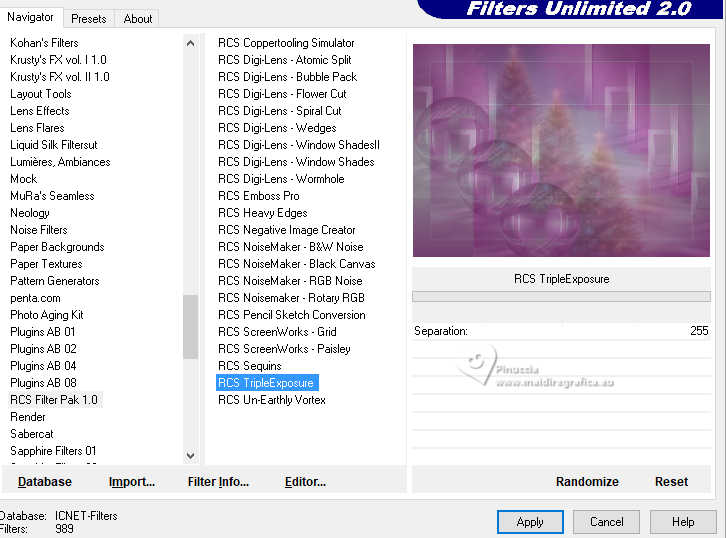
Selections>Select None.
24. Image>Add borders, 2 pixels, symmetric, background color.
Image>Add borders, 2 pixels, symmetric, foreground color.
Selections>Select All.
25. Image>Add borders, 60 pixels, symmetric, whatever color.
Selections>Invert.
Again Flood Fill  the selection with your Linear Gradient. the selection with your Linear Gradient.
Effects>Plugins>Toadies - Blast'em!, default settings.
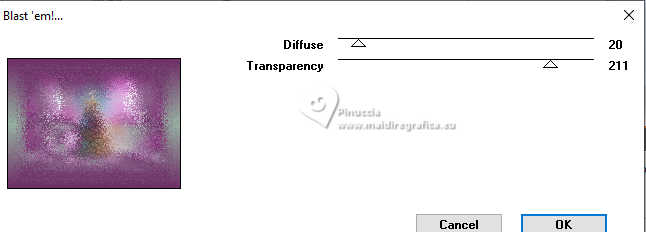
Adjust>Sharpness>Sharpen.
26. Image>Add borders, 2 pixels, symmetric, background color.
Image>Add borders, 2 pixels, symmetric, foreground color.
Selections>Select None.
27. Image>Add borders, 60 pixels, symmetric, foreground color.
28. Set your foreground color with the color white.
Layers>New Raster Layer.
Flood Fill  the layer with color white. the layer with color white.
Layers>New Mask layer>From image
Open the menu under the source window and you'll see all the files open.
Select the mask Narah_Mask_0923
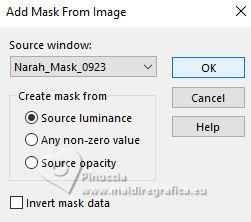
Layers>Merge>Merge Group.
29. Image>Add borders, 1 pixel, symmetric, background color.
30. Image>Resize, 1000 pixels width, resize all layers checked.
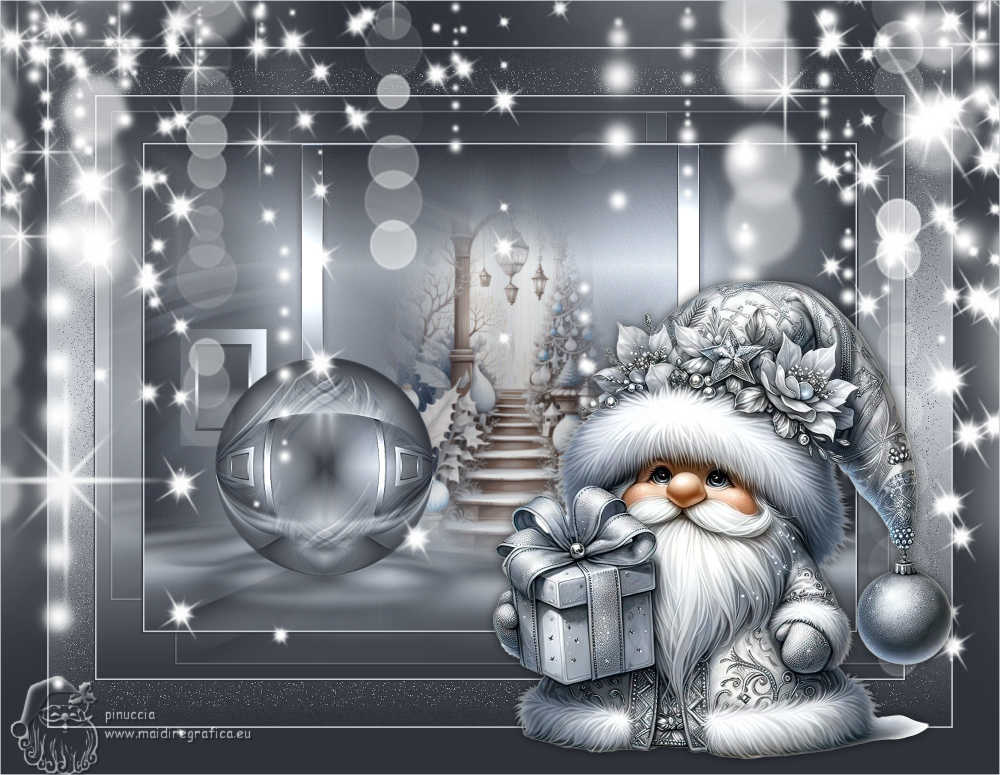
31. Open your main tube Coraline_xT7204zUGD1a... 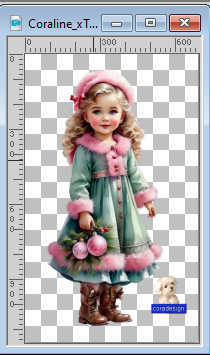
Erase the watermark and go to Edit>Copy.
Go back to your work and go to Edit>Paste as new layer.
Image>Resize, if necessary, for the supplied tube I resized to 70%, resize all layers not checked.
Move  the tube to the right side. the tube to the right side.
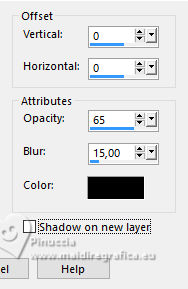
Effects>3D Effects>Drop Shadow, color black, or at your choice.
32. Sign your work on a new layer.
Layers>Merge>Merge All and save as jpg.
For the tubes of these versions thanks
LR and Arasimage

Renée and Mentali

If you have problems or doubts, or you find a not worked link, or only for tell me that you enjoyed this tutorial, write to me.
8 December 2024

|

