|
NAKED 

This tutorial, was created with PSPX9 and translated with PSP2020, but it can also be made using other versions of PSP.
For this tutorial, you will need:  Thanks for the tubes and the mask AnaRidzi and Silvie. (you find here the links to the material authors' sites)  consult, if necessary, my filter section here Filters Unlimited 2.0 here Mehdi - Wavy Lab 1.1. here Graphics Plus - Cross Shadow here Mura's Meister - Perspective Tiling here Mura's Meister - Copies here It@lian Editors Effect - Effetto Fantasma here Filter Factory Gallery C - Versa Tile here AAA Frames - Foto Frame here FM Tile Tools - Blend Emboss here Filters Graphics Plus and Toadies can be used alone or imported into Filters Unlimited. (How do, you see here) If a plugin supplied appears with this icon  You can change Blend Modes according to your colors.  Copy the Selection in the Selection Folder. Open the mask in PSP and minimize it with the rest of the material. 1. Set your foreground color to #c795aa and your background color to #0c4670. third color (for the Mehdi Filter #e6d0da) fourth color (for the Drop Shadow #051f33) 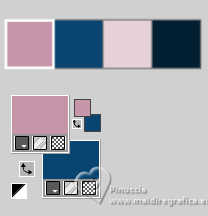 2. Open a new transparent image 900 x 550 pixels. Effects>Plugins>Mehdi - Wavy Lab 1.1. This filter creates gradients with the colors of your Materials palette. The first is your background color, the second is your foreground color. Change both last two colors with #e6d0da. 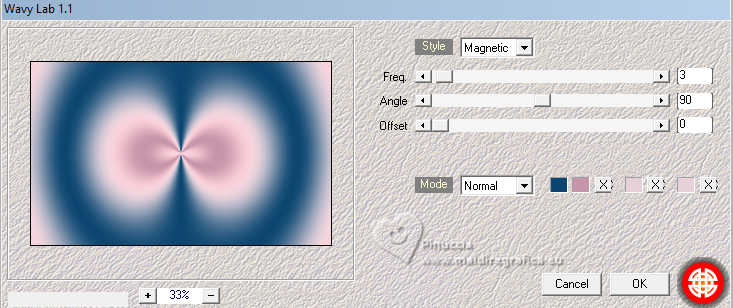 Layers>Duplicate. 3. Adjust>Blur>Gaussian Blur - radius 50.  Effects>Plugins>Filters Unlimited 2.0 - Filter Factory Gallery C - VersaTile 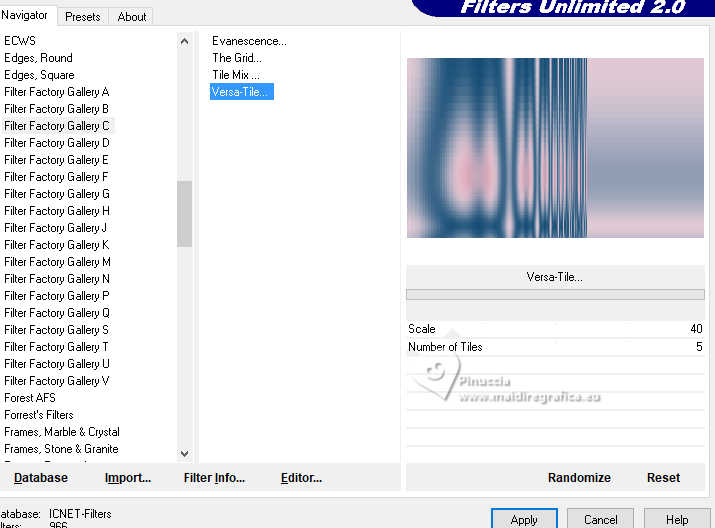 Effects>Reflextion Effects>Rotating Mirror.  Effects>Image Effects>Seamless Tiling, default settings.  4. Layers>Duplicate. Effects>Geometric Effects>Perspective horizontal. 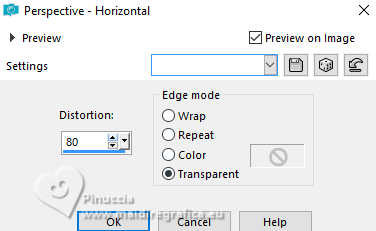 Repeat Effects>Geometric Effects>Perspective horizontal -80. 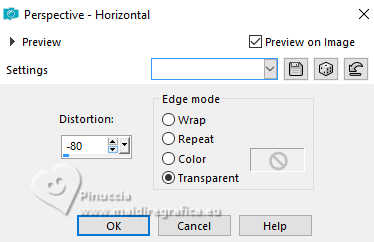 We have this 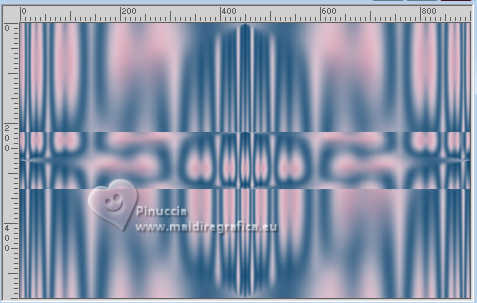 5. Activate the central layer - Copy of Raster 1. Effects>Plugins>Mura's Meister - Perspective Tiling. 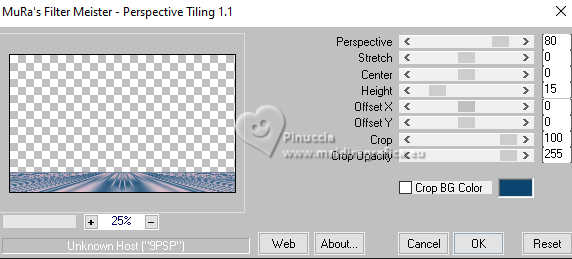 Activate your Magic Wand Tool  , tolerance 0 and feather 60, , tolerance 0 and feather 60, and click in the transparent zone to select it. Press 4 times CANC on the keyboard  Don't forget to set again the feather to 100. Selections>Select None. Effects>3D Effects>Drop Shadow, color #051f33. 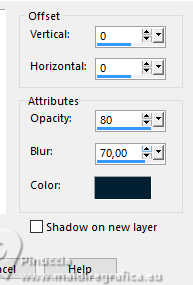 Edit>Repeat Drop Shadow. 6. We have this  7. Activate your top layer. Effects>Plugins>Filters Unlimited 2.0 - Itali@n Editors Effect - Effetto Fantasma, default settings. 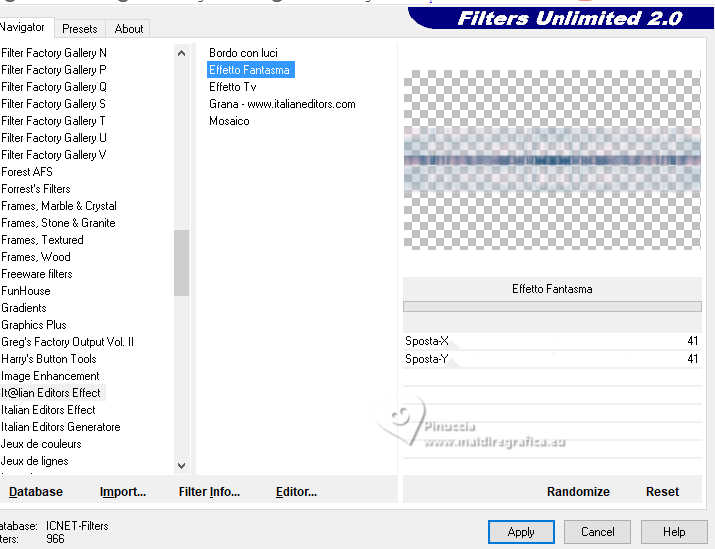 Attention please: this effect can give different results if used alone or in Unlimited, and again depending on the version of Unlimited. If you use the filter alone or in Unlimited 2.3 you will have this result:  Repeat this Effect another time. 8. Layers>Arrange>Move down. Activate again your top layer. Layers>Duplicate. Image>Mirror>Mirror Vertical. Layers>Merge>Merge Down. 9. Effects>Geometric Effects>Circle.  Effects>Image Effects>Seamless Tiling - Side by Side.  Adjust>Sharpness>Sharpen. Layers>New Raster Layer. Selections>Load/Save Selection>Load Selection from Disk. Look for and load the selection Naked_sel_1  10. Reduce the opacity of your Flood Fill Tool to 50%. Flood Fill  with your foreground color #cee7fa. with your foreground color #cee7fa.Layers>New Raster Layer. Open Blue_Hibiscus5TZ_misted_Silvie_23.07.2024  Edit>Copy. Go back to your work and go to Edit>Paste into Selection. 11. Selections>Select None. Layers>Merge>Merge Down. Layers>Arrange>Move Down. Effects>Image Effects>Seamless Tiling, Side by Side  12. We have this  13. Activate the layer Copy (2) of Raster 1, the second from the bottom. Objctos>Align>Top. Layers>Duplicate. Objects>Align>Bottom. Make sure you are positioned on the top layer of these two copies. Layers>Merge>Merge Down. Effects>3D Effects>Drop Shadow, color #051f33.  Adjust>Sharpness>Sharpen More. 14. Layers>New Raster Layer. Layers>Arrange>Bring to Top. Set again the opacity of your Flood Fill Tool to 100. Flood Fill  the layer with your background color #0c4670. the layer with your background color #0c4670.15. Layers>New Mask layer>From image Open the menu under the source window and you'll see all the files open. Select the mask Silvie_Mask_Glitter_Deco88Z.  Layers>Merge>Merge Group. 16. Effects>Edge Effects>Enhance. Effects>3D Effects>Drop Shadow, color #051f33.  Adjust>One Step Photo Fix. Effects>Plugins>FM Tile Tools - Blend Emboss, default settings.  17. We have this  18. Edit>Copy Special>Copy Merged. Edit>Paste as new image, and minimize this image for the moment. Go back to your work. Image>Add borders, 1 pixel, symmetric, foreground color #c795aa. 19. Image>Add borders, 20 pixels, symmetric, background color #0c4670. Image>Add borders, 1 pixel, symmetric, foreground color #c795aa. Selections>Select All. Image>Add borders, 40 pixels, symmetric, color #ffffff. Selections>Invert. 20. Edit>Paste into Selection (the image of step 18 is still in memory). Adjust>Blur>Gaussian Blur - radius 20.  Effects>Plugins>AAA Frames - Foto Frame.  21. Effects>Reflection Effects>Rotating Mirror, default settings.  Selections>Select None. Activate your Magic Wand Tool  , tolerance and feather 0, , tolerance and feather 0,and click on the 20 pixels border to select it. 22. Effects>Plugins>Graphics Plus - Cross Shadow.  Effects>Effets 3D>Inner Bevel.  Selezione>Deseleziona. 23. Open AnaRidzi1803  Edit>Copy. Go back to your work and go to Edit>Paste as new layer. K key to activate your Pick Tool  Position X: 176,00 - Position Y: 55,00.  M key to deselect the Tool. Effects>Plugins>Mura's Meister - Copies 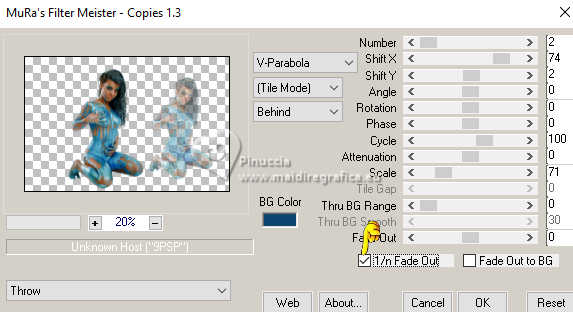 Effects>3D Effects>Drop Shadow, color #051f33.  small note: since the shadow color is very dark and may look black, please be careful about the color next time you use the drop shadow Adjust>Sharpness>Sharpen More. 25. Open LTDStudio_Naked_Texto  Edit>Copy. Go back to your work and go to Edit>Paste as new layer. Place  as below. as below. Sign your work on a new layer. Add the author and the translator's watermarks. Layers>Merge>Merge All and save as jpg. For the tubes of this version thanks Luz Cristina and Silvie    Your versions. Thanks Your versions. Thanks Kika  Marygraphics  Baby  Baby  If you have problems or doubts, or you find a not worked link, or only for tell me that you enjoyed this tutorial, write to me. |