HERMINE


Thanks Carine for your invitation to translate

Clic and move the brush to follow the tutorial.

To print


|
This tutorial was translated with PSPX9 and PSP2020, but it can also be made using other versions of PSP.
Since version PSP X4, Image>Mirror was replaced with Image>Flip Horizontal,
and Image>Flip with Image>Flip Vertical, there are some variables.
In versions X5 and X6, the functions have been improved by making available the Objects menu.
In the latest version X7 command Image>Mirror and Image>Flip returned, but with new differences.
See my schedule here
 italian translation here italian translation here
 your versions here your versions here
Necessary

Thanks for the tubes Kamil, Mentali, Nadège, Elfairy and for the mask Silvie.
(The links of the tubemakers here).

consult, if necessary, my filter section here
Filters Unlimited 2.0 here
Toadies - Blur em' here
Mehdi - Wavy Lab 1.1 here
Simple - Blintz here
AP [Innovations] - Lines SilverLining here
Mura's Meister - Copies here
Filters Toadies and Simple can be used alone or imported into Filters Unlimited.
(How do, you see here)
If a plugin supplied appears with this icon  it must necessarily be imported into Unlimited it must necessarily be imported into Unlimited

You can change Blend Modes according to your colors.
In the newest versions of PSP, you don't find the foreground/background gradient (Corel_06_029).
You can use the gradients of the older versions.
The Gradient of CorelX here

Copy the texture in the Textures Folder.
Copy the selections in the Selections Folder.
Open the mask in PSP and minimize it with the rest of the material.
1. Open a new transparent image 900 x 570 pixels.
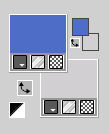
Set your foreground color to #4e6dc7,
and your background color to #d1cfd2.
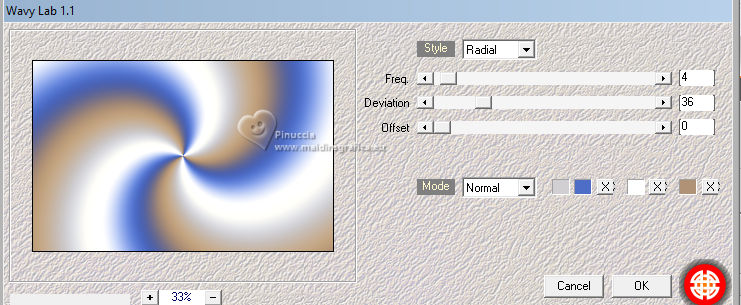
2. Effects>Plugins>Mehdi - Wavy Lab 1.1.
This filter creates gradients with the colors of your Materials palette.
The first is your background color, the second is your foreground color.
Change the last two colors created by the filtre:
the third color with #ffffff and the fourth color with #b09276.
3. Adjust>Blur>Gaussian Blur - radius 40.

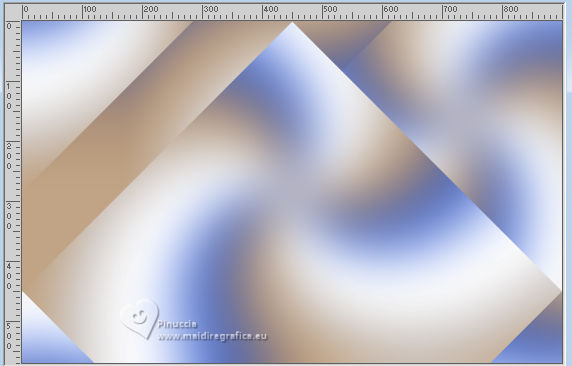
4. Effects>Plugins>Simple - Blintz
Edit>Repeat Blintz
This Effect works without window; result
5. Layers>Duplicate.
Image>Mirror>Mirror horizontal.
Image>Mirror>Mirror vertical.
Reduce the opacity of this layer to 50%.
Layers>Merge>Merge Down.
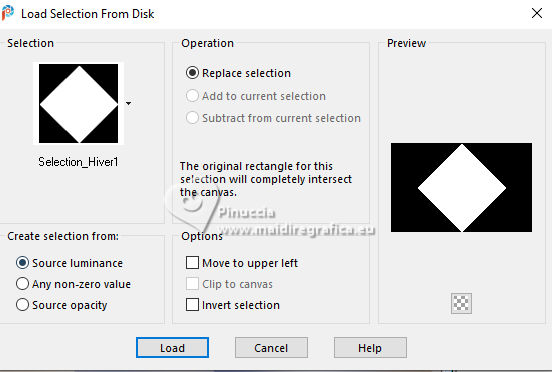
6. Selections>Load/Save Selection>Load Selection from Disk.
Look for and load the selection Sélection_Hiver 1
7. Set your foreground color to white.
Layers>New Raster Layer, Raster 2.
Flood Fill srC="../../strumenti/riempimentox.jpg"> the layer with color white.
8. Selections>Modify>Contract - 30 pixels.
Press CANC on the keyboard 
Selections>Select None.
9. Layers>Duplicate.
Image>Free Rotate - 45 degrees to right.

10. Selections>Load/Save Selection>Load Selection from Disk.
Look for and load the selection Sélection_Hiver 2
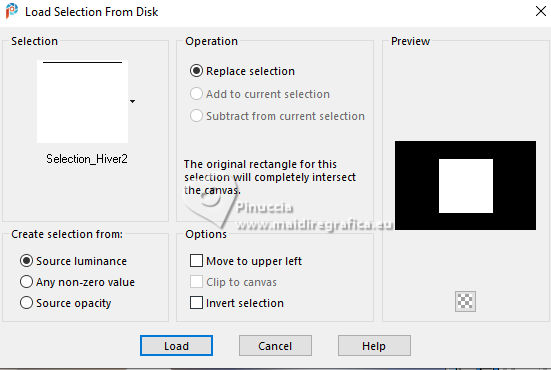
11. For the next plugin, set again your foreground color to the first color #4e6dc7.
Effects>Plugins>Mehdi - Wavy Lab 1.1., same settings.
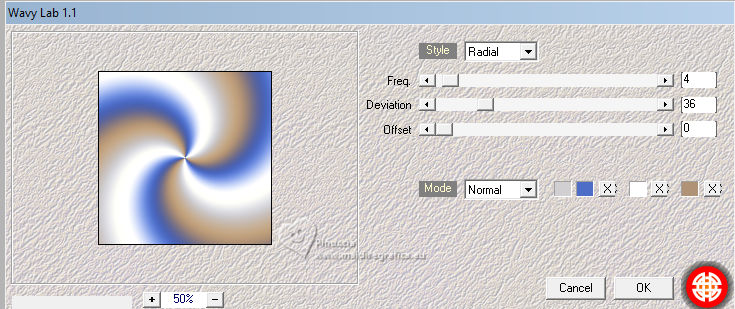
Keep selected.
12. Adjust>Blur>Gaussian Blur - radius 40.

13. Effects>Texture Effects>Texture - select the Texture Diagonal
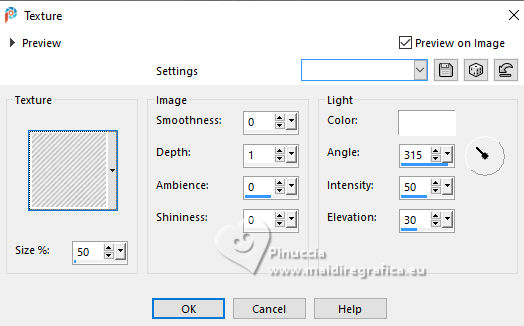
14. Selections>Modify>Contract - 20 pixels.
Set again your foreground color to white.
Layers>New Raster Layer.
Flood Fill  the layer with color white. the layer with color white.
15. Selections>Modify>Contract - 5 pixels.
Press CANC on the keyboard.
Layers>Merge>Merge Down.
16. Adjust>Blur>Gaussian Blur, same settings.
Keep selected.
17. Open the landscape by Mentali mentali-misted2638 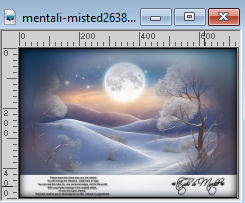
Edit>Copy.
Go back to your work and go to Edit>Paste as new layer.
18. Image>Resize, 1 time to 70% and 2 times to 90%, resize all layers not checked.
Selections>Invert.
Press CANC on the keyboard.
Selections>Select None.
19. Layers>Merge>Merge Down.
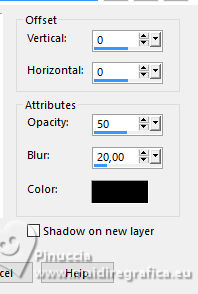
20. Effects>3D Effects>Drop Shadow, color black.
21. Image>Resize, to 80%, resize all layers not checked.
22. Activate the layer Raster 2.
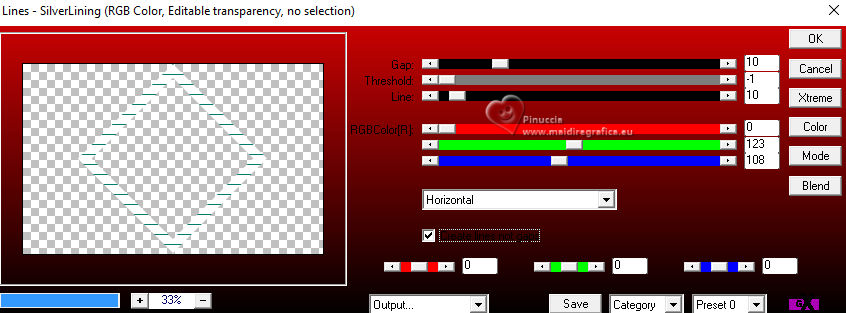
Effects>Plugins>AP 01 [Innovations] - Lines SilverLining.
23. Effects>Image Effects>Seamless Tiling.

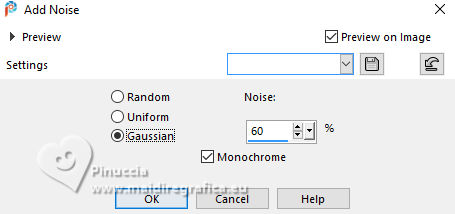
24. Adjust>Add/Remove Noise>Add Noise.
25. Reduce the opacity of this layer to 55%.
Adjust>Sharpness>Sharpen.
26. Activate the layer above, copy of Raster 2.
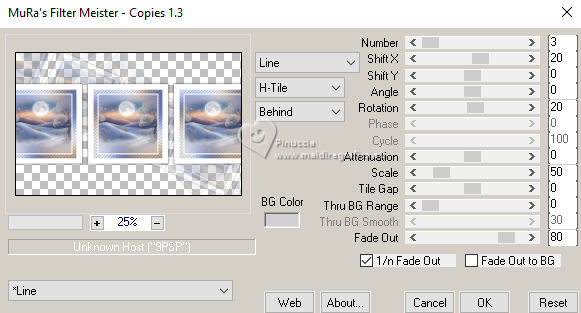
Effects>Plugins>Mura's Meister - Copies.
27. Activate the layer Raster 1.
Layers>New Raster Layer.
Selections>Select All.
Open the landscape by Nadège20-18-17-Nadege 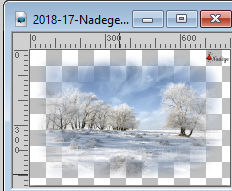
Erase the watermark and go to Edit>Copy.
Go back to your work and go to Edit>Paste into Selection.
Selections>Select None.
28. Effects>Image Effects>Seamless Tiling, default settings.

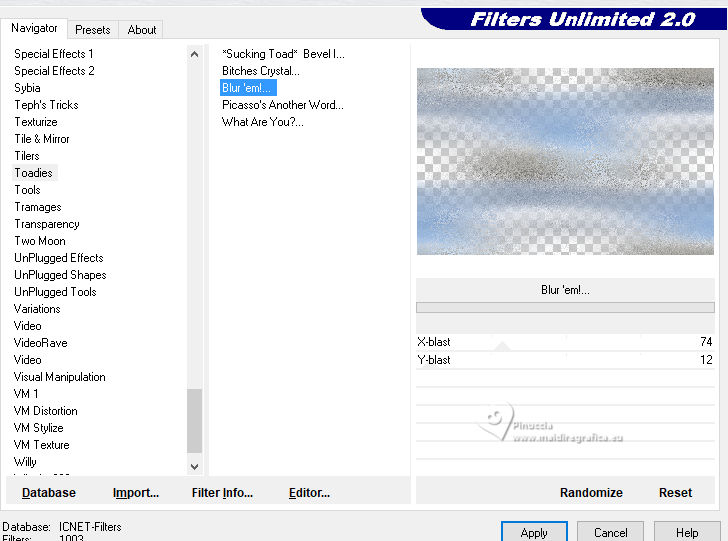
29. Effects>Plugins>Toadies - Blur'em
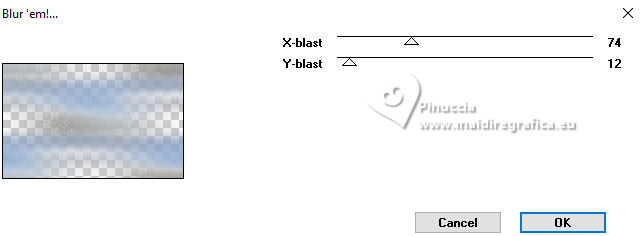
If you use the plugin in Unlimited, don't forget that Unlimited doesn't keep the settings in memory
Change the Blend Mode of this layer to Overlay.
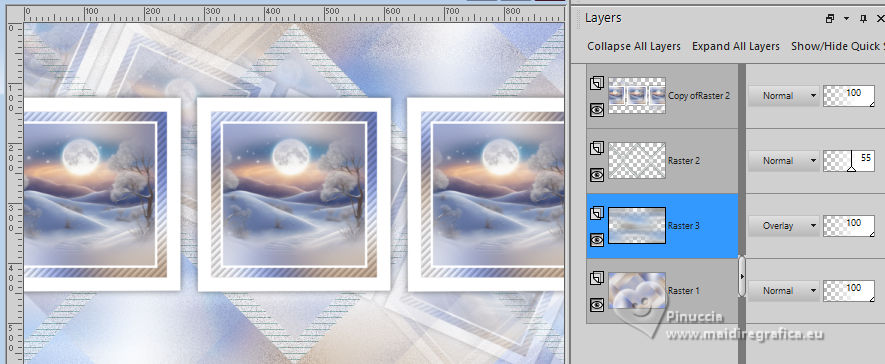
30. Stay on the layer Raster 3 (the second layers from the bottom).
Layers>New Raster Layer.
Flood Fill  the layer with color white. the layer with color white.
Layers>New Mask layer>From image
Open the menu under the source window and you'll see all the files open.
Select the mask Silvie_Mask_Lines990
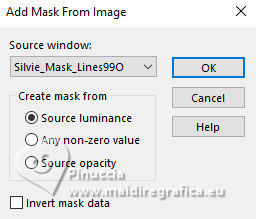
Layers>Merge>MErge Group.
31. Effects>3D Effects>Drop Shadow, color black.
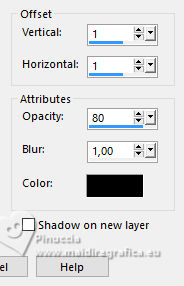
32. Layers>Merge>Merge visible.
Set your foreground color with your first color #4e6dc7,
and your background color with white.
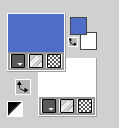
Set your foreground color to a Foreground/Background Gradient, style Sunburst.
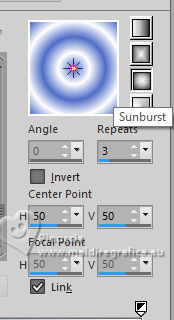
33. Image>Add borders, 1 pixel, symmetric, foreground color.
Image>Add borders, 2 pixels, symmetric, color white.
Image>Add borders, 1 pixel, symmetric, foreground color.
34. Selections>Select All.
Image>Add borders, 10 pixels, symmetric, color white.
Selections>Invert.
Flood Fill  the selection with your Gradient. the selection with your Gradient.
35. Effects>Plugins>Toadies - Blur'em, same settings.
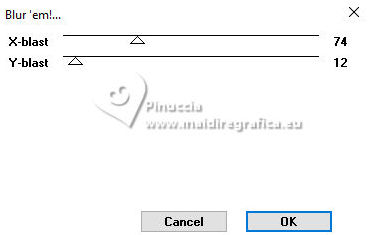
Effects>Edge Effects>Enhance.
36. Effects>3D Effects>Inner Bevel.
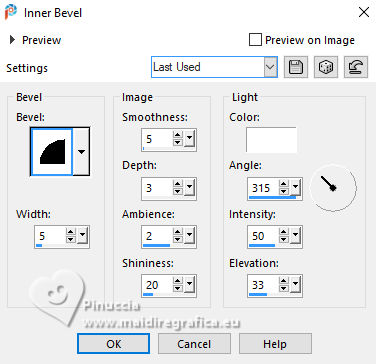
Selections>Select None.
37. Image>Add borders, 25 pixels, symmetric, color white.
Selections>Invert.
38. Effects>3D Effects>Cutout - color #203152.
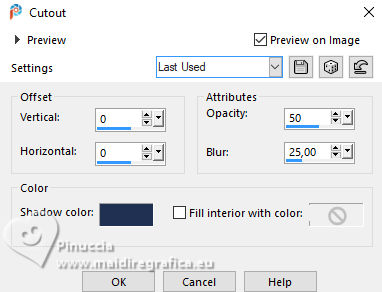
Selections>Select None.
39. Selections>Select All.
Image>Add borders, 10 pixels, symmetric, color white.
Selections>Invert.
Flood Fill  the selection with your Gradient. the selection with your Gradient.
40. Effects>Plugins>Toadies - Blur'em, same settings.

Effects>Edge Effects>Enhance.
41. Effects>3D Effects>Inner Bevel.

Selections>Select None.
42. Open the tube déco 1 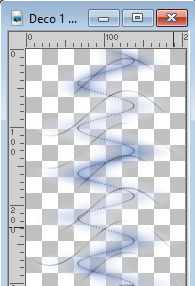
Edit>Copy.
Go back to your work and go to Edit>Paste as new layer.
Objcts>Align>Right.
Or K key to activate your Pick Tool 
Position X: - 793,00 - Position Y: 44,00

43. Layers>Duplicate.
Image>Mirror>Mirror horizontal.
44. Open the woman's tube KamilTube-4196 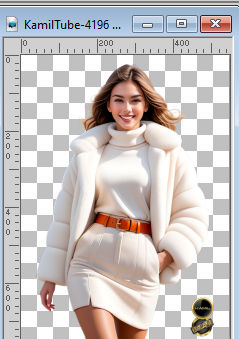
Erase the watermark and go to Edit>Copy.
Go back to your work and go to Edit>Paste as new layer.
Move  the tube to the left. the tube to the left.
45. Effects>3D Effects>Drop Shadow, color black.

46. Open the tube element fleur_Elfairy(13) 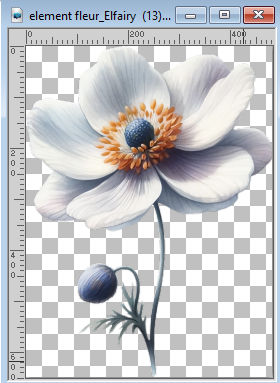
Edit>Copy.
Go back to your work and go to Edit>Paste as new layer.
Image>Resize, to 50%, resize all layers not checked.
Move  the tube at the bottom right. the tube at the bottom right.
47. Effects>3D Effects>Drop Shadow, color black.
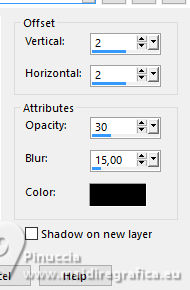
48. Image>Add borders, 1 pixel, symmetric, foreground color.
49. Sign your work on a new layer.
50. Image>Resize, 950 pixels width, resize all layers checked.
Save as jpg.
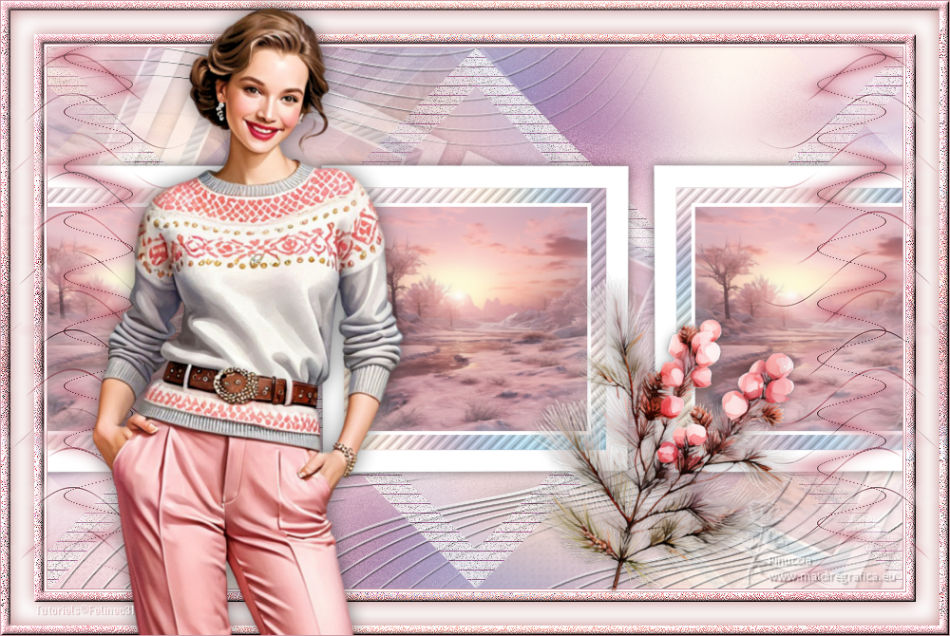
For the tube of this version thanks Virginia; for the scrap elements thanks Niekske.

If you have problems or doubts, or you find a not worked link, or only for tell me that you enjoyed this tutorial, write to me.
25 November 2024

|

