|
FRAGMENTO


Thanks Estela for your invitation to translate your tutorials into english

This tutorial, created with PSP2022, was translated with PspX7, but it can also be made using other versions of PSP.
Since version PSP X4, Image>Mirror was replaced with Image>Flip Horizontal,
and Image>Flip with Image>Flip Vertical, there are some variables.
In versions X5 and X6, the functions have been improved by making available the Objects menu.
In the latest version X7 command Image>Mirror and Image>Flip returned, but with new differences.
See my schedule here
 French Translation here French Translation here
 Your versions here Your versions here

For this tutorial, you will need:

Thanks for the tubes and the mask Vera Mendes, Mentali and Cameron.
The rest of the material is by Estela Fonseca.
(The links of the tubemakers here).
*It is forbidden to remove the watermark from the supplied tubes, distribute or modify them,
in order to respect the work of the authors

consult, if necessary, my filter section here
Filters Unlimited 2.0 here
Two Moon - EndageredSpecies, VerticalRipple here
Filters Two Moon can be used alone or imported into Filters Unlimited.
(How do, you see here)
If a plugin supplied appears with this icon  it must necessarily be imported into Unlimited it must necessarily be imported into Unlimited

You can change Blend Modes according to your colors.

Copy the preset Emboss 3 in the Presets Folder.
Open the mask in PSP and minimize it with the rest of the material.
Set your foreground color to #bce329  . .
1. Open a new transparent image 900 x 700 pixels.
Flood Fill  l'image transparente with your foreground color #bce329. l'image transparente with your foreground color #bce329.
2. Selections>Select All.
Open the tube mentali-misted3244 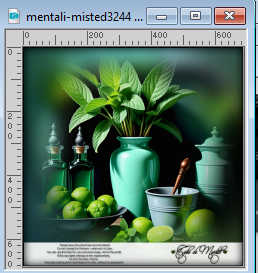
Edit>Copy.
Go back to your work and go to Edit>Paste into Selection.
Selections>Select None.
3. Effects>Image Effects>Seamless Tiling.

4. Adjust>Blur>Radial Blur
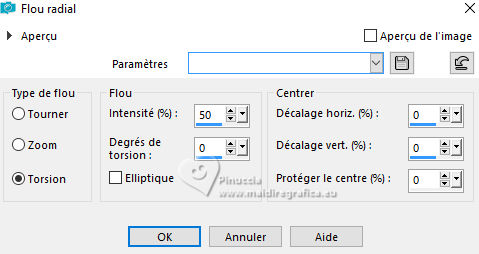
5. Effects>Plugins>Two Moon - EndageredSpecies, default settings.
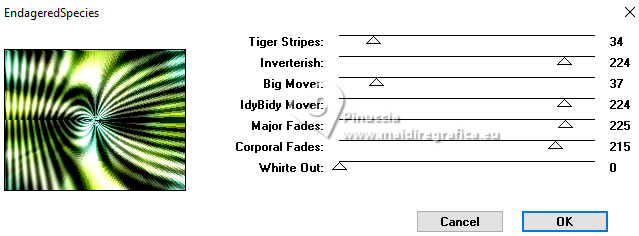
6. Effects>Reflection Effects>Rotating Mirror, default settings.

7. Layers>Duplicate.
Effects>Plugins>Two Moon - VerticalRipplie, default settings.
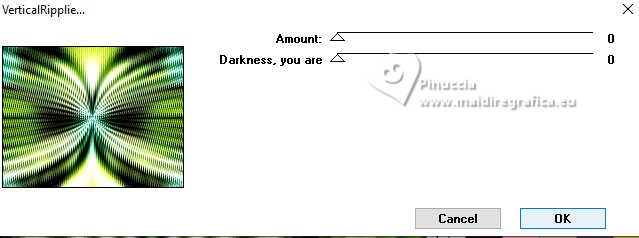
Adjust>Sharpness>Sharpen More.
8. Layers>New Raster Layer.
Flood Fill  the layer with your foreground color #bce329. the layer with your foreground color #bce329.
9. Layers>New Mask layer>From image
Open the menu under the source window and you'll see all the files open.
Select the mask maskcameron_ocean6
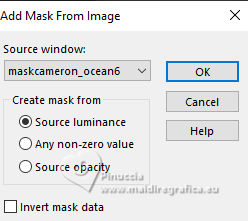
Layers>Merge>Merge Group.
10. Effects>User Defined Filter - select the preset Emboss 3 and ok.

Adjust>Sharpness>Sharpen More.
11. Activate the layer Copy of Raster 1.
Layers>Arrange>Move Up.
12. Effects>Geometric Effects>Circle.

Image>Resize, to 65%, resize all layers not checked.
13. Selections>Select All.
Selections>Float.
Selections>Defloat.
14. Selections>Modify>Contract - 25 Pixels.
Selections>Invert.
Press CANC on the keyboard
Selections>Select None.
Adjust>Sharpness>Sharpen.
15. Effects>3D Effects>Drop Shadow, color #39440c.
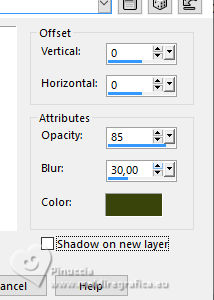
Move  the image at the bottom left. the image at the bottom left.
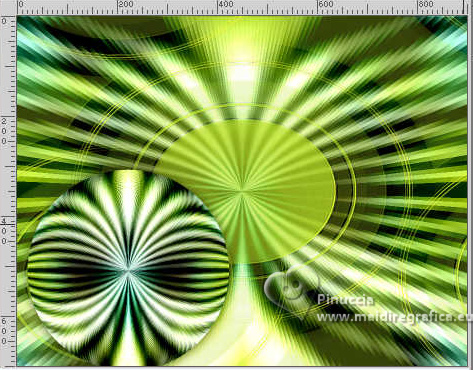
16. Edit>Paste as new layer - the tube mentali-misted3244 is still in memory.
Image>Resize, to 75%, resize all layers not checked.
Adjust>Sharpness>Sharpen More.
Don't move it.
17. Open the tube 1835-vmtubes 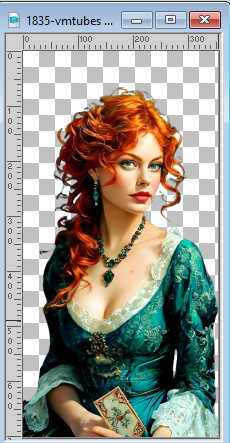
Edit>Copy.
Go back to your work and go to Edit>Paste as new layer.
Image>Mirror>Mirror horizontal.
Move  the tube to the right side. the tube to the right side.
18. Effects>3D Effects>Drop Shadow, color #39440c.

19. Image>Add borders, 4 pixels, symmetric, color #ffffe2  . .
Image>Add borders, 4 pixels, symmetric, color #548521  . .
Image>Add borders, 45 pixels, symmetric, color #ffffe2 
20. Activate your Magic Wand Tool 
and click in the last border to select it.
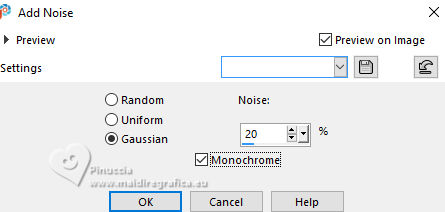
21. Adjust>Add/Remove Noise>Add Noise.
22. Selections>Invert.
Effects>3D Effects>Drop Shadow, color #39440c

Selections>Select None.
23. Layers>Duplicate.
Image>Resize, to 15%, resize all layers not checked.
Adjust>Sharpness>Sharpen.
24. K key to activate your Pick Tool 
Position X: 86,00 - Position vert.: 209,00.

25. Layers>Duplicate.
Position X: 202,00 - Position vert.: 73,00.

M key to deselect the Tool.
26. Layers>Merge>Merge Down.
27. Effects>3D Effects>Drop Shadow, color #39440c.

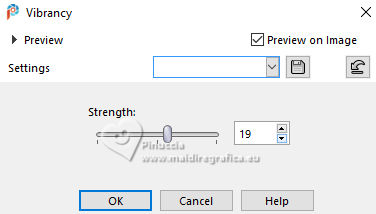
28. Adjust>Hue and Saturation>Vibrancy.
29. Open EF-Fragmento_Texto 
Edit>Copy.
Go back to your work and go to Edit>Paste as new layer.
Move  the text at the bottom left. the text at the bottom left.
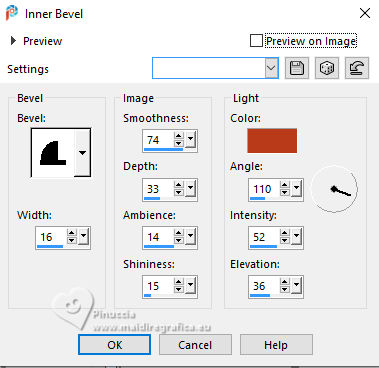
30. Effects>3D Effects>Inner Bevel - color at your choice.
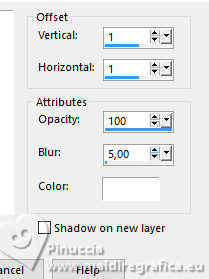
31. Effects>3D Effects>Drop Shadow, color #ffffff.
32. Sign your work on a new layer.
33. Image>Add borders, 4 pixels, symmetric, color #548521  . .
35. Adjust>Hue and Saturation>Vibrancy.

36. Image>Resize, 1000 pixels width, resize all layers checked.
Save as jpg.
For the tubes of this version thanks Silvie .


If you have problems or doubts, or you find a not worked link,
or only for tell me that you enjoyed this tutorial, write to me.
3 November 2024

|


