|
VISION


Thanks Yedralina for your invitation to translate your tutorials into english

This tutorial was written with PSP2020 and translated with CorelX17, but it can also be made using other versions of PSP.
Since version PSP X4, Image>Mirror was replaced with Image>Flip Horizontal,
and Image>Flip with Image>Flip Vertical, there are some variables.
In versions X5 and X6, the functions have been improved by making available the Objects menu.
In the latest version X7 command Image>Mirror and Image>Flip returned, but with new differences.
See my schedule here
 italian translation here italian translation here
 french translation here french translation here
 your versions here your versions here

For this tutorial, you will need:

For the tube thanks Clo, VioletVixen.
The rest of the material is by Yedralina.
(The links of the tubemakers here).

consult, if necessary, my filter section here
Filters Unlimited 2.0 here
Toadies - What are you here
L&K's - L&K's Zitah here
AAA Frames - Foto Frame here
Filters Toadies can be used alone or imported into Filters Unlimited.
(How do, you see here)
If a plugin supplied appears with this icon  it must necessarily be imported into Unlimited it must necessarily be imported into Unlimited

You can change Blend Modes according to your colors.
In the newest versions of PSP, you don't find the foreground/background gradient (Corel_06_029).
You can use the gradients of the older versions.
The Gradient of CorelX here

Copy the two files of the brush in the Brushes Folder.
Copy the selection in the Selections Folder.
1. Set your foreground color to #d6edf6,
and your background color to #153c4f.

Set your foreground color to a Foreground/Background Gradient, style Linear.
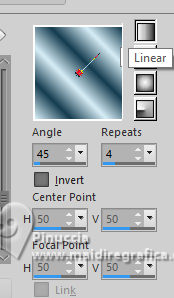
Open a new transparent image 950 x 650 pixels.
Flood Fill  the transparent image with your gradient. the transparent image with your gradient.
2. Effects>Plugins>Filters Unlimited 2.0 - Paper Textures - Japanese paper, default settings.

3. Effects>Plugins>Filters Unlimited 2.0 - Tile & Mirror - Distortion Mirror (Horizontal), default settings.

4. Effects>Reflection Effects>Rotating Mirror.

5. Selections>Select All.
Selections>Modify>Contract - 75 pixels.

Selections>Promote Selection to Layer.
Adjust>Blur>Radial Blur.
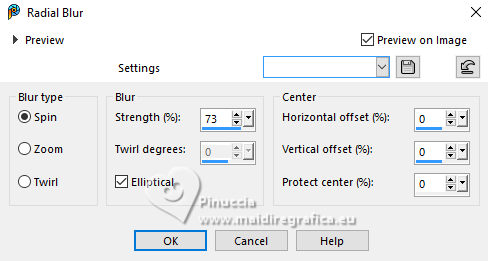
6. Effects>Plugins>AAA Frames - Foto Frame.

Selections>Select None.
7. Layers>Duplicate.
Image>Resize, to 55%, resize all layers ot checked.
8. Effects>Plugins>Filters Unlimited 2.0 - Toadies - What are you, default settings.

9. Effects>Plugins>Filters Unlimited 2.0 - Tile & Mirror - Distortion Mirror (Horizontal), same settings.

10. Effects>Image Effects>Seamless Tiling, default settings.

Reduce the opacity of this layer +/-65%.
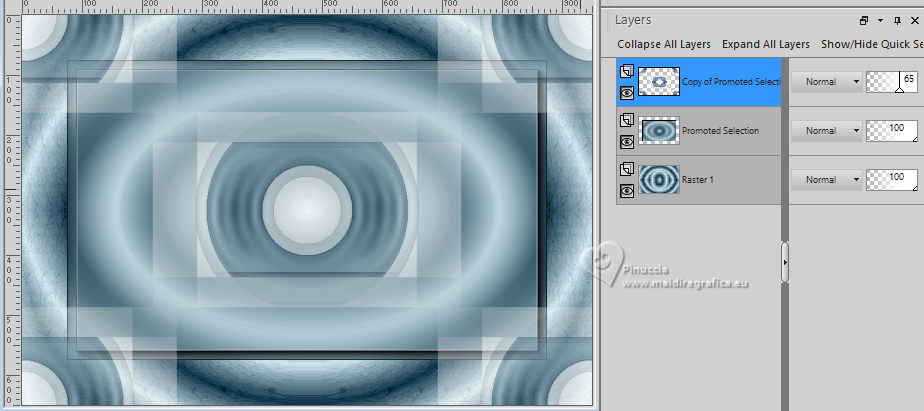
11. Effects>3D Effects>Drop Shadow, color black.
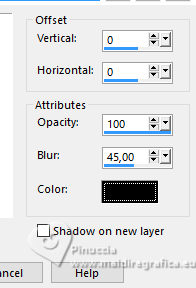
Change the Blend Mode of this layer to Overlay.
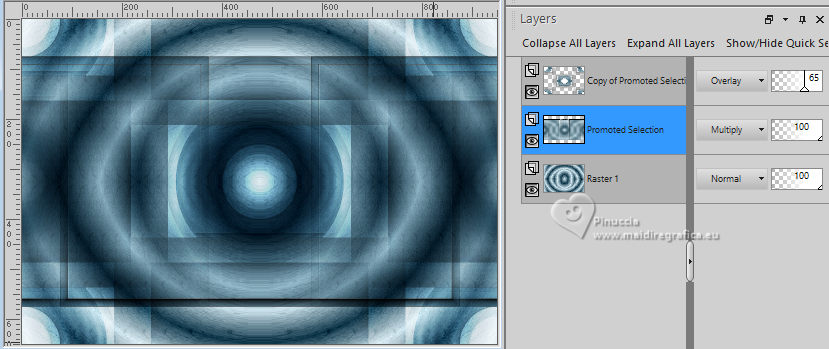
Activate the layer below, Promoted Selection.
12. Effects>Image Effects>Seamless Tiling, side by side.

13. Effects>Reflection Effects>Rotating Mirror, default settings.

Change the Blend Mode of this layer to Multiply.
14. Layers>New Raster Layer.
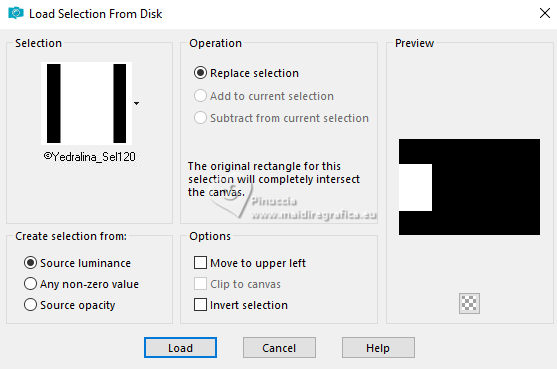
15. Selections>Load/Save Selection>Load Selection from Disk.
Look for and load the selection ©Yedralina_Sel120
16. Activate your Brush Tool 
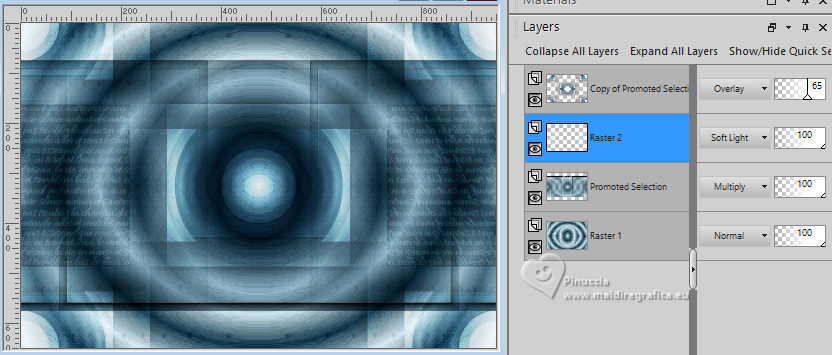
Look for and select the brush Libellule_100%_natura

Set your foreground color to Color.
Apply the brush to the left, a little off the edge.

Selections>Select None.
17. Effects>Reflection Effects>Rotating Mirror.

Change the Blend Mode of this layer to Soft Light.
18. Open the misted Lighthouse0001-VioletVixenMist2 
Erase the watermark and go to Edit>Copy.
Go back to your work and go to Edit>Paste as new layer.
Suggest: If your misted is rectangular, I would apply the 20-20 mask,
to give the tube a more oval shape, and more similar to the background of the work
Image>Resize, if necessary, for me 90%.
19. Reduce the opacity of this layer +/-50%.
20. Image>Add borders, 1 pixel, symmetric, foreground color.
Image>Add borders, 1 pixel, symmetric, background color.
Image>Add borders, 1 pixel, symmetric, foreground color.
Selections>Select All.
21. Edit>Copy.
Edit>Paste as new image, and minimize it.
Go back to your work.
22. Image>Add borders, 10 pixels, symmetric, whatever color.
Set your foreground color to Gradient.
Flood Fill  the selection with your Gradient. the selection with your Gradient.
Selections>Select None.
23. Repeat Image>Add borders, 1 pixel, symmetric, foreground color.
Image>Add borders, 1 pixel, symmetric, background color.
Image>Add borders, 1 pixel, symmetric, foreground color.
24. Selections>Select All.
Image>Add borders, 25 pixels, symmetric, foreground color.
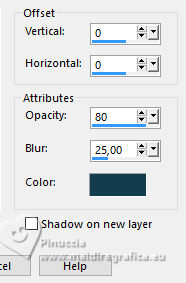
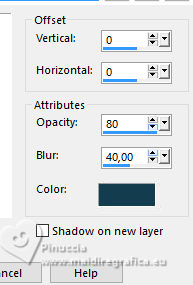
Effects>3D Effects>Drop Shadow, background color.
25. Image>Add borders, 1 pixel, symmetric, background color.
Image>Add borders, 1 pixel, symmetric, foreground color.
Image>Add borders, 1 pixel, symmetric, background color.
Selections>Select All.
26. Image>Add borders, 20 pixels, symmetric, whatever color.
Selections>Invert.
27. Edit>Paste into Selection (the image minimized at step 21 is still in memory).
Adjust>Blur>Radial Blur, same settings.
28. Effects>Plugins>L&K's - L&K's Zitah, default settings.

Effects>Edge Effects>Dilate.
29. Effects>Reflection Effects>Rotating Mirror.

Effects>Reflection Effects>Rotating Mirror.

30. Selections>Invert.
31. Effects>3D Effects>Drop Shadow, same settings.
Selections>Select None.
32. Open the tube deco00284©Yedralina 
Edit>Copy.
Go back to your work and go to Edit>Paste as new layer.
Don't move it.
Change the Blend Mode of this layer to Overlay.
33. Open your main tube Woman2255_byClo 
Erase the watermark and go to Edit>Copy.
Go back to your work and go to Edit>Paste as new layer.
Image>Resize, if necessary (for me to 63%), resize all layers ot checked.
Image>Mirror.
Move  the tube to the right side. the tube to the right side.
Effects>3D Effects>Drop Shadow, at your choice, for me background color
34. Image>Resize, 1000 pixels width, resize all layers checked.
Sign your work on a new layer.
Layers>Merge>Merge All and save as jpg.
For the tubes of this version thanks Clo and Mentali


If you have problems or doubts, or you find a not worked link, or only for tell me that you enjoyed this tutorial, write to me.
14 Ottobre 2023

|


