|
TODO SE TRASFORMA
 EVERYTHNG TRANSFORMS EVERYTHNG TRANSFORMS

Thanks Yedralina for your invitation to translate your tutorials into english

This tutorial was written with PSP2020 and translated with CorelX17, but it can also be made using other versions of PSP.
Since version PSP X4, Image>Mirror was replaced with Image>Flip Horizontal,
and Image>Flip with Image>Flip Vertical, there are some variables.
In versions X5 and X6, the functions have been improved by making available the Objects menu.
In the latest version X7 command Image>Mirror and Image>Flip returned, but with new differences.
See my schedule here
 italian translation here italian translation here
 french translation here french translation here
 your versions here your versions here

For this tutorial, you will need:

Thanks for the tubes Coly, LisaT, Silvie and for the masks Narah, Valy.
(The links of the tubemakers here).

consult, if necessary, my filter section here
Filters Unlimited 2.0 here
Winnies 006 - win_53, win_54 here
Simple - Top Left Mirror here
Filters Simple and Winnies can be used alone or imported into Filters Unlimited.
(How do, you see here)
If a plugin supplied appears with this icon  it must necessarily be imported into Unlimited it must necessarily be imported into Unlimited

You can change Blend Modes according to your colors.
In the newest versions of PSP, you don't find the foreground/background gradient (Corel_06_029).
You can use the gradients of the older versions.
The Gradient of CorelX here

Copy the Selections in the Selections Folder.
Open the masks in PSP and minimized them with the rest of the material.
1. Set your foreground color to #175752,
and your background color to #cffcf3.

Set your foreground color to a Foreground/Background Gradient, style Rectangular.
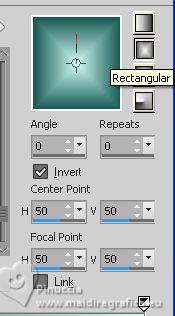
2. Open a new transparent image 950 x 650 pixels.
Flood Fill  the transparent image with your Gradient. the transparent image with your Gradient.
3. Effects>Plugins>Filters Unlimited 2.0 - Winnie006 - win_53, default settings.

4. Effects>Plugins>Filters Unlimited 2.0 - Winnie006 - win_54, default settings.

5. Image>Flip.
Effects>Reflection Effects>Rotating Mirror.

Effects>Edge Effects>Enhance More.
6. Selections>Charger/Enregistrer une sélection>Charger à partir du disque.
Chercher et charger la selection ©Yedralina_Sel071
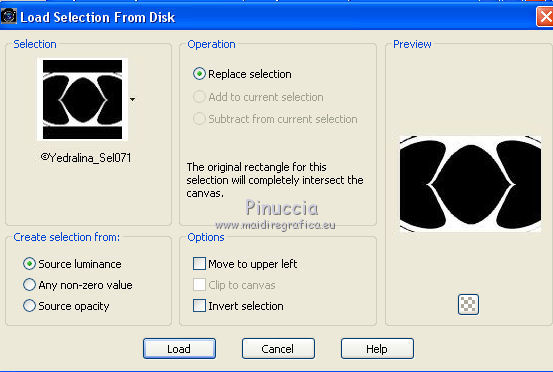
Selections>Promote Selection to Layer.
7. Change the Blend Mode of this layer to Hard Light.
Selections>Select None.
8. Set your foreground color to white #ffffff.
Layers>New Raster Layer.
Flood Fill  the layer with color white. the layer with color white.
9. Layers>New Mask layer>From image
Open the menu under the source window and you'll see all the files open.
Select the mask Narah_mask_Abstract127

Layers>Merge>Merge Group.
10. Image>Flip.
11. Effects>Reflection Effects>Rotatig Mirror, same settings.

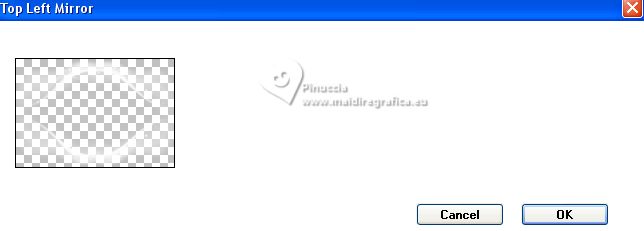
12. Effects>Plugins>Simple - Top Left Mirror.
13. Change the Blend Mode of this layer to Luminance (legacy).
14. Layers>New Raster Layer.
Flood Fill  the layer with color white. the layer with color white.
15. Layers>New Mask layer>From image
Open the menu under the source window
and select the mask VSP195

Layers>Merge>Merge Group.
16. Change the Blend Mode of this layer to Soft Light.

17. Activate the bottom layer, Raster 1.
Layers>New Raster Layer.
18. Selections>Load/Save Selection>Load Selection from Disk.
Look for and load the selection ©Yedralina_Sel072
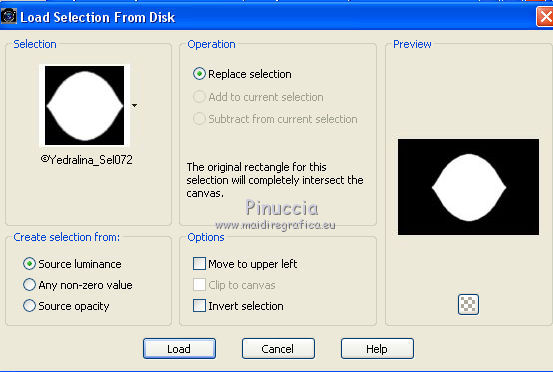
19. Open the misted paysages_0405_lisat 
Erase the watermark and go to Edit>Copy.
Go back to your work and go to Edit>Paste into Selection.
Selections>Select None.
Adjust>Sharpness>Sharpen.

20. Activate your top layer.
Open the tube Glowing_Butterflys364_Silvie_10.11.21 
Edit>Copy.
Go back to your work and go to Edit>Paste as new layer.
Image>Resize, to 80%, resize all layers not checked.
21. Layers>New Mask layer>From image
Open the menu under the source window
and select the mask 20-20
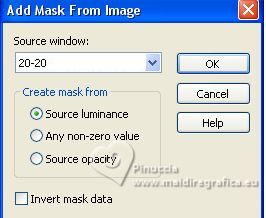
Layers>Duplicate.
Layers>Merge>Merge Group.
22. K key to activate your Pick Tool 
and set Position X: 422,00 and Position Y: -34,00

M key to deselect the Tool.
23. Change the Blend Mode of this layer to Luminance.

24. Open your main tube femme659-coly 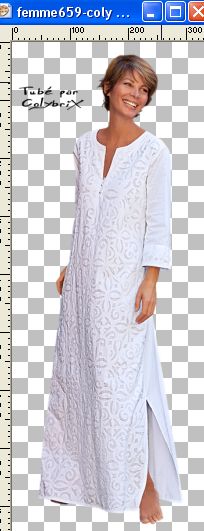
Erase the watermark and go to Edit>Copy.
Go back to your work and go to Edit>Paste as new layer.
Image>Resize, 1 time to 80%, and 1 time to 90%, resize alla layers not checked.
Place  correctly the tube. correctly the tube.
Effects>3D Effects>Drop Shadow, at your choice.
25. For the borders, set again your foreground color to #175752.

Image>Add borders, 1 pixel, symmetric, background color.
Image>Add borders, 3 pixels, symmetric, foreground color.
Image>Add borders, 1 pixel, symmetric, background color.
Selections>Select All.
26. Image>Add borders, 15 pixels, symmetric, foreground color.
Selections>Invert.
27. Activate your Dropper Tool 
and click with your right mouse button (to set it as background color),
on the color of your choice from the mask layer.
 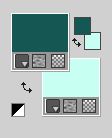
28. With your new background color,
set your foreground color to a Foreground/Background Gradient, style Linear.

Flood Fill  the selection with your Gradient. the selection with your Gradient.
Selections>Select None.
28. Image>Add borders, 1 pixel, symmetric, background color.
Image>Add borders, 3 pixels, symmetric, foreground color.
Immagine>Aggiungi brodatura, 1 pixel, symmetric, background color.
Selections>Select All.
29. Image>Add borders, 30 pixels, symmetric, foreground color.
Selections>Invert.
30. Invert the colors of your Gradient.
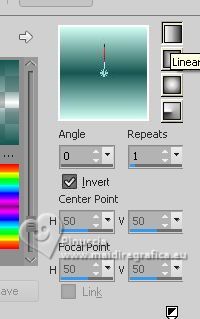
Flood Fill  the selection with your Gradient. the selection with your Gradient.
Selections>Select None.
31. Image>Add borders, 1 pixel, symmetric, background color.
Image>Add borders, 3 pixels, symmetric, foreground color.
Image>Add borders, 1 pixel, symmetric, background color.
32. Image>Resize, 1000 pixels width, resize all layers checked.
33. Sign your work on a new layer.
Layers>Merge>Merge All and save as jpg.
For the tubes of this versions thanks Beatriz and LisaT.


If you have problems or doubts, or you find a not worked link, or only for tell me that you enjoyed this tutorial, write to me.
1 September 2023

|
 EVERYTHNG TRANSFORMS
