|
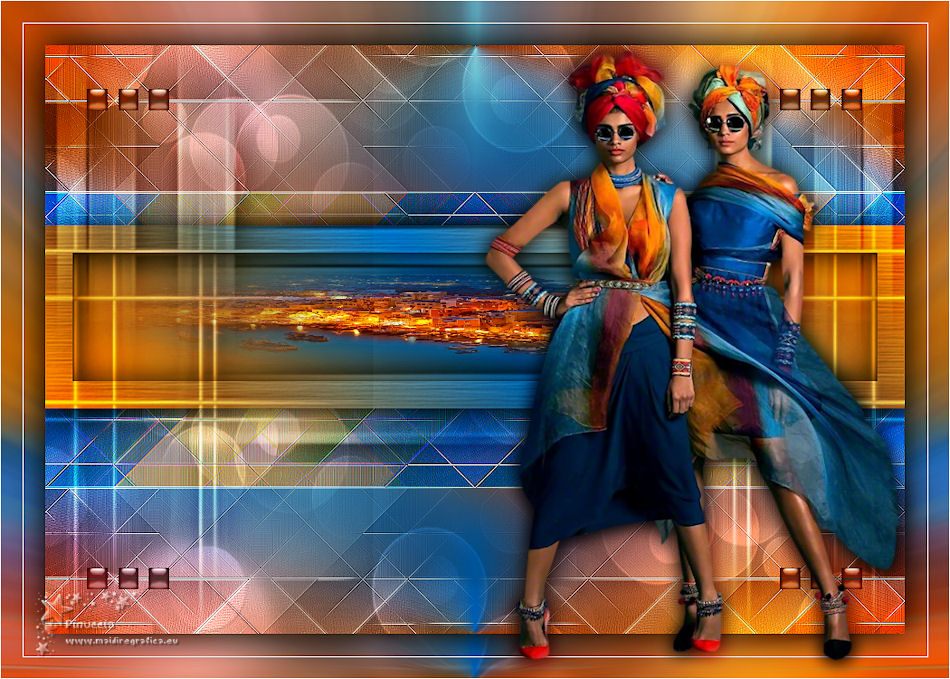
COLORES DE TEMPORADA


Thanks Yedralina for your invitation to translate your tutorials into english

This tutorial was written with CorelX19 and translated with CorelX17, but it can also be made using other versions of PSP.
Since version PSP X4, Image>Mirror was replaced with Image>Flip Horizontal,
and Image>Flip with Image>Flip Vertical, there are some variables.
In versions X5 and X6, the functions have been improved by making available the Objects menu.
In the latest version X7 command Image>Mirror and Image>Flip returned, but with new differences.
See my schedule here
italian translation here
french translation here
your versions here
For this tutorial, you will need:
Tube at your choice.
The rest of the material qui
For the tube used and not supplied, thanks SYL (SvB1102).
Image from the net.
Masque by TD (TD_TagMask114)
Deco by Yedralina (Deco00253©Yedralina.
(The links of the tubemakers here).
Plugins:
consult, if necessary, my filter section here
Filters Unlimited 2.0 here
Mura's Seamless - Emboss at Alpha here
Mehdi - Sorting Tiles here
Lokas Software - Aqua here
AAA Filters - AAA Framer here
AAA Filters - Custom here
Filters Mura's Seamless can be used alone or imported into Filters Unlimited.
(How do, you see here)
If a plugin supplied appears with this icon  it must necessarily be imported into Unlimited it must necessarily be imported into Unlimited

You can change Blend Modes according to your colors.
In the newest versions of PSP, you don't find the foreground/background gradient (Corel_06_029).
You can use the gradients of the older versions.
The Gradient of CorelX here
The texture Corel_15_017, or Grain long deep, is standard in PSP.
If you don't find it in your PSP, copy the supplied texture in the Textures Folder.
Copy the selection in the Selections Folder.
Copy the mask 20-20 in the Masks Folder.
Open the second mask in PSP and minimize it with the rest of the material.
1. Set your foreground color to #014f91,
and your background color to #fd8604.

Set your foreground color to a Foreground/Background Gradient, style Linear.

Open a new transparente image 950 x 650 pixels.
Selections>Select All.
Open the jpg image and go to Edit>Copy.
Go back to your work and go to Edit>Paste into Selection.
Selections>Select None.
Adjust>Blur>Gaussian Blur - radius 50.

Effects>Image Effects>Seamless Tiling.

2. Layers>New Raster Layer.
Flood Fill  the layer with your Gradient. the layer with your Gradient.
Effects>Plugins>Mehdi - Sorting Tiles.

Effects>Edge Effects>Enhance More.
Image>Resize, to 50%, resize all layers not checked.
Effects>Geometric Effects>Skew.

Effects>Image Effects>Seamless Tiling.

3. Layers>Duplicate.
Image>Mirror.
Change the Blend Mode of this layer to Soft Light.
Layers>Merge>Merge Down.
Effects>Edge Effects>Enhance More.
Layers>Duplicate.
4. Effects>Image Effects>Seamless Tiling.

Image>Flip.
Effects>Reflection Effects>Rotating Mirror.

Change the Blend Mode of this layer to Luminance (legacy).
5. Set your foreground color to white.
Layers>New Raster Layer.
Flood Fill  with color white. with color white.
Layers>New Mask layer>From image
Open the menu under the source window and you'll see all the files open.
Select the mask TD_TagMask114.

Layers>Duplicate.
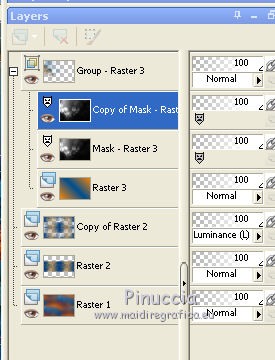
Layers>Merge>Merge group.
Layers>Duplicate.
Image>Mirror.
Image>Flip.
Layers>Merge>Merge Down.
Effects>Image Effects>Seamless Tiling.

Effects>Plugins>Mura's Seamless - Emboss at alpha, default settings.

Change the Blend Mode of this layer to Overlay.
6. Layers>New Raster Layer.
Selection Tool 
(no matter the type of selection, because with the custom selection your always get a rectangle)
clic on the Custom Selection 
and set the following settings.

Set again your foreground color to #014f91 and to Linear Gradient.
 
Flood Fill  the selection with your gradient. the selection with your gradient.
Effects>Texture Effects>Texture - select the texture Corel_15_017, or Grain long deep.
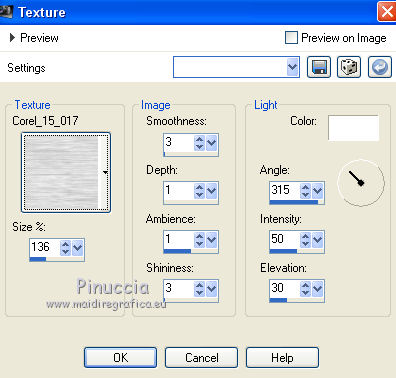
Selections>Modify>Contract - 30 pixels.
Flood Fill  again with your gradient. again with your gradient.
7. Activate again the jpg image.
On this image:
Layers>Load/Save Mask>Load Mask from Disk.
Look for and load the mask 20-20

Layers>Duplicate.
Layers>Merge>Merge Group.
9. Edit>Copy.
Go back to your work and go to Edit>Paste into Selection.
Selections>Invert.
Effects>3D Effects>Drop Shadow, color black.
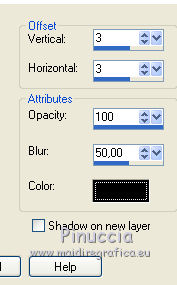
Selections>Select None.
Effects>3D Effects>Drop Shadow, same settings.
9. Open the tube Deco00253©Yedralina and go to Edit>Copy.
Go back to your work and go to Edit>Paste as new layer.
Effects>3D Effects>Drop Shadow, same settings.
Change the Blend Mode of this layer to Overlay.
10. Layers>New Raster Layer.
Selections>Load/Save Selection>Load Selection from Disk.
Look for and load the selection Sel650

Flood Fill  the selection with whatever color. the selection with whatever color.
Effects>Plugins>Lokas Software - Aqua - foreground color.

Selections>Select None.
Change the Blend Mode of this layer to Luminance (legacy).

11. Layers>Merge>Merge visible.
12. Selections>Select All.
Edit>Copy.
Image>Add borders, 50 pixels, symmetric, whatever color.
Selections>Invert.
Edit>Paste into Selection.
Adjust>Blur>Radial Blur.

Effects>Plugins>AAA Filters - AAA Framer

Selections>Invert.
Effects>3D Effects>Drop Shadow, color black.

Selections>Select None.
13. Optional: Effects>Plugins>AAA Filters - Custom - Landscape.

14. Open your tube and go to Edit>Copy.
Go back to your work and go to Edit>Paste as new layer.
Move  the tube to the right side. the tube to the right side.
Layers>Duplicate.
Adjust>Blur>Gaussian Blur - radius 10.

Layers>Arrange>Move down.
Change the Blend Mode of this layer to Multiply.
Layers>Merge>Merge visible.
15. Image>Resize, 1000 pixels width, resize all layers cheked.
Sign your work and save as jpg.
Version with tube by Nanette

Version with tube by Valy


If you have problems or doubts, or you find a not worked link, or only for tell me that you enjoyed this tutorial, write to me.
18 September 2019
|

