|
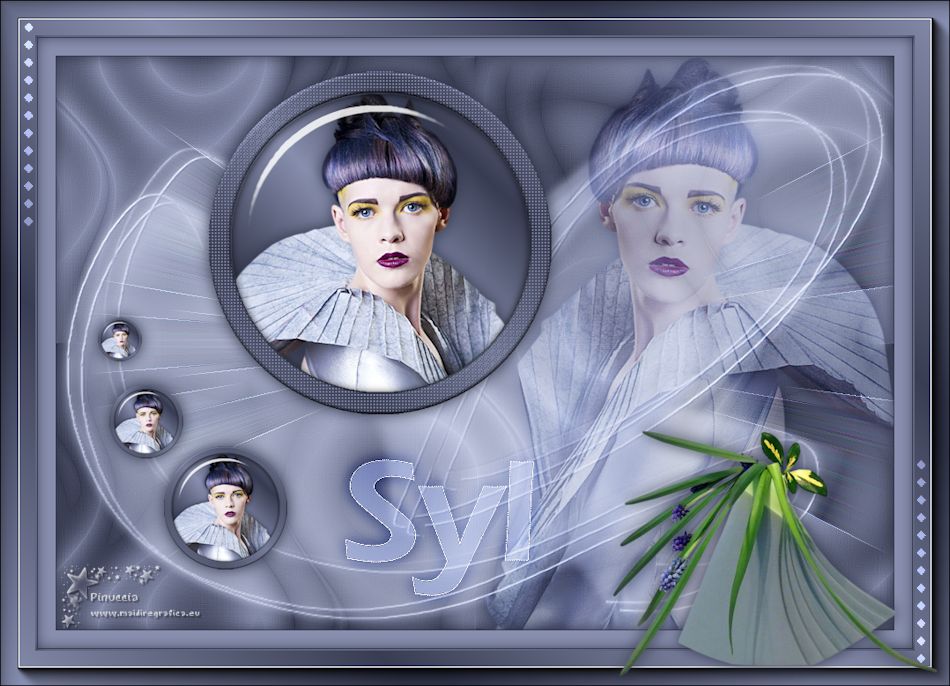
SYL


Thanks Yedralina for your invitation to translate your tutorials into english

This tutorial was written with CorelX19 and translated with CorelX17, but it can also be made using other versions of PSP.
Since version PSP X4, Image>Mirror was replaced with Image>Flip Horizontal,
and Image>Flip with Image>Flip Vertical, there are some variables.
In versions X5 and X6, the functions have been improved by making available the Objects menu.
In the latest version X7 command Image>Mirror and Image>Flip returned, but with new differences.
See my schedule here
 italian translation here italian translation here
 french translation here french translation here
 your versions here your versions here
For this tutorial, you will need:
Material here
Thanks for the tubes Syl and for the mask Tatty.
The rest of the material is by Yedralina.
(The links of the tubemakers here).
Plugins:
consult, if necessary, my filter section here
Filters Unlimited 2.0 here
VM Distortion - Radiator here
VM Toolbox - Zoom Blur here
Alien Skin Eye Candy 5 Impact - Glass here
Mura's Seamless - Emboss at Alpha here
AAA Frames - Foto Frame here
Filters VM (Distortion, Toolbox) and Mura's Seamless Extravaganza can be used alone or imported into Filters Unlimited.
(How do, you see here)
If a plugin supplied appears with this icon  it must necessarily be imported into Unlimited it must necessarily be imported into Unlimited

You can change Blend Modes according to your colors.
In the newest versions of PSP, you don't find the foreground/background gradient (Corel_06_029).
You can use the gradients of the older versions.
The Gradient of CorelX here
Copy the preset  in the folder of the plugin Alien Skin Eye Candy 5 Impact>Settings>Glass. in the folder of the plugin Alien Skin Eye Candy 5 Impact>Settings>Glass.
One or two clic on the file (it depends by your settings), automatically the preset will be copied in the right folder.
why one or two clic see here
Open the mask in PSP and minimize it with the rest of the material.

Set your foreground color to #393d53,
and your background color to #888fae.
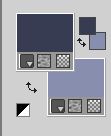
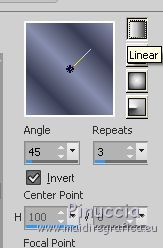
Set your foreground color to a Foreground/Background Gradient, style Linear.
1. Open CanalAlpha_syl.
Window>Duplicate or, on the keyboard, shift+D to make a copy.

Close the original.
The copy, that will be the basis of your work, is not empty,
but contains the selections saved on the alpha channel.
Flood Fill  the transparent image with your Gradient. the transparent image with your Gradient.
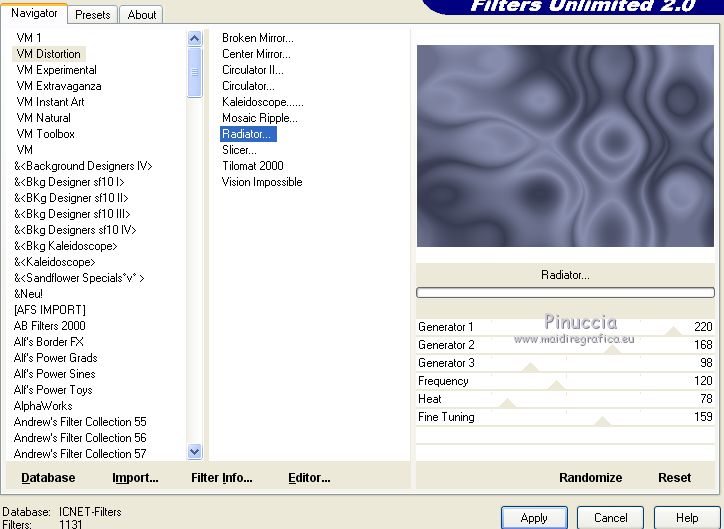
2. Effects>Plugins>Filters Unlimited 2.0 - VM Distortion - Radiator, default settings.
Effects>Image Effects>Seamless Tiling.

Effects>Edge Effects>Enhance More.
3. Selections>Load/Save Selection>Load Selection from Alpha Channel.
The selection #1 is immediately available. You just have to click Load.
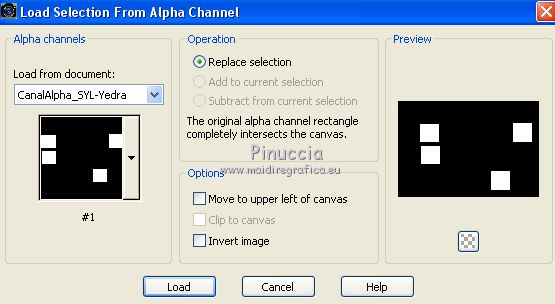
Selections>Promote Selection to layer.
Selections>Invert.
Effects>3D Effects>Drop Shadow, color black.
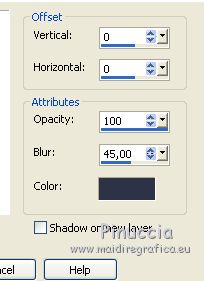
Selections>Select None.
Effects>Plugins>VM Toolbox - Zoom Blur, default settings.
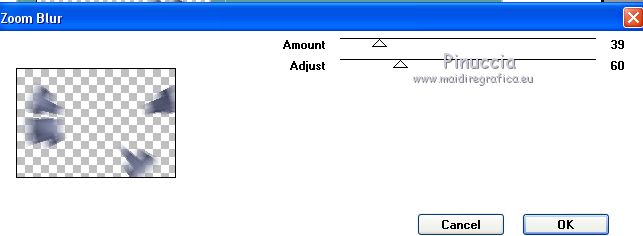
Effects>Reflection Effects>Rotating Mirror.

Effects>Edge Effects>Enhance.
4. Layers>New Raster Layer.
Selections>Load/Save Selection>Load Selection from Alpha Channel.
Open the Selections Menu and load the selection #2.
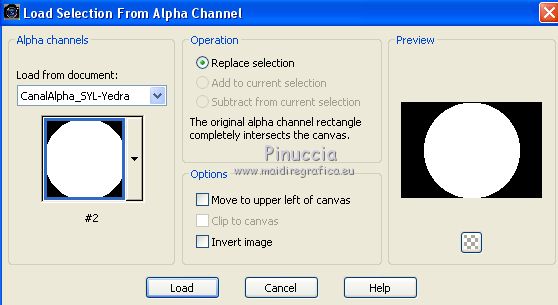
Flood Fill  the selection with your gradient. the selection with your gradient.
Selections>Modify>Select Selection Borders.
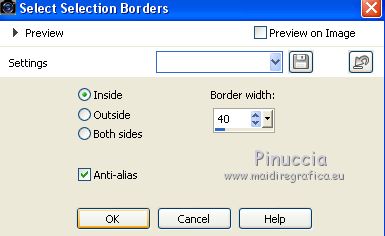
Selections>Promote Selection to layer.
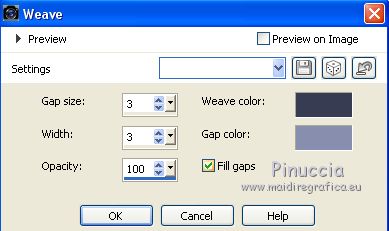
5. Effects>Texture Effects>Weave
weave color: foreground color
gap color: background color
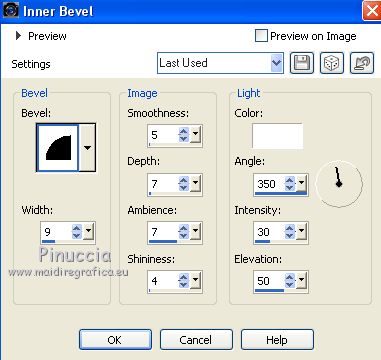
Effects>3D Effects>Inner Bevel.
Selections>Select None.
Image>Resize, to 60%, resize all layers not checked.
6. Activate the layer below, Raster 2.
Image>Resize, to 60%, resize all layers not checked.
Open your tube and go to Edit>Copy.
Go back to your work and go to Edit>Paste as new layer.
Image>Resize, to 80%, resize all layers not checked.
Place  the tube in the center of the circle. the tube in the center of the circle.
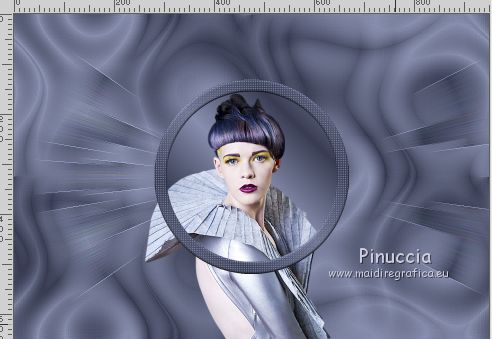
Effects>3D Effects>Drop shadow, color black.
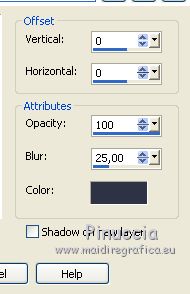
7. Selections>Load/Save Selection>Load Selection from Alpha Channel.
Open the Selections Menu and load the selection #3.
Invert image checked
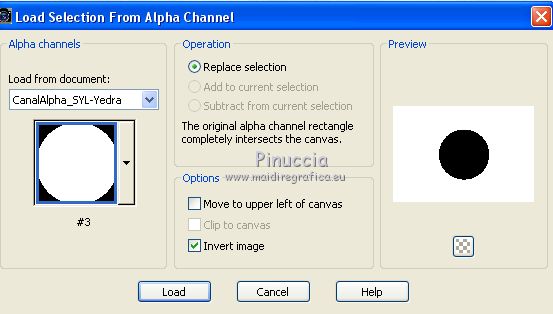
Press CANC on the keyboard 
Keep selected.
Activate the top layer of the circle.
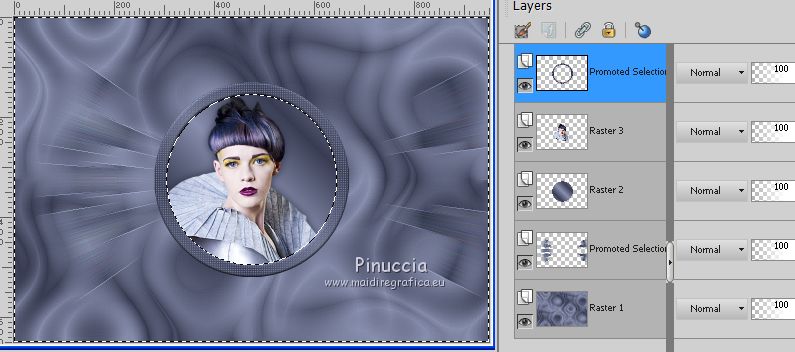
Selections>Invert.
Layers>Merge>Merge Down - 2 times.
Effects>Plugins>Alien Skin Eye Candy 5 Impact - Glass.
Select the preset preset Yedralina_Glass 3.
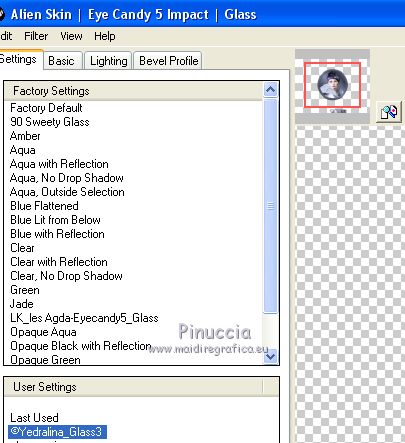
Selections>Select None.
8. Activate your bottom layer.
Selections>Select All.
Activate your top layer, Raster 2.
Image>Crop to selection.
Stay on this layer.
9. Layers>New Raster Layer.
Flood Fill  the layer with your light background color. the layer with your light background color.
Layers>Arrange>Move down.
Layers>New Mask layer>From image
Open the menu under the source window and you'll see all the files open.
Select the mask Mask065-Mony C Designs)
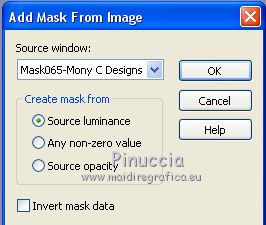
Layers>Merge>Merge Group.
Image>Mirror.
Edit>Cut (to keep the mask in memory)
Selections>Select All.
Edit>Paste into Selection.
Selections>Select None.
Effects>Plugins>Mura's Seamless - Emboss at Alpha, default settings.
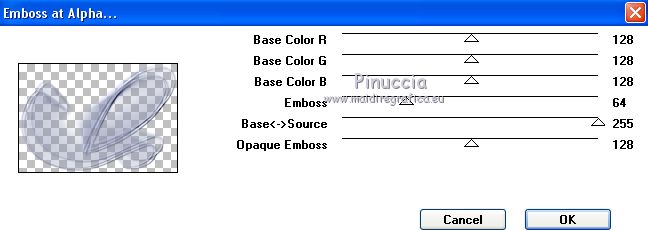
Change the Blend Mode of this layer to Screen.
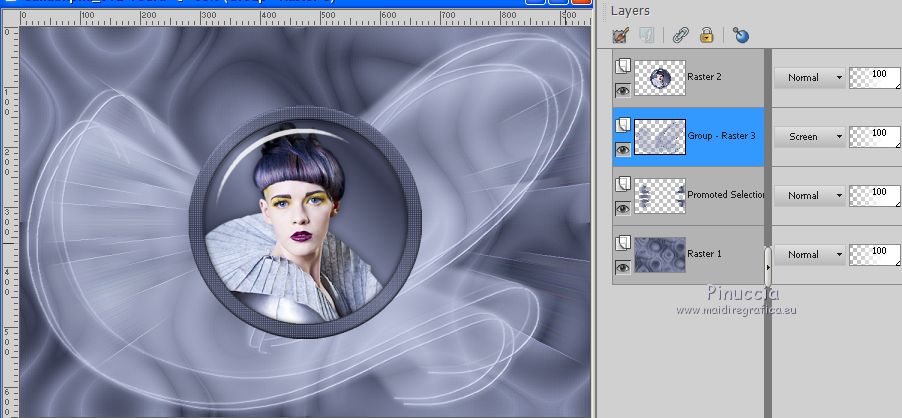
10. Activate your top layer, Raster 2.
K key to activate your Pick Tool 
and set Position X: 173,00 et Position Y: 17,00.
e imposta Posizione X: 173,00 e Posizione Y: 17.00

11. Layers>Duplicate.
Image>Resize, 2 times to 60%, resize all layers not checked.
Set Position X: 122,00 and Position Y: 442,00

Layers>Duplicate.
Image>Resize, to 60%, resize all layers not checked.
Set Position X: 60,00 and Position Y: 372,00

Layers>Duplicate.
Image>Resize, to 60%, resize all layers not checked.
Set Position X: 47,00 and Position Y: 296,00

M key to deselect the Tool.
Layers>Merge>Merge Down- 3 times.
Effects>3D Effects>Drop shadow, same settings.

12. Activate again your main tube and go to Edit>Copy.
Go back to your work and go to Edit>Paste as new layer.
Image>Mirror.
Layers>Arrange>Move Down.
Move  the tube to the right side. the tube to the right side.
Effects>3D EFfects>Drop shadow, at your choice.
Change the Blend Mode of this layer to Soft Light.
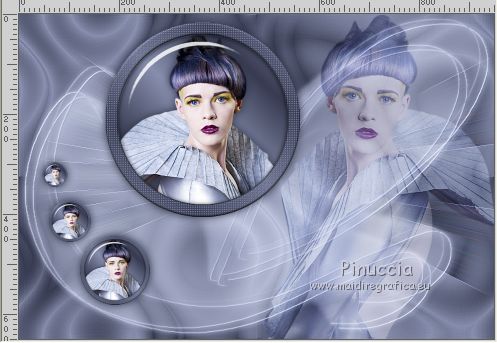
13. Open the text and go to Edit>Copy.
Go back to your work and go to Edit>Paste as new layer.
If you are using other colors, you can write your text with the supplied font:
Eras Demi ITC, size 60, foreground color white; background color: light color.
Apply a Drop Shadow at your choice,
for me I used the last Drop Shadow, still in memory (0/0/100/25, color black)
Place  the text as in my example. the text as in my example.
Change the Blend Mode of this layer to Overlay, or at your choice.
For my second work, I changed to Hard Light.
14. Image>Add borders, 1 pixel, symmetric, dark color.
Image>Add borders, 20 pixels, symmetric, light color.
Selections>Select All.
Selections>Modify>Select Selection Borders.
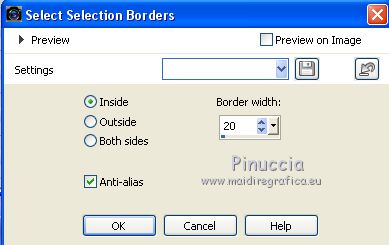
Effects>3D Effects>Drop Shadow, same settings.

Selections>Select None.
Image>Add borders, 1 pixel, symmetric, dark color.
Image>Add borders, 2 pixels, symmetric, light color.
Selections>Select All.
Image>Add borders, 40 pixels, symmetric, whatever color.
Selections>Invert.
Flood Fill  the selection with your gradient. the selection with your gradient.
Effects>Plugins>AAA Frames - Foto Frame.
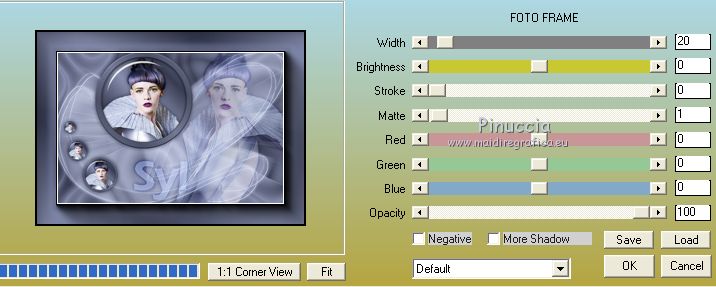
Effects>3D Effects>Drop Shadow, same settings.
Selections>Select None.
15. Open your decorative tube and go to Edit>Copy.
Go back to your work and go to Edit>Paste as new layer.
Image>Resize, to 70%, resize all layers not checked.
Move  the tube at the bottom right. the tube at the bottom right.
Effects>3D Effects>Drop Shadow, at your choice.
16. Open the tube Deco00273©Yedralina and go to Edit>Copy.
Go back to your work and go to Edit>Paste as new layer.
Don't move it.
Change the Blend Mode of this layer to Overlay.
17. Image>Resize, 1000 pixels width, resize all layers checked.
Sign your work on a new layer.
Layers>Merge>Merge All and save as jpg.
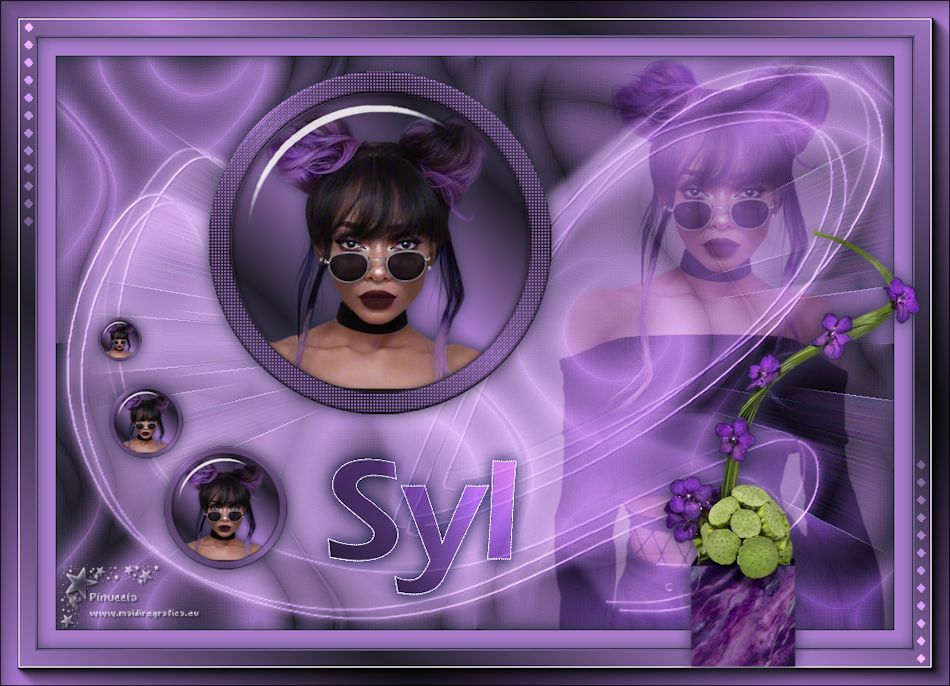
Other version with tubes by Syl

If you have problems or doubts, or you find a not worked link, or only for tell me that you enjoyed this tutorial, write to me.
3 March 2021
|

