|
OLIVIA


Thanks Yedralina for your invitation to translate your tutorials into english

This tutorial was written with PSP2020 and translated with PSPX9 and PSP2020, but it can also be made using other versions of PSP.
Since version PSP X4, Image>Mirror was replaced with Image>Flip Horizontal,
and Image>Flip with Image>Flip Vertical, there are some variables.
In versions X5 and X6, the functions have been improved by making available the Objects menu.
In the latest version X7 command Image>Mirror and Image>Flip returned, but with new differences.
See my schedule here
 italian translation here italian translation here
 french translation here french translation here
 your versions here your versions here

For this tutorial, you will need:

Thanks for the tube Luz Cristina and for the mask Narah.
The rest of the material is by Yedralina.
(The links of the tubemakers here).

consult, if necessary, my filter section here
Filters Unlimited 2.0 here
VM Stylize - Square Blur, Depp Crunch here
Simple - Diamonds, Blintz, Top Left Mirror here
Simple - Top Bottom Wrap (bonus) here
Optional: Nik Software - Color Efex Pro here
Filters VM Stylize and Simple can be used alone or imported into Filters Unlimited.
(How do, you see here)
If a plugin supplied appears with this icon  it must necessarily be imported into Unlimited it must necessarily be imported into Unlimited

You can change Blend Modes according to your colors.

Copy the Selection in the Selections Folder.
Copy the preset Emboss 3 in the Presets Folder
Open the mask in PSP and minimize it with the rest of the material.
Colors:
foreground #8a110a
background white #ffffff
The determining colors of your image will not be these,
but the colors that result in the background (Fondant).
If you prefer not to use this background, the result of your image will also be different.

1. Open a new transparent image 950 x 650 pixels.
2. Selections>Select All.
Open the background image fondant 
You can change the colors, adapting them to yours.
You can use the Nik Software filter.

Edit>Copy.
Go back to your work and go to Edit>Paste into Selection.
Selections>Select None.
3. Effects>Plugins>Filters Unlimited 2.0 - VM Stylize - Square Blur, default settings.

4. Effects>Edge Effects>Enhance More.
5. Effects>Plugins>Filters Unlimited 2.0 - VM Stylize - Depp Crunch, default settings.

6. Effects>Plugins>Filters Unlimited 2.0 - Simple - Diamonds.

7. Effects>Plugins>Filters Unlimited 2.0 - Simple - Blintz.

8. Adjust>Sharpness>Sharpen More.
9. Effects>Image Effects>Seamless Tiling - Side by side.

10. Layers>New Raster Layer.
Flood Fill  the layer with color white. the layer with color white.
11. Layers>New Mask layer>From image
Open the menu under the source window and you'll see all the files open.
Select the mask NarahsMasks_1785

Layers>Merge>Merge Group.
12. Effects>User Defined Filter - select the preset Emboss 3 and ok.

13. Effects>Edge Effects>Enhance More.
14. Change the Blend Mode of this layer to Screen.
15. Image>Add borders, 2 pixels, symmetric, color white.
Selections>Select All.
16. Image>Add borders, 10 pixels, symmetric, color white.
17. Effects>3D Effects>Drop Shadow, color black.
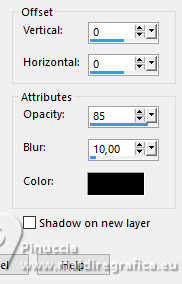
Selections>Select All.
18. Image>Add borders, 35 pixels, symmetric, color white.
Selections>Invert.
19. Your background image Fondant is still in memory:
Edit>Paste into Selection.
20. Effects>Reflection Effects>Rotating Mirror.

21. Adjust>Blur>Gaussian Blur - radius 15.

22. Selections>Select All.
Image>Add borders, 10 pixels, symmetric, color white.
Effects>3D Effects>Drop Shadow, same settings.
23. Selections>Select All.
Image>Add borders, 45 pixels, symmetric, color white.
24. Selections>Invert.
Edit>Paste into Selection (your background image is always in memory).
25. Adjust>Blur>Gaussian Blur - radius 15.

26. Effects>Reflection Effects>Rotating Mirror.

Selections>Select None.
27. Layers>New Raster Layer.
Flood Fill  the layer with color white. the layer with color white.
28. Layers>New Mask layer>From image
Open the menu under the source window
and select again the mask NarahsMasks_1785.

Layers>Merge>Merge Group.
29. Effects>Edge Effects>Enhance More.
Image>Mirror>Mirror horizontal.
30. Layers>New Raster Layer.
Selections>Load/Save Selection>Load Selection from Disk.
Look for and load the selection ©Yedralina_Sel087
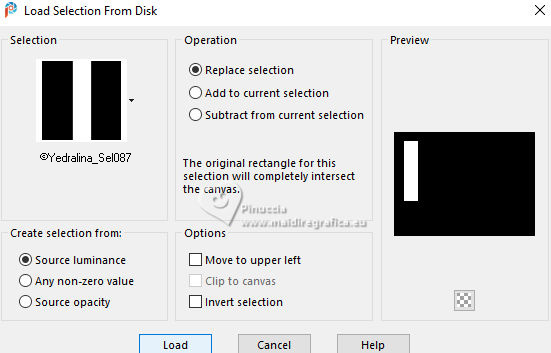
31. Edit>Paste into Selection (your background image is still in memory)
Selections>Modify>Contract - 20 pixels.
Flood Fill  the selection with color white. the selection with color white.
32. Selections>Modify>Contract - 2 pixels.
Edit>Paste into Selection (your background image in memory).
33. Image>Flip>Flip Vertical.
34. Adjust>Blur>Gaussian Blur - radius 15.

Selections>Modify>Contract - 2 pixels.
Flood Fill  with color white. with color white.
Selections>Modify>Contract - 2 pixels.
Press CANC on the keyboard 
Selections>Select None.
35. Adjust>Blur>Motion Blur.

36. Effects>Plugins>Filters Unlimited 2.0 - Simple - Top Left Mirror.

37. Effects>Plugins>Filters Unlimited 2.0 - Simple - Top Bottom Wrap.

38. Effects>Distortion Effects>Punch.
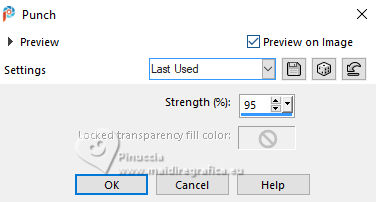
39. K key to activate your Pick Tool 
and set Position X: 9,00

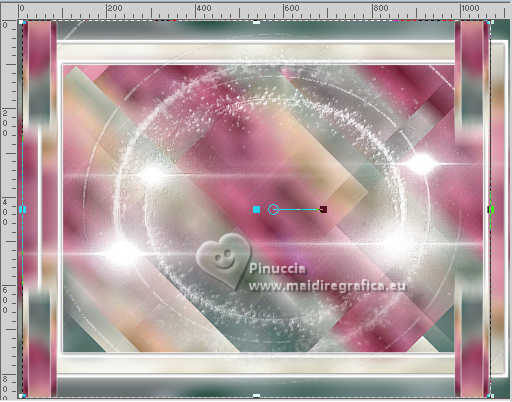
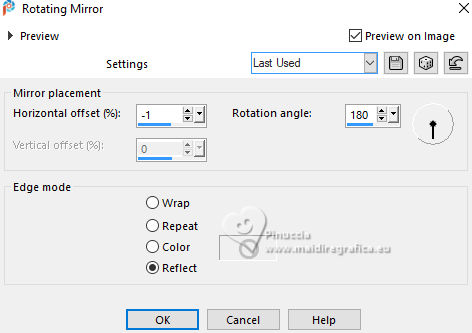
40. Effects>Reflection Effects>Rotating Mirror.
41. Open the tube Deco00325©Yedralina 
Edit>Copy.
Go back to your work and go to Edit>Paste as new layer.
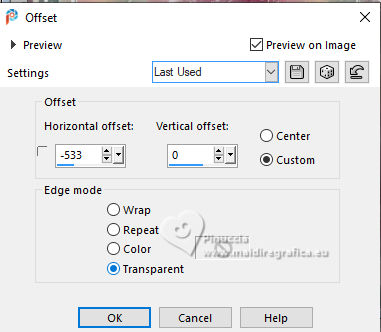
42. Effects>Image Effects>Offset.
43. Effects>3D Effects>Drop Shadow, color black.

44. Open the tube 8171-LuzCristina 
Edit>Copy.
Go back to your work and go to Edit>Paste as new layer.
Image>Resize, to 90%, resize all layers not checked.
Place  correctly the tube. correctly the tube.
45. Activate your Text Tool 
font Autumn Chant set your background color with your foreground color #8a110a 
adapt the size according to your text and your PSP version

Write Olivia and move the text at the bottom right.
Layers>Convert to raster layer.
If you prefer, copy/paste as new layer the file Text OLIVIA 
and flood fill  the text with your foreground color. the text with your foreground color.
Effects>3D Effects>Drop Shadow, at your choice.
46. Image>Add borders, 2 pixels, symmetric, color white.
47. Image>Resize, 1000 pixels width, resize all layers checked.
48. Sign your work on a new layer.
Layers>Merge>Merge All and save as jpg.
For the tube of these version thanks
Luz Cristina

Mentali


If you have problems or doubts, or you find a not worked link, or only for tell me that you enjoyed this tutorial, write to me.
1 June 2024

|


