|
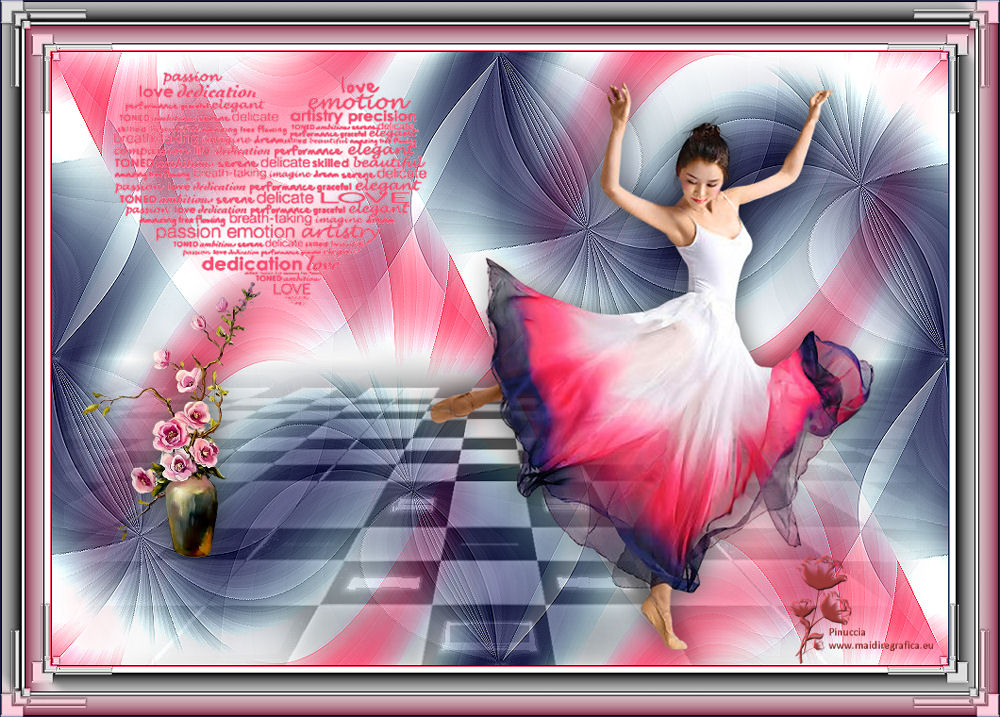
LA DANZA ES...


Thanks Yedralina for your invitation to translate your tutorials into english

This tutorial was written with CorelX19 and translated with CorelX17, but it can also be made using other versions of PSP.
Since version PSP X4, Image>Mirror was replaced with Image>Flip Horizontal,
and Image>Flip with Image>Flip Vertical, there are some variables.
In versions X5 and X6, the functions have been improved by making available the Objects menu.
In the latest version X7 command Image>Mirror and Image>Flip returned, but with new differences.
See my schedule here
 italian translation here italian translation here
 french translation here french translation here
 your versions here your versions here
For this tutorial, you will need:
Material here
Thanks for the tubes LisaT (femmes_0618_lisat) and Luz Cristina (6557-Luz Cristina);
for the mask Nikita (1250181684_nikita_masques).
The rest of the material is by Yedralina.
(The links of the tubemakers here).
Plugins:
consult, if necessary, my filter section here
Filters Unlimited 2.0 here
Mehdi - Wavy Lab 1.1. here
Filter Factory Gallery E - Gradient/Spokes Ratio Maker here
AAA Frames - Foto Frame here
Mura's Seamless - Emboss at Alpha here
Simple - Top Bottom Wrap (bonus) here
Filtres Factory Gallery, Mura's Seamless and Simple can be used alone or imported into Filters Unlimited.
(How do, you see here)
If a plugin supplied appears with this icon  it must necessarily be imported into Unlimited it must necessarily be imported into Unlimited

You can change Blend Modes according to your colors.
Copy the preset in the Presets Folder.

Open the mask in PSP and minimize it with the rest of the material.
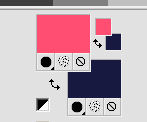
Set your foreground color to #fe4e72,
and your background color to #181a42.
1. Open a new transparent image 950 x 650 pixels.
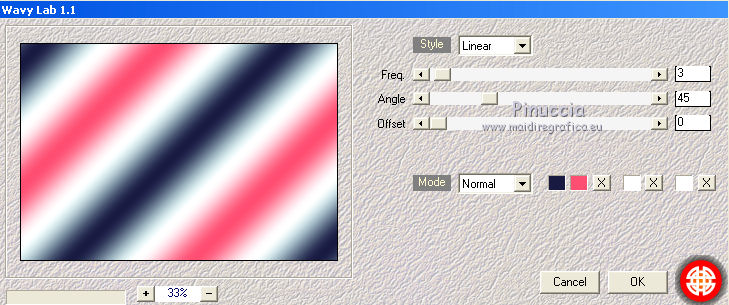
Effects>Plugins>Mehdi - Wavy Lab 1.1.
This filters creates gradients with the colors of your Materials palette.
The first is your background color #181a42, the second is your foreground color #fe4e72.
Change the last two colors created by the filtre with color white #ffffff.
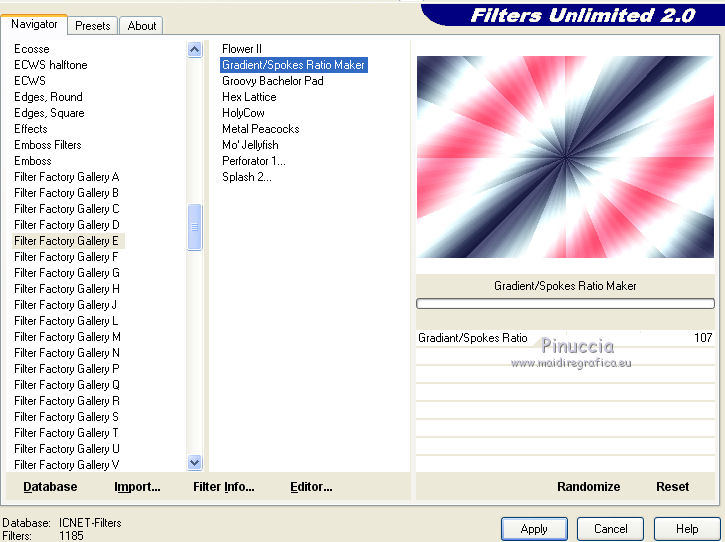
2. Effects>Plugins>Filters Unlimited 2.0 - Filter Factory Gallery E - Gradient/Spokes Ratio Maker, default settings.
3. Effects>Distortion Effects>Wave.
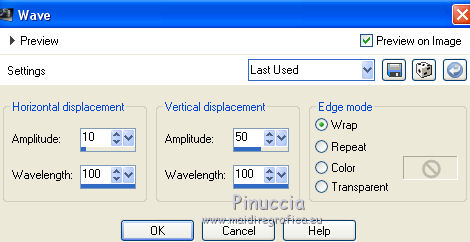
4. Effects>Plugins>Simple - Top bottom Wrap.
This effect works without window; result
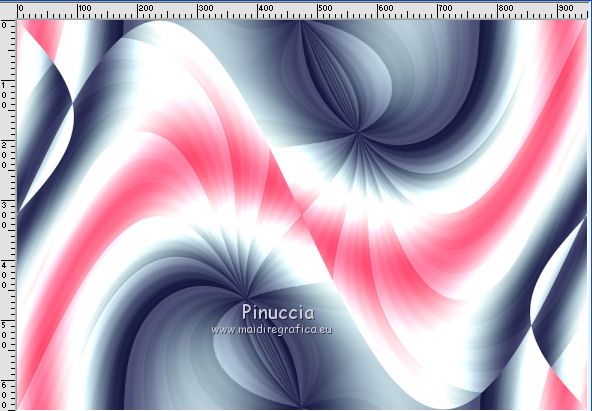
5. Effects>Image Effects>Seamless Tiling.

6. Effects>Edge Effects>Enhance.
7. Set your foreground color to white.
Layers>New Raster Layer.
Flood Fill  the layer with color white. the layer with color white.
8. Layers>New Mask layer>From image
Open the menu under the source window and you'll see all the files open.
Select the mask 1250181684_nikita_masques.
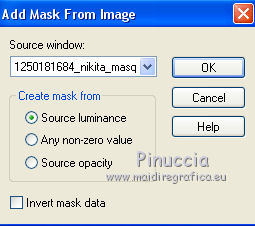
Layers>Merge>Merge Group.
9. K key on the keyboard to activate your Pick Tool 
Open the presets menu and select the preset 304-©Yedralina.
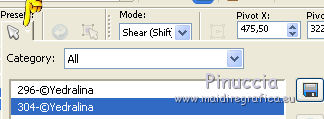
M key to deselect the Tool.
don't worry if you have problems with the preset,
you can move the mask setting Position X: 11,00 and Position Y: 351,00

10. Effetti>Plugins>Mura's Seamless - Emboss at Alpha, default settings.
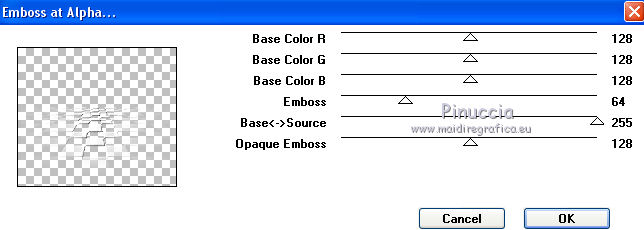
11. Effects>3D Effects>Drop Shadow, color black.

Effects>Edge Effects>High Pass.
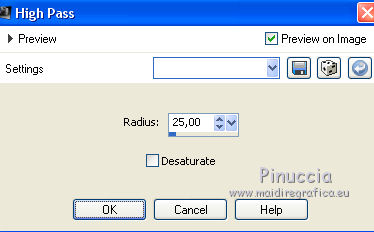
Change the Blend Mode of this layer to Luminance (legacy).
12. Open your main tube and go to Edit>Copy.
Go back to your work and go to Edit>Paste as new layer.
Image>Resize, to 80%, resize all layers not checked.
Move  the tube to the right side. the tube to the right side.
Effects>3D Effects>Drop Shadow, to your liking; for me:

13. Open the wordart DecoW04©Yedralina and go to Edit>Copy.
Go back to your work and go to Edit>Paste as new layer.
For me: Image>Resize, to 80%, resize all layers not checked.
(in my second version I have not resized)
Move  the tube at the upper left. the tube at the upper left.
Change color and Blend Mode to your liking.
For my example: Selections>Select All.
Selections>Float.
Selections>Defloat.
I filled out  the selection with the foreground color #fe4e72 the selection with the foreground color #fe4e72
14. Open the deco tube and go to Edit>Copy.
Go back to your work and go to Edit>Paste as new layer.
Image>Resize, to 40%, resize all layers not checked.
Move  the tube at the bottom left. the tube at the bottom left.
Effects>3D Effects>Drop Shadow, same settings.
15. Set again your foreground color to #fede72.

Image>Add borders, 1 pixel, symmetric, background color #181a42.
Image>Add borders, 1 pixel, symmetric, foreground color #fe4e72,.
Image>Add borders, 25 pixels, symmetric, color white.
Image>Add borders, 1 pixel, symmetric, background color #181a42.
Image>Add borders, 1 pixel, symmetric, foreground color #fe4e72,.
Selections>Select All.
Selections>Modify>Contract - 29 pixels.
Selections>Invert.
16. Effects>Plugins>AAA Frames - Foto Frame.
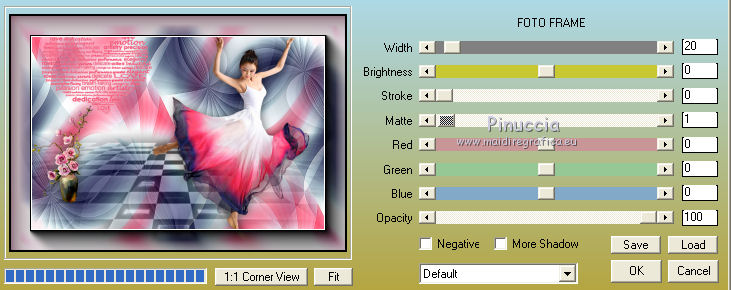
Edit>Copy.
Selections>Select all.
Image>Add borders, 25 pixels, symmetric, whatever color.
Selections>Invert.
Edit>Paste into Selection
Image>Flip.
Image>Mirror.
Selections>Select None.
Image>Add borders, 1 pixel, symmetric, background color #181a42.
Image>Resize, 1000 pixels width, resize all layers checked.
17. Open the tube EsquinaDeco02 and go to Edit>Copy.
Go back to your work and go to Edit>Paste as new layer.
Change the Color to your liking
or change the Blend Mode to Luminance (legacy).
18. Sign your work on a new layer.
Layers>Merge>Merge All.
Save as jpg.
Version with tubes by Nena Silva (vvs-danca0069) and Guismo (calguisdeco11082014)
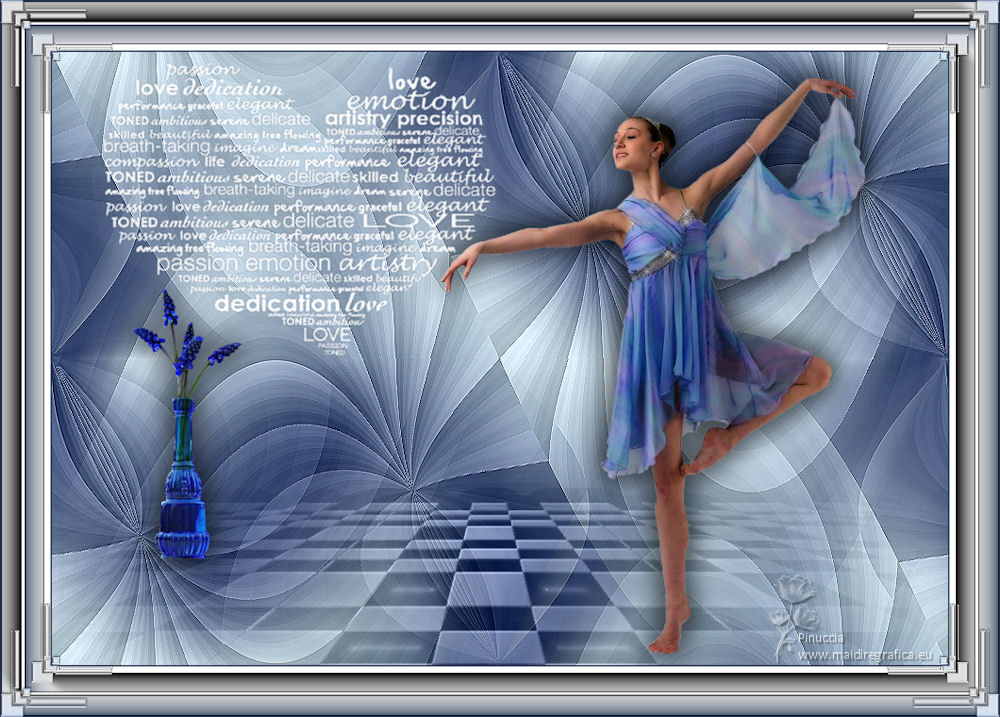

If you have problems or doubts, or you find a not worked link, or only for tell me that you enjoyed this tutorial, write to me.
15 October 2021

|

