Home |
Home |

Mappa sito |
Mappa sito |
Tutorial |
Tutorial |
Tut tecnici |
Tut tecnici |
Links-Banner |
Links-Banner |
Regali-Award |
Regali-Award |
Informatica |
Informatica |
Archivio |
Archivio |
Mail |
Mail |
Privacy policy |
Privacy policy |
Novità |
Novità |
Home |
Home |
Mappa sito |
Mappa sito |
Tutorial |
Tutorial |
Tut tecnici |
Tut tecnici |
Links-Banner |
Links-Banner |
Regali-Award |
Regali-Award |
Informatica |
Informatica |
Archivio |
Archivio |
Mail |
Mail |
Privacy policy |
Privacy policy |
Novità |
Novità |
|
ESTRELLA DEL MAR  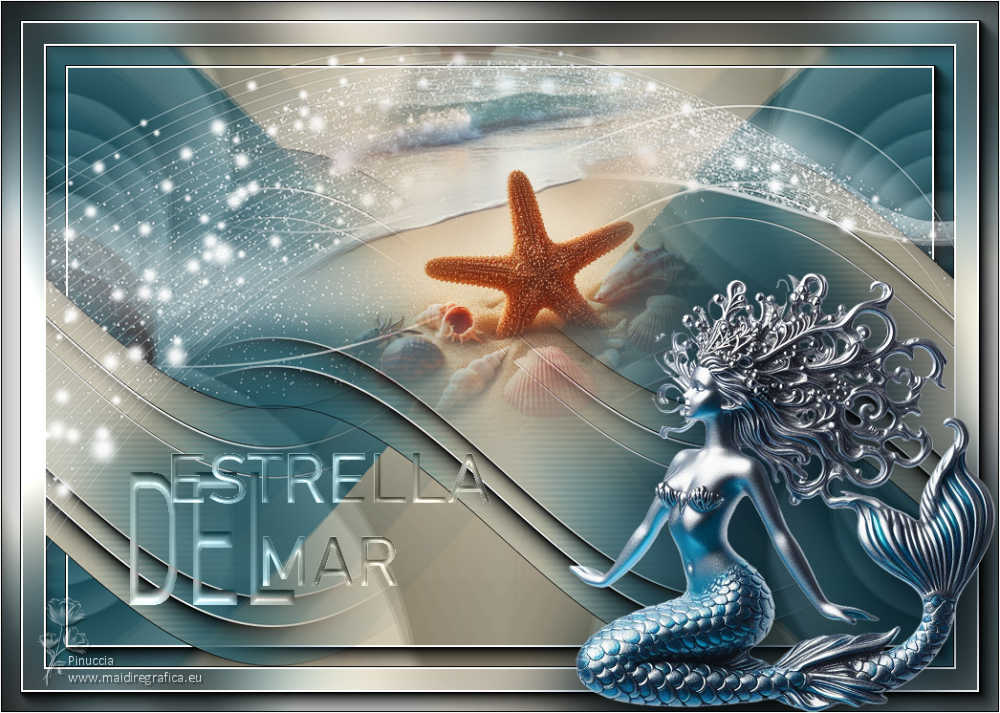

This tutorial was written with PSP2020 and translated with PSPX9 and PSP2020, but it can also be made using other versions of PSP.  consult, if necessary, my filter section here Filters Unlimited 2.0 here VM Toolbox - Seamless Tile here Graphics Plus - Cross Shadow here Simple - Top Left Mirror, 4 Way Average here Simple - Left Right Wrap (bonus) here RCS Filter Pak 1.0 - RCSTripleExposure here Filter Factory Gallery Q - Gravity Blossom here AAA Frames - Foto Frame here Filters VM Toolbox, Graphics Plus, Simple, Factory Gallery and RCS Filter can be used alone or imported into Filters Unlimited. (How do, you see here) If a plugin supplied appears with this icon  it must necessarily be imported into Unlimited it must necessarily be imported into Unlimited You can change Blend Modes according to your colors. In the newest versions of PSP, you don't find the foreground/background gradient (Corel_06_029). You can use the gradients of the older versions. The Gradient of CorelX here  Copy the presets in the Presets Folder. Open the mask in PSP and minimize it with the rest of the material. Set your foreground color to #417684, and your background color to #e1d1b8. 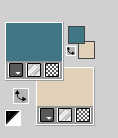 Set your foreground color to a Foreground/Background Gradient, style Radial. 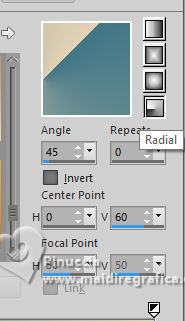 1. Open CanalAlpha ESTRELLA DEL MAR Cette image, that will be the basis of your work, is not empty, but contains the selections saved to alpha channel. Flood Fill  the transparent image with your Gradient. the transparent image with your Gradient.2. Effects>Plugins>Simple - Top Left Mirror. 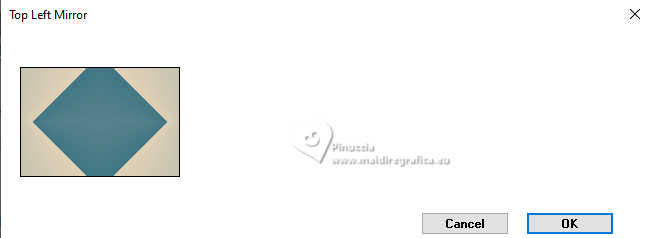 3. Effects>Plugins>Filters Unlimited 2.0 - RCS Filter Pak 1.0 - RCS TripleExposure, default settings. 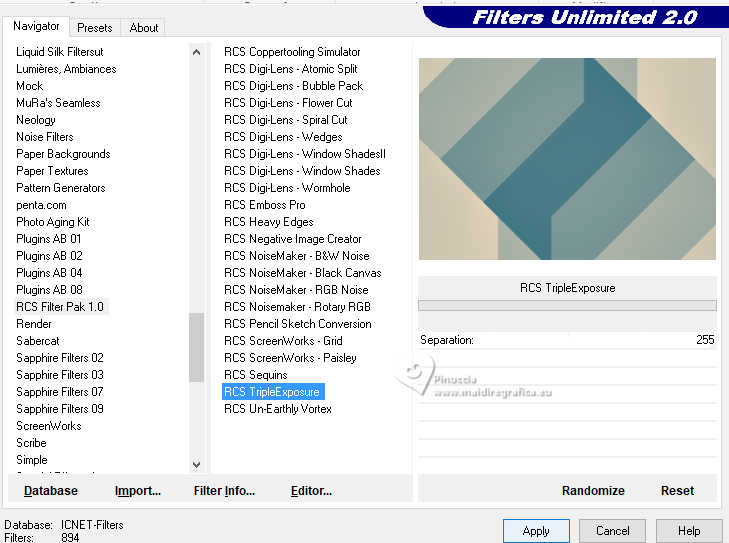 Repeat this Effect another time.  4. Effects>Plugins>Filters Unlimited 2.0 - Filter Factory Gallery Q - Gravity Blossom, default settings. 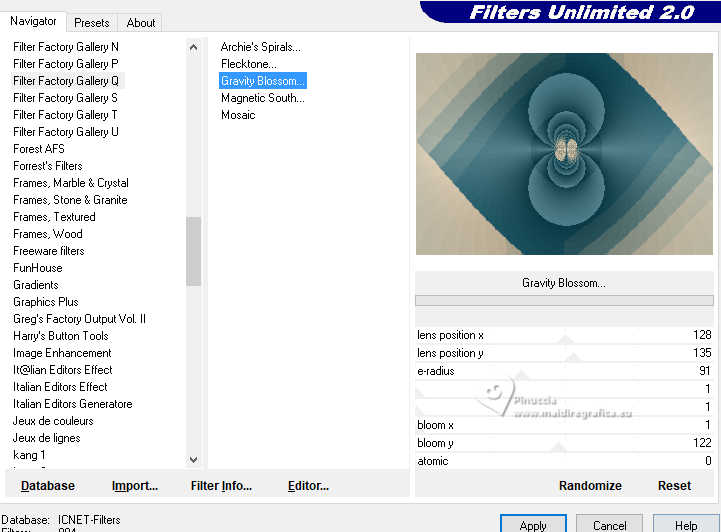 5. Effects>Plugins>Filters Unlimited 2.0 - Simple - Left Right wrap 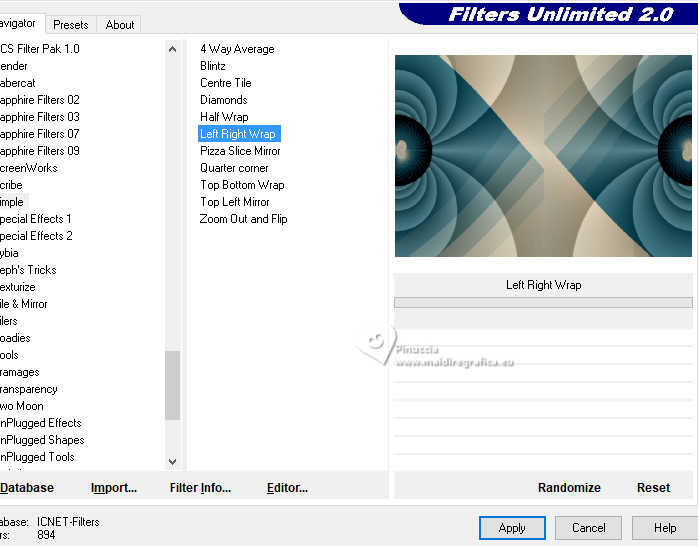 6. Effects>Plugins>Filters Unlimited 2.0 - Simple - 4 Way Average 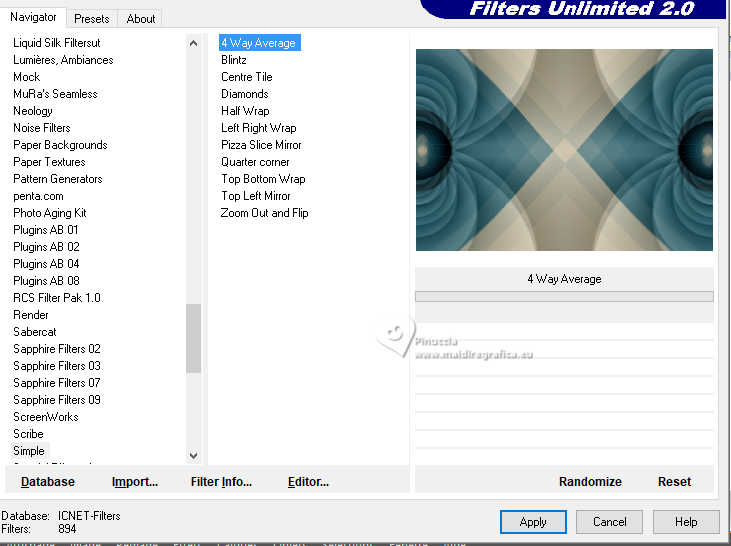 7. Selections>Load/Save Selection>Load Selection from Alpha Channel. The selection #1 is immediately available. You just have to click Load. 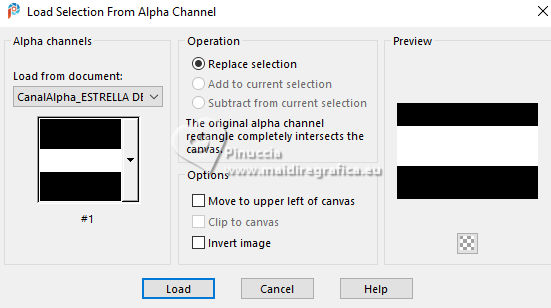 Selections>Promote Selection to Layer. 8. Adjust>Blur>Gaussian Blur - radius 35.  9. Effects>Plugins>AAA Frames - Foto Frame.  10. Edit>Copy 11. Selections>Load/Save Selection>Load Selection from Alpha Channel. Open the selections menu and load the selection #2 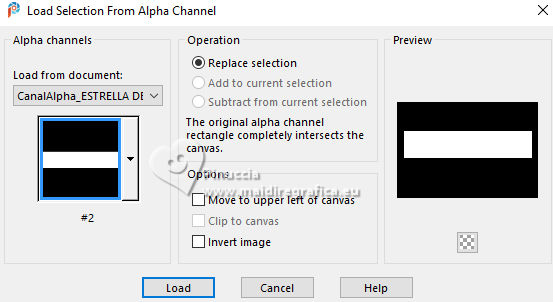 12. Edit>Paste into Selection (the image copied at step 10). Selections>Select None. 13. Effects>Distortion Effects>Wave. 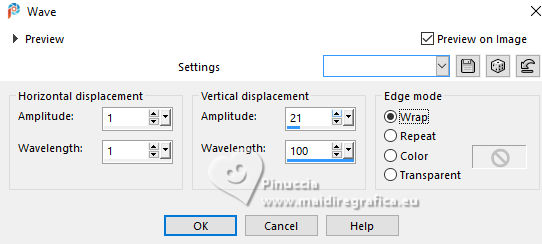 14. Effects>Image Effects>Seamless Tiling. 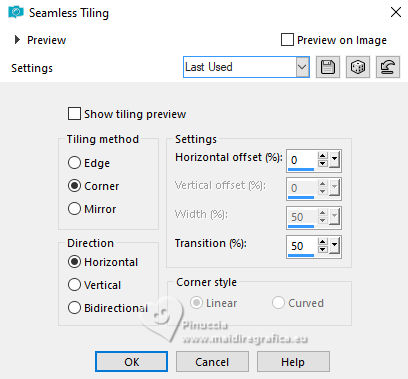 15. Objects>Align>Bottom or K key to activate your Pick Tool  Position X: 0,00 - Position Y: 106,00. 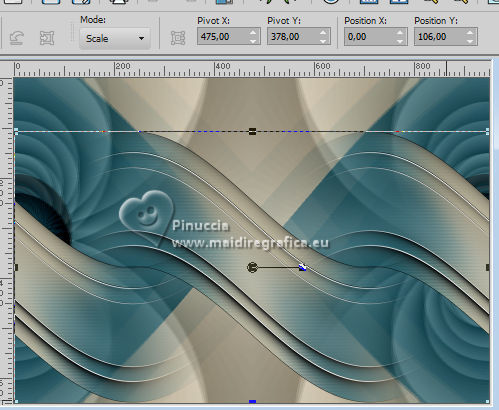 16. Open the misted 2874_IA©Yedralina 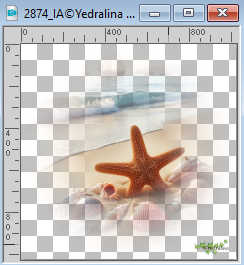 Erase the watermark and go to Edit>Copy. Go back to your work and go to Edit>Paste as new layer. 17. Activate your Pick Tool open the presets menu and select the preset 321-©Yedralina 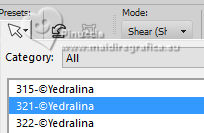 Result 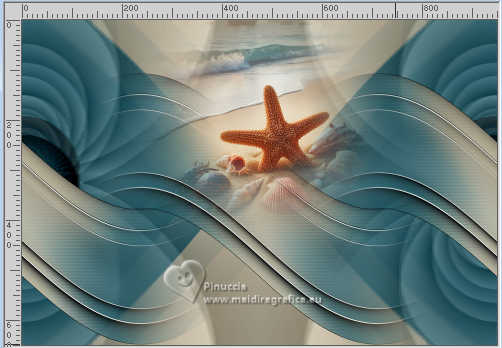 18. Set your foreground color to white #ffffff. Layers>New Raster Layer. Flood Fill the layer with color white.19. Layers>New Mask layer>From image Open the menu under the source window and you'll see all the files open. Select the mask Silvie_Mask_Glitter__Wave_Deco44G 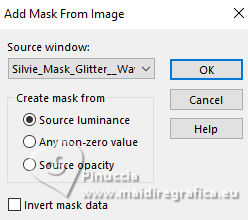 Image>Mirror>Mirror Horizontal. Image>Mirror>Mirror Vertical. Layers>Merge>Merge Group. 20. Activate again your Pick Tool open the presets menu and select the preset 322-©Yedralina 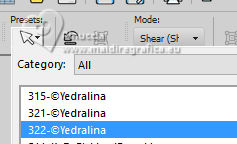 Result 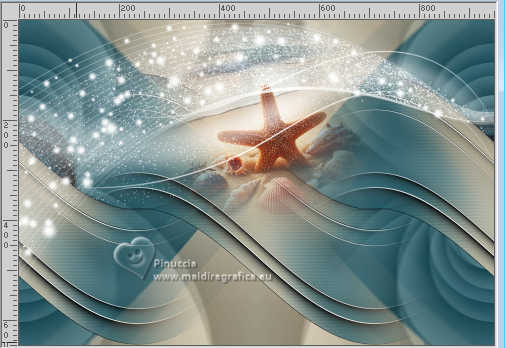 Adjust>Sharpness>Sharpen. 21. Layers>Arrange>Move Down. 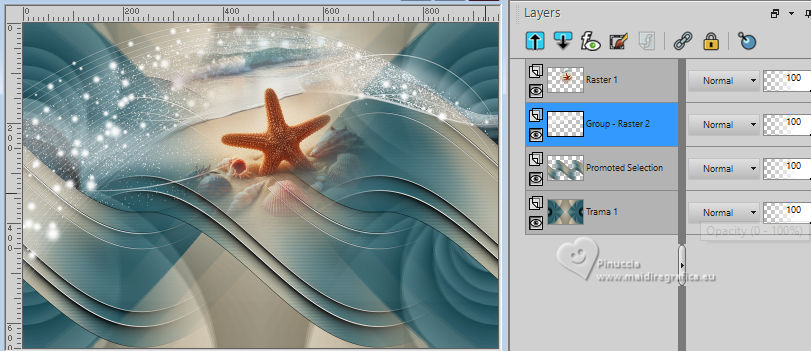 22. Activate your bottom layer. Effects>Plugins>AAA Frames - Foto Frame. 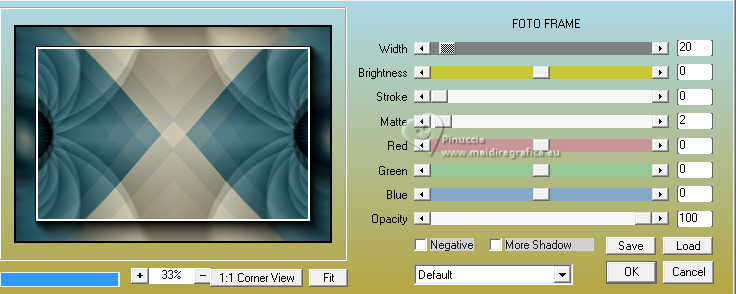 23. Image>Add borders, 2 pixels, symmetric, color white. Selections>Select All. Edit>Copy. 24. Image>Add borders, 45 pixels, symmetric, whatever color. Selections>Invert. 25. Edit>Paste into Selection. 26. Adjust>Blur>Gaussian Blur - radius 35. 27. Effects>Plugins>Graphics Plus - Cross Shadow, default settings. 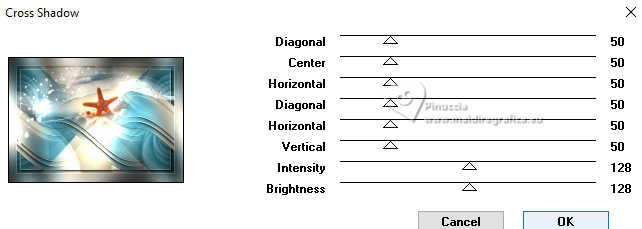 28. Effects>Plugins>AAA Frames - Foto Frame, last settings. 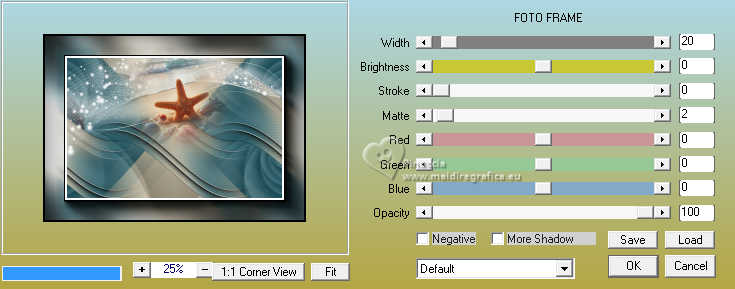 Selections>Select None. 29. Open your main tube 2952_IA©Yedralina 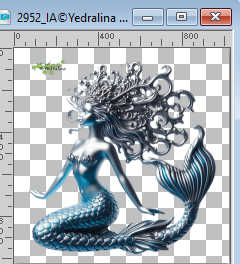 Erase the watermark and go to Edit>Copy. Go back to your work and go to Edit>Paste as new layer. Image>Resize, if necessary, I resized to 50%, resize all layers not checked. Adjust>Sharpness>Sharpen. Move  the tube at the bottom right. the tube at the bottom right.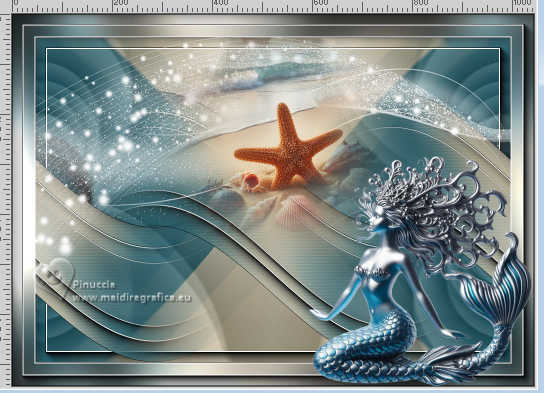 30. Layers>Duplicate. Adjust>Blur>Gaussian Blur - radius 35. 31. Layers>Arrange>Move Down. Change the Blend Mode of this layer to Multiply. 32. Activate your top layer. Open the text Text_ESTRELLA DEL MAR-Yedra 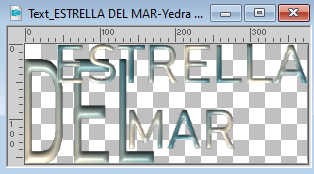 Edit>Copy. Go back to your work and go to Edit>Paste as new layer. K key to activate your Pick Tool Position X: 135,00 - Position Y: 473,00.  Change the Blend Mode of this layer to Luminance (legacy). 33. Image>Add borders, 1 pixel, symmetric, color white. 34. Sign your work on a new layer. 35. Image>Resize, 1000 pixels width, resize all layers checked. 36. Layers>Merge>Merge All and save as jpg. For the tubes of these versions thanks Yedralina 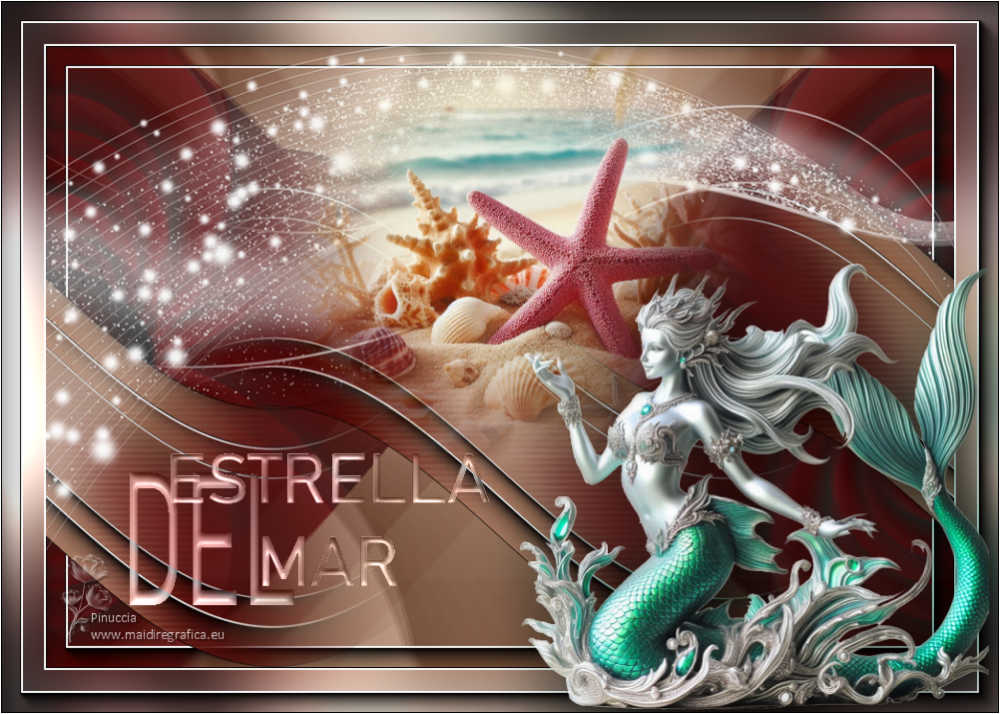 Thafs  If you have problems or doubts, or you find a not worked link, or only for tell me that you enjoyed this tutorial, write to me. 8 August 2024 |


 italian translation
  french translation
  your versions


