|
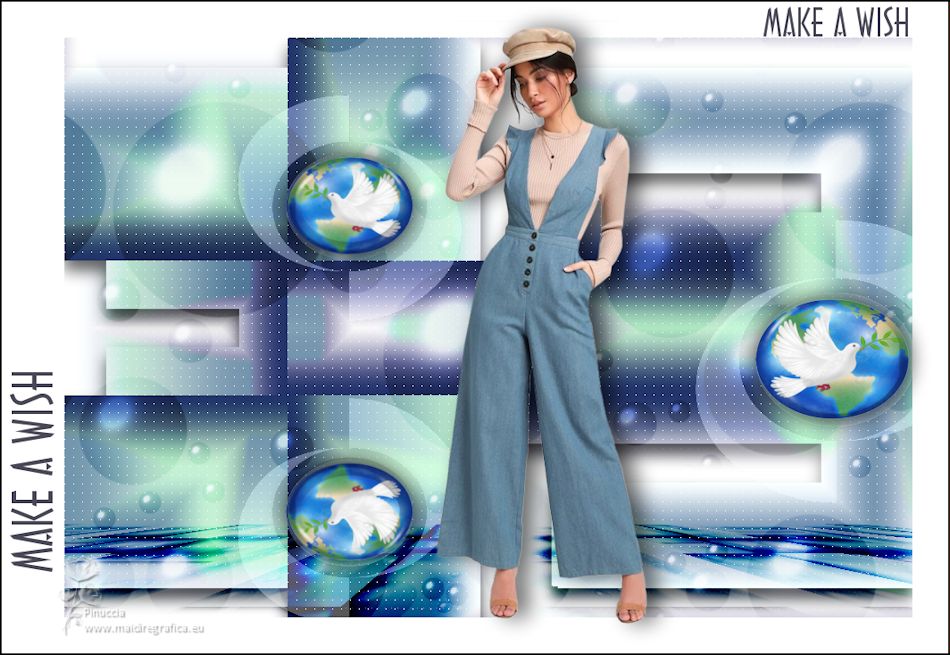
PIDE UN DESEO
 MAKE A WISH MAKE A WISH
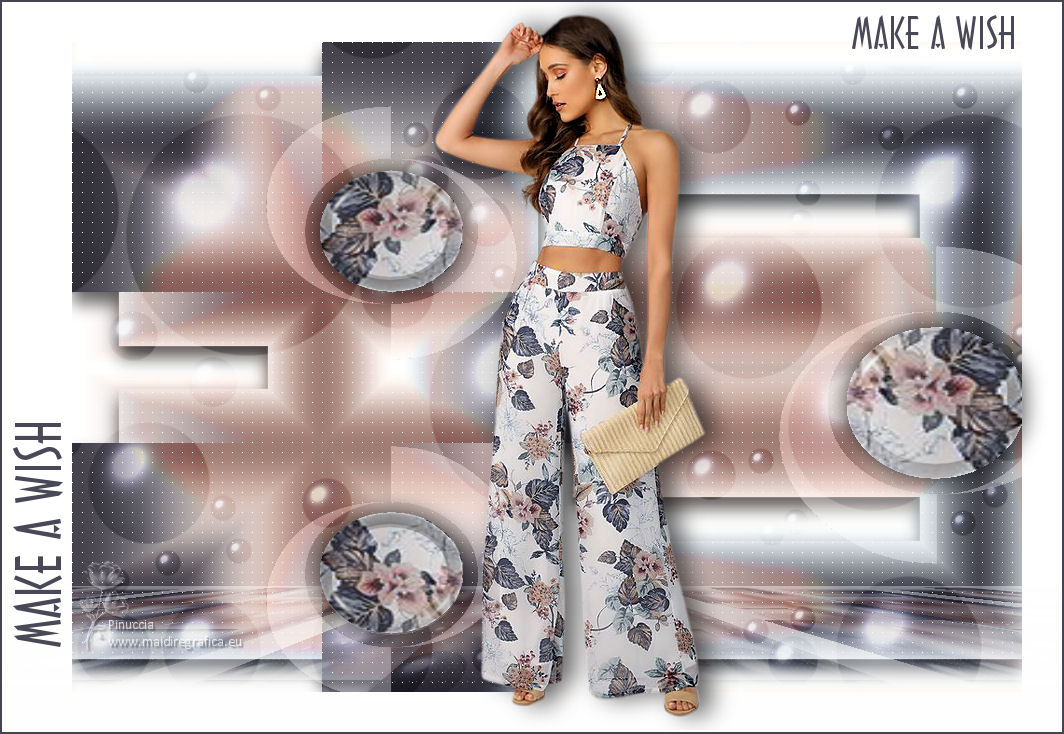
Thanks Yedralina for your invitation to translate your tutorials into english

This tutorial was written with CorelX19 and translated with CorelX17, but it can also be made using other versions of PSP.
Since version PSP X4, Image>Mirror was replaced with Image>Flip Horizontal,
and Image>Flip with Image>Flip Vertical, there are some variables.
In versions X5 and X6, the functions have been improved by making available the Objects menu.
In the latest version X7 command Image>Mirror and Image>Flip returned, but with new differences.
See my schedule here
 italian translation here italian translation here
 french translation here french translation here
 your versions here your versions here
For this tutorial, you will need:
At your choice: image en jpg and/or a person tube.
The rest of the material qui
For the tube used and not supplied, thanks Beatriz (3698-woman-LBTUBES).
(The links of the tubemakers here).
Plugins:
consult, if necessary, my filter section here
Mehdi - Wavy Lab 1.1. here
Mehdi - Sorting Tiles here
AP 01 [Innovations] - Lines SilverLining here
Alien Skin Eye Candy 5 Impact - Bevel here
Mura's Meister - Perspective Tiling here

You can change Blend Modes according to your colors.
Copy the preset  in the folder of the plugin Alien Skin Eye Candy 5 Impact>Settings>Bevel. in the folder of the plugin Alien Skin Eye Candy 5 Impact>Settings>Bevel.
One or two clic on the file (it depends by your settings), automatically the preset will be copied in the right folder.
why one or two clic see here
Copy the preset Preset_BallsAndBubbles_©Yedralina_Burbuj01 in the Presets Folder.

Set your foreground color to #46444e,
and your background color to #a27e74.

1. Open CanalAlpha_PIDE UN DESEO.
Window>Duplicate or, on the keyboard, shift+D to make a copy.

Close the original.
The copy, that will be the basis of your work, is not empty,
but contains the selections saved to alpha channel.
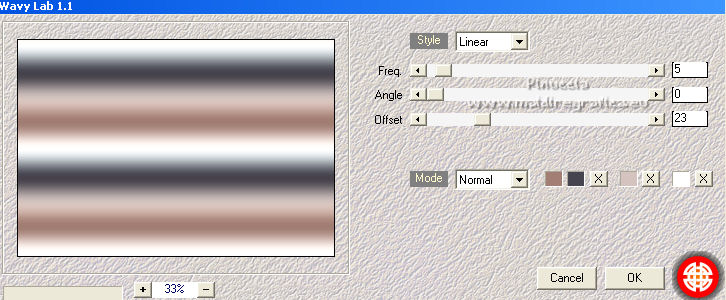
Effects>Plugins>Mehdi - Wavy Lab 1.1.
This filter creates gradients with the colors of your Materials palette.
The first is your background color, the second is your foreground color.
Change the last two colors created by the filtre:
the third color with #d4c3be and the forth color with #ffffff.
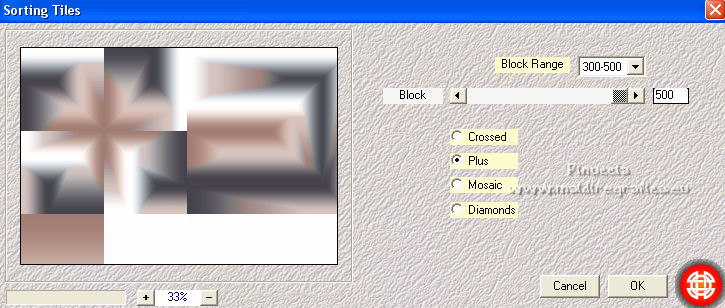
2. Effects>Plugins>Mehdi - Sorting Tiles.
3. Effects>Plugins>AP 01 [Innovations] - Lines SilverLining.

4. Effects>Reflections>Effects>Rotating Mirror.

5. Selections>Load/Save Selection>Load Selection from Alpha Channel.
The selection #1 is immediately available. You just have to click Load.
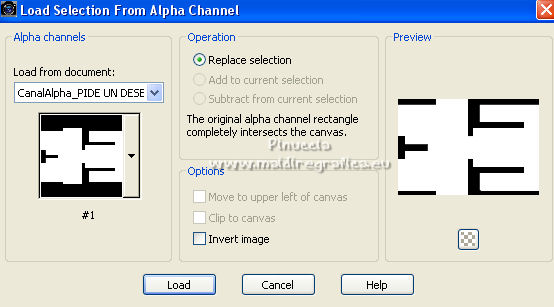
Effects>3D Effects>Drop Shadow, color black.

Selections>Select None.
6. Layers>New Raster Layer.
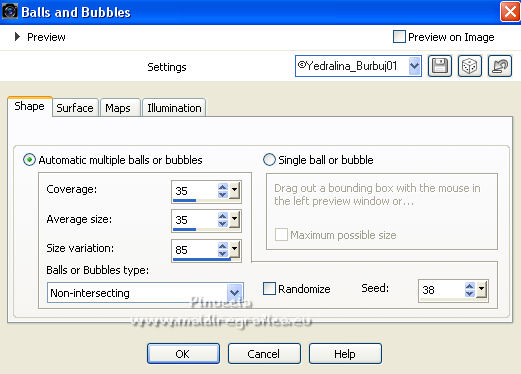
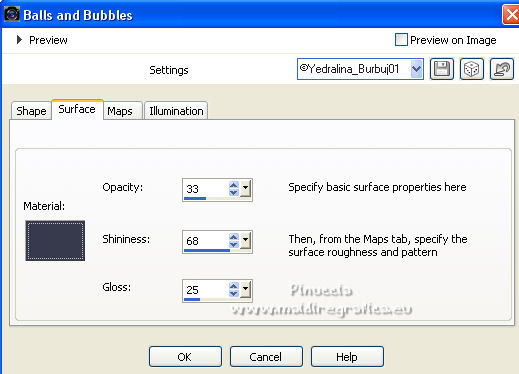
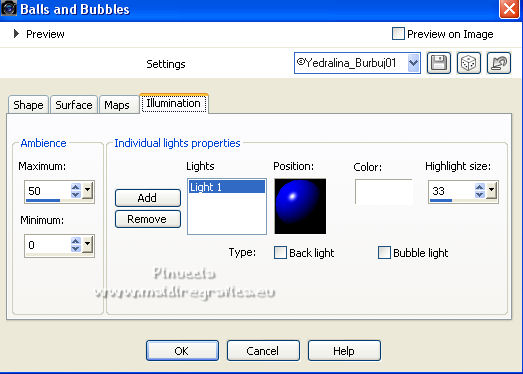
Effects>Artistic Effects>Balls and Bubbles - select the preset Preset_BallsAndBubbles_©Yedralina_Burbuj01,
foreground color
Shape
Surface
Maps
Illumination
7. Change the Blend Mode of this layer to Overlay and reduce the opacity +/-70%.
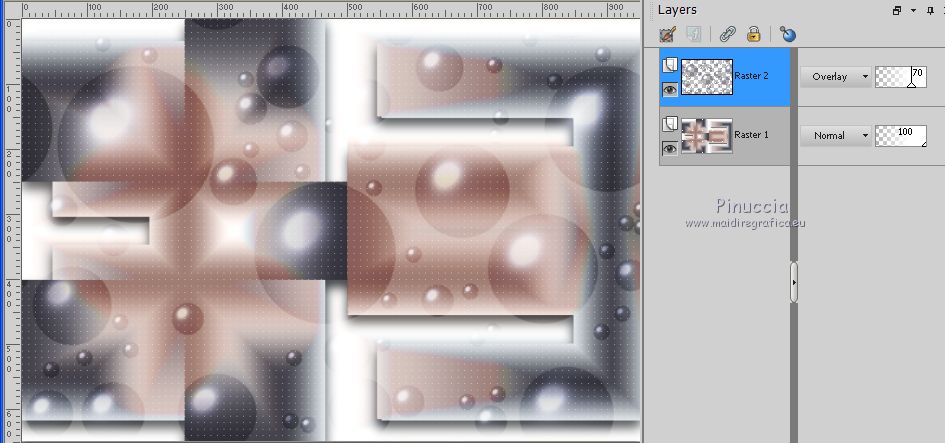
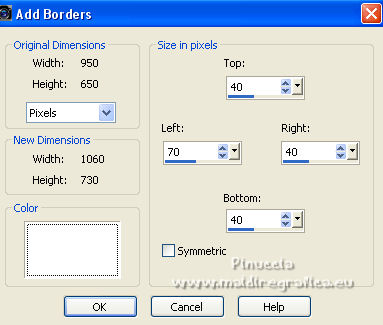
8. Image>Add borders, symmetric not checked, color white.
9. Layers>Duplicate.
Effects>Plugins>Mura's Meister - Perspective Tiling.
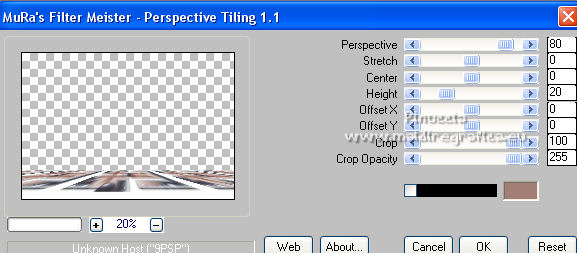
Change the Blend mode of this layer to Soft Light.
10. Layers>New Raster Layer.
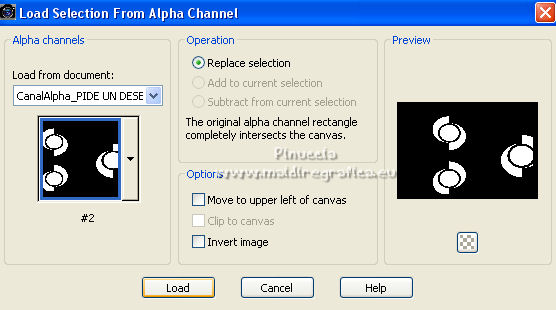
Selections>Load/Save Selection>Load Selection from Alpha Channel.
Open the selections menu and load the selection #2.
Set your foreground color to white.
Reduce the opacity of your Flood Fill Tool to 35%.
Flood Fill  the selection with color white. the selection with color white.
(don't forget to set again the opacity to 100.
11. Effects>Edge Effects>Enhance More.
Change the Blend Mode of this layer to Luminance (legacy).
12. Layers>New Raster Layer.
Selections>Load/Save Selection>Load Selection from Alpha Channel.
Open the selections menu and load the selection #3.
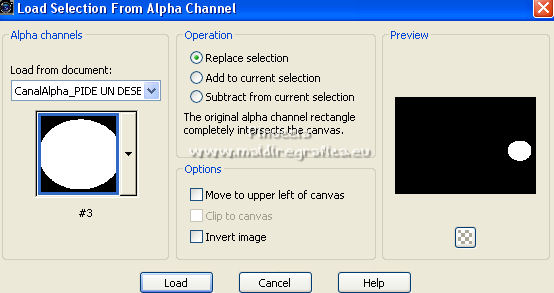
13. If you use a jpg image, go directly to step 14.
Open your main tube.
Activate your Selection Tool  , rectangle, , rectangle,
and select a part of the tube, to your liking.
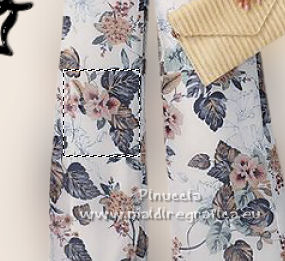
Edit>Copy.
Go back to your work.
14. Edit>Paste into Selection (the selection you copied of your jpg image).
Effects>Plugins>Alien Skin Eye Candy 5 Impact - Bevel.
Seleziona il preset ©Yedralina_Bevel1.

Selections>Select None.
Edit>Copy.
15. Layers>New Raster Layer.
Selections>Load/Save Selection>Load Selection from Alpha Channel.
Open the selections menu and load the selection #4.
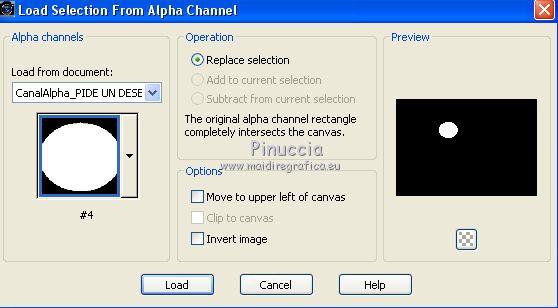
16. Edit>Paste into Selection.
Image>Flip>Flip Horizontal.
This command mirrors the image, leaving it in the same position.
If you are using an older version, you get the same result with Image>Mirror.
17. Repeat Effects>Plugins>Alien Skin Eye Candy 5 Impact - Bevel - preset ©Yedralina_Bevel1.
Selections>Select None.
18. Layers>Duplicate.
Image>Flip.
Effects>Image Effects>Offset.
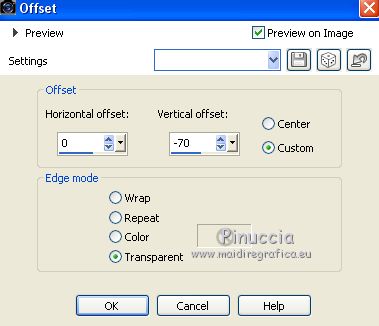
19. Layers>Merge>Merge Down - 2 times.
Effects>3D Effects>Drop Shadow, color black.
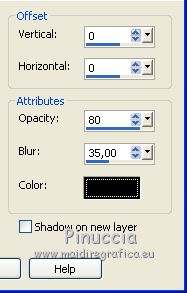
20. Activate your main tube and go to Edit>Copy.
Go back to your work and go to Edit>Paste as new layer.
Image>Resize, if and as needed (in my case I didn't it), resize all layers not checked.
Place  correctly the tube. correctly the tube.
21. Effects>3D Effects>Drop Shadow, to your liking; for me:
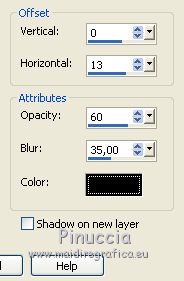
22. Open the text, which has 2 layers.
Activate the layer of the horizontal text and go to Edit>Copy.
Go back to your work and go to Edit>Paste as new layer.
Place  the text on the top right edge. the text on the top right edge.
Activate the layer of the vertical text and go to Edit>Copy.
Go back to your work and go to Edit>Paste as new layer.
Place  the text on the lower left edge. the text on the lower left edge.
23. Image>Add borders, 2 pixels, symmetric, dark color.
24. Image>Resize, 1000 pixels width, resize all layers checked.
Sign your work on a new layer.
25. Layers>Merge>Merge All and save as jpg.
For the tube of this version thanks Lana (LD-model-1017).

If you have problems or doubts, or you find a not worked link, or only for tell me that you enjoyed this tutorial, write to me.
8 April 2022

|
 MAKE A WISH
