|
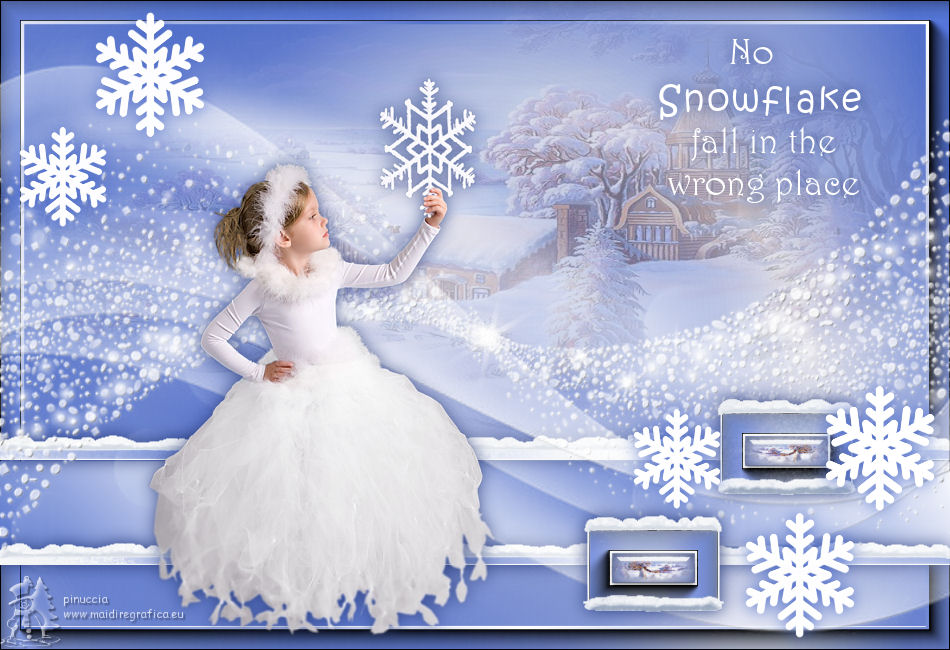
COPOS DE NIEVE
 SNOWFLAKES SNOWFLAKES

Thanks Yedralina for your invitation to translate your tutorials into english

This tutorial was written with CorelX19 and translated with CorelX17, but it can also be made using other versions of PSP.
Since version PSP X4, Image>Mirror was replaced with Image>Flip Horizontal,
and Image>Flip with Image>Flip Vertical, there are some variables.
In versions X5 and X6, the functions have been improved by making available the Objects menu.
In the latest version X7 command Image>Mirror and Image>Flip returned, but with new differences.
See my schedule here
 italian translation here italian translation here
 french translation here french translation here
 your versions here your versions here
For this tutorial, you will need:
Tubes of yours (a main tube and a landscape)
The rest of the material here
For the tube used thanks Animabelle (061_tube_noel_p1_animabelle).
The landscape from www.ArtFile.
For the masks thanks Silvie.
The rest of the material is by Yedralina.
(The links of the tubemakers here).
Plugins:
consult, if necessary, my filter section here
Filters Unlimited 2.0 here
Alien Skin Eye Candy 5 Impact - Glass here
Alien Skin Eye Candy 5 Nature - Snow Drift here
VM Distortion - Distortion by Brightness here
Mura's Seamless - Emboss at Alpha here
AAA Frames - Foto Frame here
Filtres VM Distortion and Mura's Seamless can be used alone or imported into Filters Unlimited.
(How do, you see here)
If a plugin supplied appears with this icon  it must necessarily be imported into Unlimited it must necessarily be imported into Unlimited

You can change Blend Modes according to your colors.
In the newest versions of PSP, you don't find the foreground/background gradient (Corel_06_029).
You can use the gradients of the older versions.
The Gradient of CorelX here
Copy the presets  in the folders of the plugins Alien Skin Eye Candy 5 Impact>Settings>Glass, in the folders of the plugins Alien Skin Eye Candy 5 Impact>Settings>Glass,
and Alien Skin Eye Candy 5 Nature>Settings>Snow Drift.
One or two clic on the file (it depends by your settings), automatically the preset will be copied in the right folder.
why one or two clic see here

Copy the Mask 20-20 in the Masks Folder.
Open the other masks in PSP and minimize them with the rest of the material.
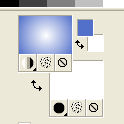
Set your foreground color to #5270ca,
and your background color to #d8d8e4.

Set your foreground color to a Foreground/Background Gradient, style Sunburst.

1. Open CAlpha_COPOSDNIEVE.
Window>Duplicate or, on the keyboard, shift+D to make a copy.

Close the original.
The copy, that will be the basis of your work, is not empty,
but contains the selections saved to alpha channel.
Flood Fill  the transparent image with your Gradient. the transparent image with your Gradient.
2. Effects>Plugins>Filters Unlimited 2.0 - VM Distortion - Distortion by Brightness, default settings

3. Layers>New Raster Layer.
Selections>Load/Save Selection>Load Selection from Alpha Channel.
The selection #1 is immediately available. You just have to click Load.

4. Open the jpg landscape and go to Edit>Copy.
Go back to your work and go to Edit>Paste into Selection.
5. Layers>Load/Save Mask>Load Mask from Disk.
Look for and load the mask 20-20.

Layers>Merge>Merge Group.
if you are using a misted, it is not necessary apply the mask 20-20
Selections>Select None.
6. Edit>Copy.
Edit>Paste as new image, and minimize this image; you'll use later.
Go back to your work and reduce the opacity of this layer between 40-60%, according to your image.
7. Set your background color to white.
Layers>New Raster Layer.
Flood Fill  the layer with your white background color. the layer with your white background color.
Layers>New Mask layer>From image
Open the menu under the source window and you'll see all the files open.
Select the mask Silvie_Mask_Deco2.

Layers>Merge>Merge Group.
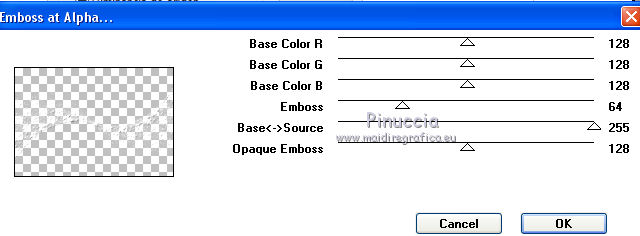
8. Effects>Plugins>Mura's Seamless - Emboss at Alpha, default settings.
9. Layers>New Raster Layer.
Flood Fill  the layer with your white background color. the layer with your white background color.
Layers>New Mask layer>From image
Open the menu under the source window
and select the mask Silvie_Mask_Deco_purple22.

Layers>Merge>Merge Group.
10. Image>Mirror.
Effects>Plugins>Mura's Seamless - Emboss at Alpha, default settings.
Layers>Merge>Merge Down.
11. Layers>New Raster Layer.
Selections>Load/Save Selection>Load Selection from Alpha Channel.
Open the selections menu and load the selection #2.

Flood Fill  the selection with your white background color. the selection with your white background color.
12. Sélections>Modify>Contract - 2 pixels.
Set again your background color with the first color #d8d8e4.
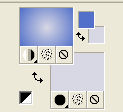
Flood Fill  the selection with the Gradient Sunburst. the selection with the Gradient Sunburst.
13. Effects>Plugins>AAA Frames - Foto Frame.

14. Selections>Modify>Contract - 23 pixels.
Activate the image minimized at step 6 and go to Edit>Copy.
Go back to your work and go to Edit>Paste into Selection.
Adjust>Sharpness>Sharpen.
15. Effects>Plugins>Alien Skin Eye Candy 5 Impact - Glass.
Select the preset ©Yedralina_Glass9.

Selections>Select None.
16. Layers>Duplicate.
Image>Flip>Flip Horizontal
this command reflects the image leaving it in the same position.

If you are using an older version:
Image>Mirror
Activate your Pick Tool 
and set Position X: 720,00 and Position Y: 411,00

and you'll have the image in the same position
Effects>Image Effects>Offset.
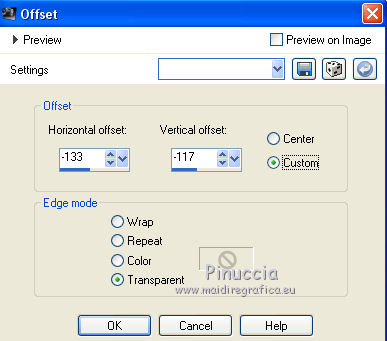
You should have this:

Layers>Merge>Merge Down.
17. Effects>Plugins>Alien Skin Eye Candy 5 Nature - Snow Drift
Select the preset EC5_SD03-Yedra and ok.

18. Effects>Plugins>Alien Skin Eye Candy 5 Nature - Snow Drift
Select the preset EC5_SD02-Yedra and ok.

Effects>3D Effects>Drop Shadow, colore #26397a.

19. Layers>New Raster Layer.
Selections>Load/Save Selection>Load Selection from Alpha Channel.
Open the selections menu and load the selection #3.

20. Set again your background color to white

Change the settings of the Gradient, style Linear.

Flood Fill  the selection with Gradient Linear. the selection with Gradient Linear.
Effects>Edge Effects>Enhance.
Selections>Select None.
Layers>Arrange>Move down - 2 times.
21. Effects>Plugins>Alien Skin Eye Candy 5 Nature - Snow Drift, last settings.

Effects>3D Effects>Drop Shadow, last settings.

22. Layers>New Raster Layer.
Selections>Load/Save Selection>Load Selection from Alpha Channel.
Open the selections menu and load the selection #4.

Change the settings of your Gradient, Invert not checked.

Flood Fill  the selection with the Gradient Linear. the selection with the Gradient Linear.
Layers>Arrange>Move Down.
23. Layers>New Raster Layer.
Layers>Arrange>Bring to Top.
Selections>Load/Save Selection>Load Selection from Alpha Channel.
Open the selections menu and load the selection #5.

Flood Fill  the selection with your white background color. the selection with your white background color.
Selections>Select None.
Effects>3D Effects>Drop Shadow, foreground color #5270ca.

24. Activate your background layer.
Effects>Plugins>AAA Frames - Foto Frame.

25. Selections>Load/Save Selection>Load Selection from Alpha Channel.
Open the selections menu and load the selection #6.

Flood Fill  the selection with the last Gradient (Linear, Invert not checked). the selection with the last Gradient (Linear, Invert not checked).
Selections>Select None.
Activate the top layer.

26. Open the text Text_CopodNieve-Yedra and go to Edit>Copy.
Go back to your work and go to Edit>Paste as new layer.
If you want to write your own text, find the fonts used in the material.
Font Kristen ITC, size 36 pixels, background color white, foreground color closed.

Write Snowflake
Font Harrington, size 36 pixels,

Over Snowflake write "No"
and under Snoflake write "fall in the wrong place">
Move  the text at the upper right. the text at the upper right.
Effects>3D Effects>Drop Shadow, foreground color #5270ca or color #26397a.

27. Open your tube and go to Edit>Copy.
Go back to your work and go to Edit>Paste as new layer.
Image>Resize, if necessary (for me 80%), resize all layers not checked.
In this case: Adjust>Sharpness>Sharpen.
Effects>3D Effects>Drop Shadow, at your choice; for me color #26397a

28. Sign your work on a new layer.
Layers>Merge>Merge All and save as jpg.
For the tube of this version thanks Animabelle (36_tube_femme_p3_animabelle).


If you have problems or doubts, or you find a not worked link, or only for tell me that you enjoyed this tutorial, write to me.
16 January 2022

|
 SNOWFLAKES