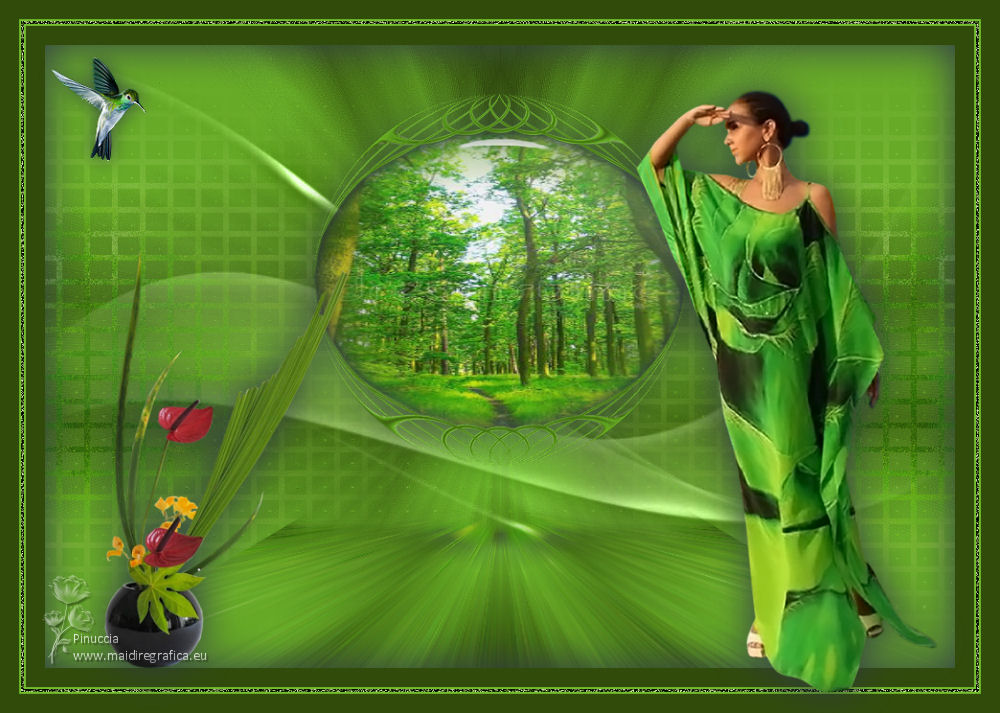
|
COLYBRIX


Thanks Yedralina for your invitation to translate your tutorials into english

This tutorial was written with CorelX19 and translated with CorelX17, but it can also be made using other versions of PSP.
Since version PSP X4, Image>Mirror was replaced with Image>Flip Horizontal,
and Image>Flip with Image>Flip Vertical, there are some variables.
In versions X5 and X6, the functions have been improved by making available the Objects menu.
In the latest version X7 command Image>Mirror and Image>Flip returned, but with new differences.
See my schedule here
 italian translation here italian translation here
 french translation here french translation here
 your versions here your versions here
For this tutorial, you will need:
Material here
Thanks: for the main tube Coly (femme842-coly), for the landscape Yedralinalina (2109©Yedralina),
for the deco Lana (LD-flowers base), and for the mask Narah (Narah_Mask_1313).
The rest of the material is by Yedralina
(The links of the tubemakers here).
Plugins:
consult, if necessary, my filter section here
Filters Unlimited 2.0 here
Horizonaus Mixed Bag - Putitinthecorner here
Funhouse - Radial Mirror, Sunraze here
I joined the effect Sunraze in the material
Simple - 4 Way Average here
Simple - Top Bottom Wrap, Left Right Wrap (bonus) here
Mura's Meister - Copies here
Alien Skin Eye Candy 5 Impact - Glass here
Filter Factory Gallery H - Zoom Blur here
Mura's Seamless - Emboss at Alpha here
Filters Horizonaus, Funhouse, Simple, Factory Gallery and Mura's Seamless can be used alone or imported into Filters Unlimited.
(How do, you see here)
If a plugin supplied appears with this icon  it must necessarily be imported into Unlimited it must necessarily be imported into Unlimited

You can change Blend Modes according to your colors.
In the newest versions of PSP, you don't find the foreground/background gradient (Corel_06_029).
You can use the gradients of the older versions.
The Gradient of CorelX here
Copy the preset  in the folder of the plugin Alien Skin Eye Candy 5 Impact>Settings>Glass. in the folder of the plugin Alien Skin Eye Candy 5 Impact>Settings>Glass.
One or two clic on the file (it depends by your settings), automatically the preset will be copied in the right folder.
why one or two clic see here

Copy the presets Pick in the Presets Folder.
Open the mask in PSP and minimize it with the rest of the material.
1. Set your foreground color to #314b0b,
and your background color to #74c02e.
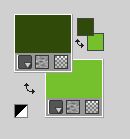
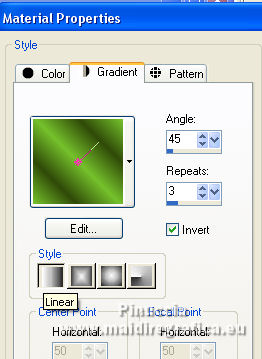
Set your foreground color to a Foreground/Background Gradient, style Linear.
2. Open colybrix2_CanalAlpha
Window>Duplicate or, on the keyboard, shift+D to make a copy.

Close the original.
The copy, that will be the basis of your work, is not empty,
but contains the selections saved to alpha channel.
Flood Fill  tha transparent image with your Gradient. tha transparent image with your Gradient.
3. Effects>Plugins>Filters Unlimited 2.0 - Horizonaus Mixed Bag - PutitintheCorner, default settings.
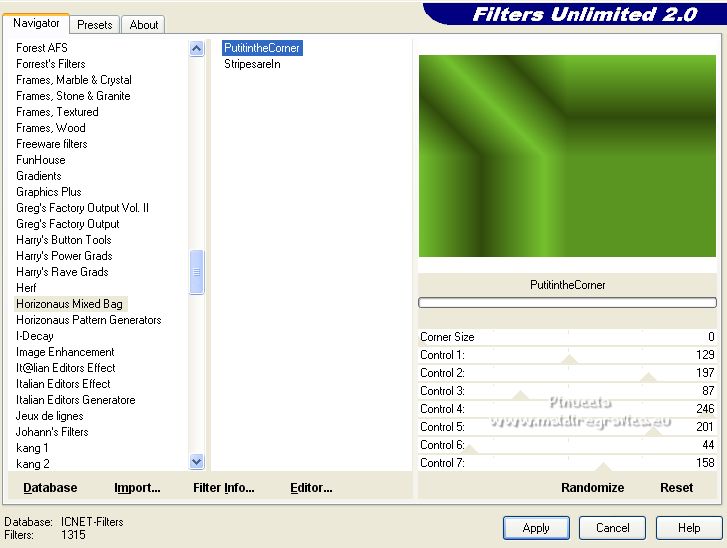
4. Effects>Plugins>Filters Unlimited 2.0 - Funhouse - Radial Mirror, default settings.
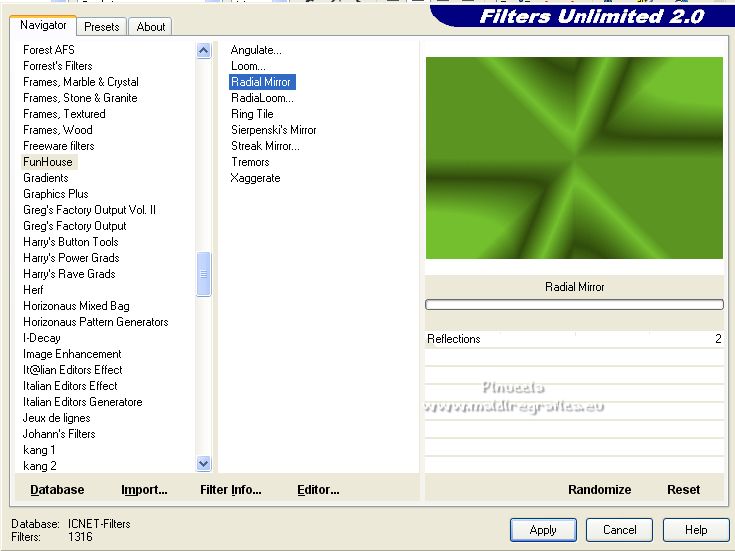
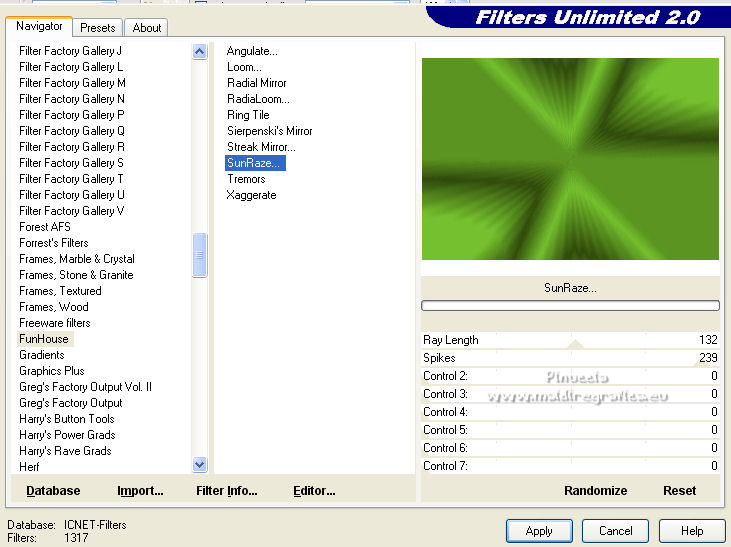
5. Effects>Plugins>Filters Unlimited 2.0 - Funhouse - Sunraze, 2 times default settings.
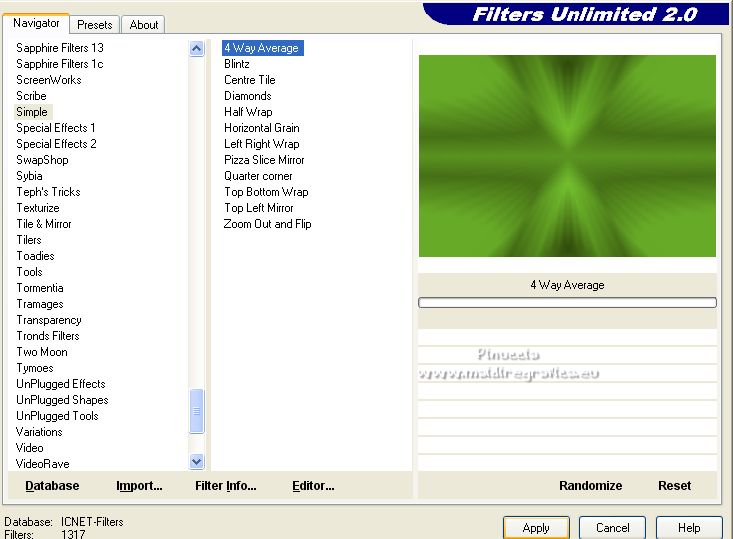
6. Effects>Plugins>Filters Unlimited 2.0 - Simple - 4 Way Average.
7. Effects>Edge Effects>Enhance more.
8. Layers>Duplicate.
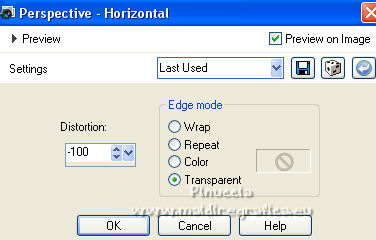
9. Effects>Geometric Effects>Perspective horizontal
10. Image>Mirror.
11. Repeat Effects>Geometric Effects>Perspective horizontal, same settings.
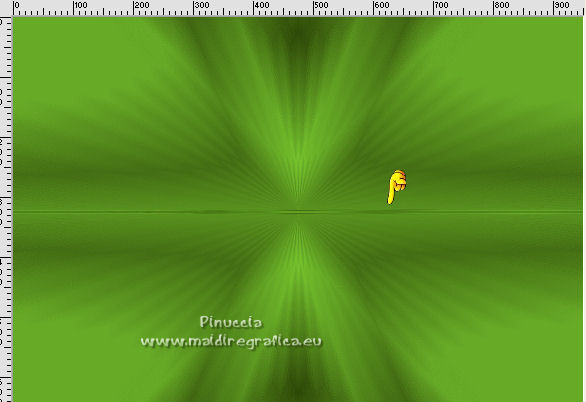
Result:
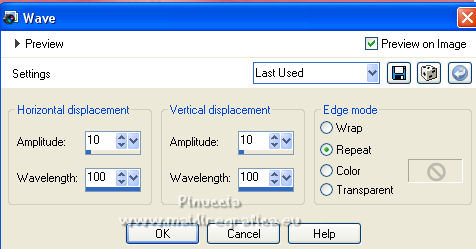
12. Effects>Distortion Effects>Wave.
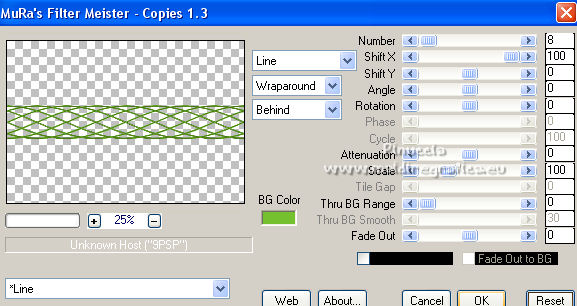
13. Effects>Plugins>Mura's Meister - Copies.
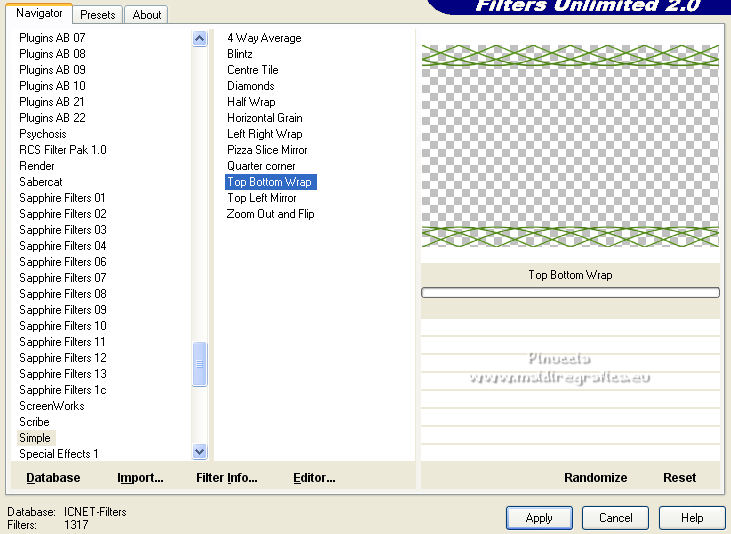
14. Effects>Plugins>Filters Unlimited 2.0 - Simple - Top Bottom Wrap.
15. Effects>Geometric Effects>Circle.

16. Activate your bottom layer.
Selections>Load/Save Selection>Load Selection from Alpha Channel.
The selection #1 is immediately available. You just have to click Load.
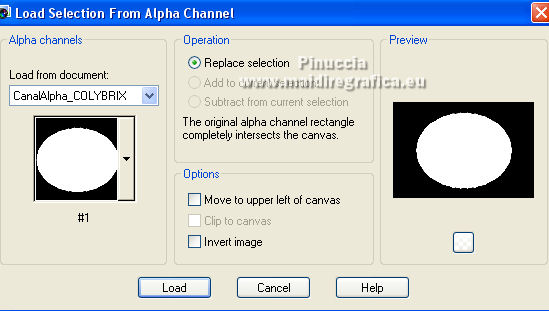
Selections>Promote Selection to layer.
17. Adjust>Blur>Gaussian Blur - radius 10.

Selections>Select None.
18. Activate your top layer, Copy of Raster 1.
Layers>Merge>Merge Down.
19. Image>Resize, to 60%, resize all layers not checked.
Adjust>Sharpness>Sharpen.
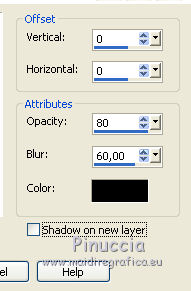
20. Effects>3D Effects>Drop Shadow, color black.
21. Open the misted and go to Edit>Copy.
Go back to your work and go to Edit>Paste as new layer.
Note. If the tube you are using is too large and exceeds the edge of the image,
try to adjust the size.
There are my settings with the Pick Tool 
(K key on the keyboard)

You can use, if you want, the supplied preset 197_22-@Yedralina.
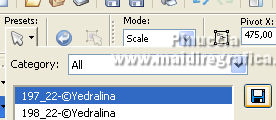
If you use a larger tube, such as the second tube provided,
applying the preset will automatically reduce it (see the second example below: the blue image).
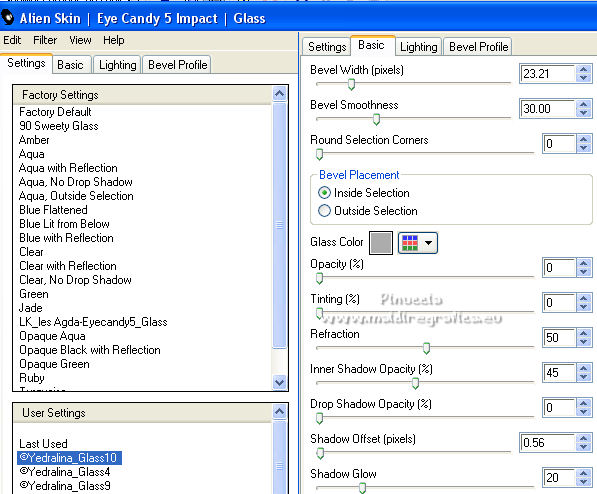
22. Effects>Plugins>Alien Skin Eye Candy 5 Impact - Glass.
Select the preset Glass 10 and ok.
And here is the result, using the tube provided
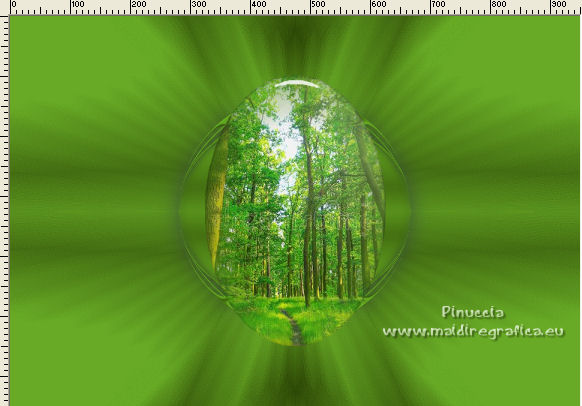
This is the result with the second tube provided.
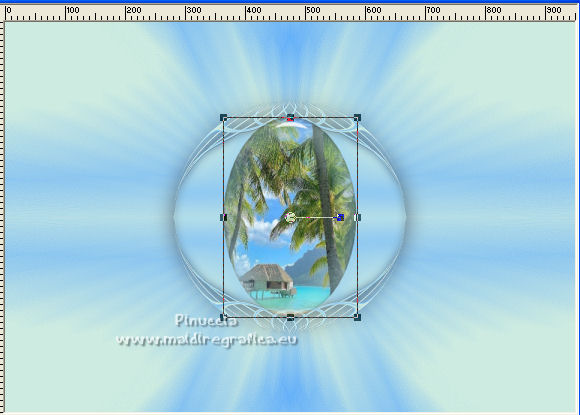
And here's another example, again with a "vertical" tube.
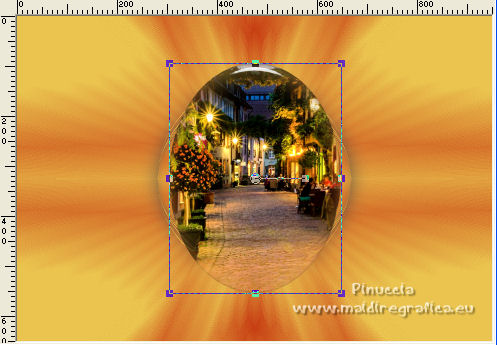
However, if you use a non-vertical tube and a different "misted",
you may have a skewed result, as happened in this example
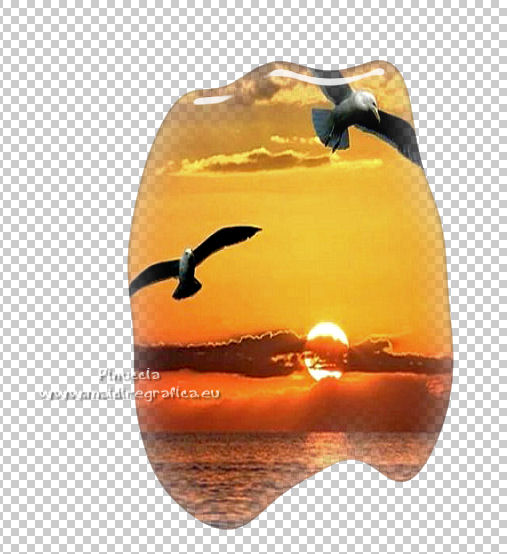
The reason is because the preset was created on the basis of the tubes provided,
to give an oval result, like the ones shown above.
If you don't want to change tubes, I suggest you do this:
Copy in the Selection folder the selection I added in the material.
Activate the bottom layer.
Selections>Load/Save Selection>Load Selection from disk.
Look for and load the selection sel yedra colybrix ovale
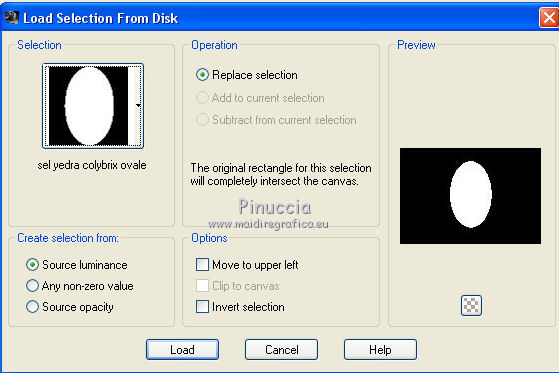
Selections>Transform Selection to layer.
Layers>Arrange>Bring to Top.
Adjust>Blur>Gaussian Blur, with previous settings.
Edit>Paste into selection your tube.
Apply the Glass Effect, and here is the good result
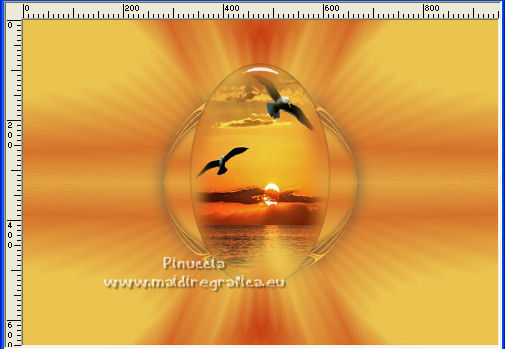
23. Edit>Cut (this command cuts and keeps in memory).
Stay on this empty layer.
24. Selections>Load/Save Selection>Load Selection from Alpha Channel.
Open the selections menu and load the selection #2.
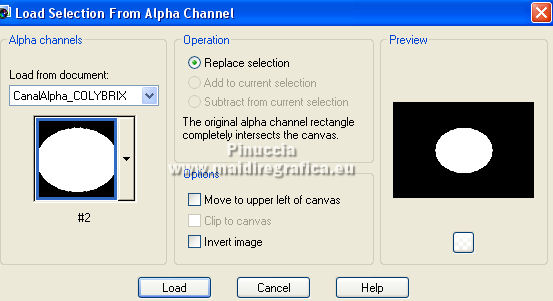
25. Edit>Paste into Selection.
Adjust>Sharpness>Sharpen.
26. Selections>Invert.
Effects>3D Effects>Drop Shadow, color black.
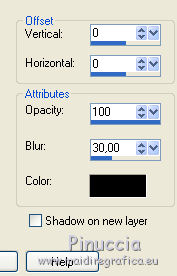
Selections>Select None.
27. Layers>Merge>Merge down.
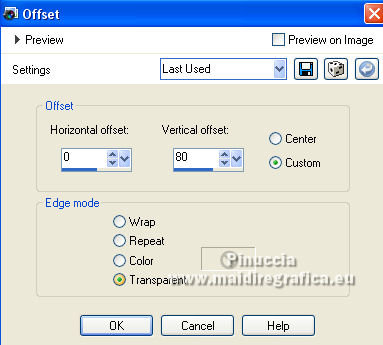
28. Effects>Image Effects>Offset.
29. Layers>New Raster layer.
Layers>Arrange>Move Down.
Selections>Select All.
Activate again your misted and go to Edit>Copy.
Go back to your work and go to Edit>Paste into Selection.
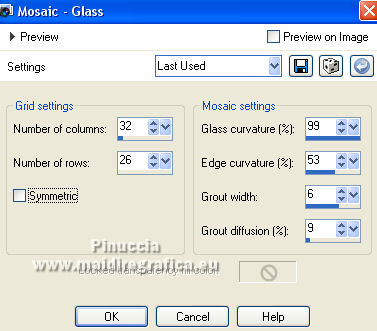
30. Effects>Texture Effects>Mosaic Glass
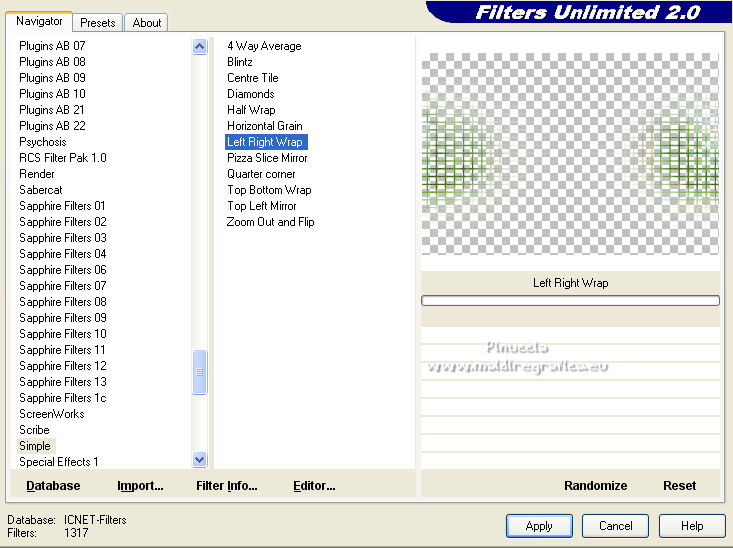
31. Effects>Plugins>Filters Unlimited 2.0 - Simple - Left Right Wrap.
32. Effects>Reflection Effects>Rotating Mirror.

Adjust>Sharpness>Sharpen.
Selections>Select None.
33. Change the Blend Mode of this layer to Soft Light.
34. Edit>Copy Special>Copy Merged.
Edit>Paste as new layer.
(in the newest version: Layers>Merge>Merge visible in a new layer).
Layers>Arrange>Bring to top.
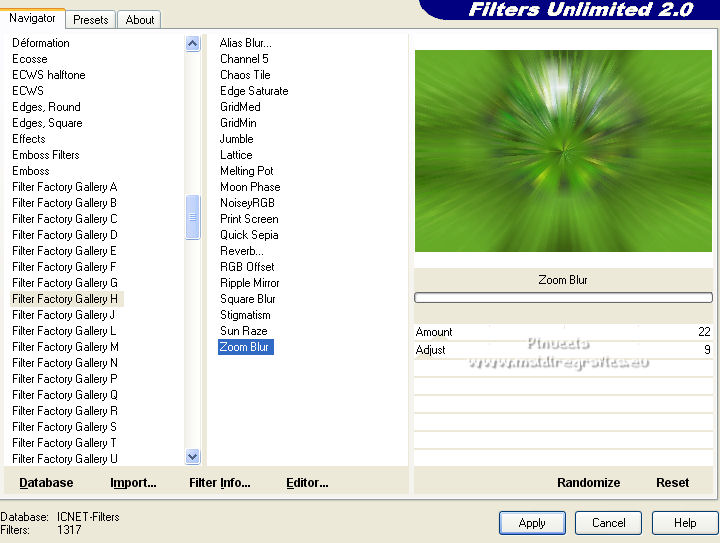
35. Effects>Plugins>Filter Factory Gallery H - Zoom Blur, par défaut.
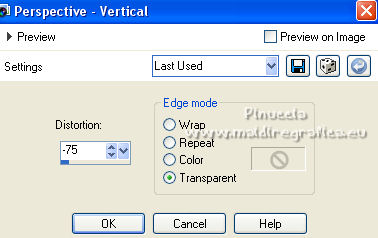
36. Effects>Geometric Effects>Perspective Vertical.
37. Activate your Pick Tool 
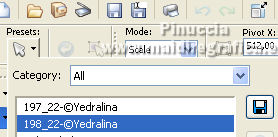
select the supplied preset (198_22-©Yedralina).
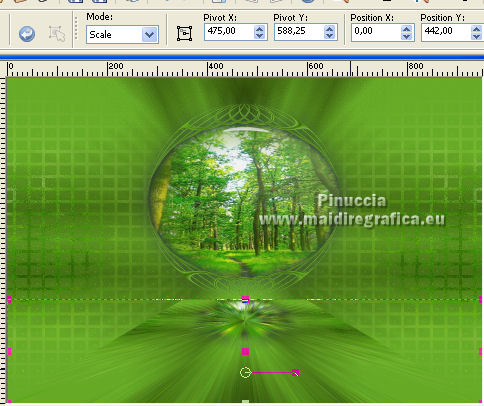
M key to deselect the tool.
38. Selections>Load/Save Selection>Load Selection from Alpha Channel.
Open the selections menu and load the selection #3.
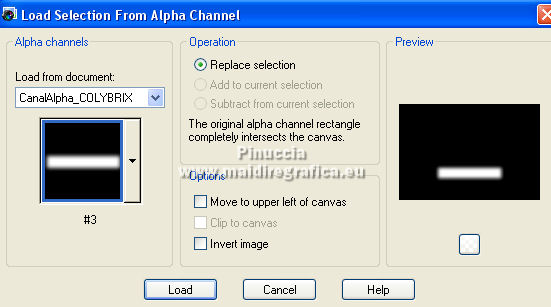
Press 1 or 2 times CANC on the keyboard 
Selections>Select None.
39. Set your foreground color to white.
Layers>New Raster layer.
Flood Fill  the layer with color white. the layer with color white.
40. Layers>New Mask layer>From image
Open the menu under the source window and you'll see all the files open.
Select the mask Narah_Mask_1313.
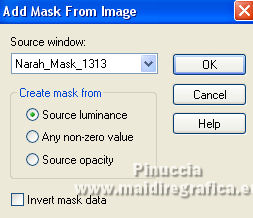
Layers>Merge>Merge Group.
Image>Flip.
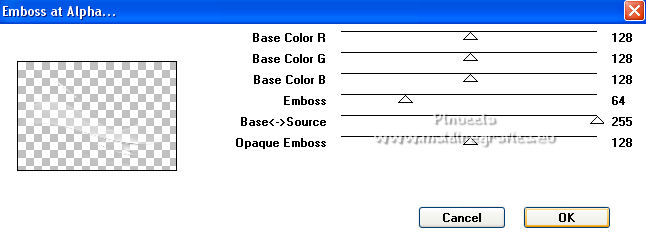
41. Effects>Plugins>Mura's Seamless - Emboss at Alpha, default settings.
42. Effects>3D Effects>Drop Shadow, color black.

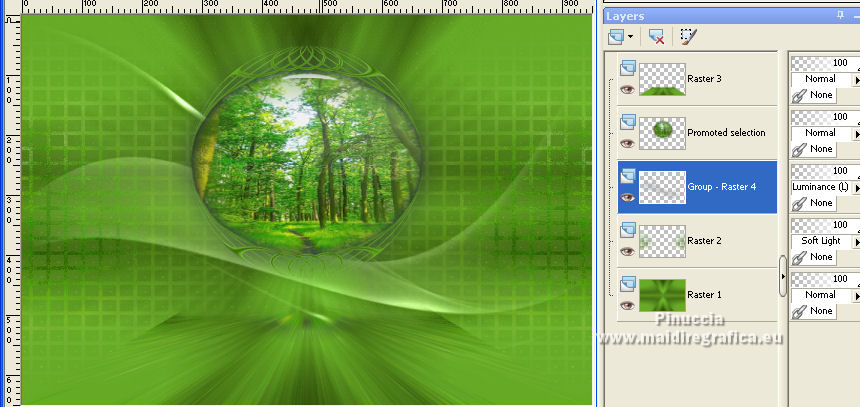
42. Layers>Arrange>Move Down- 2 times.
Change the Blend Mode of this layer to Luminance (legacy).
43. For the borders, set again your foreground color to #314b0b.

Image>Add borders, 20 pixels, symmetric, foreground color.
Image>Add borders, 2 pixels, symmetric, background color.
44. Selections>Select All.
Image>Add borders, 3 pixels, symmetric, foreground color.
Selections>Invert.
45. Adjust>Add/Remove Noise>Add Noise.
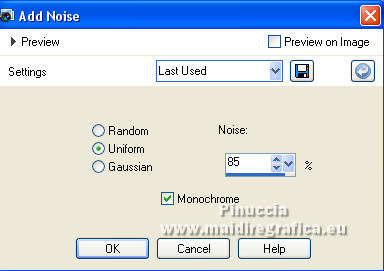
Adjust>Sharpness>Sharpen More.
Selections>Select None.
46. Image>Add borders, 2 pixels, symmetric, background color.
Image>Add borders, 20 pixels, symmetric, foreground color.
47. Selections>Select All.
Selections>Modify>Contract - 47 pixels.
Selections>Invert.
48. Effects>3D Effects>Drop Shadow, color black.
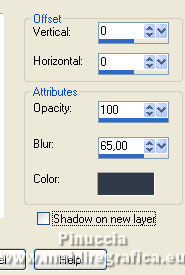
Selections>Select None.
49. Open the woman tube and go to Edit>Copy.
Go back to your work and go to Edit>Paste as new layer.
Image>Resize, if necessary (for me 80%), resize all layers not checked.
Adjust>Sharpness>Sharpen.
For me: Image>Mirror.
Move  the tube to the right side. the tube to the right side.
Effects>3D Effects>Drop Shadow, same settings.
50. Open the deco tube (for me a flowers vase) and go to Edit>Copy.
Go back to your work and go to Edit>Paste as new layer.
Image>Resize, if necessary, for me 2 times to 80%, resize all layers not checked.
Adjust>Sharpness>Sharpen.
Move  the tube at the bottom left. the tube at the bottom left.
Effects>3D Effects>Drop Shadow, same settings.
51. Open the colibri tube or another to your liking, and go to Edit>Copy.
Go back to your work and go to Edit>Paste as new layer.
Image>Resize, if necessary (for my second version to 20%), resize all layers not checked.
Adjust>Sharpness>Sharpen.
Move  the tube at the upper left, or to your liking. the tube at the upper left, or to your liking.
52. Effects>3D Effects>Drop Shadow, color black.
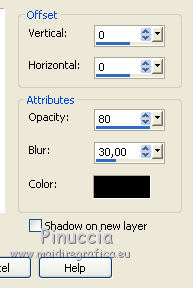
53. Image>Resize, 1000 pixels width, resize all layers checked.
54. Sign your work on a new layer.
Layers>Merge>Merge All and save as jpg.
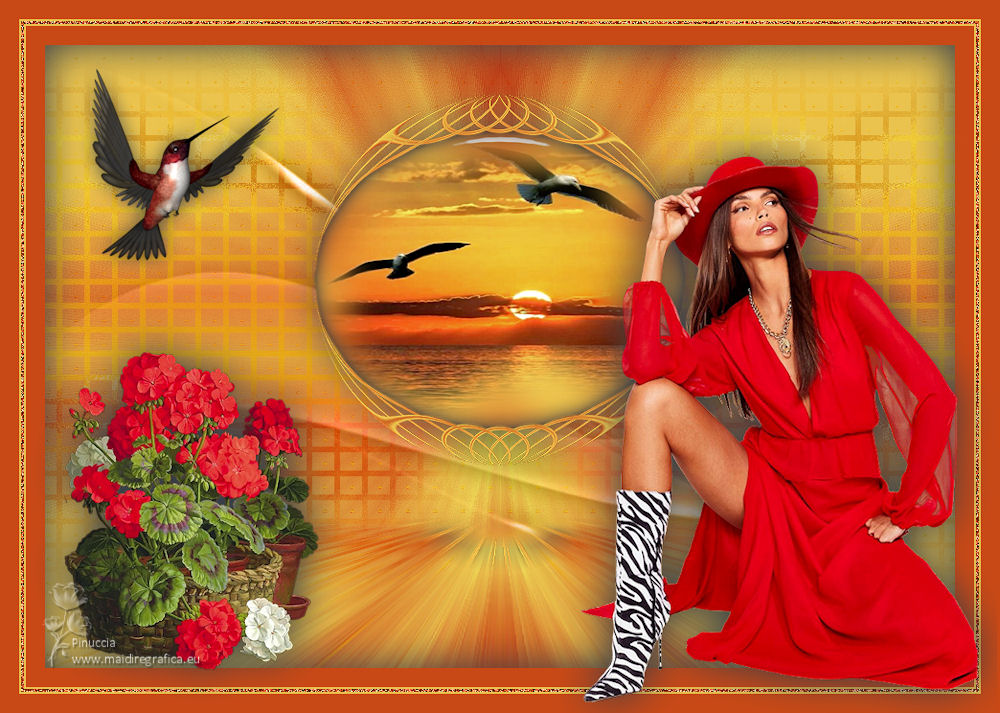
For the tubes of this version thanks Colybrix and Yedralina
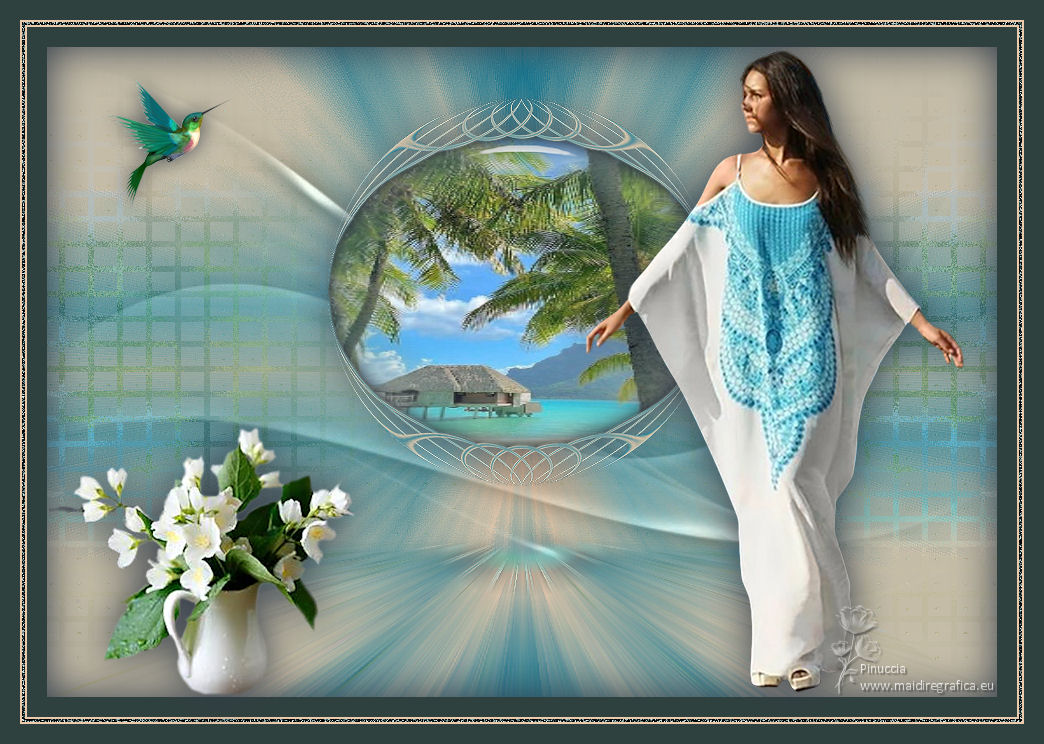
For the tubes of this version thanks Luz Cristina, Colybrix and Vera Mendes
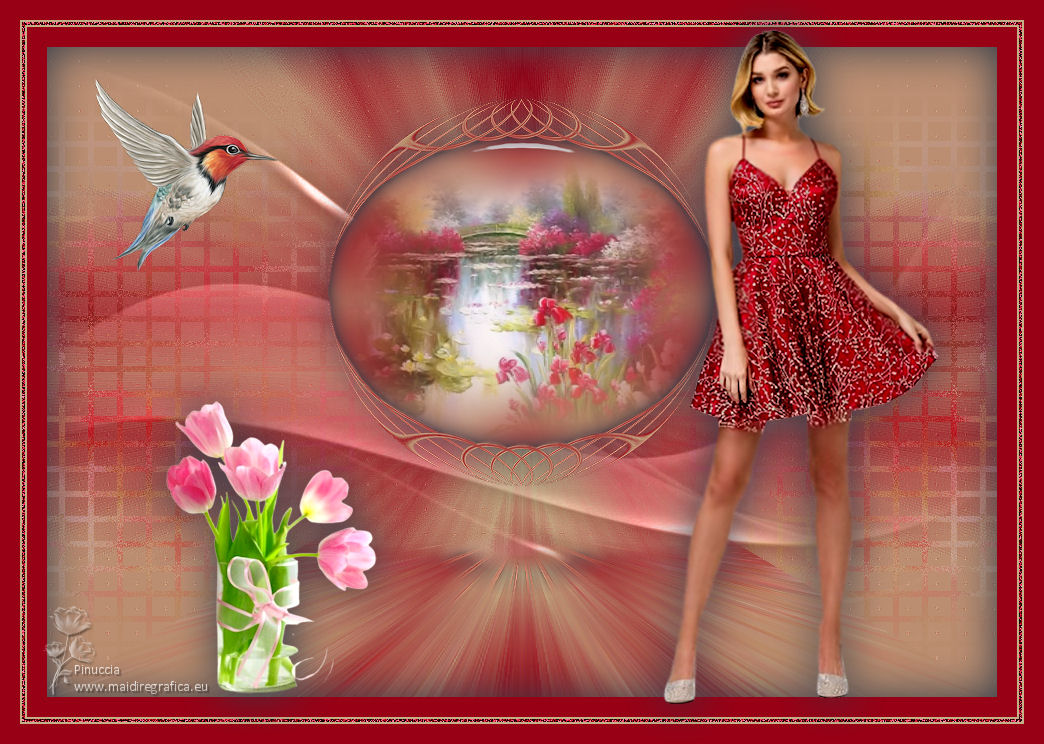
For the tube of this version thanks CibiBijoux, Sonia, Luz Cristina and Lori Rhae.

If you have problems or doubts, or you find a not worked link, or only for tell me that you enjoyed this tutorial, write to me.
28 July 2022

|

