|
TUTORIAL 87
english version
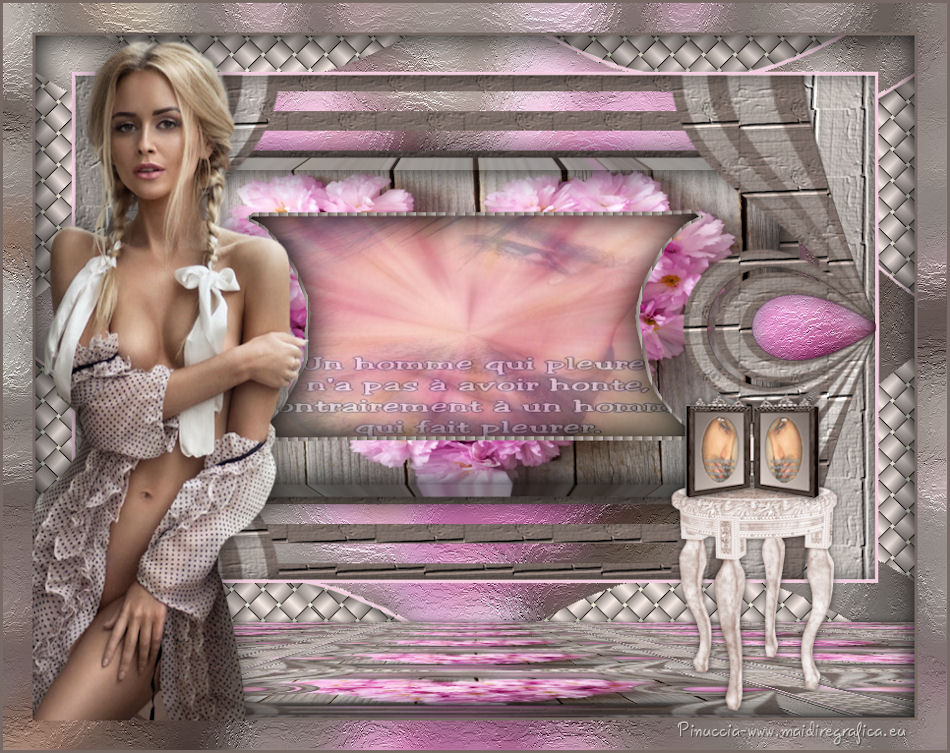
Thank you Sweety for your invitation to translate your tutorial.
Here you find the original of this tutorial:

This tutorial is a personal creation of Sweety and it is prohibited to copy or distribute it on the net (forums, groupes.. etc), or to use it on commercials sites.
This tutorial was created and translated with Corel12, but can also be made using other versions of PSP.
Since version PSP X4, Image>Mirror was replaced with Image>Flip Horizontal,
and Image>Flip with Image>Flip Vertical, there are some variables.
In versions X5 and X6, the functions have been improved by making available the Objects menu.
In the latest version X7 command Image>Mirror and Image>Flip returned, but with new differences.
See my schedule here
For this tutorial, you will need:
tubes and decos of yours: a landscape, a person and a deco.
The rest of material here
Tubes used:
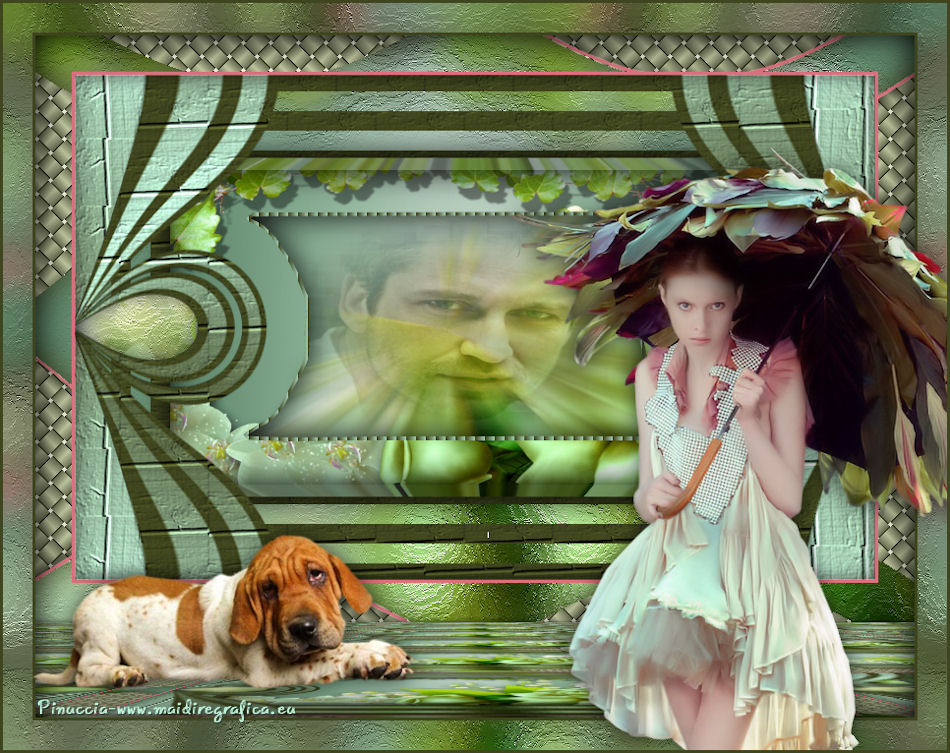
image man face (found on Google image and not included)
Image Pink-flower-love-heart-wood (found on google image and not included)
tube woman by A PSP Devil, received by sharing
Plugins
consult, if necessary, my filter section here
Filters Unlimited 2.0 here
VM Toolbox - Zoom blur here
&<Bkg Designer sf10I> - Crosstich (to import in Unlimited) here
Flaming Pear - Flexify 2 here
Mura's Meister - Perspective Tiling here
Alien Skin Eye Candy 5 Impact - Extrude here
Filters VM Toolbox can be used alone or imported into Filters Unlimited.
(How do, you see here)
If a plugin supplied appears with this icon  it must necessarily be imported into Unlimited it must necessarily be imported into Unlimited

You can change Blend Modes according to your colors.
In the newest versions of PSP, you don't find the foreground/background gradient (Corel_06_029).
You can use the gradient of oldest versions: you can find corel X gradients here
Copy the preset  in the folder of the plugins Alien Skin Eye Candy 5 Impact>Settings>Extrude. in the folder of the plugins Alien Skin Eye Candy 5 Impact>Settings>Extrude.
One or two clic on the file (it depends by your settings), automatically the preset will be copied in the right folder.
why one or two clic see here
Copy the preset TN_ice_and_fire.q8r in the folder of Flood.
If you prefer, you can import it from the folder of the material, when you'll need it.
Copy the selections in the Selections Folder.
Copy the textures in the Textures Folder.
Used colors

1. Choose two colors according to your main tube.
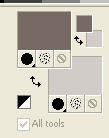
Set your foreground to #776a64,
and your background to #d1ccc8.
Open a new transparent image 900 x 600 pixels.
Flood Fill  the image with your foreground color. the image with your foreground color.
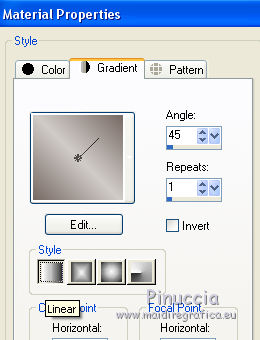
Set your foreground color to a Foreground/Background Gradient, style Linear
Selections>Select All.
Selections>Modify>Contract - 40 pixels.
Selections>Invert.
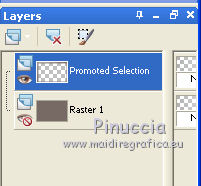
Selezione>Promote Selection to Layer.
Selections>Modify>Contract - 10 pixels.
Flood Fill  with your gradient. with your gradient.
Selections>Select None.
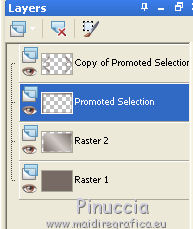
Close the bottom layer (Raster 1) but stay on the top layer Promoted Selection
2. Activate the Magic Wand Tool  , tolerance and feather 0, , tolerance and feather 0,
and clic in the rectangle to select it
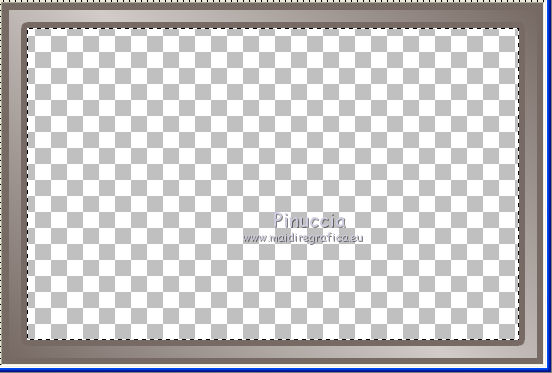
Layers>New Raster Layer.
Layers>Arrange>Move down.
Flood Fill  the selection with your gradient. the selection with your gradient.
Selections>Select None.
Now your can open the bottom layer.
Activate the top layer (Promoted selection).
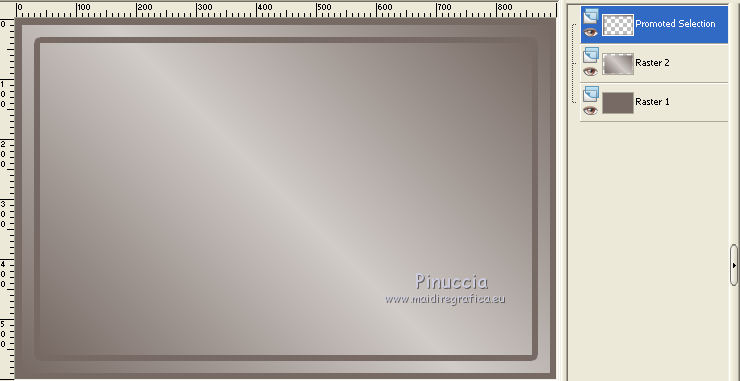
Layers>Duplicate.
Image>Resize, to 80%, resize all layers not checked.
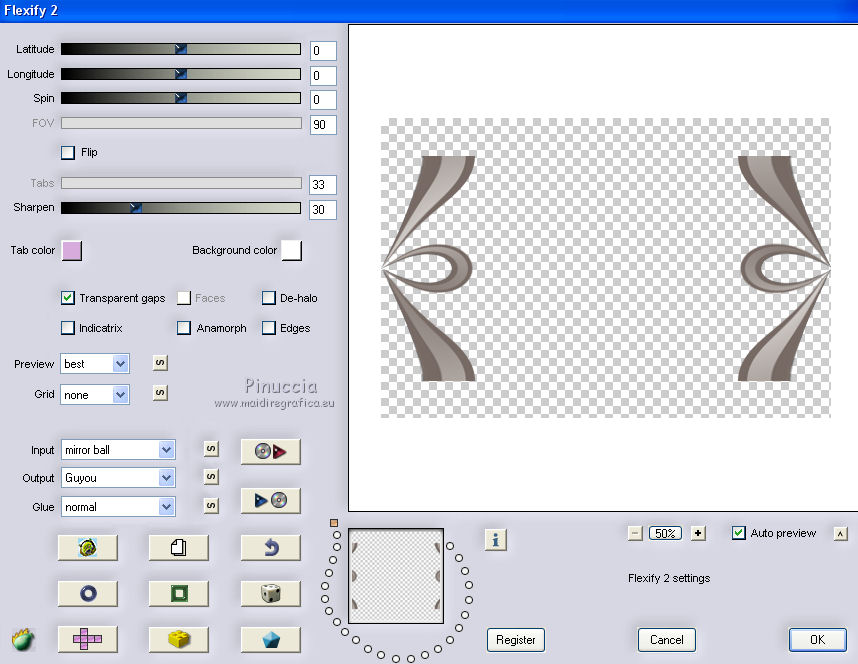
Effects>Plugins>Flaming Pear - Flexify 2
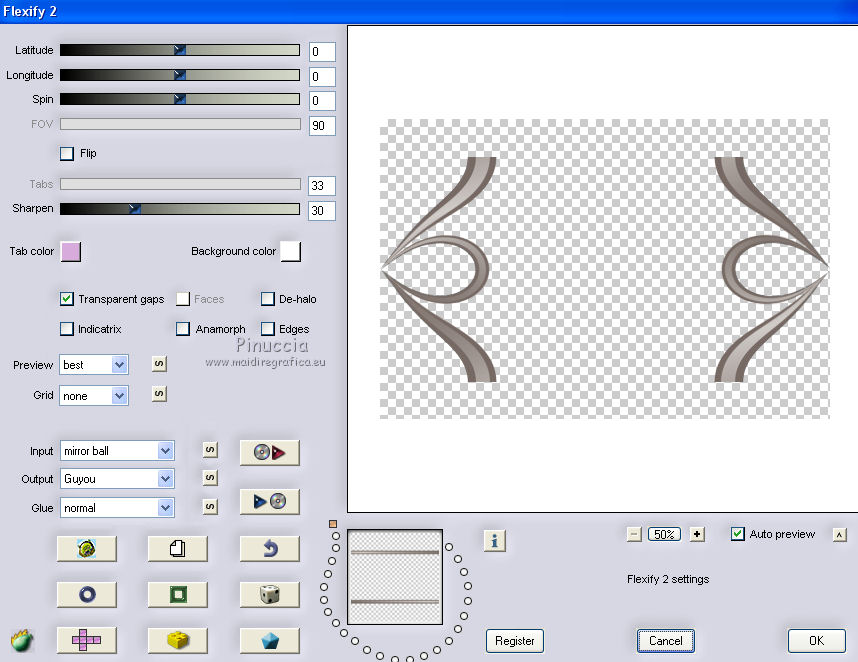
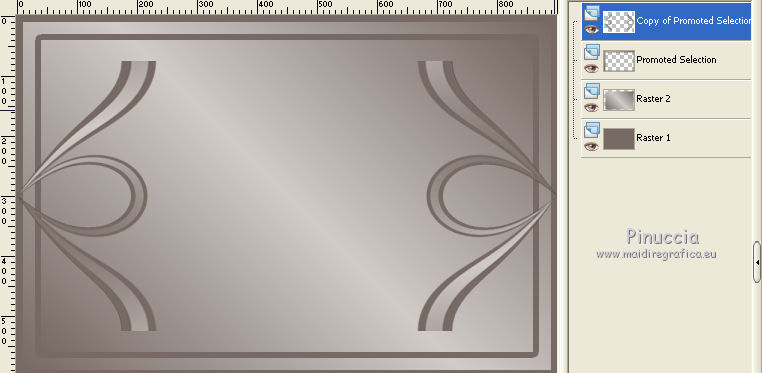
Activate the layer below (Promoted Selection)
Image>Resize, to 90%, resize all layers not checked.
Again Effcts>Plugins>Flaming Pear - Flexify 2, same settings.
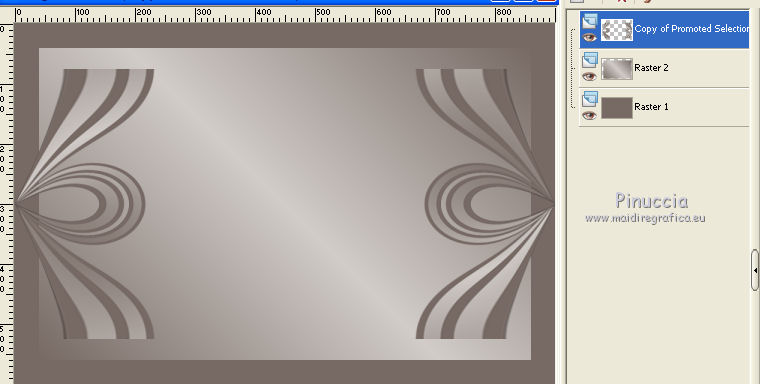
Layers>Arrange>Move up.
Layers>Merge>Merge down.
Keep this layer selected.
Edit>Cut (this cuts and also keeps in memory).
Selection Tool 
(no matter the type of selection, because with the custom selection your always get a rectangle)
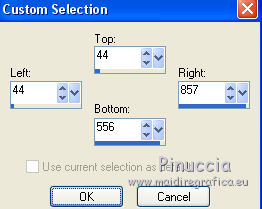
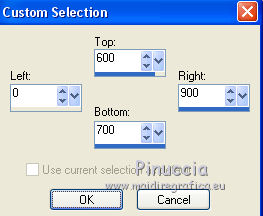
clic on the Custom Selection 
and set the following settings.
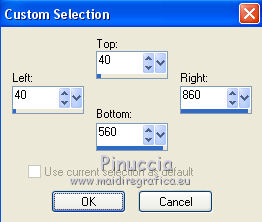
Edit>Paste into Selection (the image cutted is in memory).
Selections>Select None.
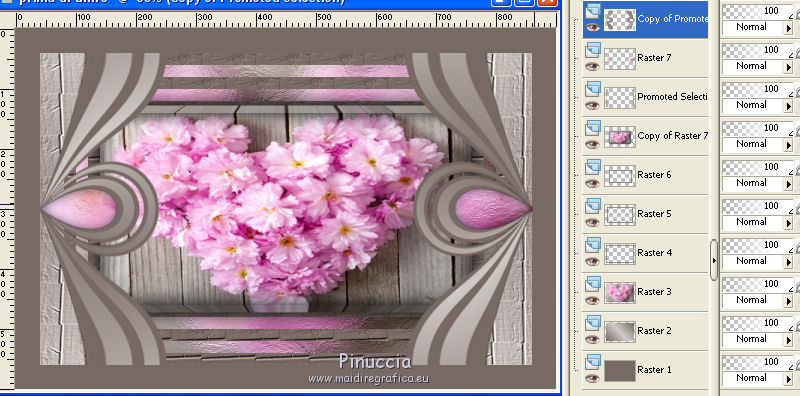
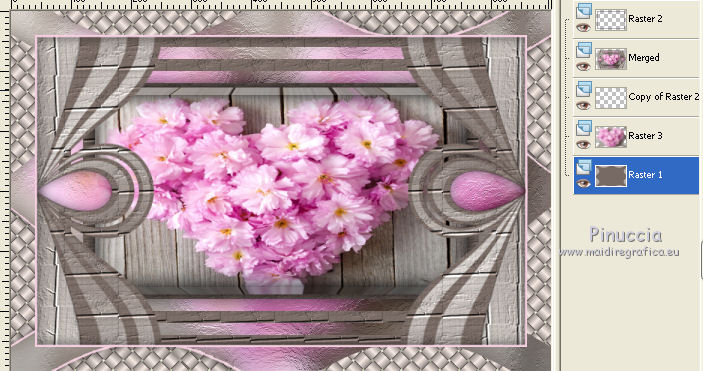
You should have this
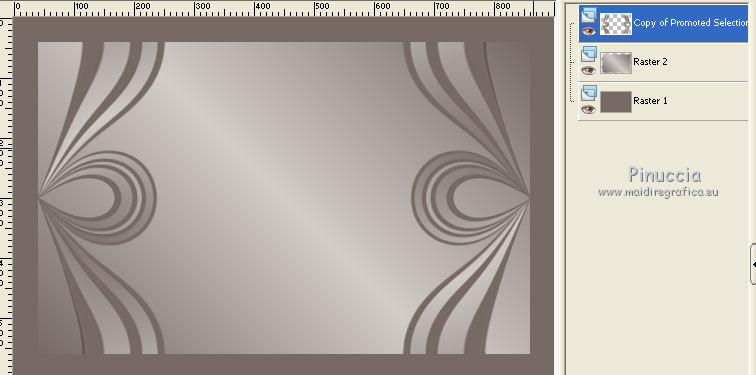
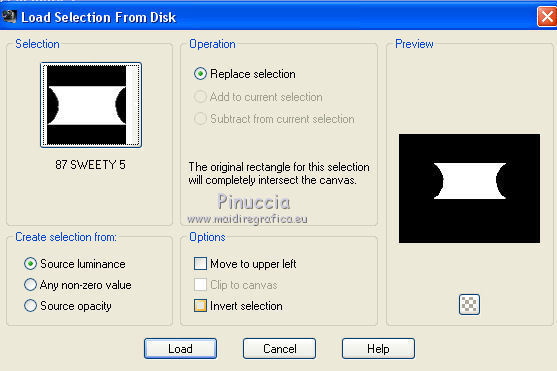
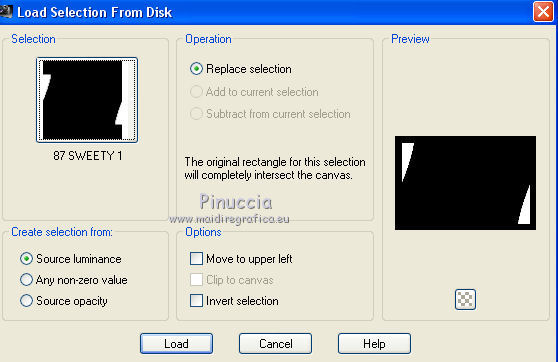
Selections>Load/Save Selection>Load Selection from Disk.
Load again the selection 87Sweety1.
Activate the layer below (Raster 2).
Selections>Promote Selection to Layer.
Effects>Texture Effects>Texture - select the texture "Texture 87"
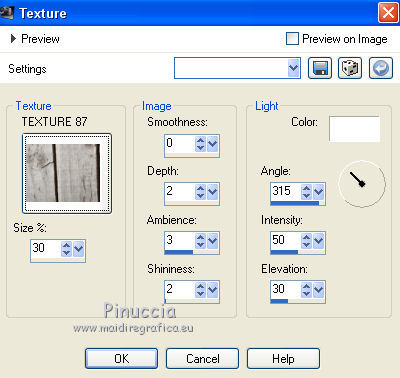
Selections>Select None.
5. Layers>Duplicate.
Image>Flip.
Layers>Merge>Merge down.
Activate the layer below (Raster 2)
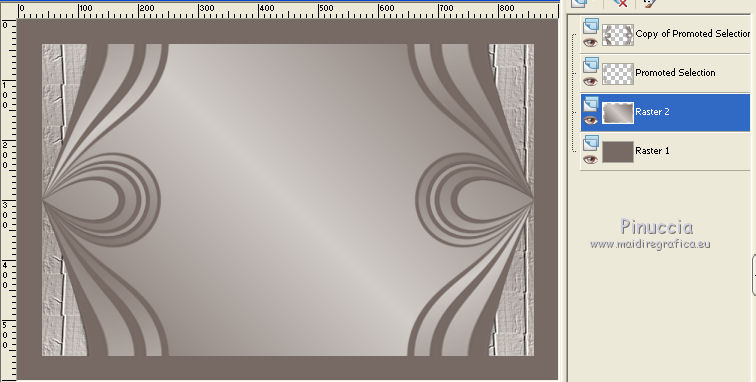
Custom Selection  , same settings, still in memory. , same settings, still in memory.

Layers>New Raster Layer.
Open your landscape tube - for me Pink-flowers-love-heart-wood - Edit>Copy.
Go back to your work and go to Edit>Paste into Selection.
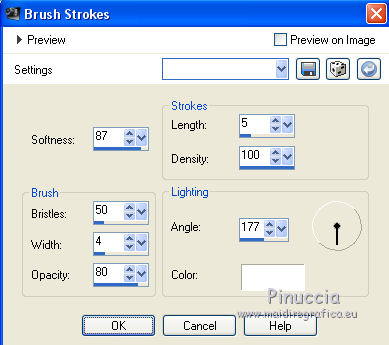
Effects>Art Media Effects>Brush Stokes
Keep selected and remain on this layer Raster 3.
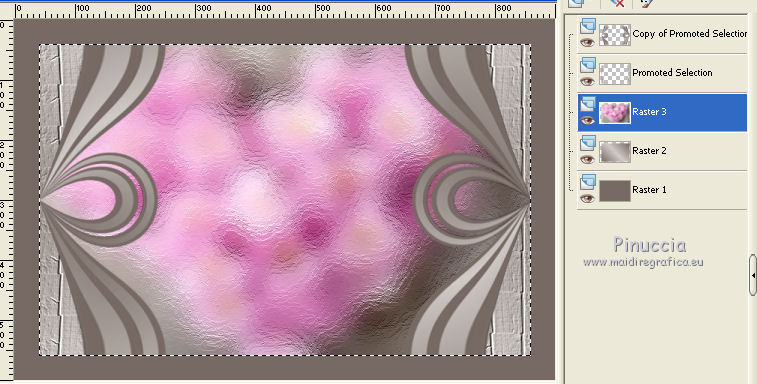
Attention, please, to the next steps:
a. Layers>New Raster Layer.
Set your foreground color to Color.
Flood Fill  the layer with your foreground color #776a64. the layer with your foreground color #776a64.
Effects>Texture Effects>Texture - select the texture 87(1)
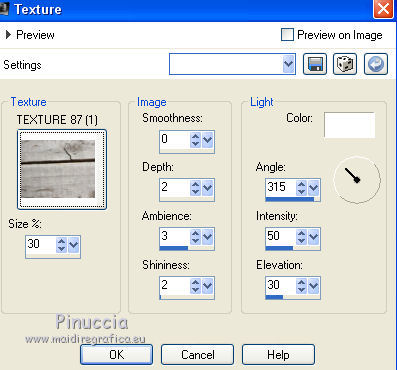
Selections>Modify>Contract - 20 pixels.
Press CANC on the keyboard 
Selections>Modify>Contract - 20 pixels.
b. Layers>New Raster Layer.
Flood Fill  with your foreground color. with your foreground color.
Effects>Texture Effects>Texture, same settings, still in memory

Selections>Modify>Contract - 20 pixels.
Press CANC on the keyboard.
Selections>Modify>Contract - 20 pixels.
c. Layers>New Raster Layer.
Flood Fill  with your foreground color. with your foreground color.
Again Effects>Texture Effects>Texture, same settings.

Selections>Modify>Contract - 20 pixels.
Press CANC on the keyboard.
You should have this
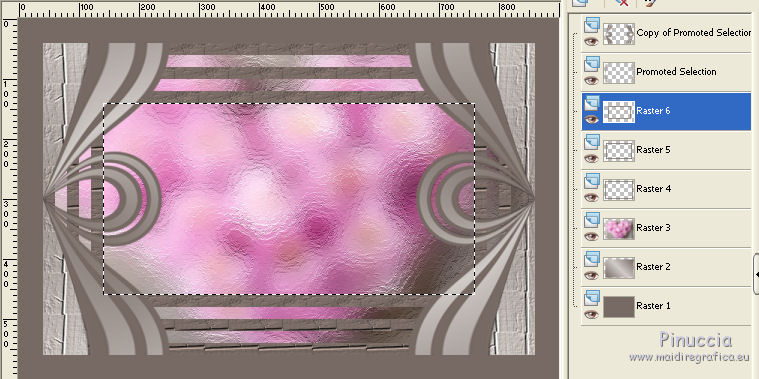
7. Keep the selection active and remain on layer 6.
Layers>New Raster Layer.
Edit>Paste into selection (your landscape tube is still in memory).
Layers>Duplicate.
Layers>Arrange>Move down.
Effects>Plugins>Alien Skin Eye Candy 5 Impact - Extrude
Select the preset EXTRUDE 87(1) and ok.
Here the settages if your have problems with the preset.
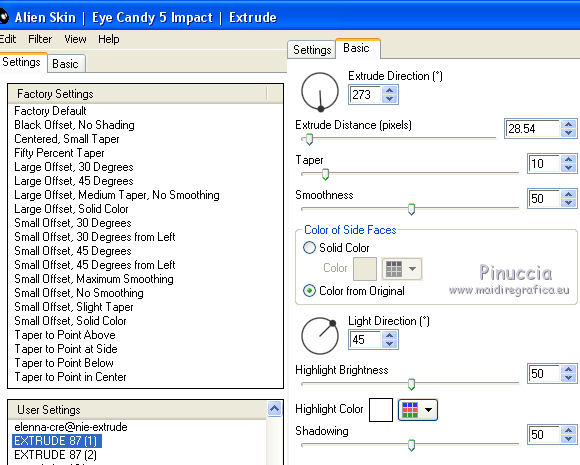
Activate the layer above (Raster 7)
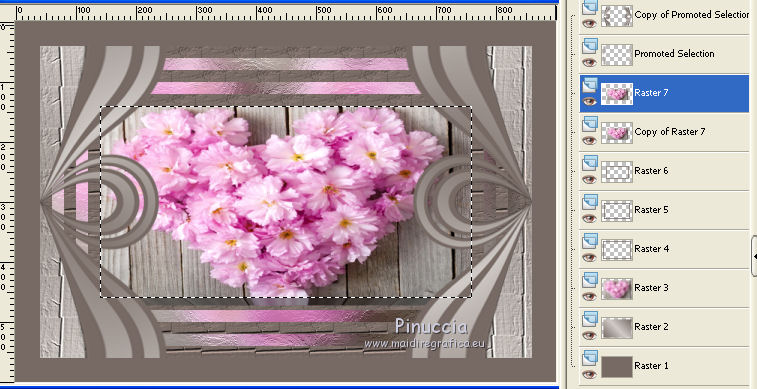
Effects>Plugins>Alien Skin Eye Candy 5 Impact - Extrude
Select the preset EXTRUDE 87(2) and ok.
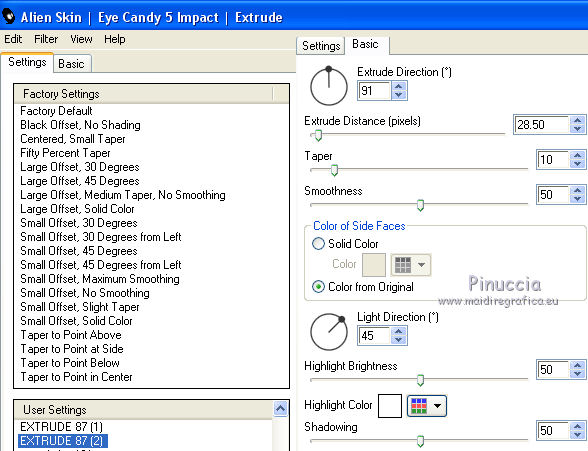
Layers>Merge>Merge down.
Selections>Invert.
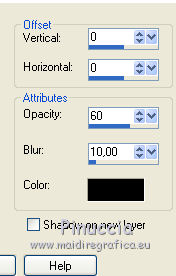
Effects>3D Effects>Drop shadow, color black.
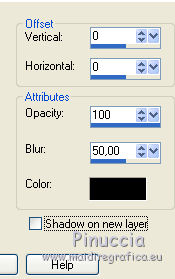
Selections>Select None.
Repeat Effects>3D Effects>Drop Shadow, same settings.
8. You should have this.
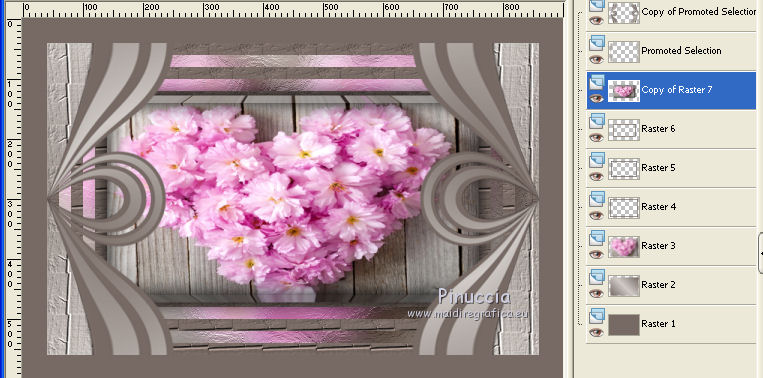
Activate the top layer (copy of Promoted Selection).
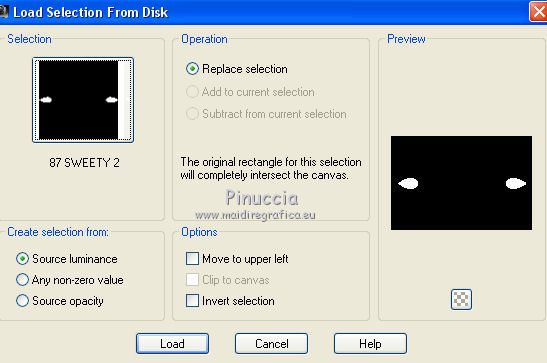
Selections>Load/Save Selection>Load Selection from Disk.
Load again the selection 87Sweety2.
Edit>Paste as new layer (your landscape tube is still in memory).
Image>Resize, if it is necessary - for me to 60% - and place  into the selection
the part you want keep visible. into the selection
the part you want keep visible.
Selections>Invert.
Press CANC on the keyboard.
Again Selections>Invert.
Layers>Duplicate.
Effects>Art Media Effects>Brush Strokes, same settings

Layers>Merge>Merge down.
Layers>Arrange>Move down.
Selections>Invert.
Effects>3D Effects>Drop Shadow, color black.

Selections>Select None.
9. Activate the top layer (copy of promoted selection)

Effects>Texture Effects>Texture, same settings (Texture 87(1)).

Close the bottom layer and keep the top layer selected.
Layers>Merge>Merge visible.
Re-open the bottom layer (raster 1) and keep the top layer (merged) selected.
Selections>Select All.
Selections>Float.
Selections>Defloat.
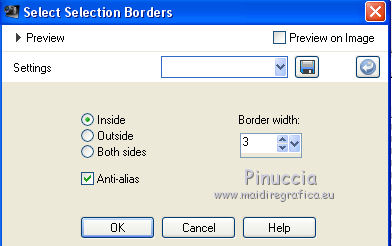
Selections>Modify>Select Selection Border.

Layers>New Raster Layer.
Set your background color to color 3 ##f4cfe1.
Match mode of your Flood Fill Tool to None

and flood fill  the selection with your new background color. the selection with your new background color.
Selections>Select None.
10. Custom Selection 

Selections>Invert.
Effects>3D Effects>Drop Shadow, color black.

Selections>Select None.
Layers>Duplicate.
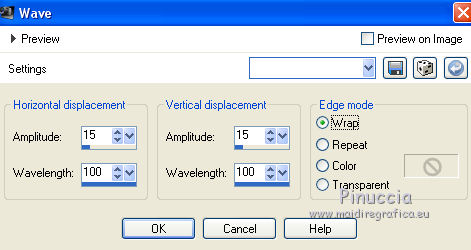
Effects>Distortion Effects>Wave.

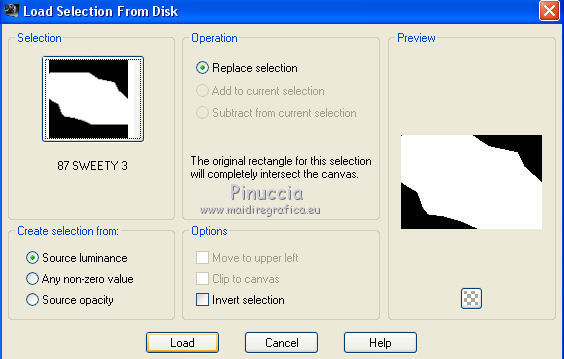
Selections>Load/Save Selection>Load Selection from Disk.
Load again the selection 87Sweety3.

Press CANC on the keyboard 
Selections>Select None.
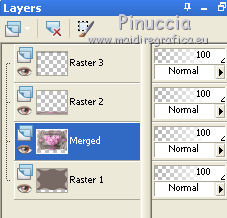
Layers>Arrange>Move down - 2 times (it should be between the layers 1 and merged)

Layers>Duplicate.
Image>Mirror.
Layers>Merge>Merge down.
11. Keep this layer (copy of Raster 2) selected.
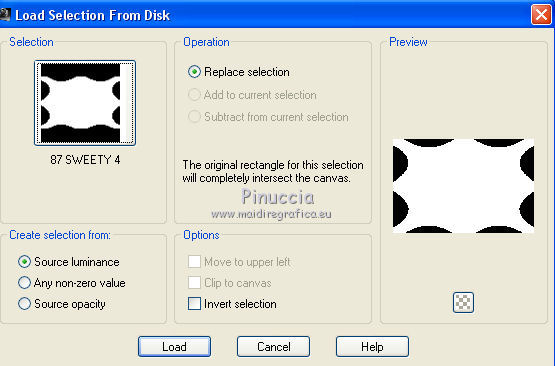
Selections>Load/Save Selection>Load Selection from Disk.
Load again the selection 87Sweety4.

Layers>New Raster Layer.
Layers>Arrange>Move down.
Edit>Paste into selection (your landscape tube is still in memory).
Effects>Art Media Effects>Brush Strokes, same settings.

Selections>Invert.
Activate the layer below (raster 1)

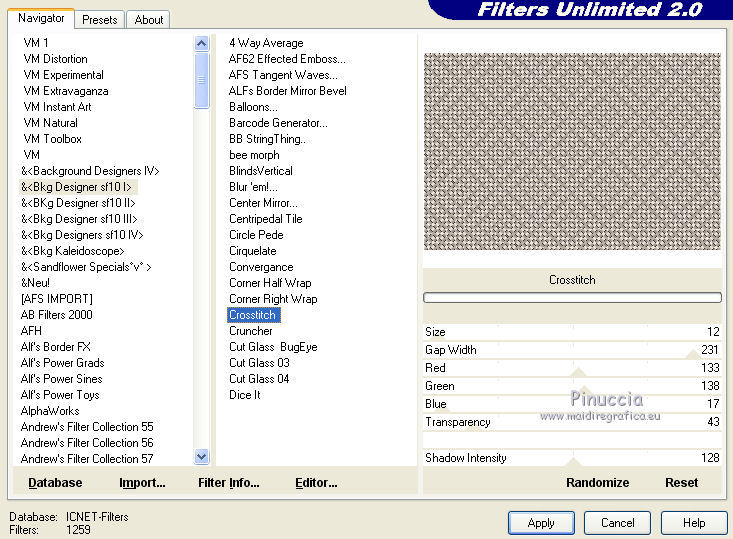
Effects>Plugins>Filters unlimited 2.0 - &<Bkg Designer sf10I> - Crosstitch, default settings.

Selections>Select None.
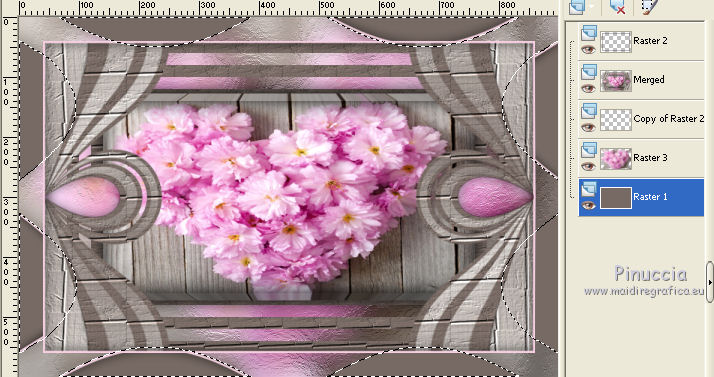
12. You should have this.

Close this layer (raster 1) and activate the layer above.
Layers>Merge>Merge visible.
Re-open the layer Raster 1 and remain on the top layer.
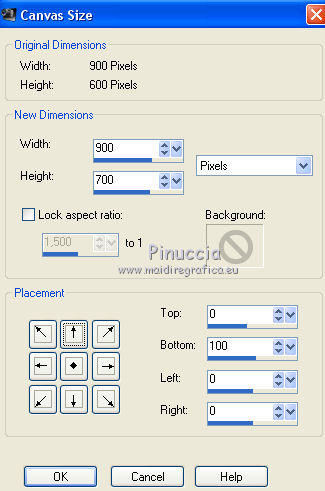
13. Image>Canvas Size - 900 x 700 pixels.

Edit>Copy Special>Copy Merged.
Custom Selection 

Layers>New Raster Layer.
Edit>Paste into Selection.
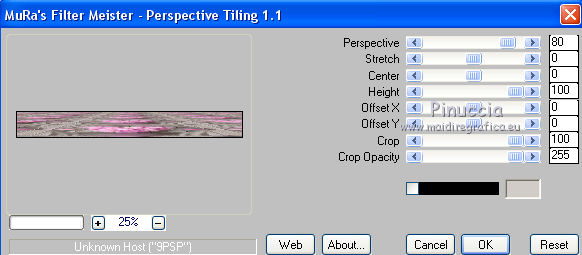
Effects>Plugins>Mura's Meister - Perspective Tiling, default settings.

Effects>3D Effects>Drop Shadow, color black.

Selections>Select None.
14. Layers>New Raster layer.
Flood Fill  with your foreground color #776a64. with your foreground color #776a64.
Selections>Select All.
Selections>Modify>Contract - 3 pixels.
Press CANC on the keyboard.
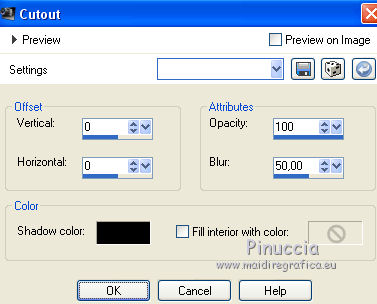
Effects>3D Effects>Cutout.

Selections>Select None.
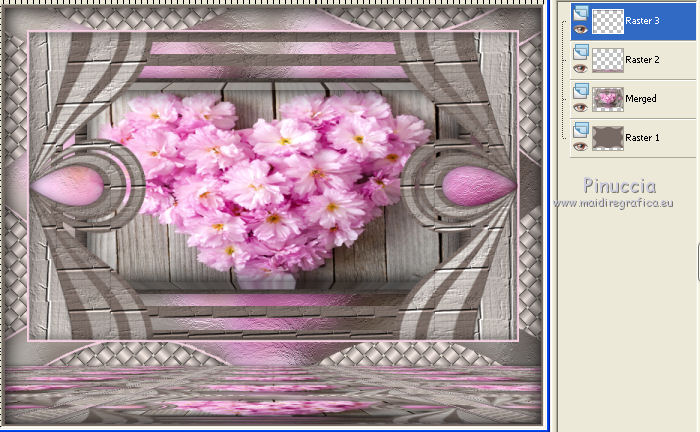
You shoud have this.

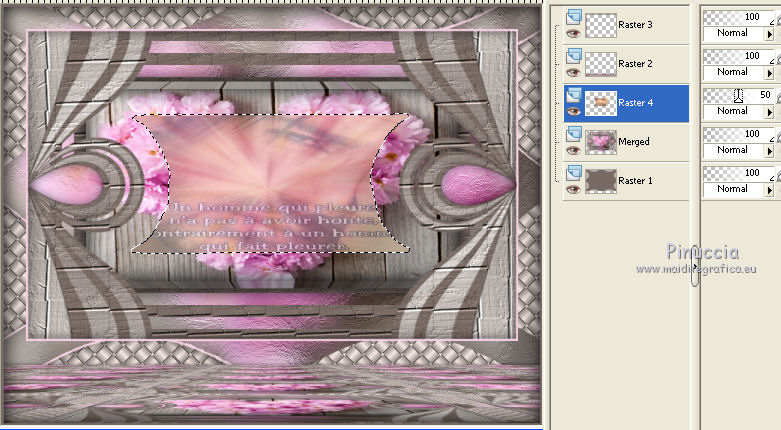
15. Activate the layer Merged.

Selections>Load/Save Selection>Load Selection from Disk.
Load again the selection 87Sweety5.

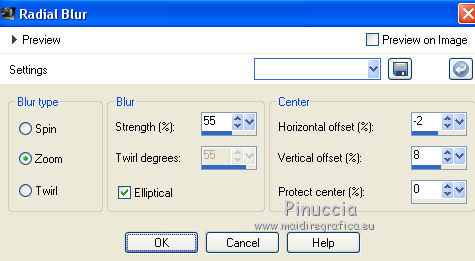
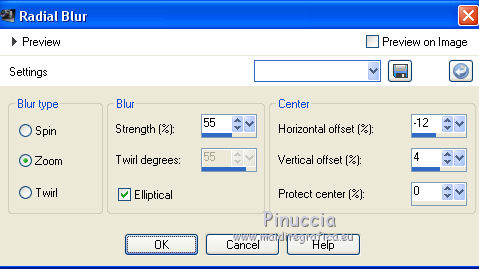
Adjust>Blur>Radial Blur.

Layers>New Raster Layer.
Open the mist of a man or a woman - Edit>Copy.
Go back to your work and go to Edit>Paste into Selection.
Change the opacity of this layer to 50%, or according to your mist.
(I used an image found on Google image).

Layers>New Raster Layer.
Effects>3D Effects>Cutout, same settings.
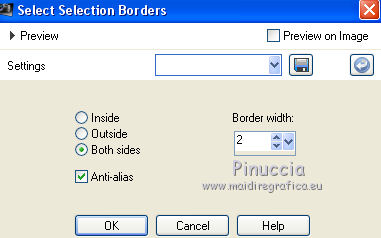
Selections>Modify>Select Selection Borders.

Match mode of the Flood fill tool to None
Flood Fill  with your foreground color. with your foreground color.
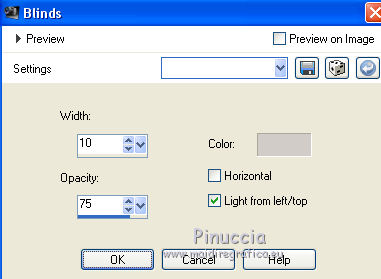
Effects>Texture Effects>Blinds, with the first background color #d1ccc8.

Selections>Select None.
16. Activate the top layer (raster 3).
Open your person tube - Edit>Copy.
Go back to your work and go to Edit>Paste as new layer.
Image>Resize, if it is necessary
and place  the tube where you like. the tube where you like.
Effects>3D Effects>Drop shadow, as you like.
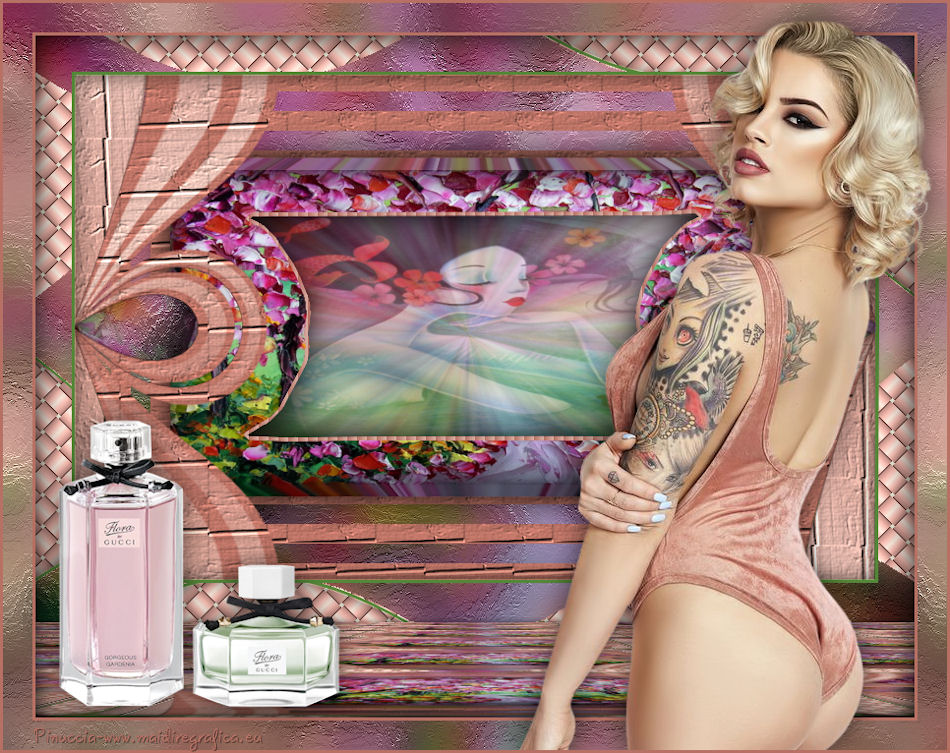
Finish your work with the tube your like.
17. Image>Add borders, 30 pixels, symmetric, the color is not important.
Selections>Select All.
Selections>Modify>Contract - 30 pixels.
Selections>Invert.
Open your landscape image (for me Pink-flowers-love-heart-wood) - Edit>Copy.
Go back to your work and go to Edit>Paste into Selection.
Adjust>Blur>Radial Blur.

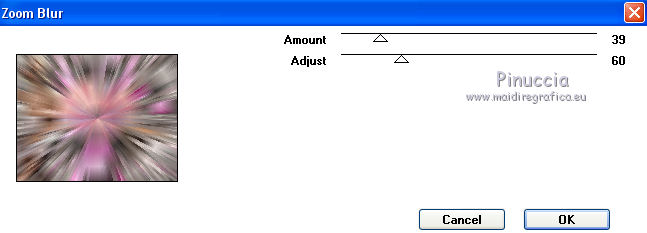
Effects>Plugins>VM Toolbox - Zoom Blur.

Effects>Art Media Effects>Brush Strokes, same settings

Selections>Select None.
Image>Add border, 3 pixels, symmetric, foreground color.
Sign your work.
Layers>Merge>Merge All.
Image>Resize, to 950 pixels width, resize all layer checked.
Save as jpg.
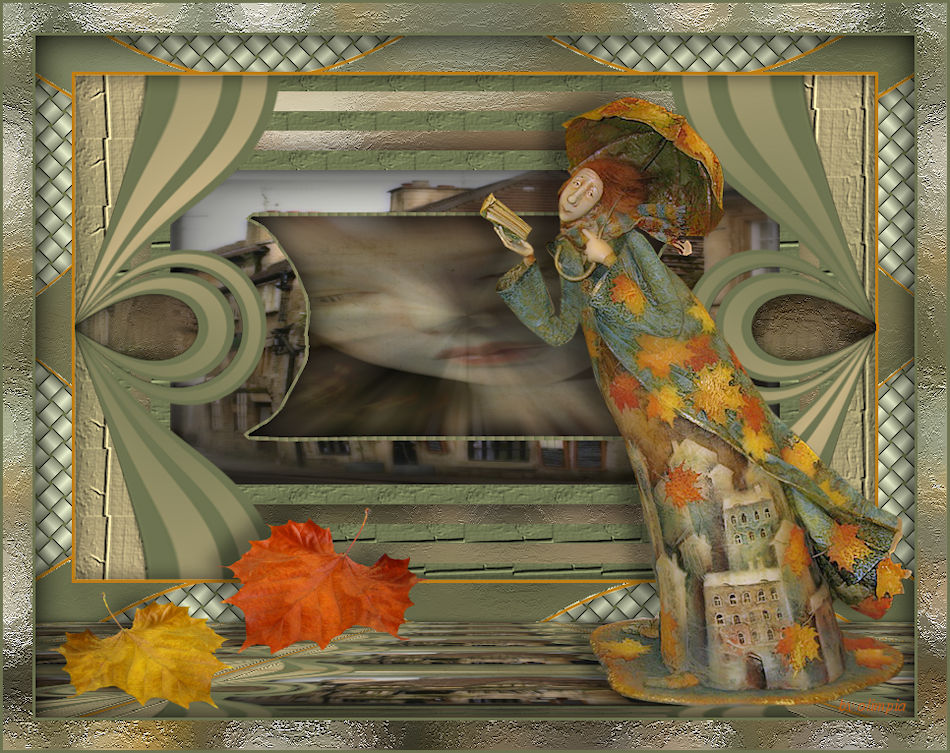
The tubes of this version are by Isa and Leny

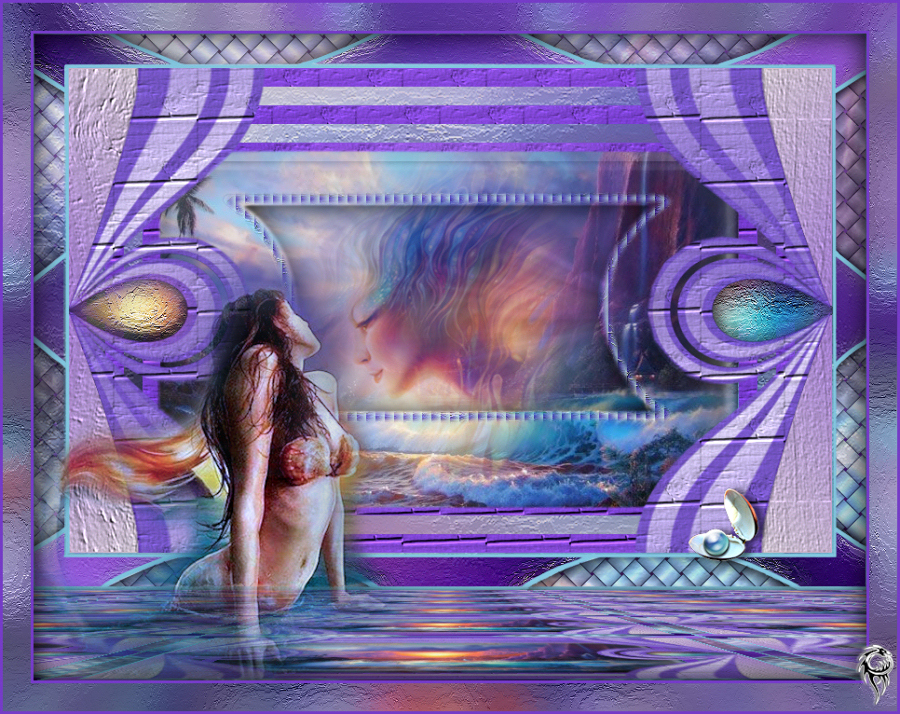
The tubes of this version are by Libellule et Min@


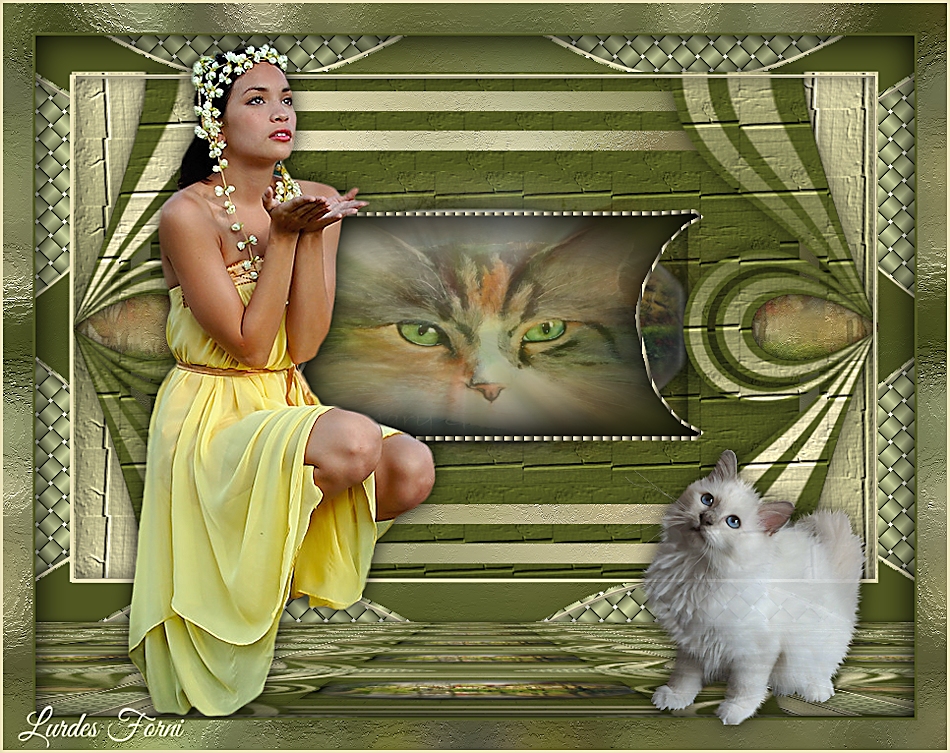
Your versions. Thanks

Olimpia

Cal

Lurdes

If you have problems or doubts, or you find a not worked link, or only for tell me that you enjoyed this tutorial, write to me.
27 June 2016
|


 the image with your foreground color.

 , tolerance and feather 0,


 into the selection
the part you want keep visible.
