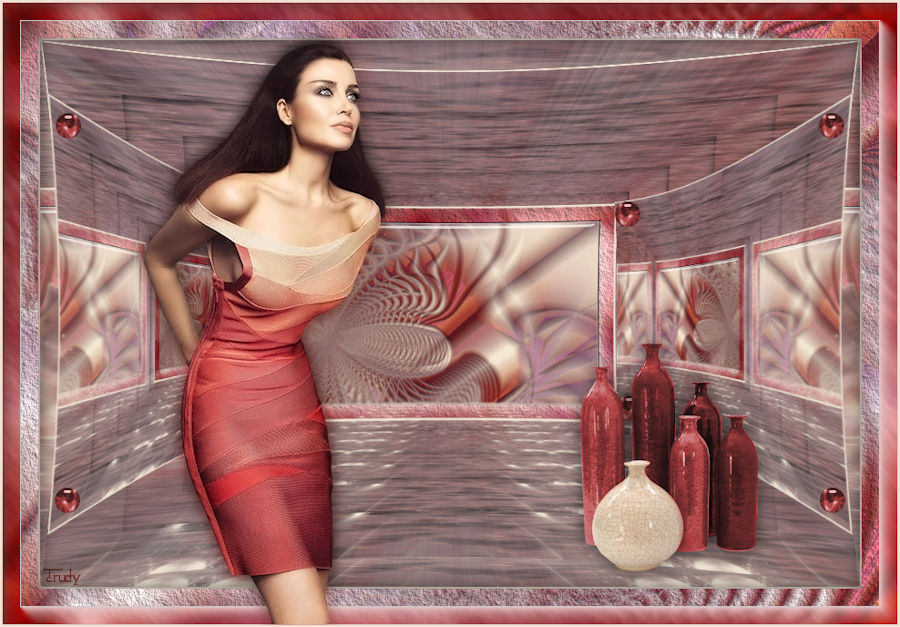
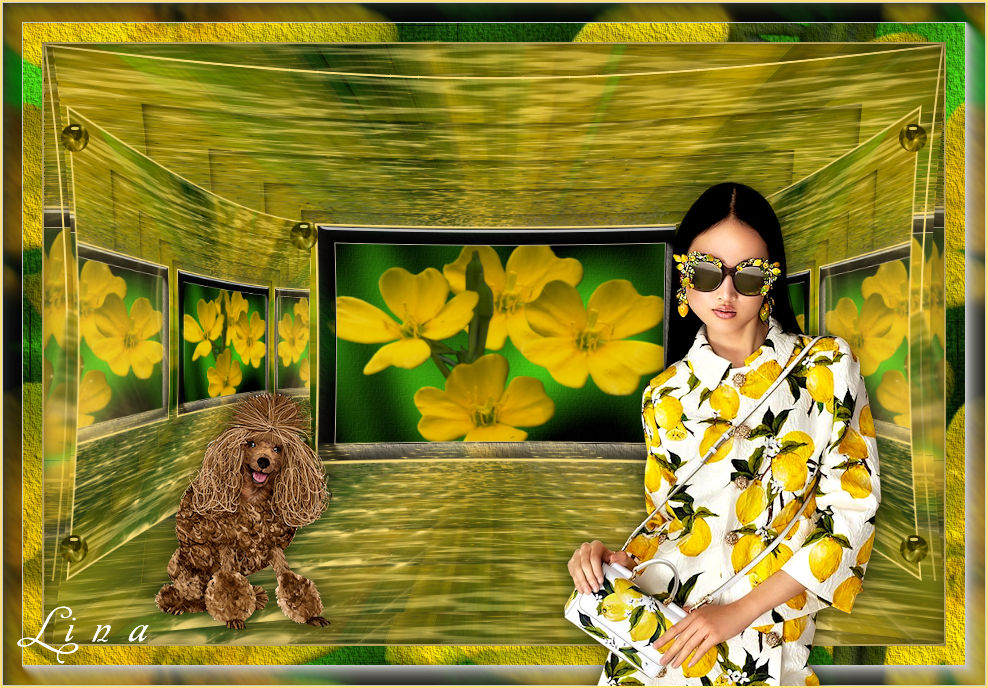
|
TUTORIAL 117
 english version english version

Thank you Sweety for your invitation to translate your tutorial.
Here you find the original of this tutorial:

This tutorial is a personal creation of Sweety and it is prohibited to copy or distribute it on the net (forums, groupes.. etc), or to use it on commercials sites.
This tutorial was created with CorelX12 and translated with Corel13, but it can also be made using other versions of PSP.
Since version PSP X4, Image>Mirror was replaced with Image>Flip Horizontal,
and Image>Flip with Image>Flip Vertical, there are some variables.
In versions X5 and X6, the functions have been improved by making available the Objects menu.
In the latest version X7 command Image>Mirror and Image>Flip returned, but with new differences.
See my schedule here
Your versions
For this tutorial, you will need:
Tube, landscapes and decos at your choice.
The rest of the material here
Images not supplied:
1st version:
Fractal: thumb-1920-114558.jpg (Google image).
Woman: tubeclaudiaviza-mujer2367 (sharing)
vase 2_65.psp (unknown source)
Version 2 :
Fractal thumb-1920-120816.jpg (Google image)
Woman: bicharita_lixtones_axules_por_barullo.psp (sharing)
tube déco vase (unknown source)
Plugins
consult, if necessary, my filter section here
Alien Skin Eye Candy 5 Impact - Glass, Perspective Shadow here
Mura's Meister - Perspective Tiling here
Flaming Pear - Flood here
VM Toolbox - Zoom Blur here
Filters Unlimited 2.0 here
AAA Frames - Foto Frame, Texture Frame here
Filters VM Toolbox can be used alone or imported into Filters Unlimited.
(How do, you see here)
If a plugin supplied appears with this icon  it must necessarily be imported into Unlimited it must necessarily be imported into Unlimited

You can change Blend Modes according to your colors.
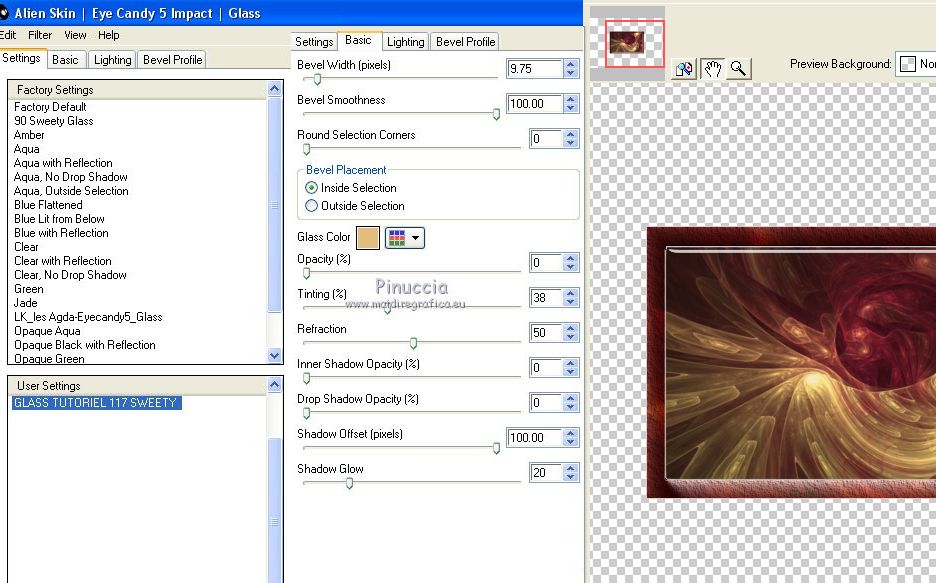
Copy the preset  in the folder of the plugins Alien Skin Eye Candy 5 Impact>Settings>Shadow/Glass. in the folder of the plugins Alien Skin Eye Candy 5 Impact>Settings>Shadow/Glass.
One or two clic on the file (it depends by your settings), automatically the preset will be copied in the right folder.
why one or two clic see here
Copy the Selections in the Selections Folder.
Open the mask in PSP and minimize it with the reste of the material.
Choose 2 colors according to your main tube.
For version 1:
foreground color #581826
background color ##e4bd7c.
For versions 2:
foreground color #096769
background color #fade7b.
1.
Choose two colors from your fractal image.
Foreground color: dark color #581826
and background color: light color #e4bd7c.
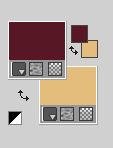
Open a new transparent image 900 x 600 pixels.
Selections>Select All.
Open your image fractal and go to Edit>Copy.
Go back to your work and go to Edit>Paste into Selection.
Selections>Select None.
The next step depends on your fractal.
For example for my 2nd version I did not this, but I went straight to step 2.
For my first version; I did:
Layers>Duplicate.
Image>Mirror.
Reduce the opacity of this layer to 50%.
Layers>Merge>Merge Down.
Layers>Duplicate.
Image>Flip.
Reduce the opacity of this layer to 50%.
Layers>Merge>Merge Down.
2.
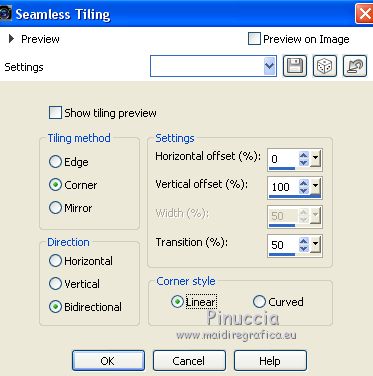
Effects>Image Effects>Seamless Tiling.
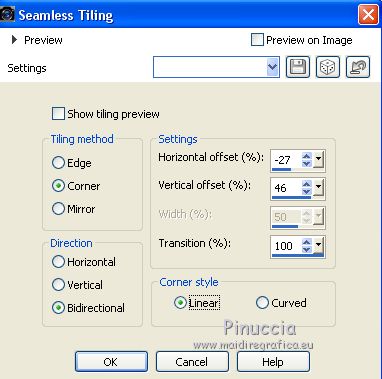
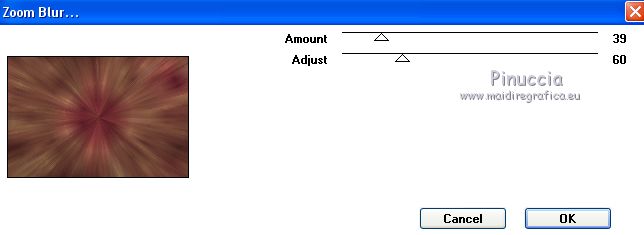
Effects>Plugins>VM Toolbox - Zoom Blur, default settings.
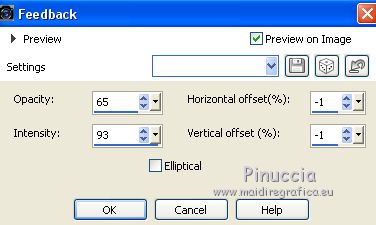
Effects>Reflection Effects>Feedback.
Adjust>Sharpness>Sharpen.
Open the tube déco perso 1 - Edit>Copy.
Go back to your work and go to Edit>Paste as new layer.
Don't move it.
3.
Layers>New Raster Layer.
Flood Fill  the layer with your background color. the layer with your background color.
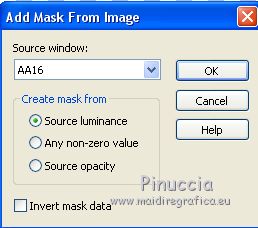
Layers>New Mask layer>From image
Open the menu under the source window and you'll see all the files open.
Select the mask AA16.

Adjust>Sharpness>Sharpen.
Layers>Merge>Merge Group.
Layers>Duplicate.
Image>Mirror.
Layers>Merge>Merge Down.
4.
Keep this layer selected (Group Raster 3).
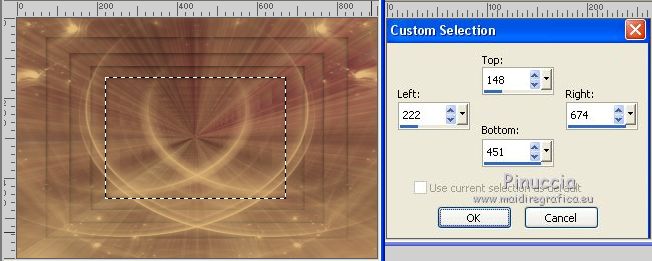
Selection Tool 
(no matter the type of selection, because with the custom selection your always get a rectangle)
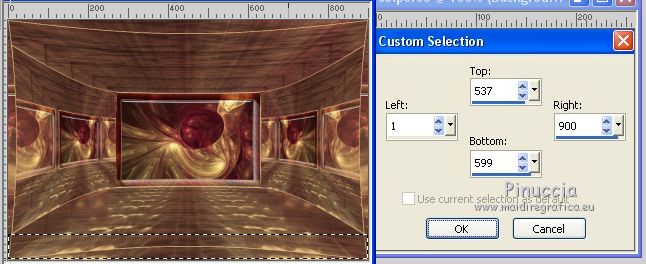
clic on the Custom Selection 
and set the following settings.

Press CANC on the keyboard 
Selections>Modify>Contract - 15 pixels.
Layers>New Raster Layer.
Layers>Arrange>Move Down.
Activate again your fractal image and go to Edit>Copy.
Go back to your work and go to Edit>Paste into Selection.
Selections>Invert.
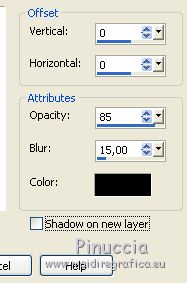
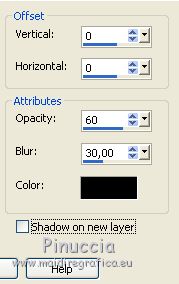
Effects>3D Effects>Drop Shadow, color black.

Again Selection>Invert.
5.
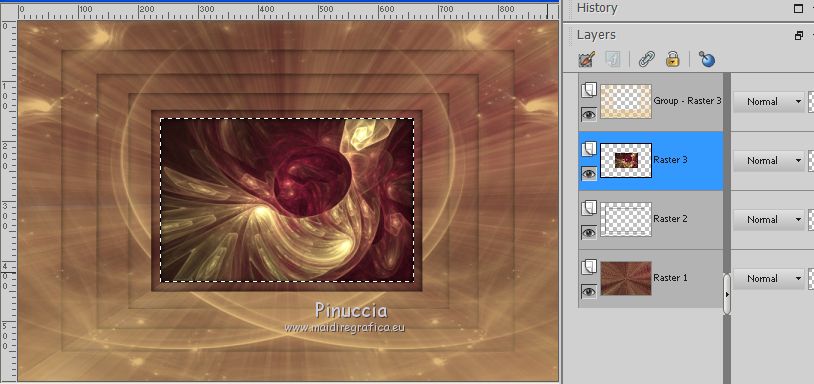
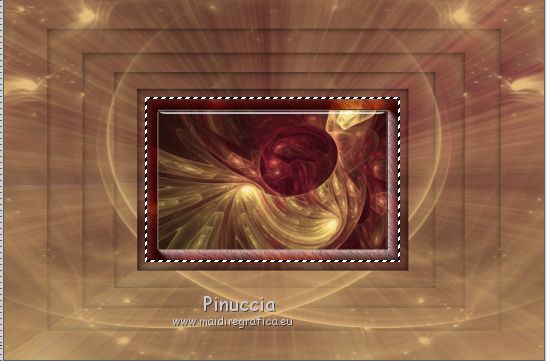
We are on Raster 3 with the active selection

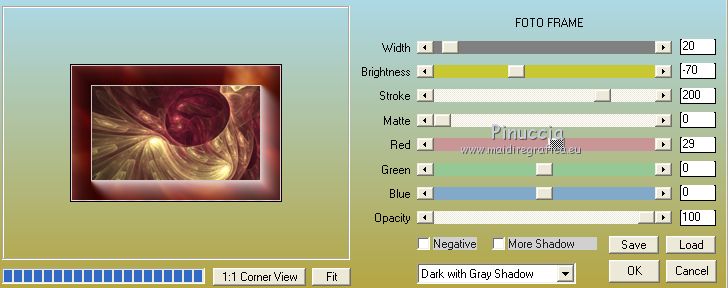
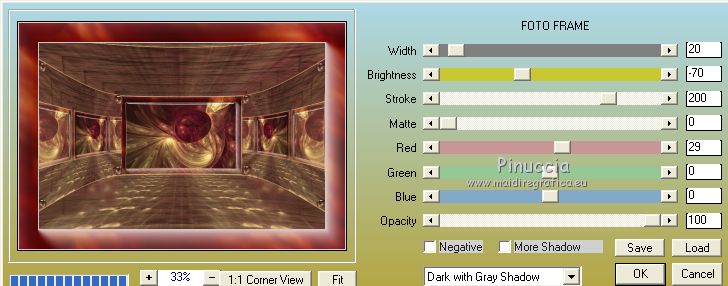
Effects>Plugins>AAA Frames - Foto Frame.
if you are using other colors, play with Red, Green, Blue settings, according to your colors

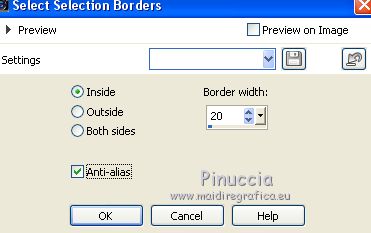
Selections>Modify>Select Selection Borders.

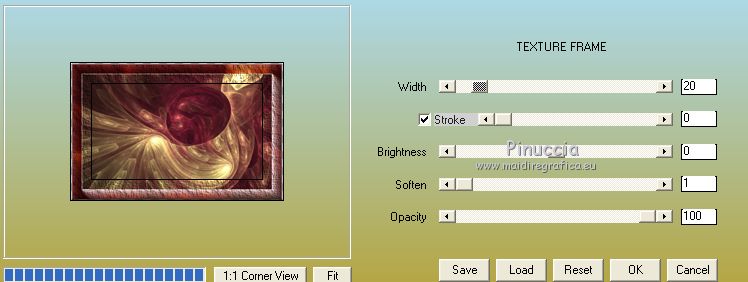
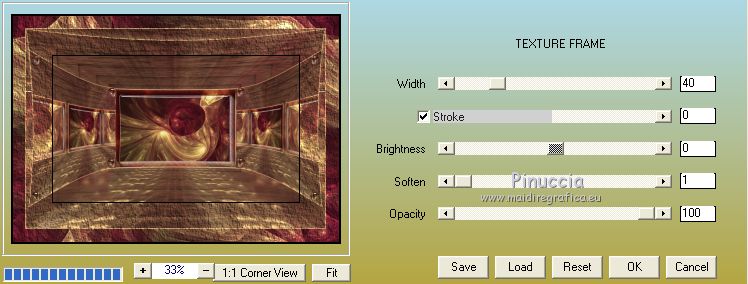
Effects>Plugins>AAA Frames - Texture Frame.

Selections>Select None.
6.
On the same layer:
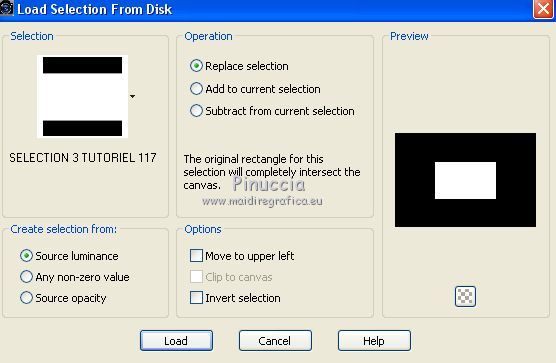
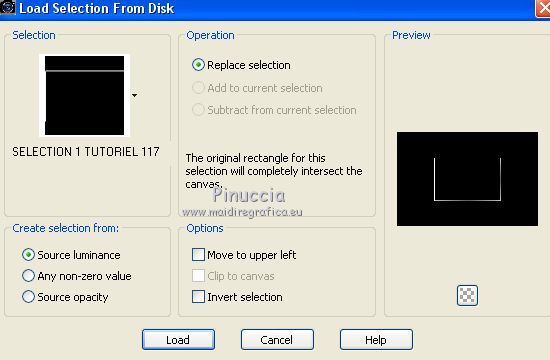
Selections>Load/Save Selection>Load Selection from Disk.
Look for and load the selection sélection 3.

Effects>Plugins>Alien Skin Eye Candy 5 Impact - Glass.
Select the preset GLASS TUTORIAL 117 SWEETY and ok.

Selections>Load/Save Selection>Load Selection from Disk.
Look for and load the selection sélection 1.

The new selection will replace the previous selection.

Flood Fill  la selection with your background color. la selection with your background color.
(use the zoom if necessary).
Selections>Select None.
7.
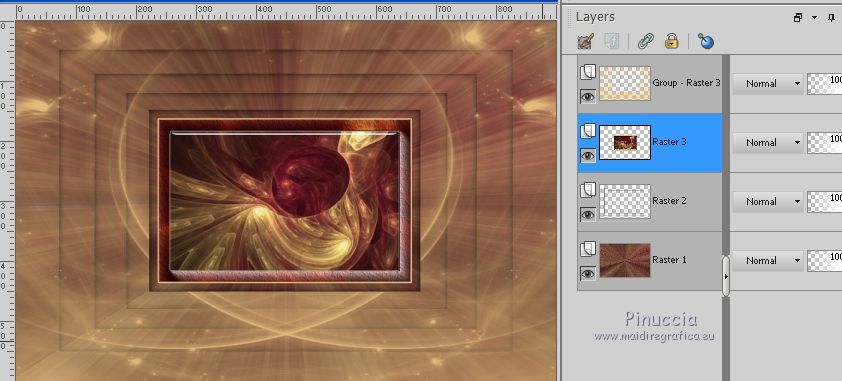
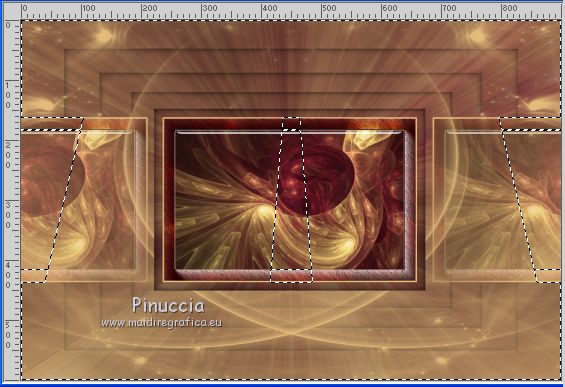
You are on the 2nd layers from the top (Raster 3)

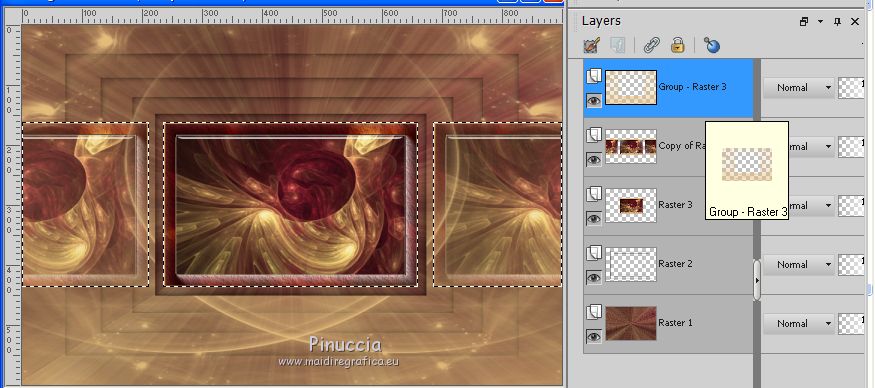
Layers>Duplicate.
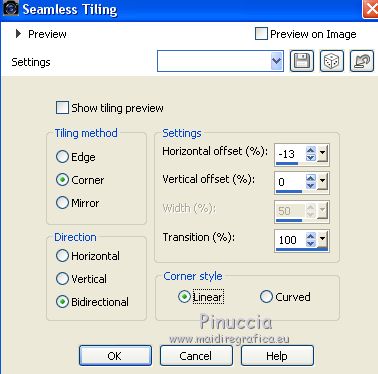
Effects>Image Effects>Seamless Tiling.

Selections>Select All.
Selections>Float.
Selections>Defloat.
Activate the layer above (Group-Raster 3).

Selections>Promote Selection to layer.
8.
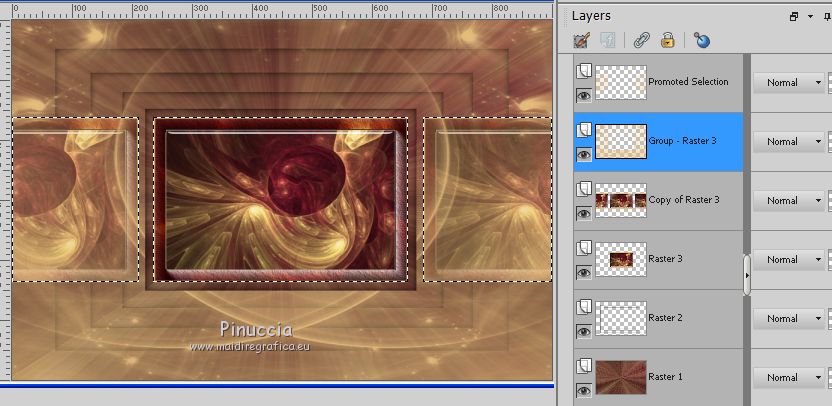
Go back to the layer below (Group-Raster 3).

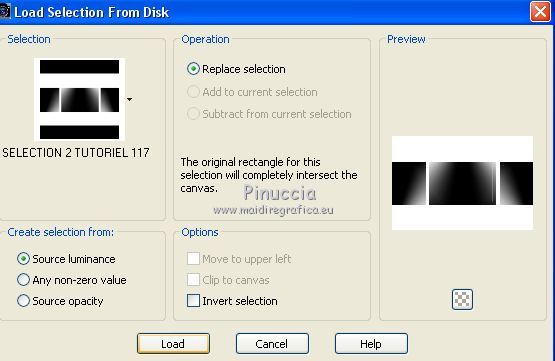
Selections>Load/Save Selection>Load Selection from Disk.
Look for and load the selection sélection2.

(this will replace the previous selection)

Selections>Promote Selection to Layer.
Selections>Select None.
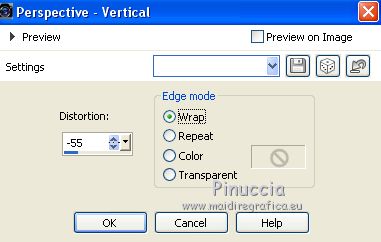
Effects>Geometric Effects>Perspective vertical.

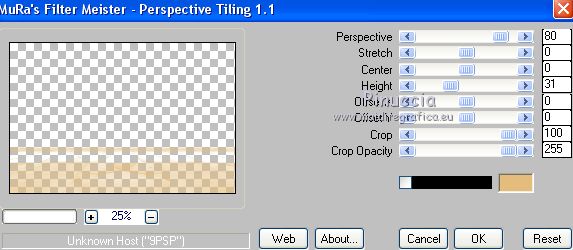
Effects>Plugins>Mura's Meister - Perspective Tiling.

9.
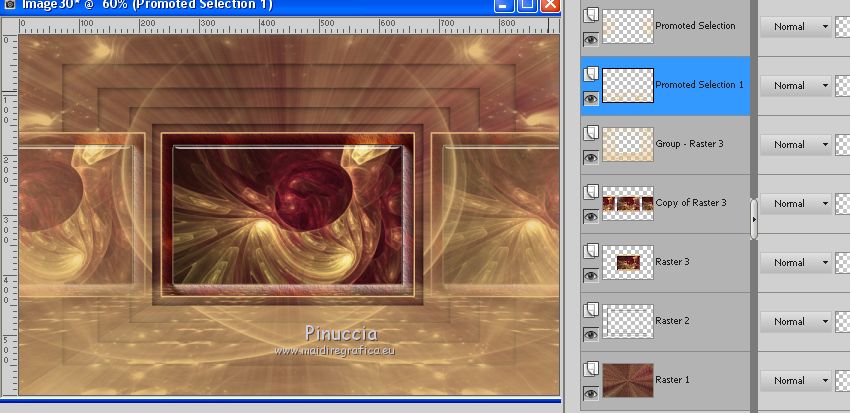
You are on the layer Promoted Selection 1.

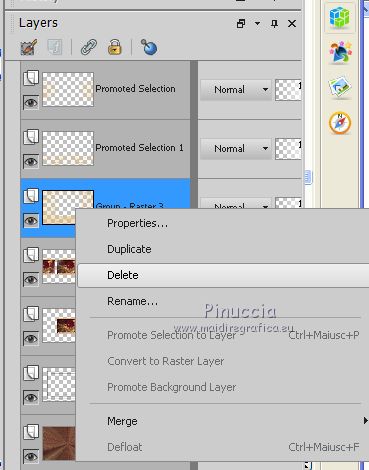
Activate the layer below (Group-Raster 3).
Right click on the layer and Delete

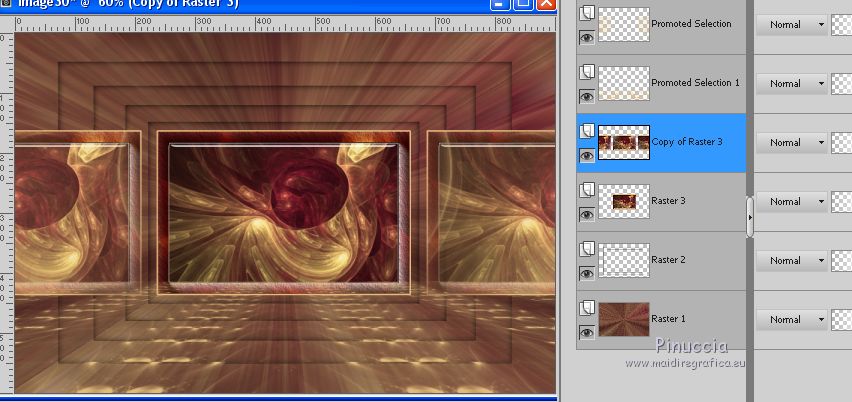
And you will be back on the layer Copy of Raster 3.

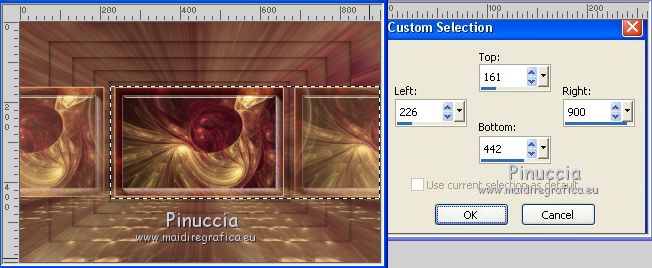
Custom Selection 

Press CANC on the keyboard.
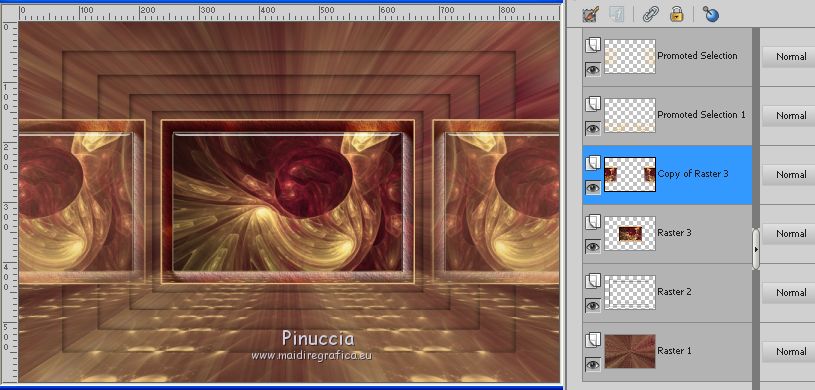
Selections>Select None.
Layers>Duplicate.
Image>Mirror.
Layers>Merge>Merge Down.
We are on the 3rd layer from the top (Copy of Raster 3).

10.
Layers>Merge>Merge Down.
Layers>Duplicate.
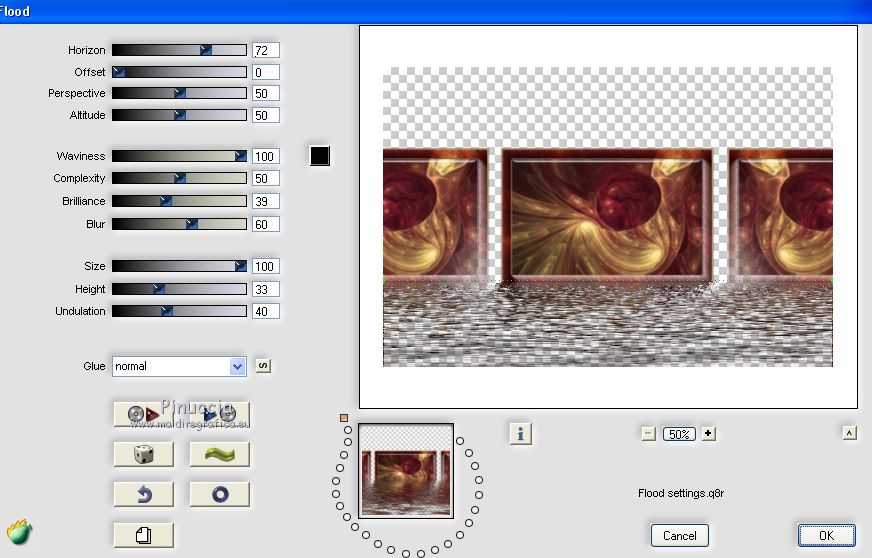
Effects>Plugins>Flaming Pear - Flood.

Reduce, if you want, the opacity of this layer about to 80%
(for my 2 versions I did it).
Layers>Duplicate.
Image>Renverser.
Layers>Merge>Merge Down.
Again reduce the opacity of this layer about to 80%
(I did it for my 2 versions).
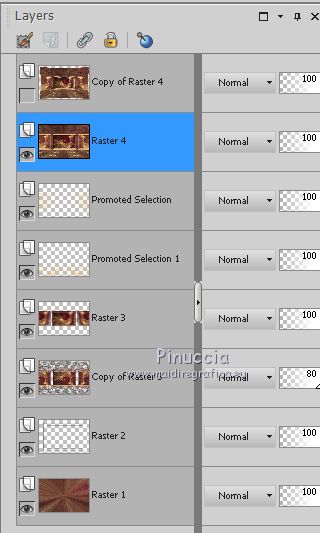
Layers>Arrange>Move Down.
11.
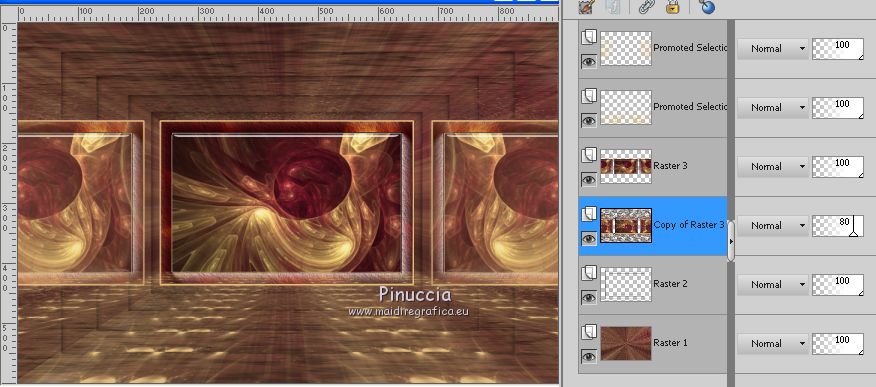
You should have this.
You are on the layer Copy of Raster 3.

Edit>Copy Special>Copy Merged.
Activate the top layer (Promoted Selection).
Edit>Paste as new layer.
Layers>Duplicate.
12.
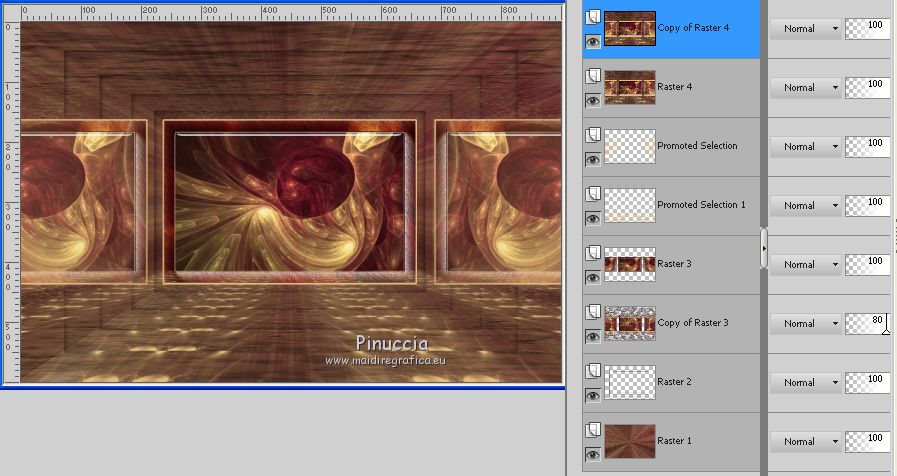
Now you are on the layer Copy of Raster 4.

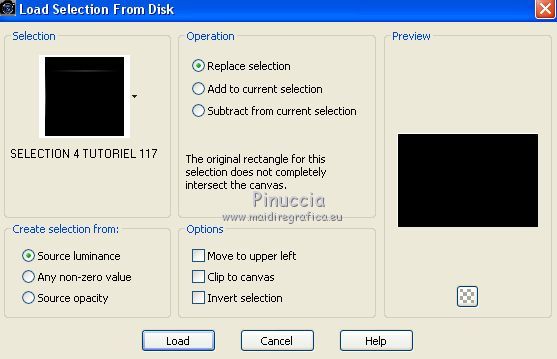
Selections>Load/Save Selection>Load Selection from Disk.
Look for and load the selection sélection4.

Flood Fill  the selection with your background color. the selection with your background color.
Selections>Select None.
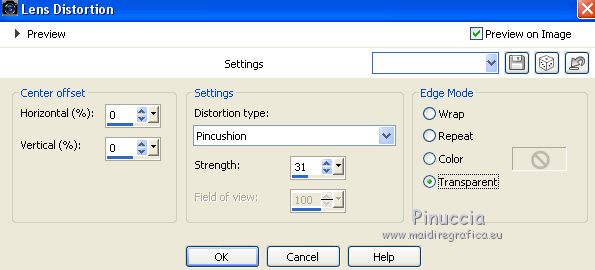
Effects>Distorsion Effects>Lens Distortion.

Close this layer
and go back to the layer below (Raster 4)

13.
Effects>Distortion Effects>Lens Distortion, same settings.
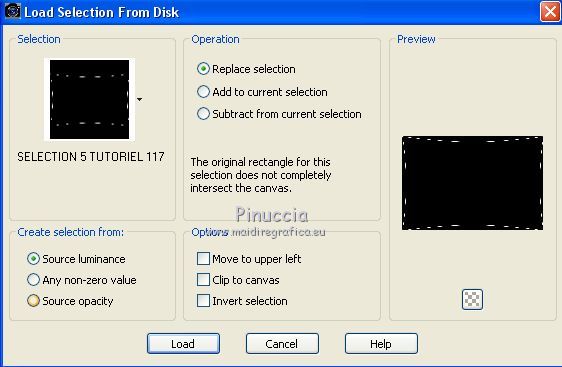
Selections>Load/Save Selection>Load Selection from Disk.
Look for and load the selection sélection5.

Layers>New Raster Layer.
Flood Fill  the selection with your background color. the selection with your background color.
Selections>Select None.
14.
Open again and activate the layer above (Copy of Raster 4).

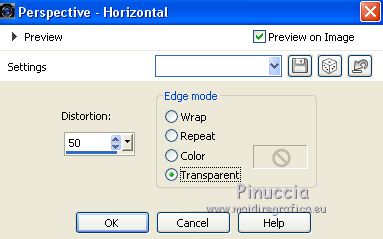
Effects>Geometric Effects>Perspective Horizontal

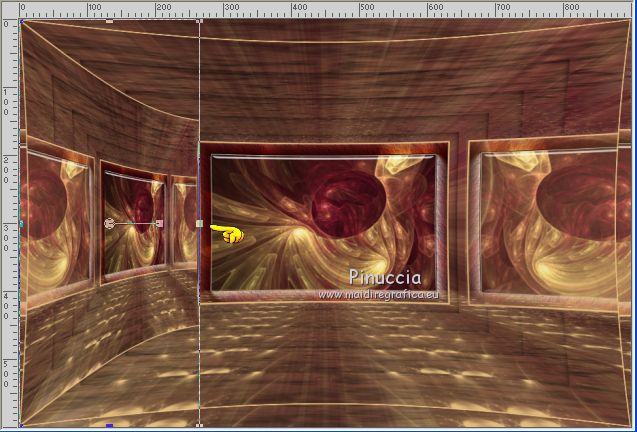
K key to activate the Pick Tool 
Mode Échelle 
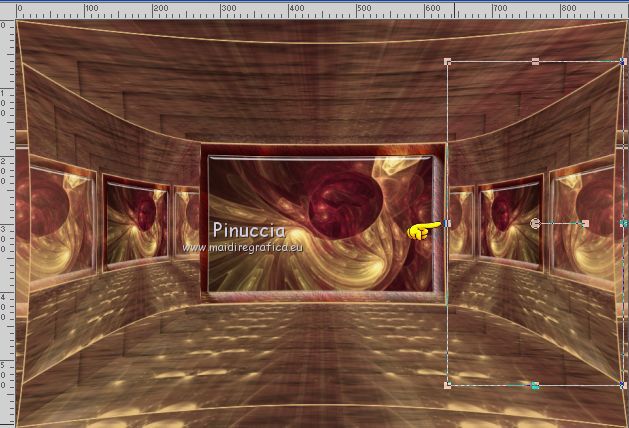
pull the central left node to the left as below

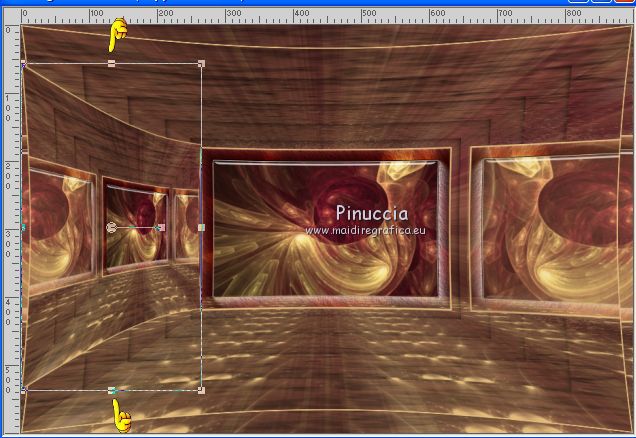
After, pull the central top node down, and the central top node up, as below.

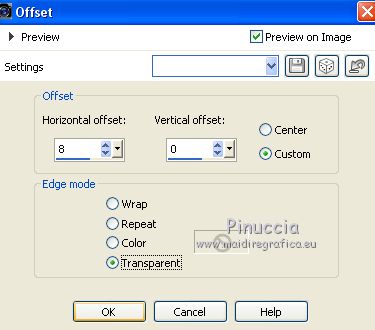
Effects>Image Effects>Offset.

Layers>Duplicate.
Image>Mirror.
Move this layer as below

Layers>Merge>Merge Down.
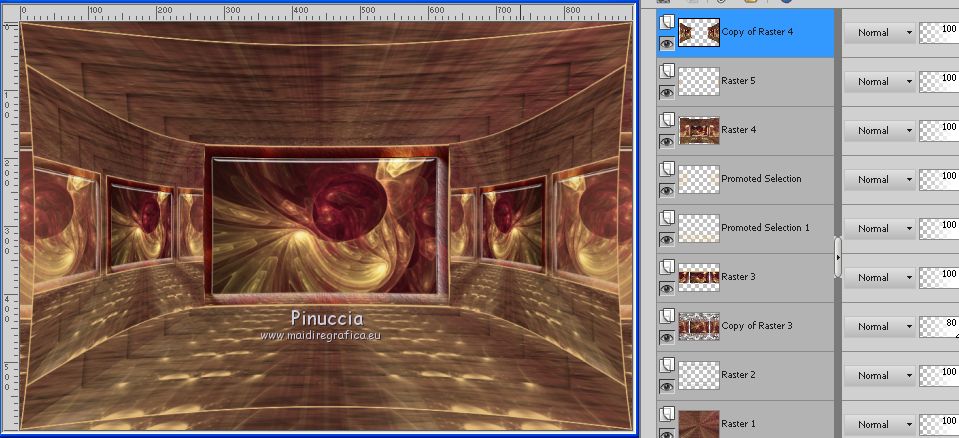
15.
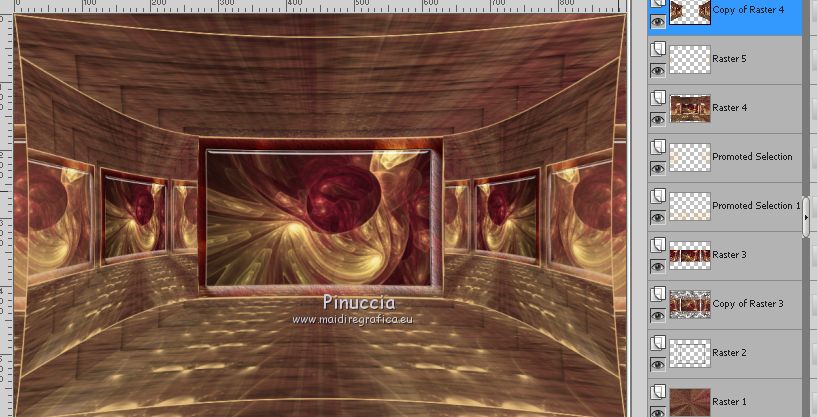
You should have this

Keep the top layer selected (Copy of Raster 4).
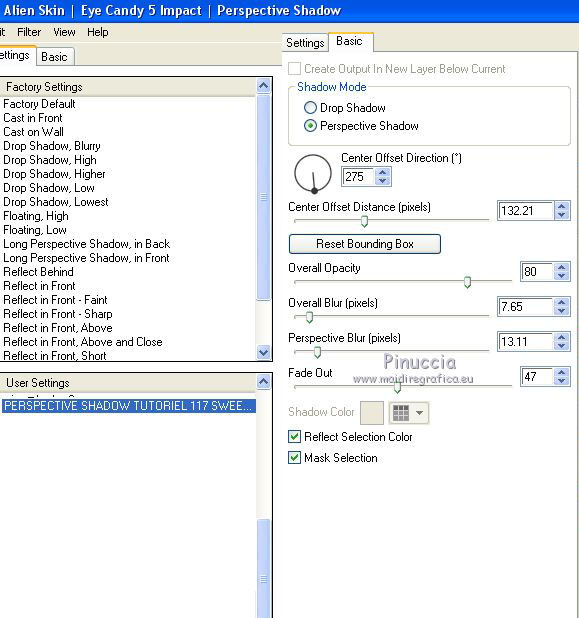
Effects>Plugins>Alien Skin Eye Candy 5 Impact - Perspective Shadow.
Select the preset PERSPECTIVE SHADOW TUTORIAL 117 SWEETY and ok.

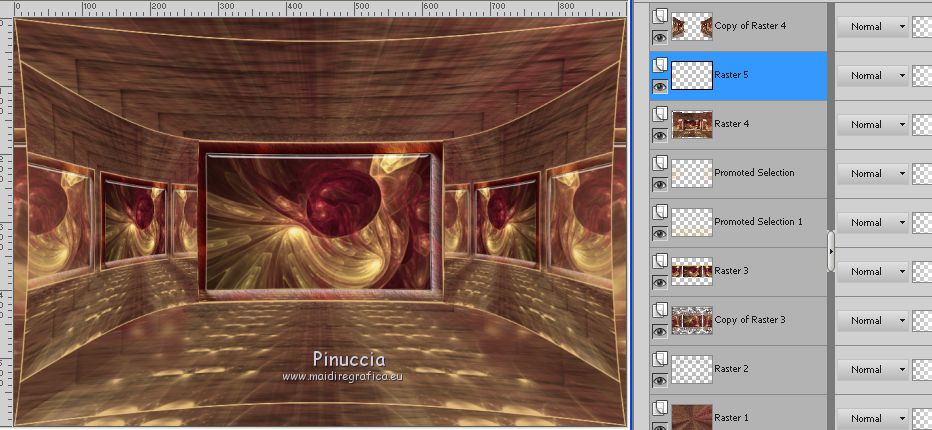
16.
Activate the layer below (Raster 5).

Custom Selection 

Press CANC on the keyboard.
Selections>Select None.
Layers>Merge>Merge Down.
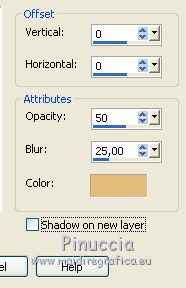
Effects>3D Effects>Drop Shadow, background color.

17.
Open the tube déco perso 2 - Edit>Copy.
Go back to your work and go to Edit>Paste as new layer.
Don't move it.
Layers>Arrange>Bring to Top.
Change the Blend Mode of this layer to Luminance (legacy), or colorize it.
18.
Image>Add borders,2 pixels, symmetric, background color.
Selections>Select All.
Image>Add borders, 40 pixels, symmetric, whatever color.
Selections>Invert.
Activate again your fractal image. Sur cette image:
Effects>Image Effects>Seamless Tiling.

Edit>Copy.
Go back to your work and go to Edit>Paste into Selection.
Effects>Plugins>AAA Frames - Texture Frame, same settings.

Effects>Plugins>AAA Frames - Foto Frame.

Effects>3D Effects>Drop Shadow, color black.

Selections>Select None.
19. THE TUBES
Copy/Paste your tubes and place them and apply Drop Shadow at your choice.
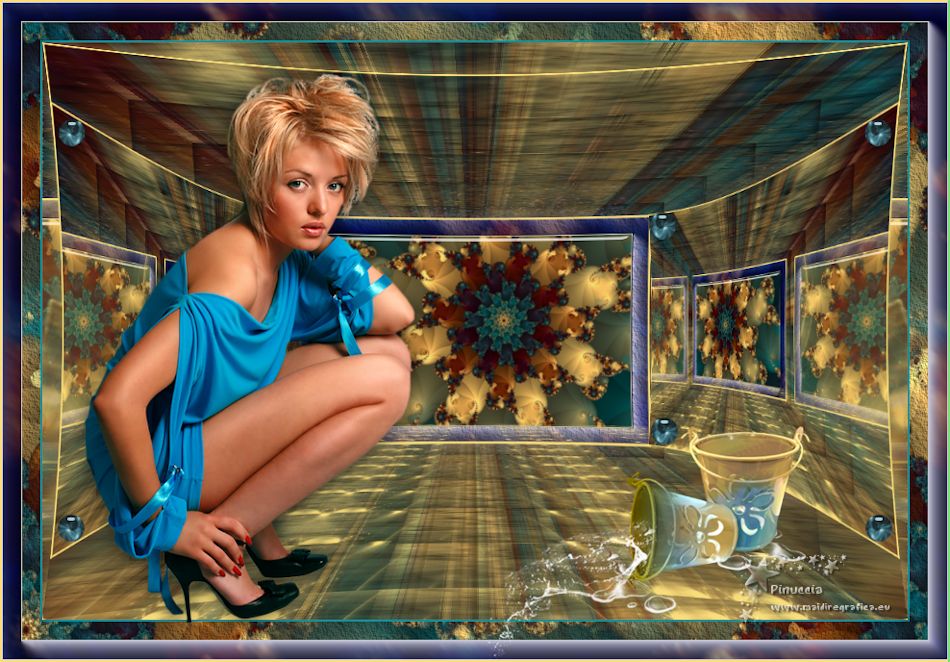
1st version:
Woman: TubeClaudiaVizaMujer2367 (received sharing groups and not supplied)
Image>Resize, to 75%, resize all layers not checked.
Deco - (from Internet and not supplied). I resized it to 30%.
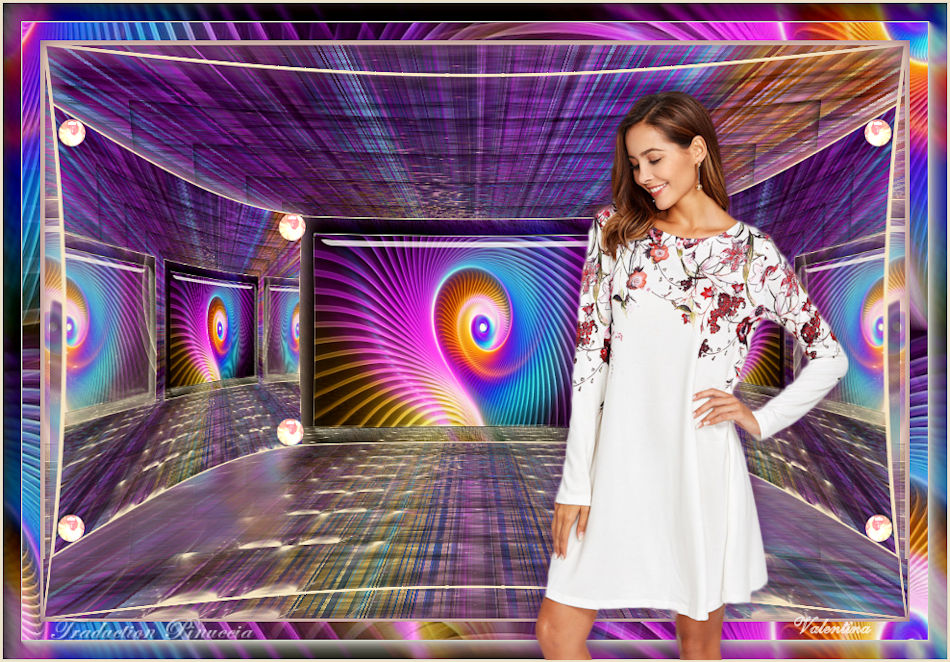
2nd version:
Woman: Bicharita-Lixtones-Axules-Por barullo.psp (received sharing groups and not supplied)
Resized to 85%, resize all layers not checked.
Deco (from Internet and not supplied). I resized 2 times to 80%.
20. FINAL STEP
Image>Add borders, 2 pixels, symmetric, background color.
Sign your work on a new layer.
Layers>Merge>Merge All.
Image>Resize, 950 pixels width, resize all layers checked.
Save as jpg.


Your versions
Thanks

Valentina

Trudy

Lina

If you have problems or doubts, or you find a not worked link, or only for tell me that you enjoyed this tutorial, write to me.
25 August 2018
|
 english version


 the layer with your background color.