|
TUTORIAL 115
 english version english version
Thank you Sweety for your invitation to translate your tutorial.
Here you find the original of this tutorial:

This tutorial is a personal creation of Sweety and it is prohibited to copy or distribute it on the net (forums, groupes.. etc), or to use it on commercials sites.
This tutorial was created with CorelX12 and translated with Corel13, but it can also be made using other versions of PSP.
Since version PSP X4, Image>Mirror was replaced with Image>Flip Horizontal,
and Image>Flip with Image>Flip Vertical, there are some variables.
In versions X5 and X6, the functions have been improved by making available the Objects menu.
In the latest version X7 command Image>Mirror and Image>Flip returned, but with new differences.
See my schedule here
For this tutorial, you will need:
Tube, landscapes and decos at your choice.
The rest of the material here
Images not supplied:
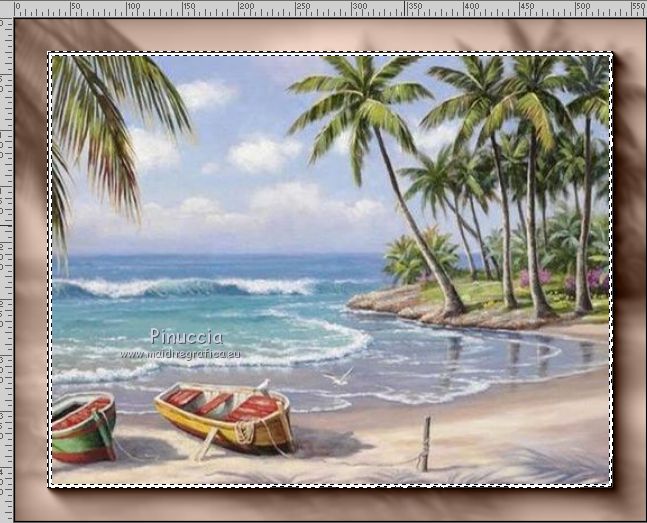
Image landscape: 51C180F65E7478CC91 (from Google Image)
Woman: 7e46c8a0.png (from Google Image)
Bird: 0-1449f1-64ee9c27-L (from Google Image)
2nd versions:
Image landscape: (from Google Image)
Woman: 141424429-devushki-2
Animal: Zényra-Animaux (111) (received from sharing)
Plugins
consult, if necessary, my filter section here
Mura's Meister - Cloud here
Mura's Meister - Perspective Tiling here
AAA Frames - Foto Frame here

You can change Blend Modes according to your colors.
Copy the Selections in the Selections Folder.
Open your landscape and choose 2 colors:
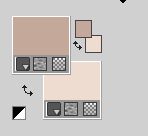
Set your foreground color to the dark color, for me #c4a89a,
and your background color to the light color, for me #eedcd0.
Your image must have these dimensions: 564 width - 449 height.
Otherwise, do this:
Open a new transparent image 564 x 449 pixels.
Selections>Select All.
Open your image and go to Edit>Copy.
Go back to the image 564x449 and go to Edit>Paste into Selection.
Selections>Select None, and minimize this image.
*****
Now we can begin:
Open a new transparent image 900 x 600 pixels.
Effects>Plugins>Mura's Meister - Cloud
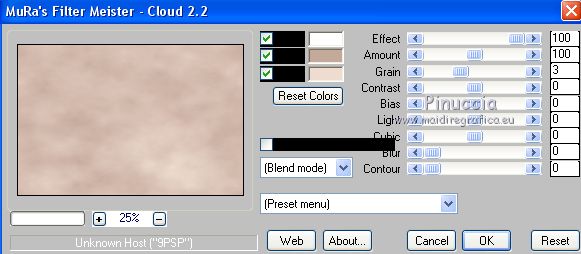
Remember that this filter works with the colors of your materials palette,
but keeps in memory the first settings from the opening of your PSP.
So if you have already used the filter, to make sure you have set the correct colors, press the Reset button.
The result is random and for this reason it will not be the same as mine.
If you want to change the appearance of the clouds, click on the preview window,
until you see what you prefer.
Effects>Art Media Effects>Brush Strokes, color white.
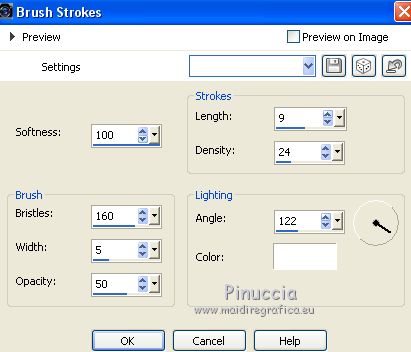
Effects>Image Effects>Seamless Tiling, Side by side.

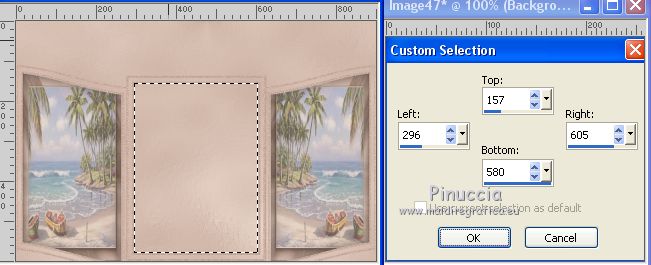
2. Selection Tool 
(no matter the type of selection, because with the custom selection your always get a rectangle)
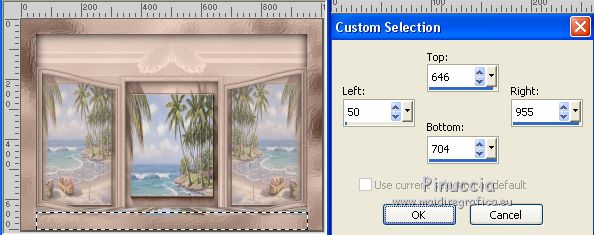
clic on the Custom Selection 
and set the following settings.
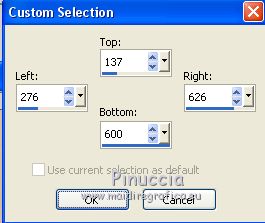
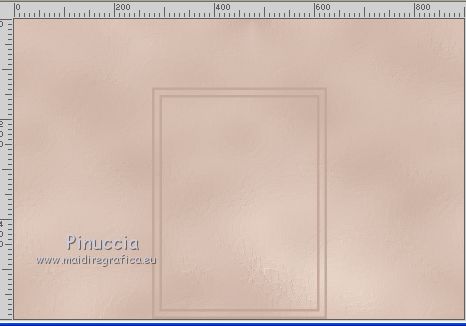
Selections>Promote Selection to Layer.
Flood Fill  with your foreground color. with your foreground color.
Selections>Modify>Contract - 5 pixels.
Press CANC on the keyboard 
Selections>Modify>Contract - 10 pixels.
Flood Fill  with your foreground color. with your foreground color.
Selections>Modify>Contract - 5 pixels.
Press CANC on the keyboard
Selections>Select None.

3. Layers>Duplicate.
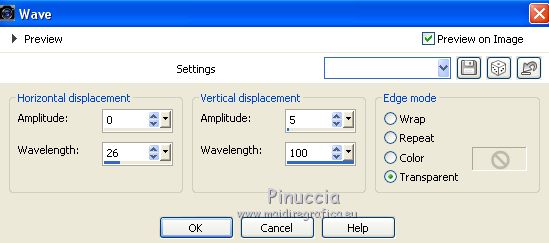
Effects>Distortion Effects>Wave.

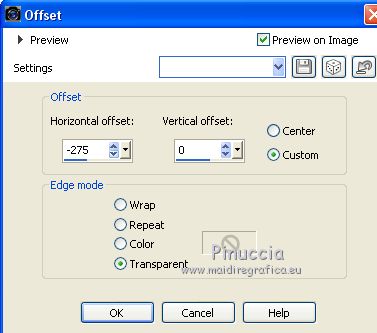
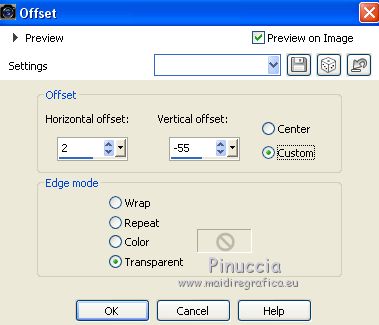
Effects>Image Effects>Offset.

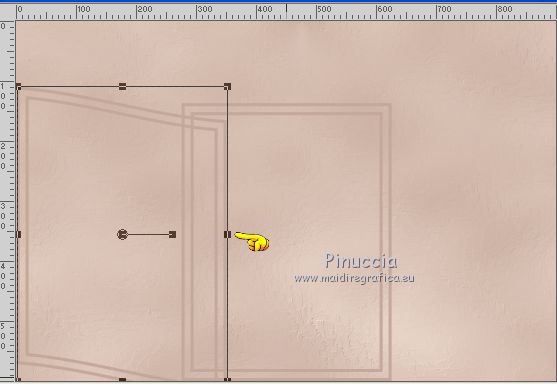
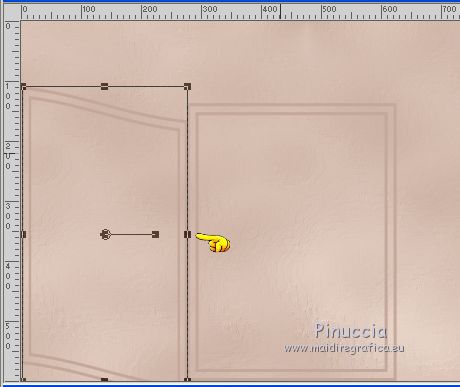
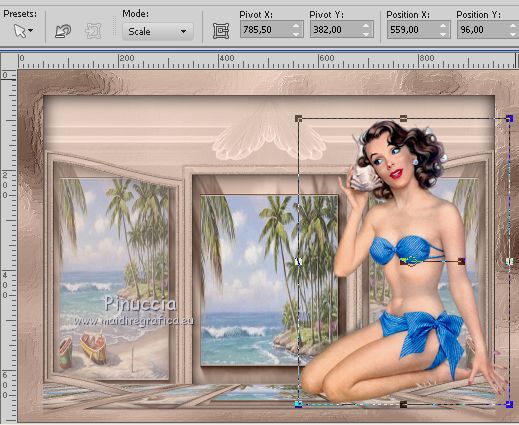
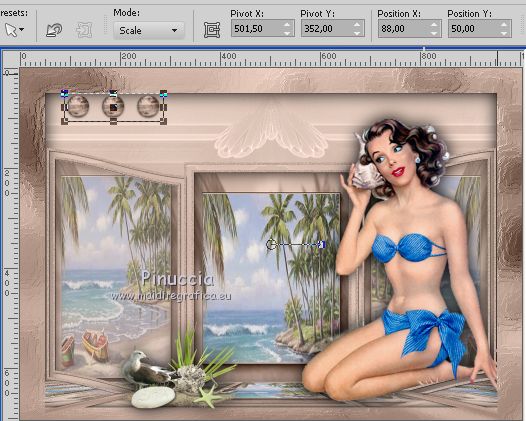
K key on the keyboard to activate the Pick Tool 
mode Scale 
push the central left node

to the left as below

M key to deselect the Tool.
Layers>Duplicate.
Image>Mirror.
Layers>Merge>Merge Down.
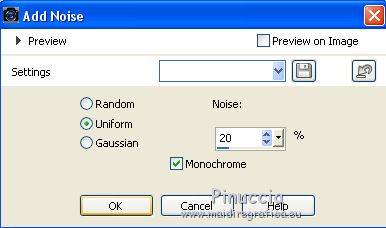
4. Adjust>Add/Remove Noise>Add Noise.

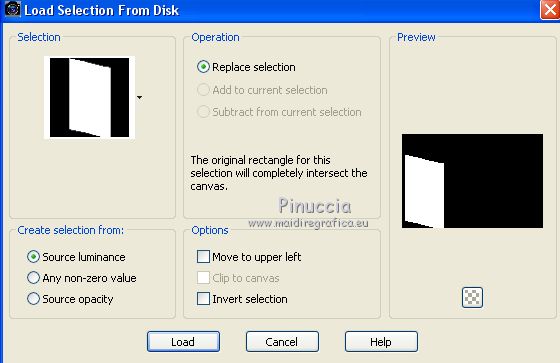
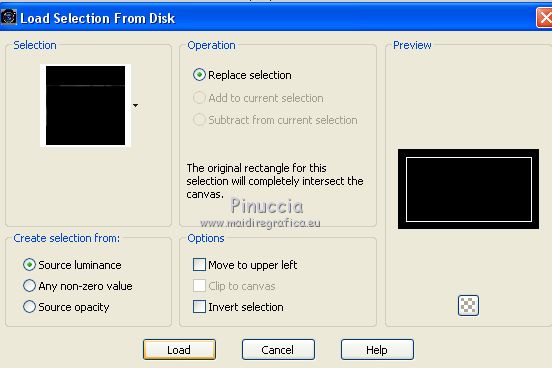
Selections>Load/Save selection>Load selection from Disk.
Look for and load the sélection#1.

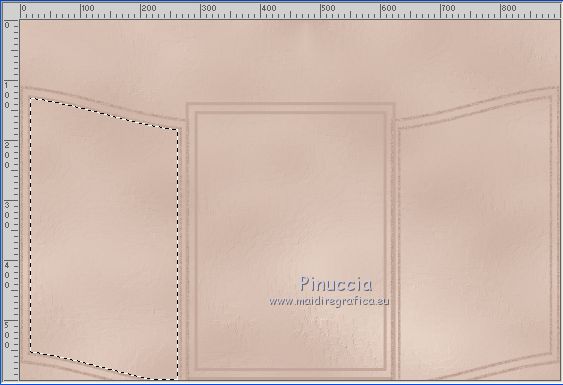
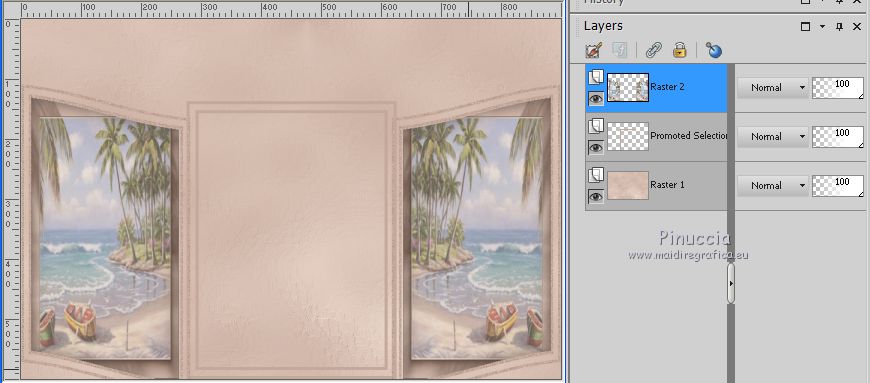
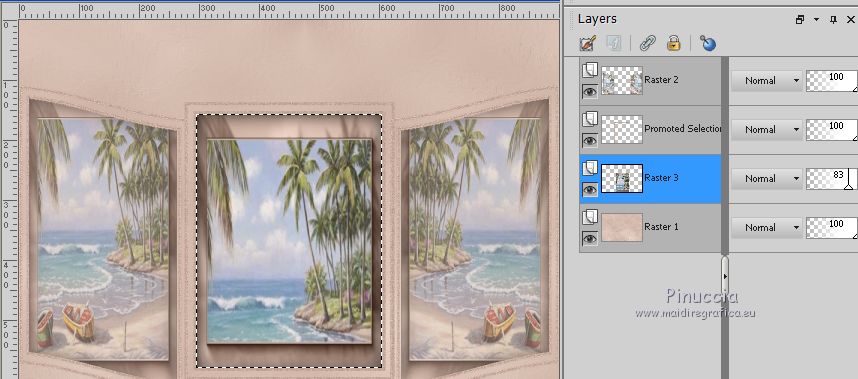
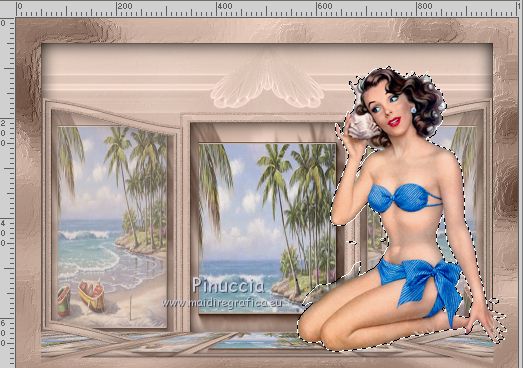
If all is right, you should have this:
if the selection is not correctly positioned, hold the right mouse button on the selection,
and position it correctly.

Layers>New Raster Layer.
Layers>Arrange>Move Down.
Minimize your work for a moment.
We'll go to work on our landscape image.
5. Activate your landscape image.
Duplicate this image with shift+D 2 times, to have 2 copy of your landscape.
Minimized the copies and work on the original.
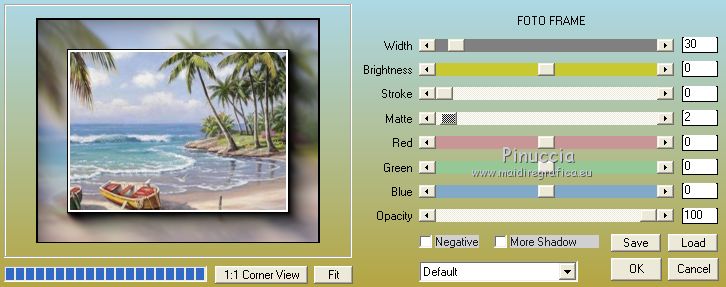
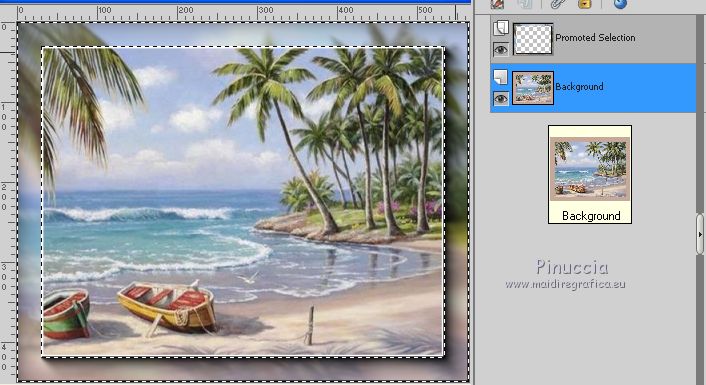
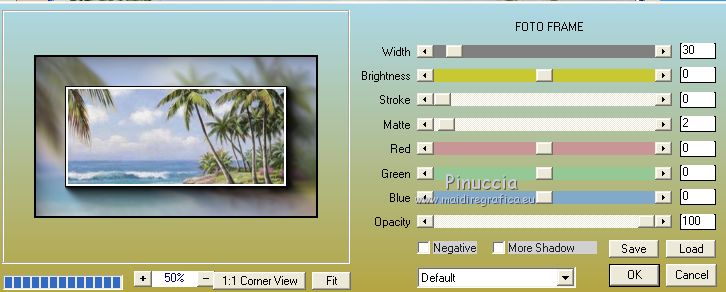
Effects>Plugins>AAA Frames - Foto Frame.

Selections>Select All.
Selections>Modify>Contract - 30 pixels.
Selections>Invert.
Selections>Promote Selection to layer.
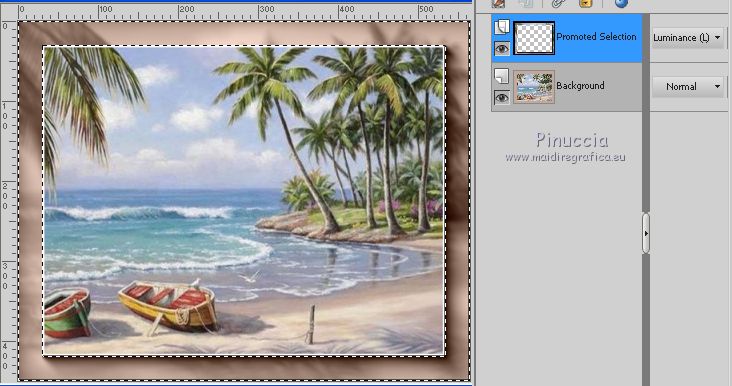
Go back to the layer below, raster 1.
Flood Fill  with your foreground color. with your foreground color.
you don't see the flood fill, don't worry, it is normal, because the color is covered by the layer above

Again activate the top layer.
Change the Blend Mode of this layer to Luminance (L) or as you prefer.

Layers>Merge>Merge Down.
Selections>Select None.
OPTIONAL:
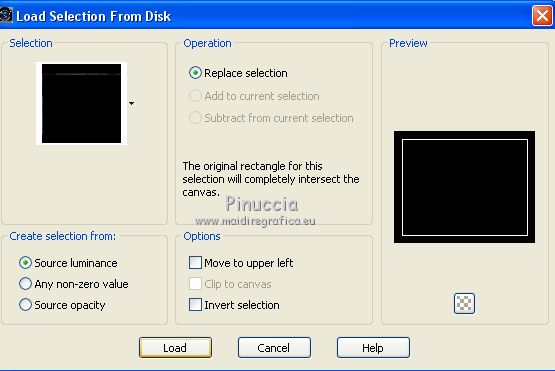
Selections>Load/Save selection>Load selection from Disk.
Look for and load the sélection#2.

Flood Fill  with your foreground or background color. with your foreground or background color.
Selections>Select None.
if the selection 2 doesn't fit with the edge of your image,
zoom and select the white border with your Magic wand tool 

Flood Fill  with your foreground or background color. with your foreground or background color.
Selections>Select None.
Edit>Copy.
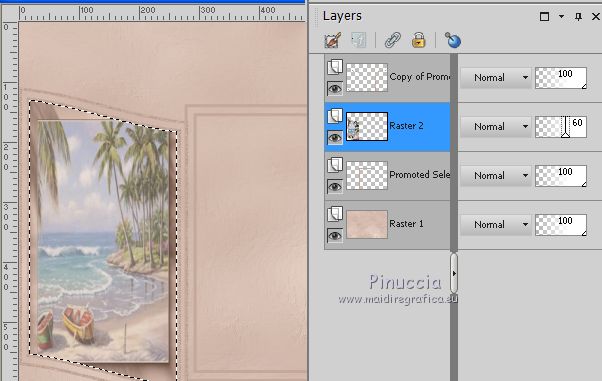
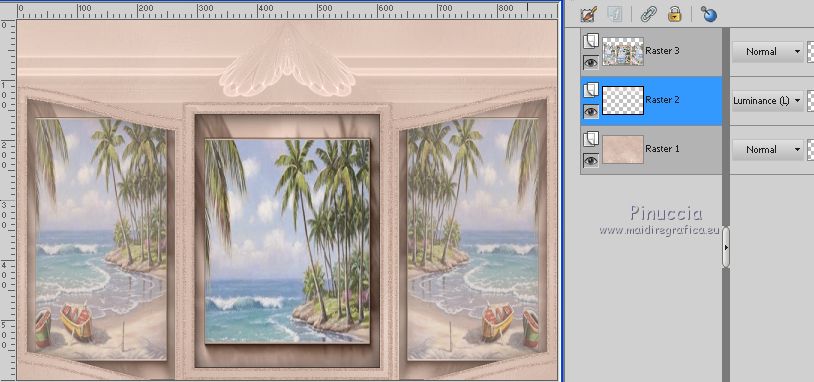
6. Go back to your work minimized at step 4.
Edit>Paste into Selection.
Reduce the opacity of this layer to 60% or acconding to your image
(for my 2nd version I reduced to 65%)

Selections>Invert.
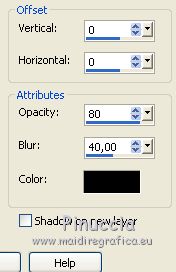
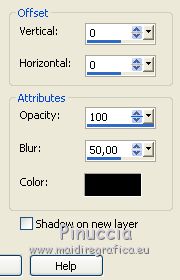
Effects>3D Effects>Drop Shadow, color black.

Selections>Select None.
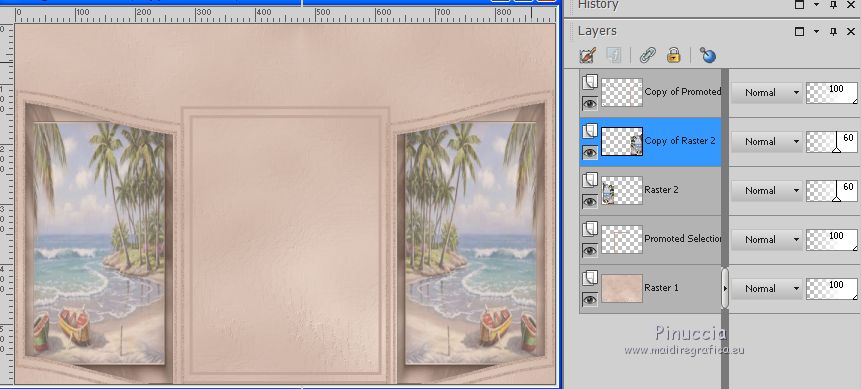
Layers>Duplicate.
Image>Mirror.
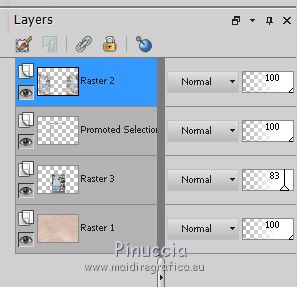
You should have this

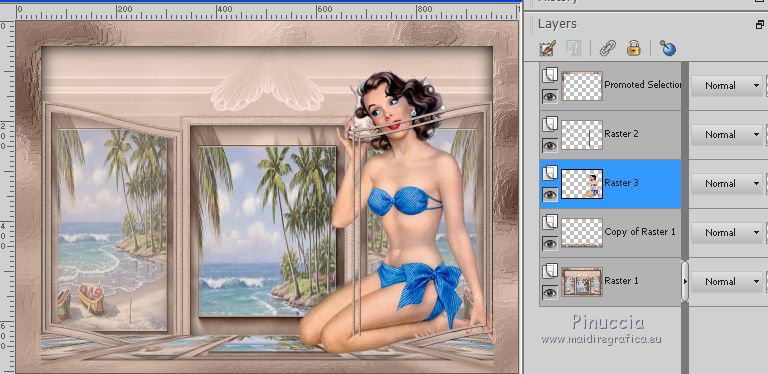
7. Activate the top layer (Copy of Promoted Selection).
Layers>Merge>Merge down - 2 times.

Adjust>Sharpness>Sharpen.
Minimize again your work and activate the copy of your landscape.
8. for my 2nd version I used again the landscape with the frame;
I simply copied it.
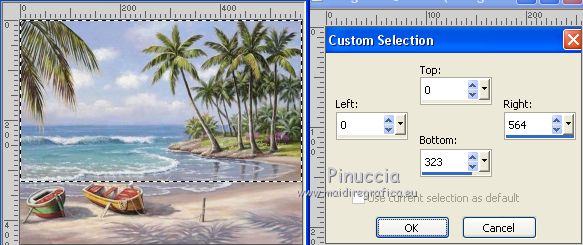
For my first version, I took a part of the landscape:
Custom Selection 

Image>Crop to Selection.
Effects>Plugins>AAA Frames - Foto Frame, same settings step 5.

9. Go on on this image:
Selections>Select All.
Select>Modify>Contract - 30 pixels.
Selections>Invert.
Selections>Promote Selection to Layer.
Activate again the layer below.
Flood Fill  with your foreground color. with your foreground color.
Again activate the top layer.
Change the Blend Mode of this layer to Luminance (L) or other.
Layers>Merge>Merge Down.
Selections>Select None.
10. Optional:
Always on this image:
Selections>Load/Save selection>Load selection from Disk.
Look for and load the sélection#3.

Flood Fill  with your foreground or background color. with your foreground or background color.
Selections>Select None.
if the selection 3 doesn't fit with the edge of your image,
zoom and select the white border with your Magic wand tool 
Flood Fill  with your foreground or background color. with your foreground or background color.
Selections>Select None.
Edit>Copy.
Go back to your work minimized at step 7.
11. We are on the top Layer, Raster 2.

Activate the layer above (Promoted Selection).
Adjust>Add/Remove Noise>Add noise, same settings step 4.

Custom Selection 

Layers>New Raster Layer.
Layers>Arrange>Move Down.
Edit>Paste into Selection (your image of step 10).
Selections>Invert.
Effects>3D Effects>Drop Shadow, color black.

Again Selections>Invert.
Reduce the opacity of this layer between 80 and 85%
(for my two version I set to 83%)

Adjust>Sharpness>Sharpen.
Selections>Select None.
12. Activate again the top layer, Raster 2.

Layers>Merge>Merge Down - 2 times.
Open the tube déco perso 1 - Edit>Copy.
Go back to your work and go to Edit>Paste as new layer.
Don't move it.
Change the Blend Mode of this layer to Luminance (L).
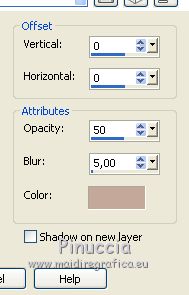
Effects>3D Effects>Drop Shadow, foreground color.

Layers>Arrange>Move Down.

13. Image>Add borders, 2 pixels, symmetric, foreground color.
Selections>Select All.
Image>Add borders, 50 pixels, symmetric, foreground color.
Selections>Invert.
Layers>New Raster layer.
Activate the second copy of your landscape original.
Edit>Copy.
Go back to your work and go to Edit>Paste into Selection.
Change the Blend Mode of this layer to Luminance (L).
Layers>Merge>Merge Down.
Effects>Art Media Effects>Brush Strokes, same settings.

Effects>3D Effects>Drop Shadow, color black.

Selections>Select None.
14. Layers>Duplicate.
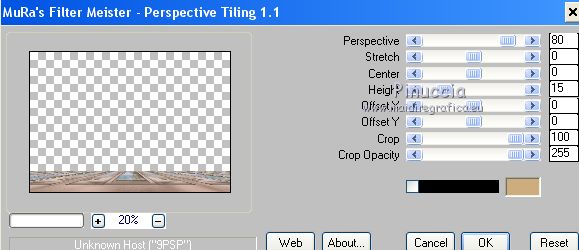
Effects>Plugins>Mura's Meister - Perspective Tiling.

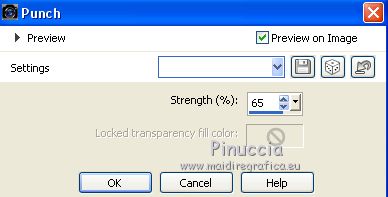
Effects>Distortion Effects>Punch.

Open the tube déco perso 2 - Edit>Copy.
Go back to your work and go to Edit>Paste as new layer.
Effects>Image Effects>Offset.

Colorize or change the Blend Mode, according to your colors.
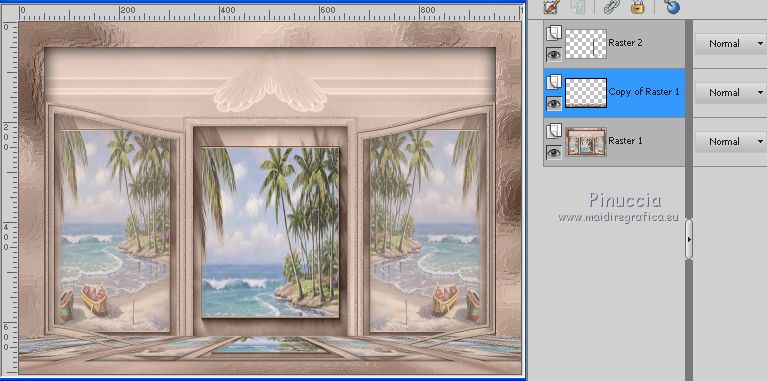
Activate the central layer, copy of Raster 1.

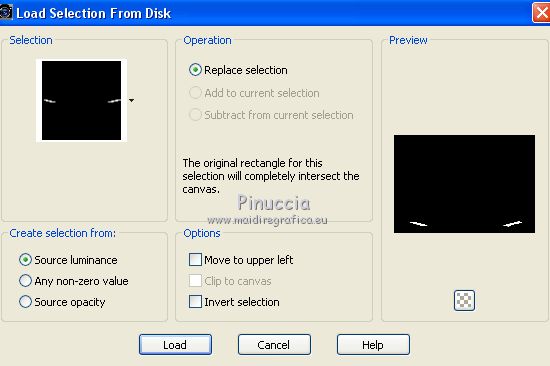
Selections>Load/Save selection>Load selection from Disk.
Look for and load the sélection#4.

Press CANC on the keyboard 
Selections>Select None.
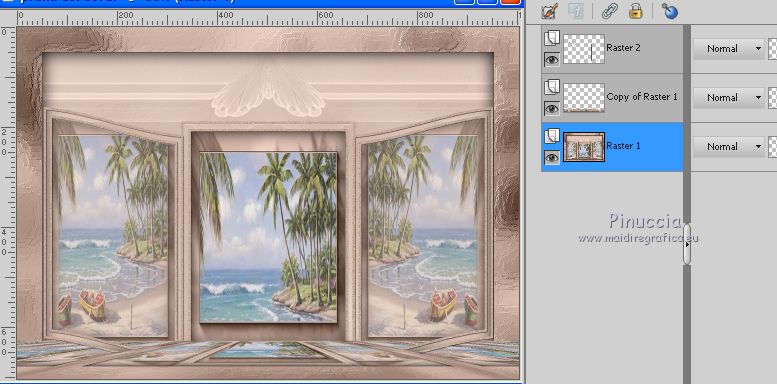
15. Activate the bottom layer, Raster 1.

Selections>Select All.
Selections>Modify>Contract - 50 pixels.
Selections>Invert.
Selections>Promote Selection to layer.
Layers>Arrange>Bring to Top.
Selections>Select None.
Custom Selection 

Press CANC on the keyboard.
Selections>Select None.
16. TUBES
For my first version:
bird: 0_1449f1_64ee9c27_L (from Internet and not supplied)
Resize: 50%.
Move at the bottom left.
woman tube: 7e46c8a0.png (from Internet and not supplied)
Resize to 130%.
I erased the shell that was next to the woman.
K key to activate the Pick tool 

OPTIONAL:
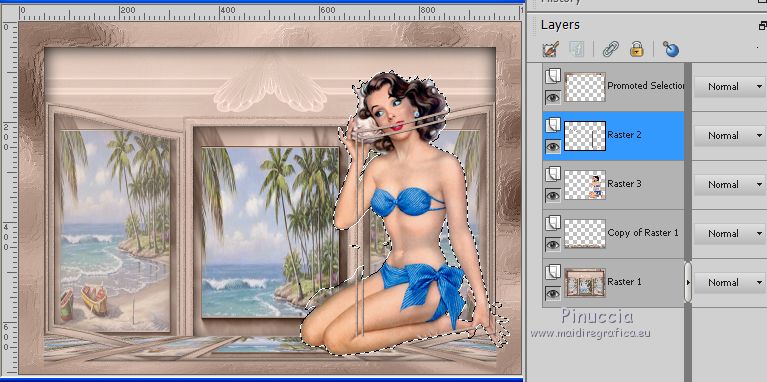
Layers>Arrange>Move down - 2 times

Selections>Selectionner tout.
Selections>Float.
Selections>Defloat.
Activate the layer above Raster 2.

Press CANC on the keyboard.

Selections>Select None.
Activate again the layer below, Raster 4.
Effects>3D Effects>Drop Shadow, at your choice.
Second version:
woman tube: 141424429-devushki-2 by Sveras (not supplied)
I didn't resized.
Effects>3D Effects>Drop Shadow, at your choice.
Animal tube: Zényra –Animaux (111) – (Received by sharing and not supplied)
Resize 45%.
Effects>3D Effects>Drop Shadow, at your choice.
17. Open the tube déco perso 3 - Edit>Copy.
Go back to your work and go to Edit>Paste as new layer.
K key to activate the Pick Tool 

Change the Blend Mode of this layer to Luminance (L), or according to your colors.
FINAL STEP.
Sign your work on a new layer.
Layers>Merge>Merge All.
Image>Resize, 950 pixels width, resize all layer checked.
Save as jpg.


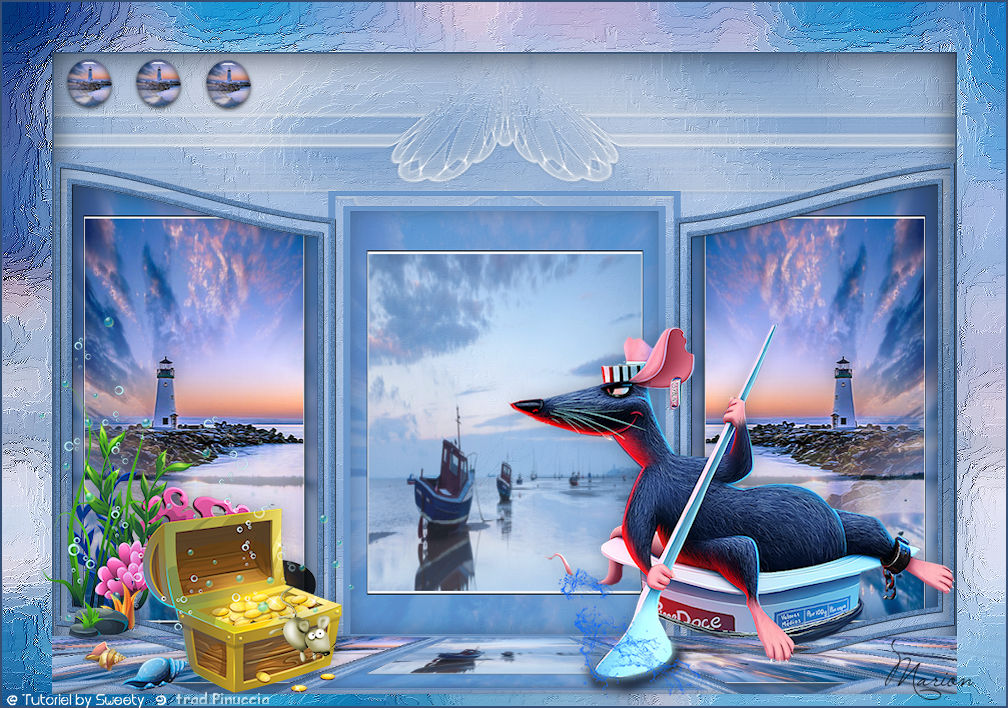
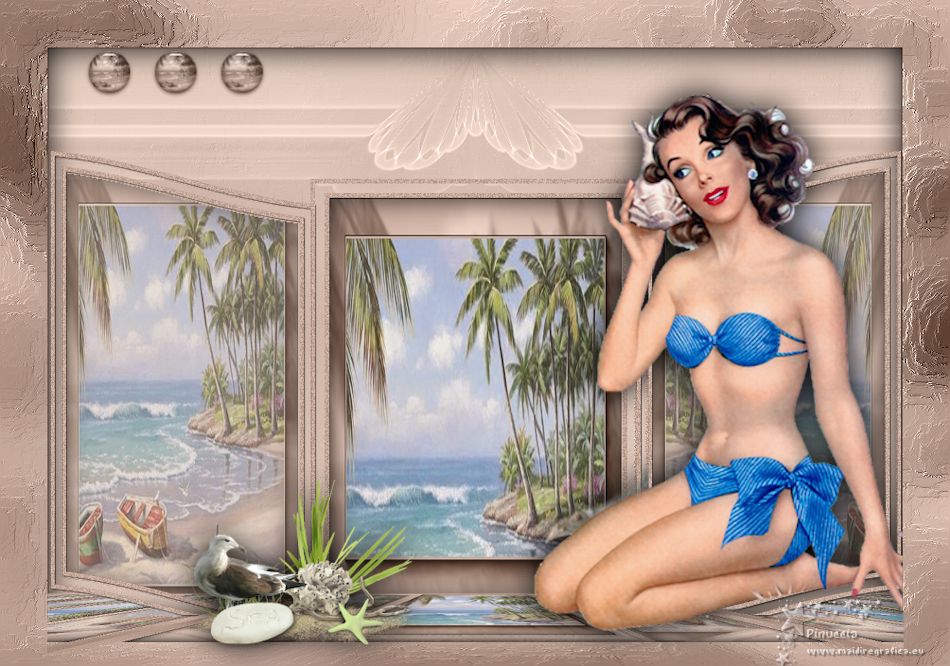
Your versions. Thanks

Marion

If you have problems or doubts, or you find a not worked link, or only for tell me that you enjoyed this tutorial, write to me.
23 Juillet 2018
|
 english version


 with your foreground color.
