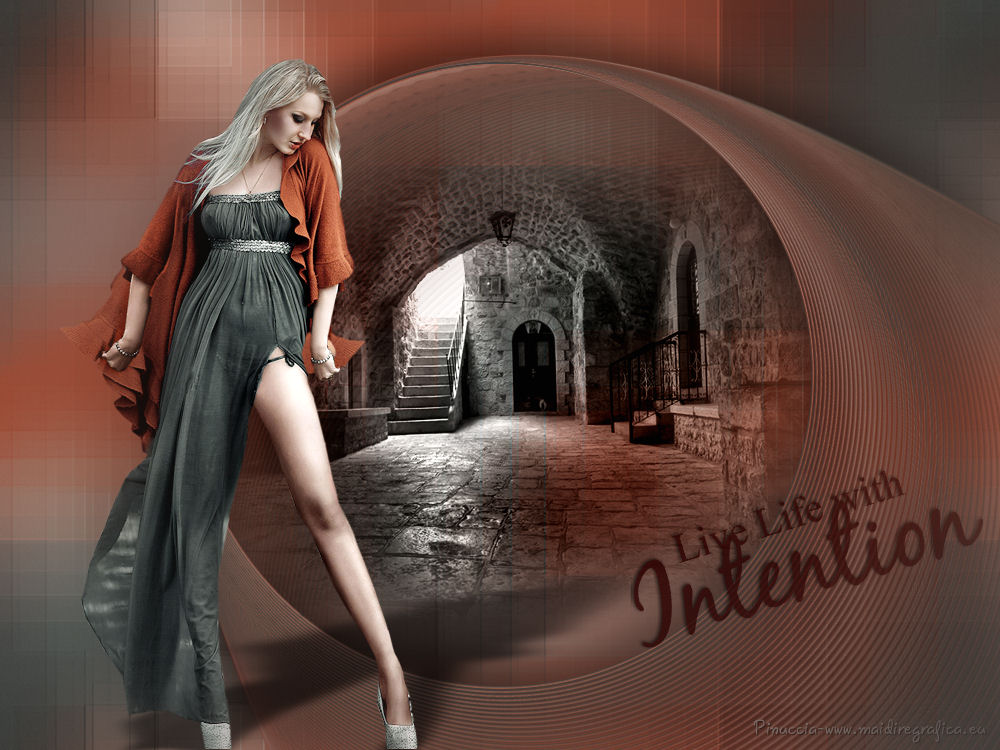
This tutorial was created with PSPX7 but it can also be made using other versions of PSP.
Since version PSP X4, Image>Mirror was replaced with Image>Flip Horizontal,
and Image>Flip with Image>Flip Vertical, there are some variables.
In versions X5 and X6, the functions have been improved by making available the Objects menu.
In the latest version X7 command Image>Mirror and Image>Flip returned, but with new differences.
See my schedule here
Italian translation here
French translation here
Your versions here
For this tutorial, you will need:
Material here
Tube Ana Ridzi 1195
Tube landscape mistedpaisajes223-Hebe
Mask 20-20
Plugins
consult, if necessary, my filter section here
Mura's Meister - Perspective Tiling here>
Filters Unlimited 2.0 here
Mura's Meister - Pole Transform here
Nik Software - Color Efex here
Alien Skin Eye Candy 5 Impact - Perspective Shadow here
Filter Factory Gallery H - Alias Blur here
Filters Factory Gallery can be used alone or imported into Filters Unlimited.
(How do, you see here)
If a plugin supplied appears with this icon  it must necessarily be imported into Unlimited

You can change Blend Modes and opacity of the layer, according to your colors.
Copy the preset Emboss 3 in the Presets Folder.
Copy the Gradient in the Gradients Folder.
Copy the mask in the Masks Folder.
1. Set your foreground color to #a35139,
and your background color to #7f7e7d.

Set your foreground color to Gradient, and select the gradient SuiGrad016, style Linear.
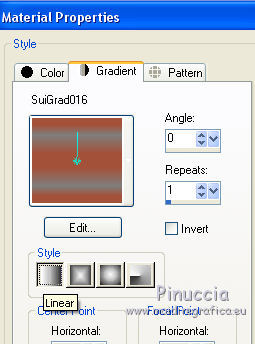
2. Open a new transparent image 1000 x 750 pixels,
Flood Fill  with your Gradient.
3. Selections>Select All.
Open the tube AnaRidzi 1195, Edit>Copy.
don't close the tube; you'll use it later
Go back to your work and go to Edit>Paste into Selection.
Selections>Select None.
4. Effects>Image Effects>Seamless Tiling.

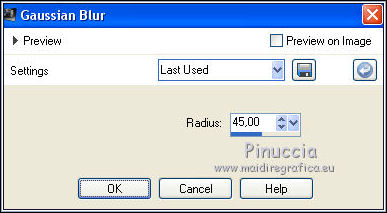
5. Adjust>Blur>Gaussian Blur - radius 45.
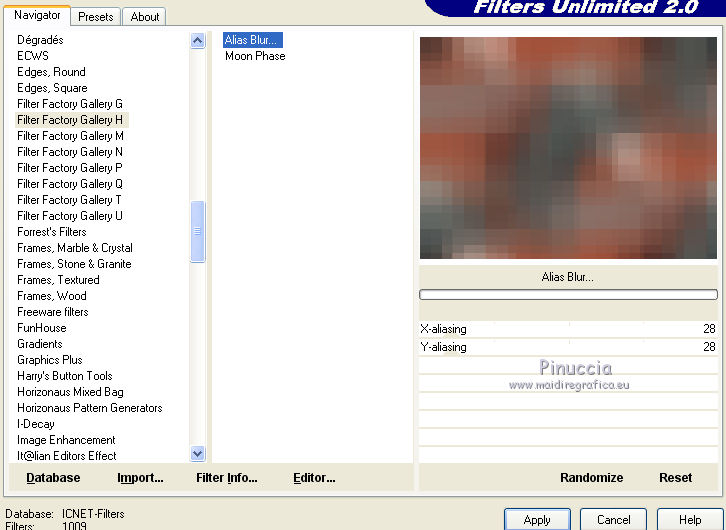
6. Effects>Plugins>Filters Unlimited 2.0 - Filter Factory Gallery H - Alias Blur.
7. Effects>User Defined Filter - select the preset Emboss 3 and ok.

8. Effects>Image Effects>Seamless Tiling, same settings.

9. Open the landscape mistedpaisajes223-Hebe - Edit>Copy.
Go back to your work and go to Edit>Paste as new layer.
10. Layers>Load/Save Mask>Load Mask from disk.
Look for and Load the mask 20-20.

Layers>Duplicate.
Layers>Merge>Merge Group.
11. Change the blend mode of this layer to Luminance (legacy).
12. Activate the layer Raster 1.
Layers>Duplicate.
Layers>Arrange>Bring to Top.
13. Effects>Geometrics Effects>Perspective horizontal.
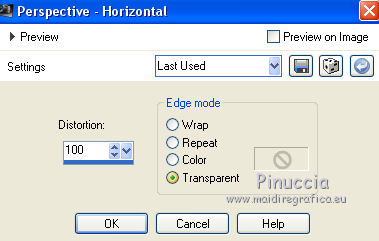
14. Image>Mirror.
Repeat Effects>Geometrics Effects>Perspective horizontal.

15. Effects>Distortion Effects>Pinch.

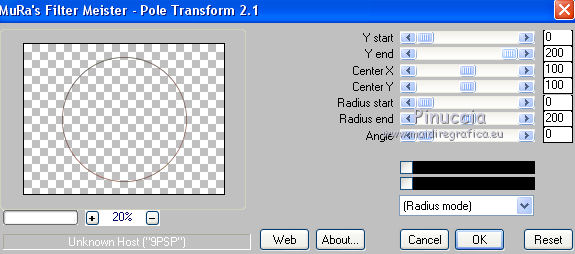
16. Effects>Plugins>Mura's Meister - Pole Transform.
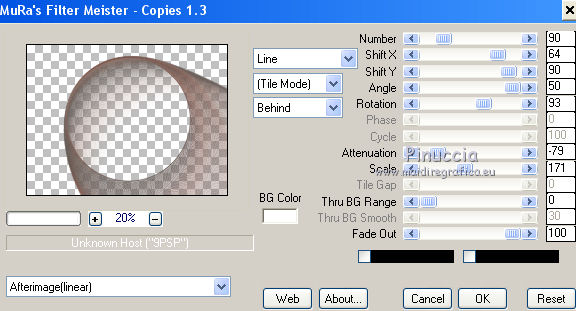
17. Effects>Plugins>Mura's Meister - Copies.
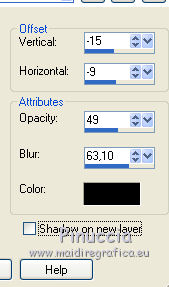
18. Effects>3D Effects>Drop Shadow.
19. Activate again the tube Ana Ridzi 1195, Edit>Copy.
Go back to your work and go to Edit>Paste as new layer.
Image>Resize, to 70%, resize all layers not checked.
20. Effects>Image Effects>Offset.

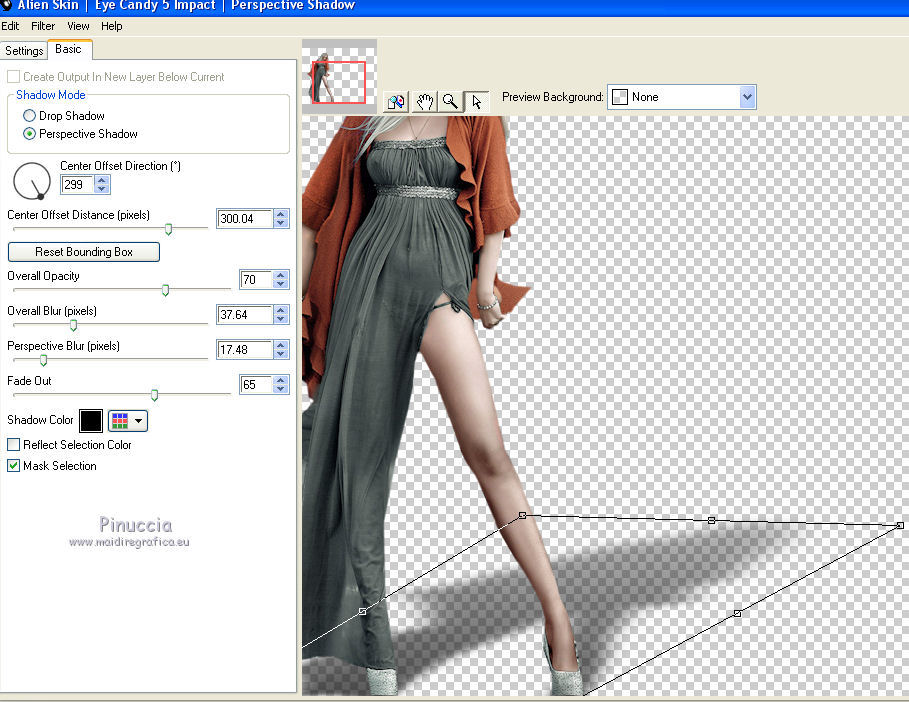
21. Effects>Plugins>Alien Skin Eye Candy 5 Impact - Perspective Shadow.

22. Open the wordart (or, if you prefer, write a texte) - Edit>Copy.
Go back to your work and go to Edit>Paste as new layer.
Place  the text where you want.
23. Layers>Merge>Merge All.
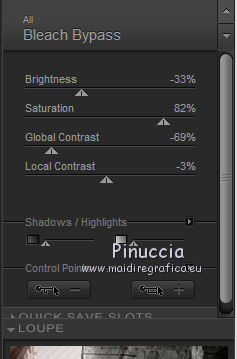
24. Effects>Plugins>Nik Software - Color Efex Pro - Bleach Bypass.
25. Effects>Plugins>Nik Software - Color Efex Pro - Vignette Blur.

26. Sign your work and save as jpg.

If you have problems or doubt, or you find a not worked link, or only for tell me that you enjoyed this tutorial, write to me.
12 September 2015
