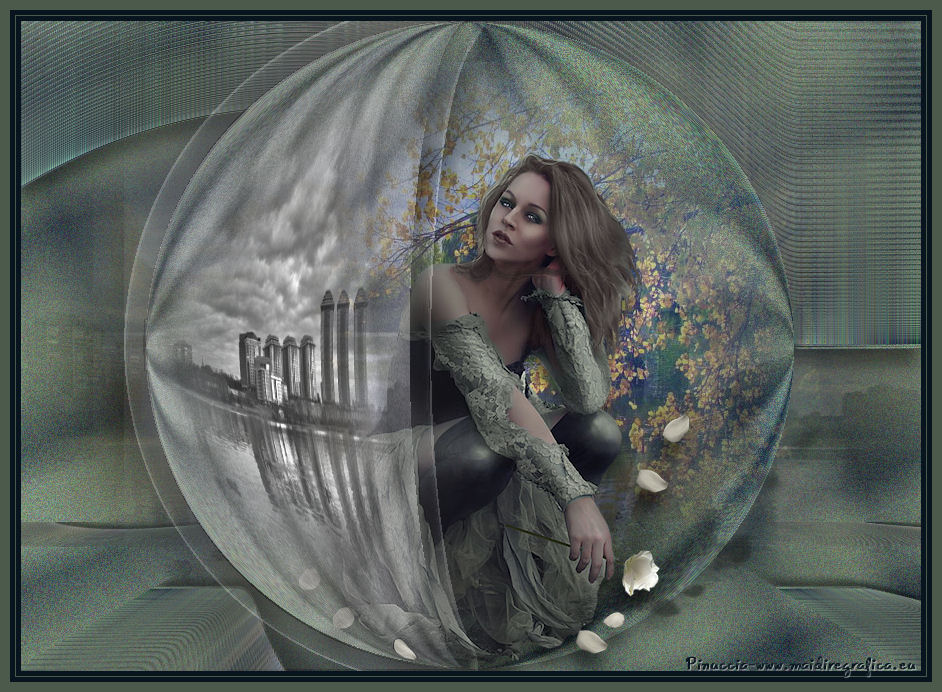
This tutorial was created with Corel X7 and translated with Corel X3, but it can also be made using other versions of PSP.
Since version PSP X4, Image>Mirror was replaced with Image>Flip Horizontal,
and Image>Flip with Image>Flip Vertical, there are some variables.
In versions X5 and X6, the functions have been improved by making available the Objects menu.
In the latest version X7 command Image>Mirror and Image>Flip returned, but with new differences.
See my schedule here
Italian translation here
French translation here
Your versions here
For this tutorial, you will need:
Material here
Tubes by AnaRidzi and JVDE.
(The links of the tubemakers here).
Plugins
consult, if necessary, my filter section here
Filters Unlimited 2.0 qui
Alien Skin Eye Candy 5 Impact qui
Mura's Meister - Copies qui
Mura's Meister - Perspective Tiling qui
Andrew's Filter 22 - Overlap, Rotation and ReSize qui
Filters Andrew's Filter can be used alone or imported into Filters Unlimited.
(How do, you see here)
If a plugin supplied appears with this icon  it must necessarily be imported into Unlimited

You can change Blend Modes according to your colors.
Open the font and minimize. You'll find it in the list of fonts available when you need it.
With the most recent o.s., this is no longer possible.
To use a font, you must copy it into the Fonts folder in Windows.
Copy the Gradient in the Gradients Folder.
Copy the mask in the Masks Folder.
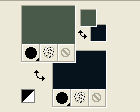
1. Set your foreground color to #4b5a4a,
and your background color to #08151e.
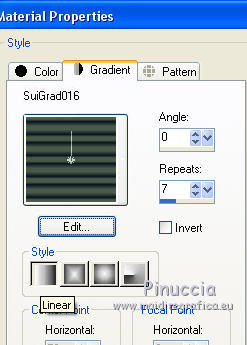
2. Set your foreground color to Gradient, and select the gradient SuiGrad016, style Linear.
if you use other colors, also the gradient will change color
3. Open a new transparent image 900 x 650 pixels,
Flood Fill  with your Gradient.
4. Effects>Plugins>Filters Unlimited 2.0 - Andrews Filter 22 - Overlap 4.
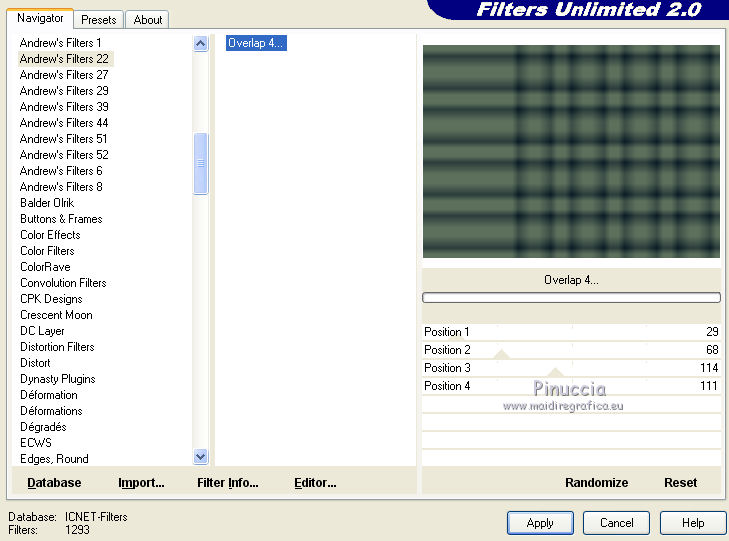
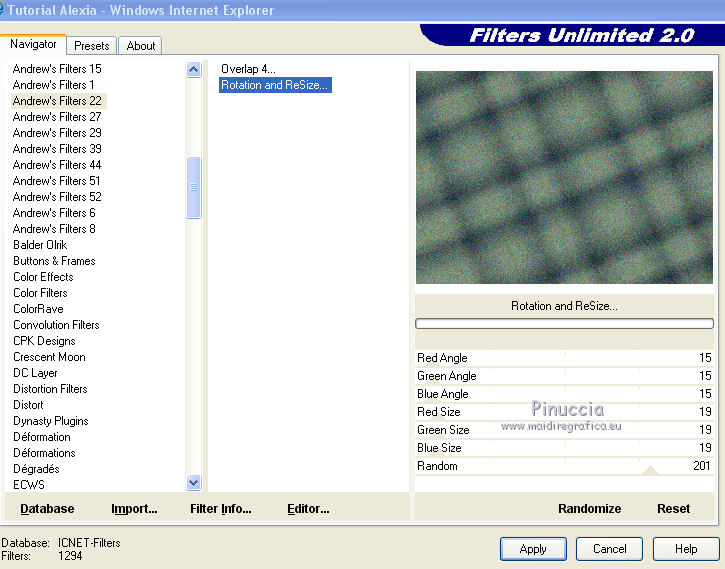
5. Effects>Plugins>Filters Unlimited 2.0 - Andrews Filter 22 - Rotation and ReSize.
6. Selections>Select All.
Open the landscape tube AnaRidzi108, and go to Edit>Copy.
Go back to your work and go to Edit>Paste into Selection.
Selections>Select None.
7. Layers>Duplicate.
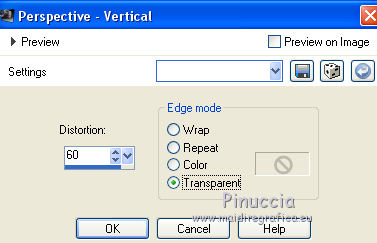
Effects>Geometric Effects>Perspective vertical.
8. Image>Flip.
Repeat Effects>Geometric Effects>Perspective vertical, same settings.
Image>Flip.
You should have this
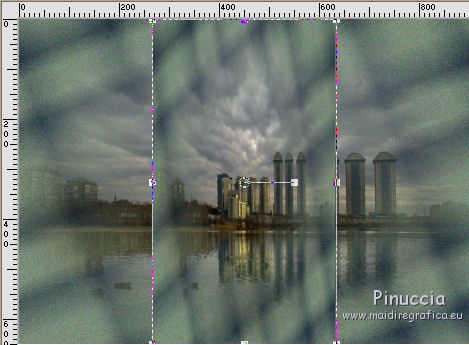
9. Move  the image to the left side.
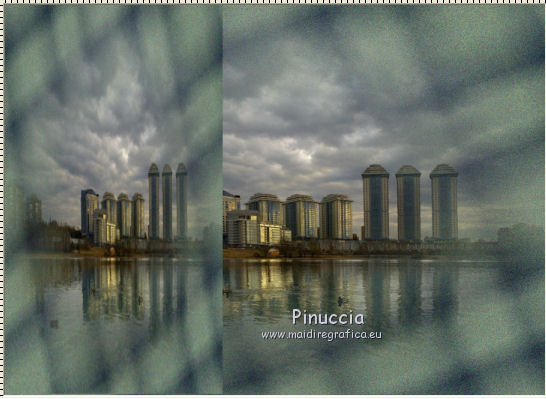
10. Effects>Geometric Effects>Circle.

11. Adjust>Sharpness>High Pass Sharpen.

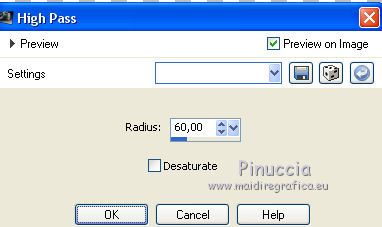
12. Effects>Edge Effects>High Pass.
13. Activate the layer Raster 1.
Layers>Duplicate.
14. Effects>Geometric Effects>Circle, same settings.
15. Adjust>Sharpness>High Pass Sharpen, same settings.

16. Open the tube AnaRidzi1624, and go to Edit>Copy.
Go back to your work and go to Edit>Paste as new layer.
17. Image>Resize, to 65%, resize all layers not checked.
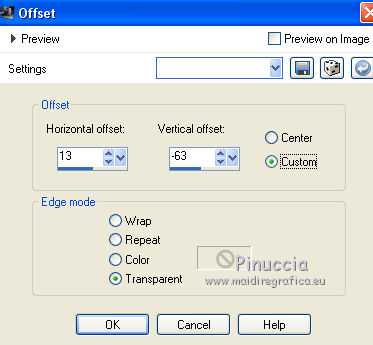
18. Effects>Image Effects>Offset.
19. Effects>3D Effects>Drop Shadow.

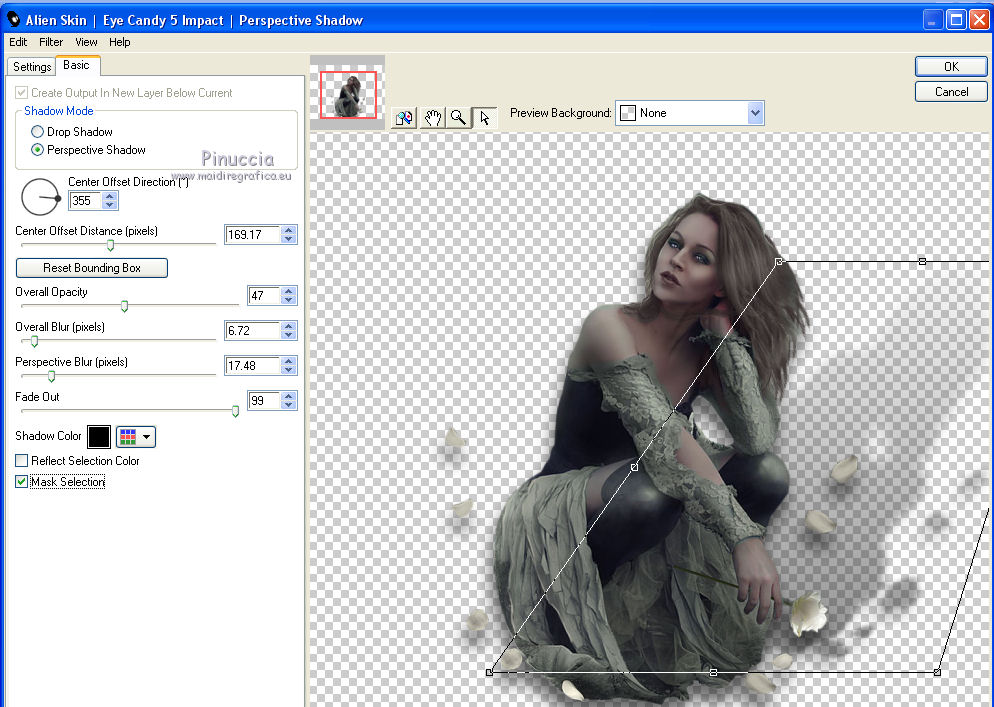
20. Effects>Plugins>Alien Skin Eye Candy 5 Impact - Perspective Shadow.
21. Activate the layer Raster 1.
Layers>Duplicate.
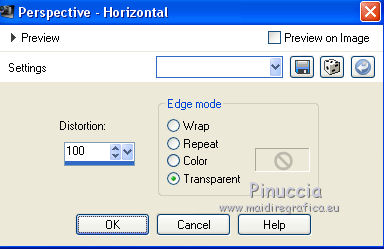
22. Effects>Geometric Effects>Perspective horizontal.
23. Image>Mirror.
Repeat Effects>Geometric Effects>Perspective horizontal, same settings.

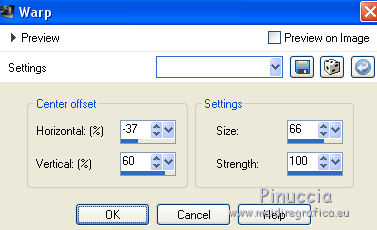
24. Effects>Distortion Effects>Warp.
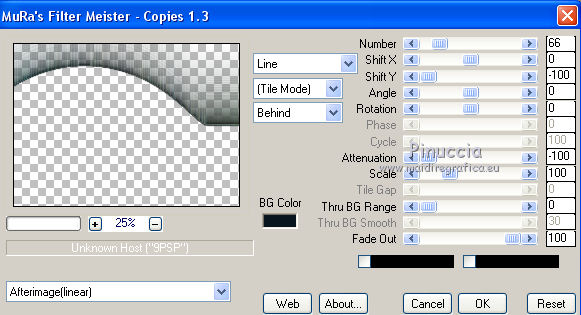
25. Effects>Plugins>Mura's Meister - Copies.
26. Adjust>Sharpness>High Pass Sharpen.

27. Layers>Duplicate.
Effects>3D Effects>Drop Shadow.

28. Layers>Duplicate.
Image>Flip.
Image>Mirror.
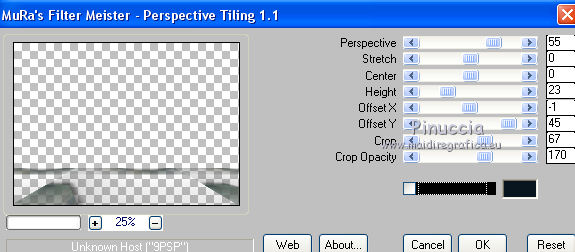
29. Effects>Plugins>Mura's Meister - Perspective Tiling.
30. Activate the layer copy of Raster 1.
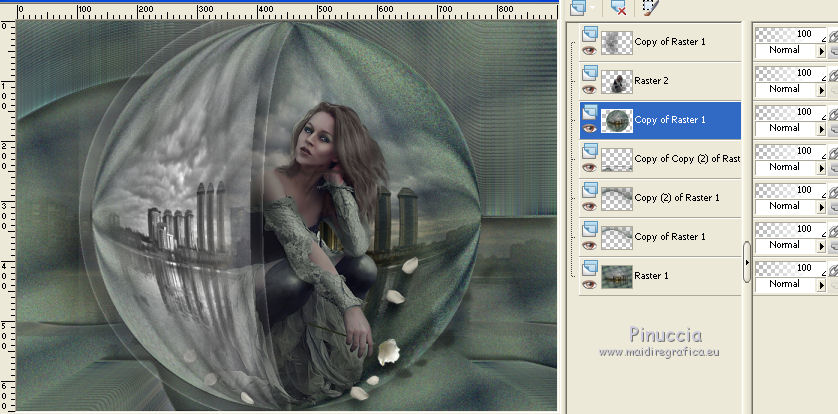
Open the landscape tube JVDE-Geleboon, and go to Edit>Copy.
Go back to your work and go to Edit>Paste as new layer.
31. Layers>Load/Save Mask>Load Mask from Disk.
Look for and load the mask 20-20.
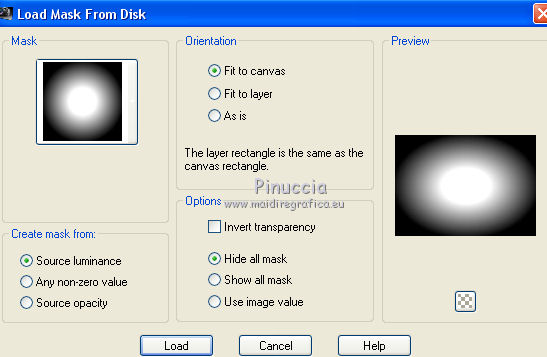
Layers>Merge>Merge Group.
Load again the mask 20-20.
Layers>Merge>Merge Group.
32. Layers>Merge>Merge down.
33. Effects>Edge Effects>High Pass.

34. If you want, write a text and add a border.
35. Sign your work.
Layers>Merge>Merge All and save as jpg.

If you have problems or doubt, or you find a not worked link, or only for tell me that you enjoyed this tutorial, write to me.
30 September 2017
 english version