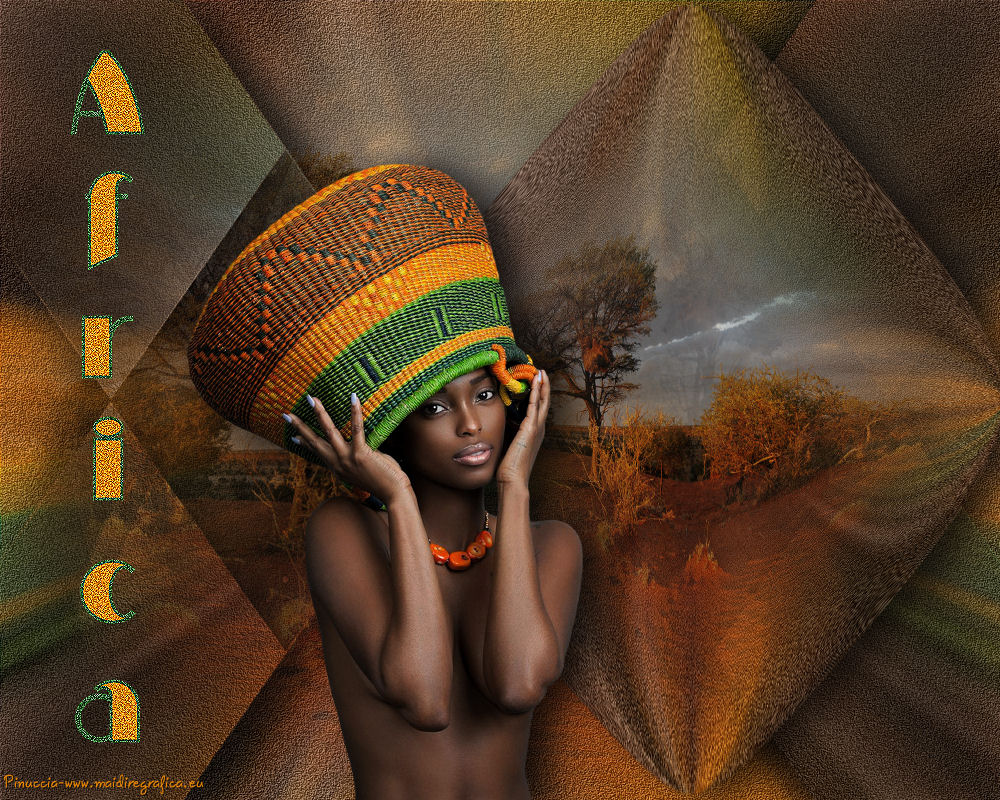
This tutorial was created with PSP 9 and translated with Corel X3, but it can also be made using other versions of PSP.
Since version PSP X4, Image>Mirror was replaced with Image>Flip Horizontal,
and Image>Flip with Image>Flip Vertical, there are some variables.
In versions X5 and X6, the functions have been improved by making available the Objects menu.
In the latest version X7 command Image>Mirror and Image>Flip returned, but with new differences.
See my schedule here
Italian translation here
French translation here
Your versions here
For this tutorial, you will need:
Material here
Tube Franie Margot
Tube Suiza-Africa-029.
Mask Aditascreation-mask-04.
(The links of the tubemakers here).
Plugins
consult, if necessary, my filter section here
FM Tile Tools - Blend Emboss here
Xero XL- Porcelain here

You can change Blend Modes according to your colors.
Copy the Gradient in the Gradients Folder.
Copy the Mask in the Masks Folder.
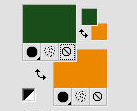
1. Set your foreground color to #ec8800,
and your background color to #1a4e1b.
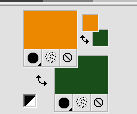
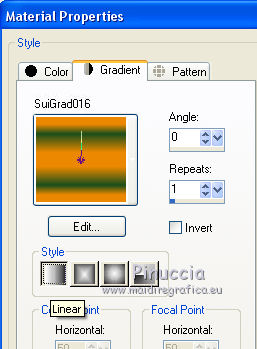
Set your foreground color to Gradient, and select the Gradient SuiGrad016, style Linear
if you use other colors, also the gradient will change color
2. Open a new transparent image 1000 x 800 pixels,
Flood Fill  with your Gradient.
3. Selections>Select All.
4. Open the tube by Franie Margot and go to Edit>Copy.
don't close because you'll use it again
Go back to your work and go to Edit>Paste into Selection.
Selections>Select None.
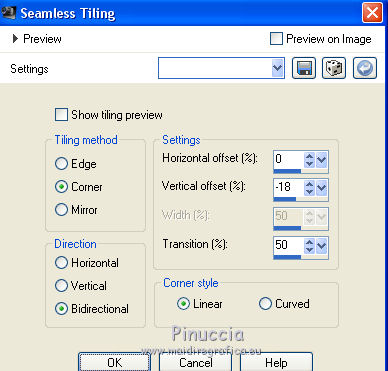
5. Effects>Image Effects>Seamless Tiling.
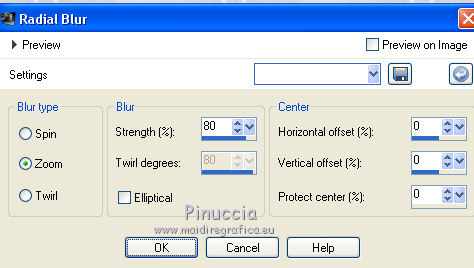
6. Adjust>Blur>Radial Blur.
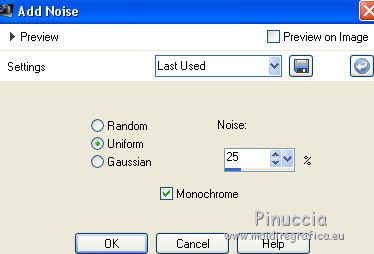
7. Adjust>Add/Remove Noise>Add Noise.
8. Effects>Plugins>FM Tile Tools - Blend Emboss, default settings.

9. Selections>Select All.
Open the tube Suiza-Africa-029 and go to Edit>Copy.
Go back to your work and go to Edit>Paste into Selection.
Selections>Select None.
10. Layers>Load/Save Mask>Load Mask from Disk.
Look for and load the mask aditascreations_mask-04.
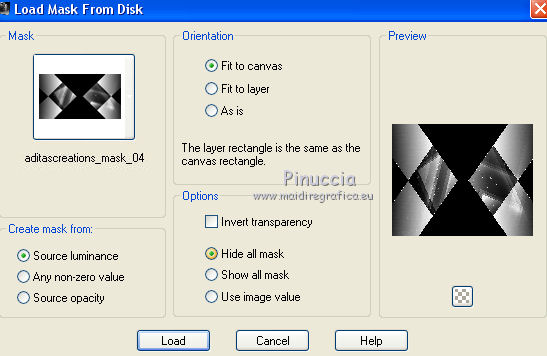
Layers>Merge>Merge Group.
11. Effects>3D Effects>Drop Shadow.
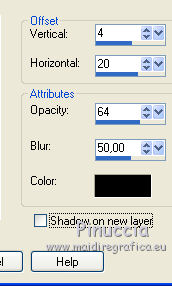
12. Layers>Duplicate.
Image>Mirror.
13. Activate the bottom layer Raster 1.
Layers>Duplicate.
Layers>Arrange>Bring to Top.
14. Effects>Geometric Effects>Circle.

15. Effects>Distortion Effects>Pinch.

Reduce the opacity of this layer to 79%.
16. Effects>Image Effects>Offset.
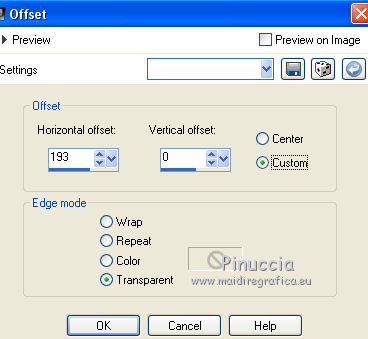
17. Effects>3D Effects>Drop Shadow, same settings.

18. Activate again the tube by Franie Margot.
Image>Resize, 650 pixels height, resize all layers checked.
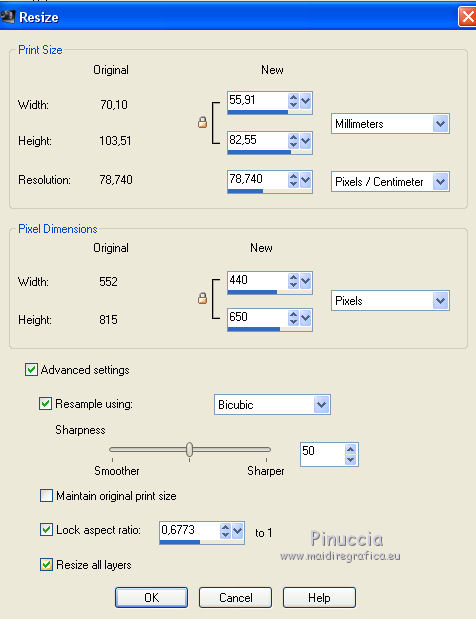
Edit>Copy.
Go back to your work and go to Edit>Paste as new layer.
19. Effects>Image Effects>Offset.
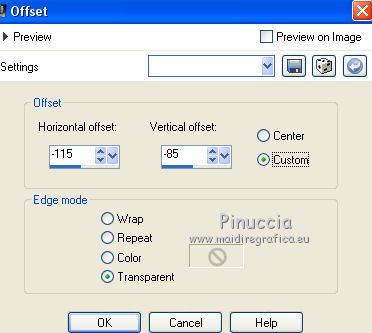
20. Effects>3D Effects>Drop Shadow, same settings.

21. Layers>Merge>Merge All.
22. If you want add a text as in my example:
activate the Text Tool  , font MiltonBurlesque, direction vertical.

Invert your colors
Write your text.
Layers>Convert to Raster Layer.
Adjust>Add/Remove Noise>Add Noise, same settings.
Effects>Edge Effects>Enhance.
23. Effects>Plugins>Xero XL - Porcelain.
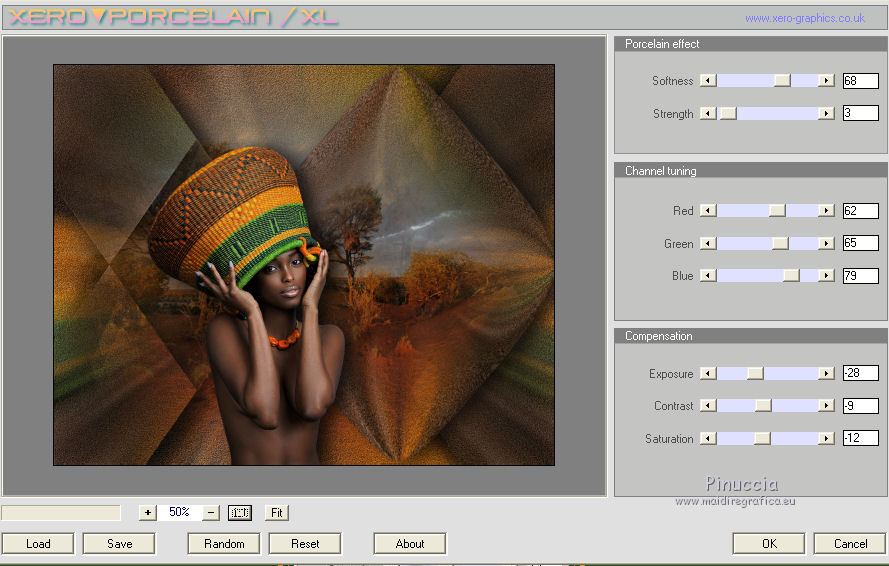
24. Sign your work and save as jpg.

If you have problems or doubt, or you find a not worked link, or only for tell me that you enjoyed this tutorial, write to me.
30 September 2017
 english version