Home |
Home |

Mappa sito |
Mappa sito |
Tutorial |
Tutorial |
Tut tecnici |
Tut tecnici |
Links-Banner |
Links-Banner |
Regali-Award |
Regali-Award |
Informatica |
Informatica |
Archivio |
Archivio |
Mail |
Mail |
Privacy policy |
Privacy policy |
Novità |
Novità |
Home |
Home |
Mappa sito |
Mappa sito |
Tutorial |
Tutorial |
Tut tecnici |
Tut tecnici |
Links-Banner |
Links-Banner |
Regali-Award |
Regali-Award |
Informatica |
Informatica |
Archivio |
Archivio |
Mail |
Mail |
Privacy policy |
Privacy policy |
Novità |
Novità |
|
NARAH  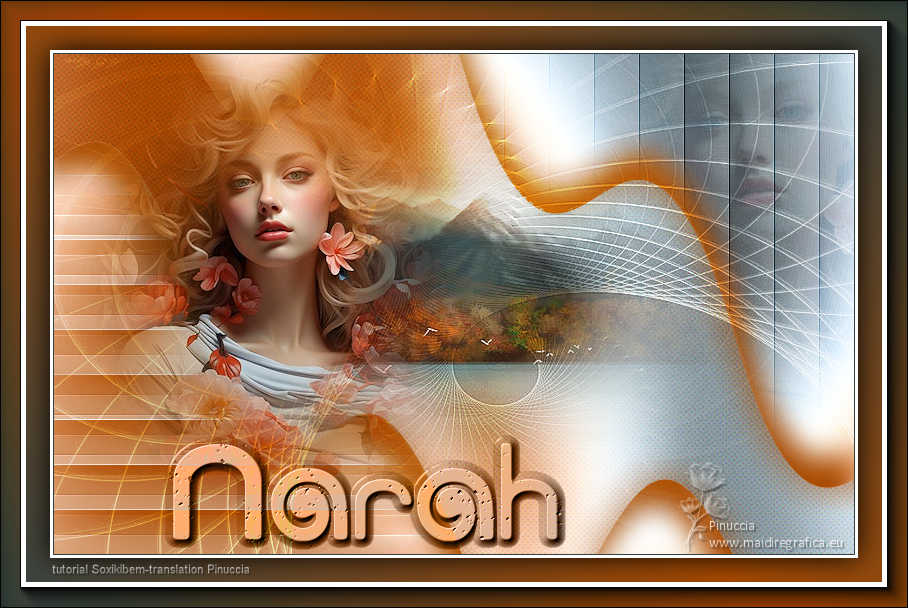
This tutorial was written with Psp2022 and translated with PspX2020, but it can also be made using other versions of PSP.
For this tutorial, you will need:  Thanks for the tubes PqnaAlice and for the mask Narah. (The links of the tubemakers here).   consult, if necessary, my filter section here Filters Unlimited 2.0 here Mehdi - Wavy Lab 1.1. here AAA Frames - Foto Frame here Art Effects - JazzMan's Fast Blur here added also in the material VM Extravaganza - James Bondage here Filters VM Extravaganza can be used alone or imported into Filters Unlimited. (How do, you see here) If a plugin supplied appears with this icon  it must necessarily be imported into Unlimited it must necessarily be imported into Unlimited You can change Blend Modes according to your colors. In the newest versions of PSP, you don't find the foreground/background gradient (Corel_06_029). You can use the gradients of the older versions. The Gradient of CorelX here  1. Choose 4 colors to work. Set your foreground color to #334343, and your background color to #a74900. 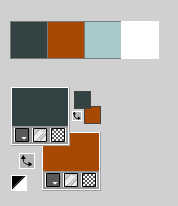 Color 3: #a6caca color 4: #ffffff. 2. Open Alpha_bySoxikibem Window>Duplicate or, on the keyboard, shift+D to make a copy. Close the original. The copy, that will be the basis of your work, is not empty, but contains the selections saved to alpha channel. Effects>Plugins>Mehdi - Wavy Lab 1.1. This filter creates gradients with the colors of your Materials palette. The first is your background color, the second is your foreground color. Change the last two colors created by the filtre: the third color with color 3 #a6caca and the fourth color with #ffffff. 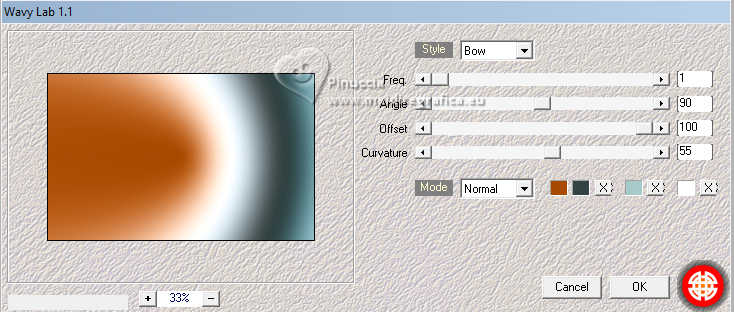 3. Effects>Plugins>Filters Unlimited 2.0 - VM Extravaganza - James Bondage, default settings. 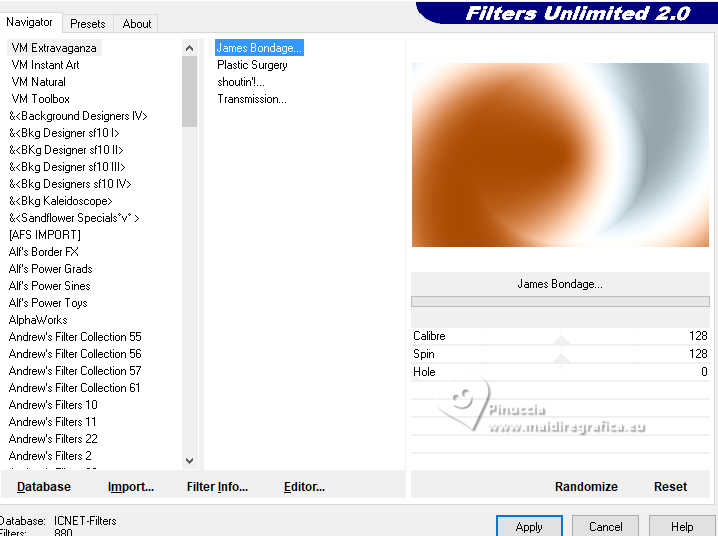 4. Layers>Duplicate. Effects>Geometric Effects>Skew. 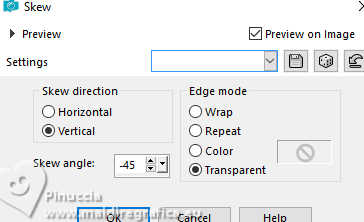 5. Effects>Distortion Effects>Wave. 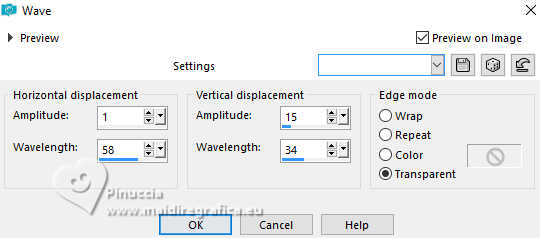 6. Effects>Plugins>Art Effects - JazzMan's Fast Blur. 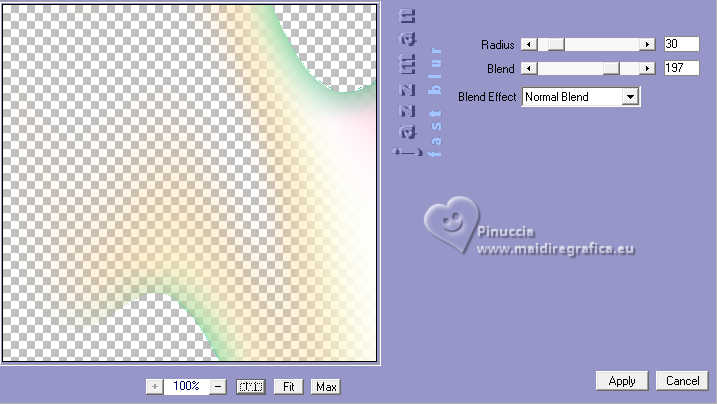 7. Effects>Artistic Effects>Halftone. 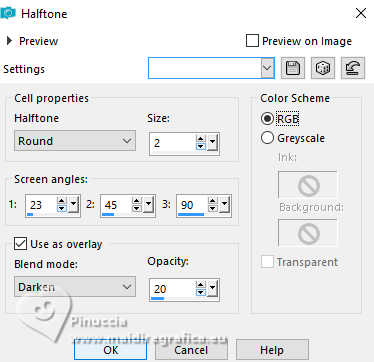 8. Effects>3D Effects>Drop Shadow, background color. 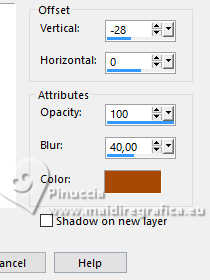 9. Repeat Effects>3D Effects>Drop Shadow, background color. 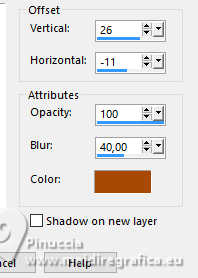 10. Selections>Load/Save Selections>Load Selection From Alpha Channel. Open the selections menu and load the selection Selection #4 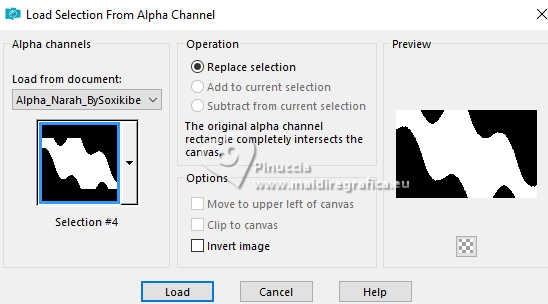 If all is ok, you should have this 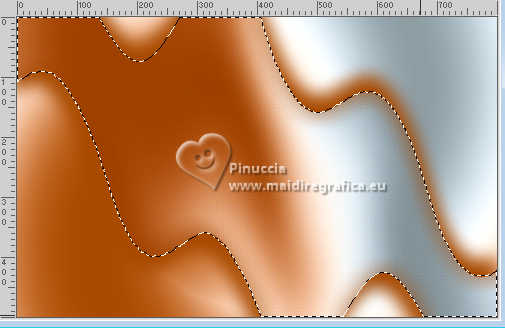 Open your landscape misted 153PaisagemByPqnaAlice 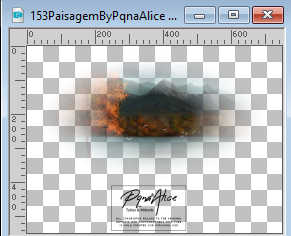 Edit>Copy. Go back to your work and go to Edit>Paste as New Layer. Selections>Invert. Press CANC on the keyboard  Selections>Select None. Adjust>Sharpness>Sharpen. Layers>Merge>Merge Down. 11. Activate the layer Raster 1. Selections>Load/Save Selections>Load Selection From Alpha Channel. The selection selection #2 is immediately available. You just have to click Load. 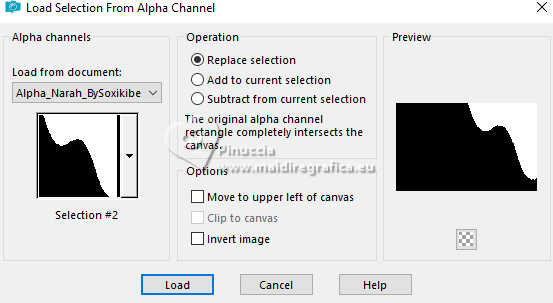  Selections>Promote Selection to Layer. Effects>Texture Effects>Blinds, color white #ffffff. 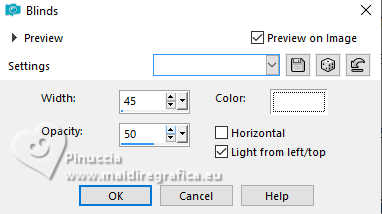 12. Effects>Edge Effects>Enhance More. Change the Blend Mode of this layer to Multiply. Selections>Select None. 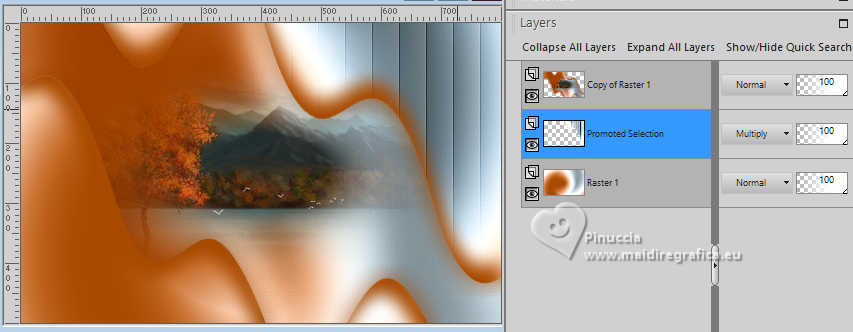 13. Activate the layer Raster 1. Selections>Load/Save Selections>Load Selection From Alpha Channel. Open the selections menu and load the selection Selection #3 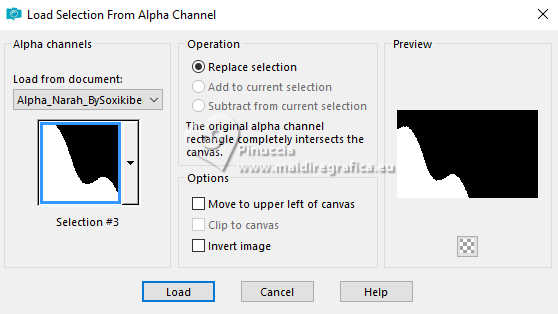 Selections>Promote Selection to Layer. Effects>Texture Effects>Blinds, same setting but also Horizontal checked. 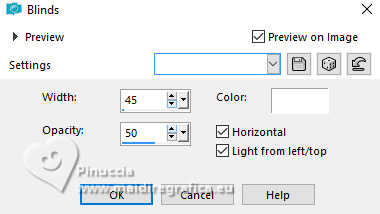 14. Effects>Texture Effects>Blinds - background color. 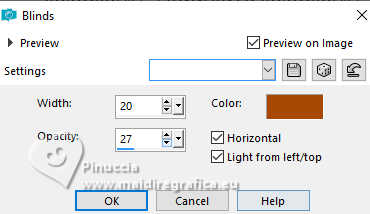 Effects>Edge Effects>Enhance. Selections>Select None. Change the Blend Mode of this layer to Lighten. 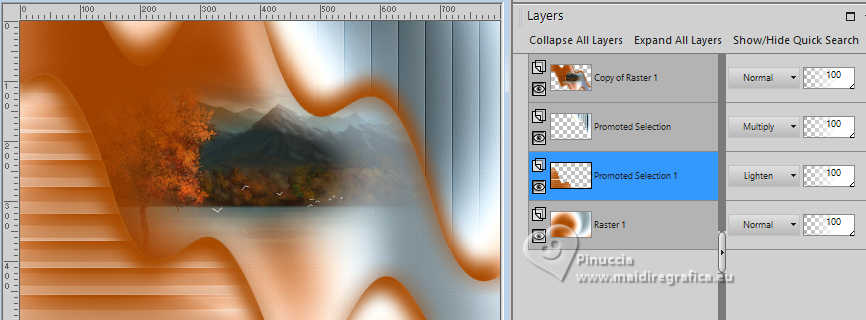 15. Open the misted 1078MulherByPqnaAlice 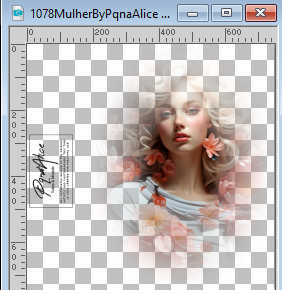 Edit>Copy. Go back to your work and go to Edit>Paste as New Layer. Layers>Arrange>Move Up.  16. Move  the tube at the upper right. the tube at the upper right.Change the Blend Mode of this layer to Soft Light and reduce the opacity to 50%. 17. Activate your top layer. Edit>Paste as new layer - the misted is still in memory. Image>Resize, if necessary - for the supplied tube to 70% - resize all layers not checked. Adjust>Sharpness>Sharpen. Move the tube to the left. 18. Layers>New Raster Layer. Flood Fill  the layer with color white #ffffff. the layer with color white #ffffff.Layers>New Mask layer>From image Open the menu under the source window and you'll see all the files open. Select the mask NarahsMasks_1771  Effects>Edge Effects>Enhance. Layers Merge>Merge Group. 19. Layers>Arrange>Move Down. Change the Blend Mode of this layer to Overlay.  20. For the borders, set again your foreground color to #334343 and keep your background color to #a74900 Set your foreground color to a Foreground/Background Gradient, style Linear.  Image>Add Borders, 1 pixel, symmetric, foreground color. Image>Add borders, 3 pixels, symmetric, color white #ffffff. Selections>Select All. 21. Image>Add Borders - 50 pixels, symmetric, whatever color. Selections>Invert. Flood Fill the selection with your Gradient.22. Selections>Invert. Effects>3D Effects>Drop Shadow, color black #000000. 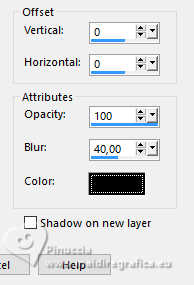 23. Selections>Invert. Effects>Plugins>AAA Frames - Foto Frame. 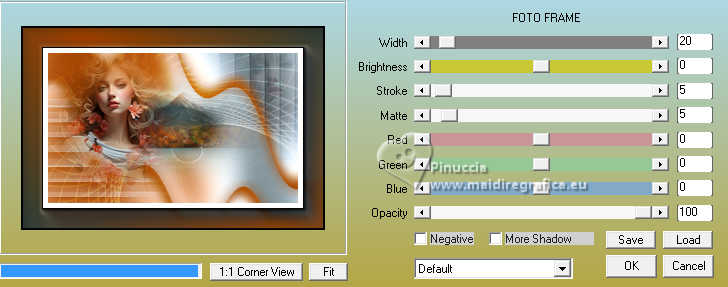 Selections>Select None. 24. Open TituloNarah_ByXiki 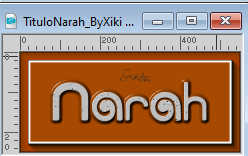 Edit>Copy. Go back to your work and go to Edit>Paste as New Layer. Pick Tool  Pick Tool: Position X: 165,00 - Position Y: 435,00. 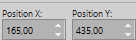 Change the Blend Mode of this layer to Luminance (L), or to your liking. 25. Image>Resize, if you want. Sign your work and save as jpg. For the tubes of this version thanks Luz Cristina and Mentali 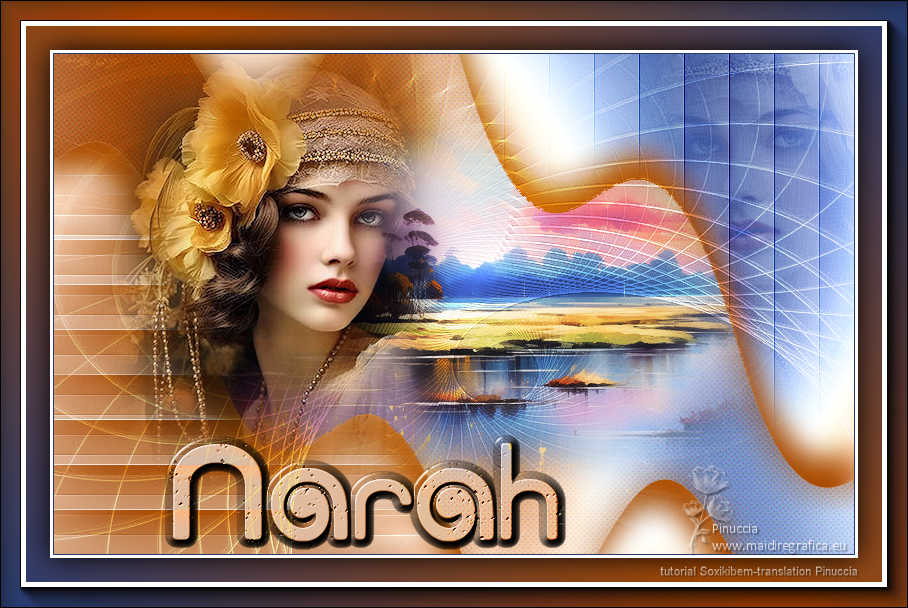  Your versions. Thanks 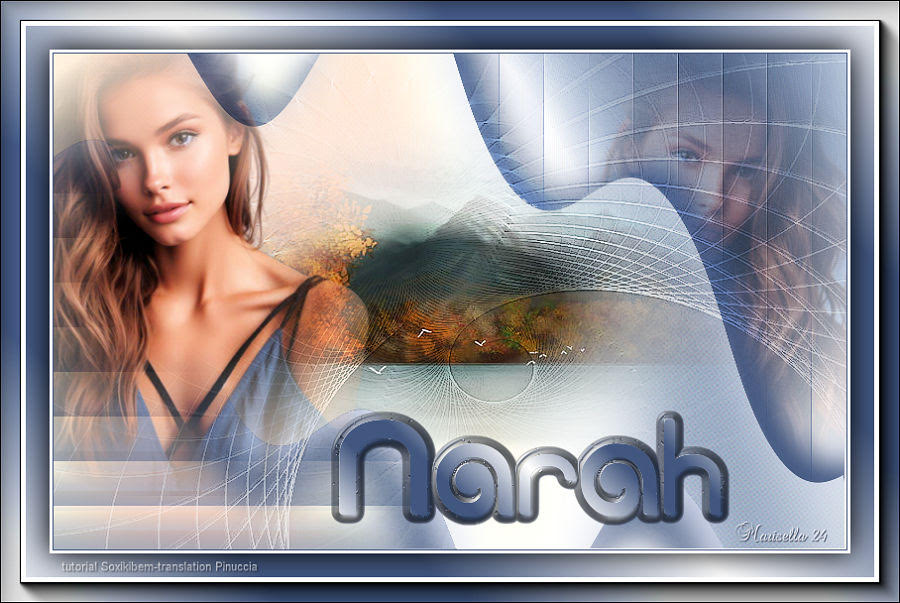 Marisella 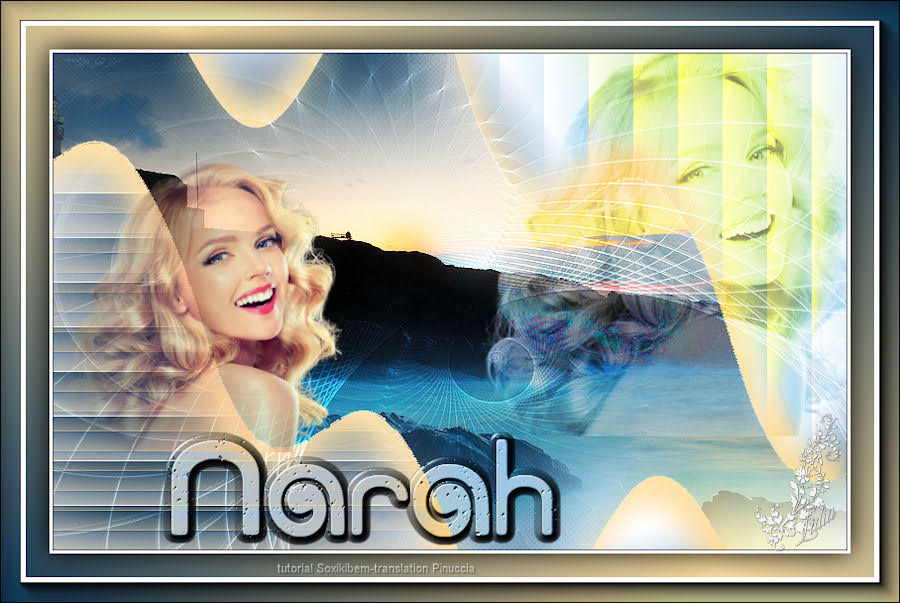 Lidia 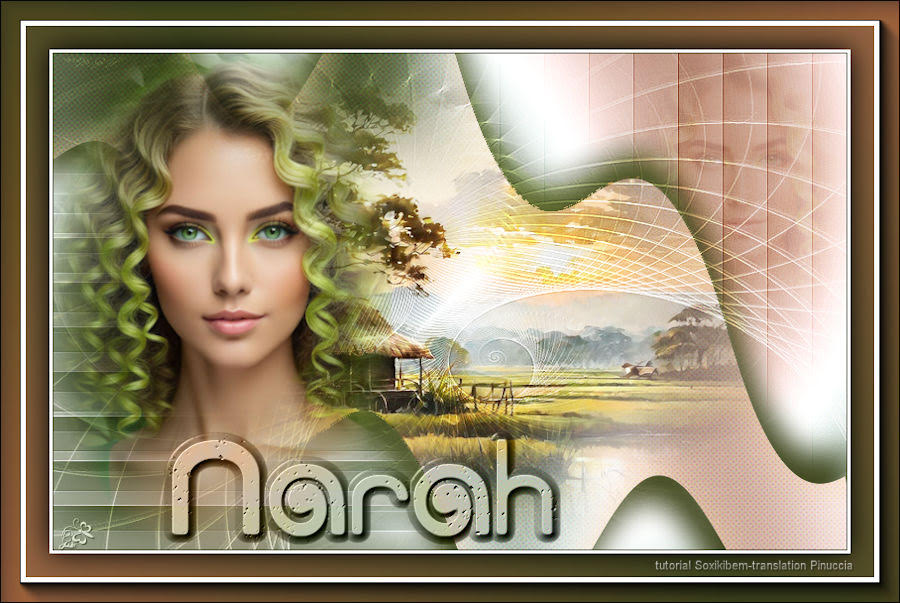 Jolcsi 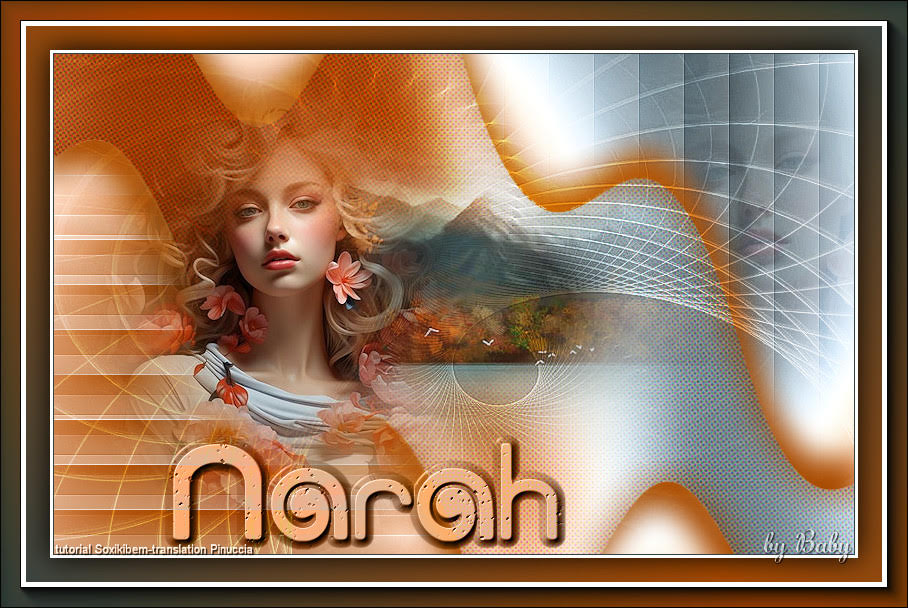 Baby 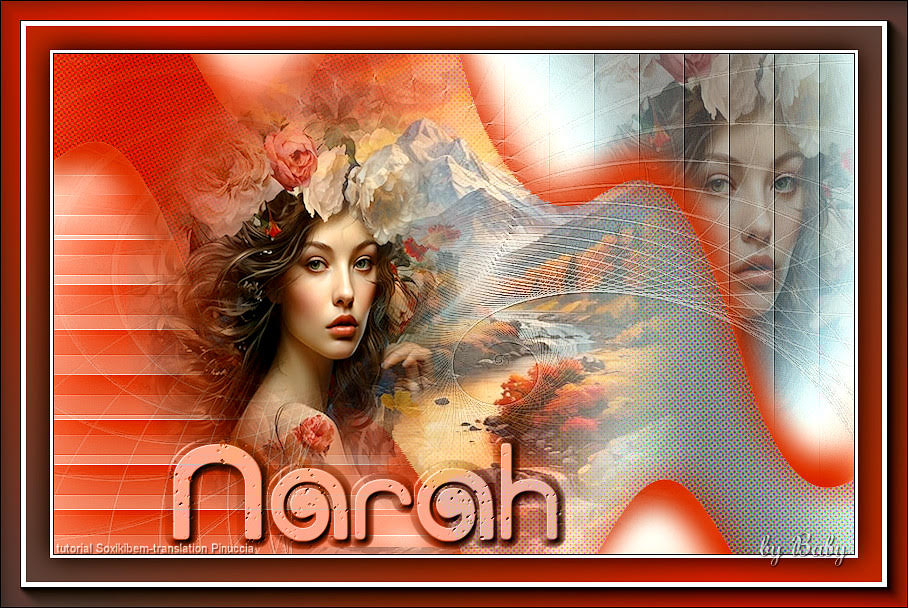 Baby  Marion  If you have problems or doubts, or you find a not worked link, or only for tell me that you enjoyed this tutorial, write to me. 8 July 2024 |