Home |
Home |

Mappa sito |
Mappa sito |
Tutorial |
Tutorial |
Tut tecnici |
Tut tecnici |
Links-Banner |
Links-Banner |
Regali-Award |
Regali-Award |
Informatica |
Informatica |
Archivio |
Archivio |
Mail |
Mail |
Privacy policy |
Privacy policy |
Novità |
Novità |
Home |
Home |
Mappa sito |
Mappa sito |
Tutorial |
Tutorial |
Tut tecnici |
Tut tecnici |
Links-Banner |
Links-Banner |
Regali-Award |
Regali-Award |
Informatica |
Informatica |
Archivio |
Archivio |
Mail |
Mail |
Privacy policy |
Privacy policy |
Novità |
Novità |
|
MAKE YOUR WAY  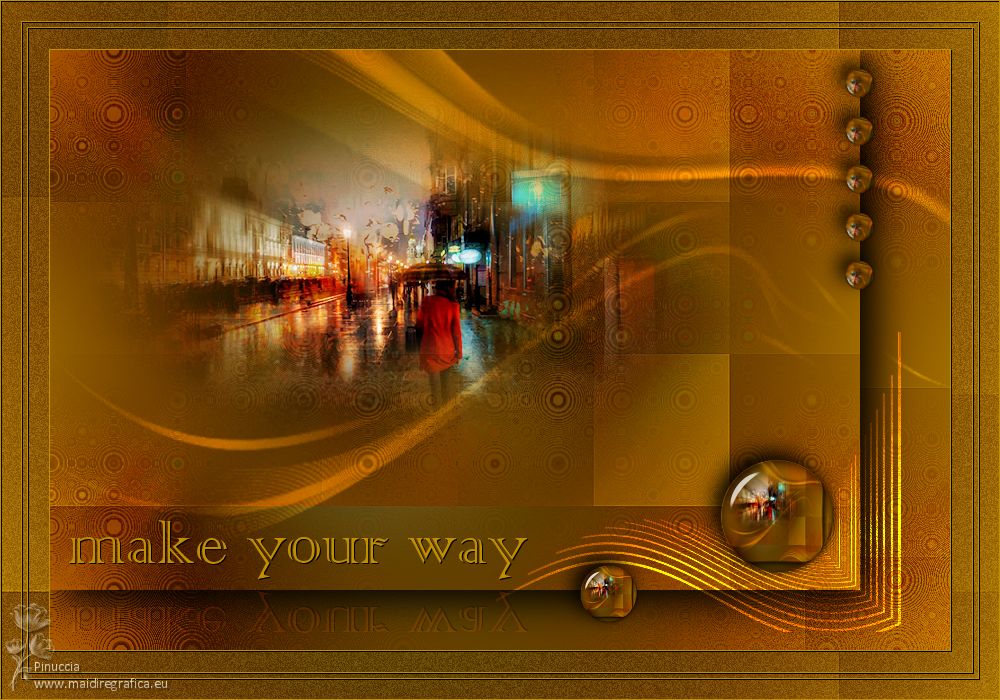
This tutorial was written with Psp2022 and translated with PspX17, but it can also be made using other versions of PSP. You can change Blend Modes according to your colors. In the newest versions of PSP, you don't find the foreground/background gradient (Corel_06_029). You can use the gradients of the older versions. The Gradient of CorelX here Copy the preset  in the folder of the plugin Alien Skin Eye Candy 5 Impact>Settings>Glass. in the folder of the plugin Alien Skin Eye Candy 5 Impact>Settings>Glass.One or two clic on the file (it depends by your settings), automatically the preset will be copied in the right folder. why one or two clic see here  Copy the selection in the Selections Folder. Open the mask in PSP and minimize it with the rest of the material. 1. Choose 4 colors. Foreground color #624501 Background color #bf8f00 Color 3: #bad795 Color 4 #ffffff 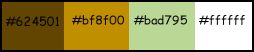 For the moment set your foreground color to #624501 and your background color to white #ffffff. 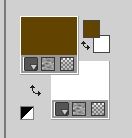 2. Open a new transparent image 900x600px. Plugin Mehdi > Wavy Lab 1.1. This filter creates gradients with the colors of your Materials palette. The first is your background color, the second is your foreground color. Change the last two colors created by the filtre: the third color with color 2 #bf8f00 and the forth color with color 3 #bad795. 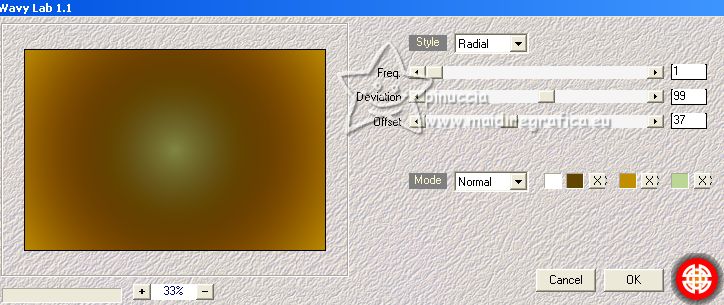 3. Effects>Plugins>VM Distortion - Vision Impossible. 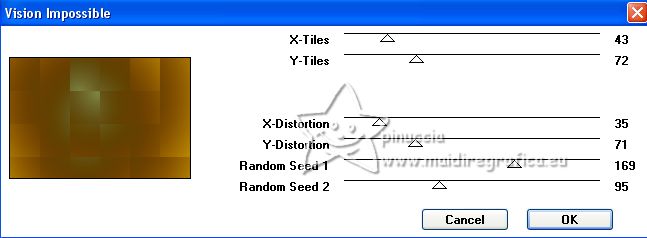 Effects>Edge Effects>Enhance. 4. Layers>New Raster Layer. Selections>Select All. Open the landascape misted 122PaisagemByPqnaAlice  Edit>Copy. Go back to your work and go to Edit>Paste into Selection. Selections>Select None. Effects>Image Effects>Seamless Tiling, default settings.  5. Effects>Plugins>Funhouse - Cirquelate. 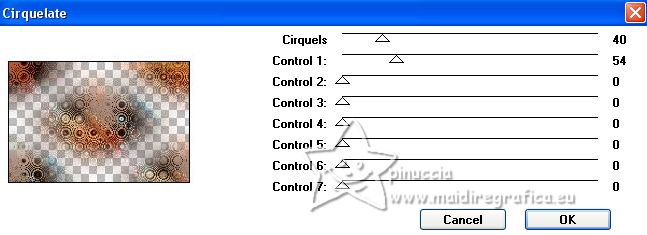 if you're using the popular version of the filter, with only one item, the result doesn't change 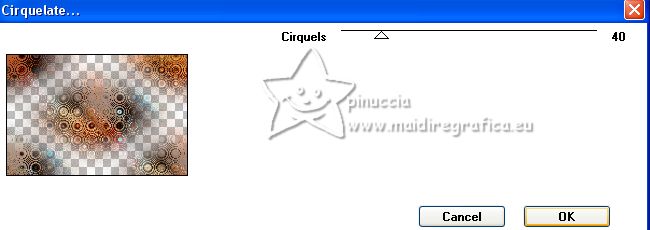 6. Effects>Reflection Effects>Rotating Mirror. 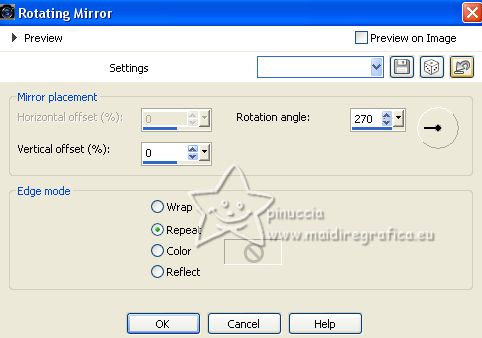 Change the Blend Mode of this layer to Soft Light. 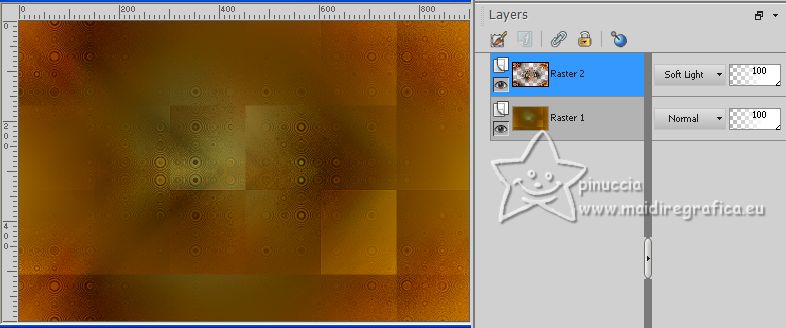 7. Edit>Copy Special>Copy Merged. Edit>Paste as a new layer. Image>Resize, to 90%, resize all layers not checked. Objects>Align>Top. Objects>Align>Left. Or with your Pick Tool  set Position X and Y to 0,00  8. Effects>3D Effects>Drop Shadow. 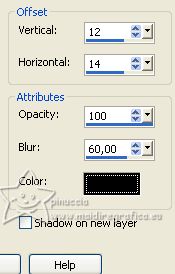 9. Activate again the landscape misted and go to Edit>Copy. Go back to your work and go to Édition>Paste as new layer. Resize, if necessary, for the supplied tube to 80%, resize all layers not checked. Adjust>Sharpness>Sharpen. Place  the tube about as below the tube about as below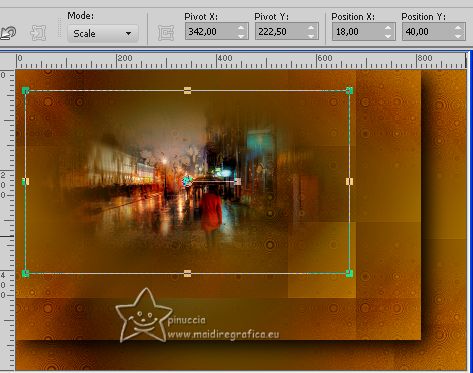 10. Layers>New Raster Layer. Flood Fill  the layer with your background color #ffffff. the layer with your background color #ffffff.Layers>New Mask layer>From image Open the menu under the source window and you'll see all the files open. Select the mask NarahsMasks_1697. 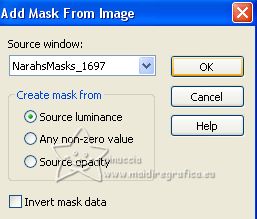 Layers>Merge>Merge Group. Change the Blend Mode of this layer to Overlay. 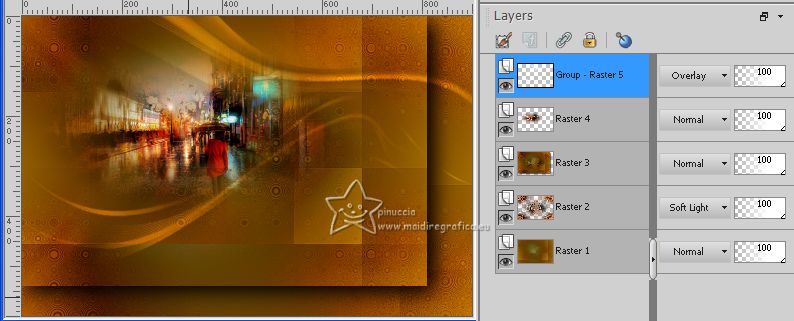 11. Selections>Load/Save Selections>Load Selection From Disk Look for and load the selection Selection253_Xiki 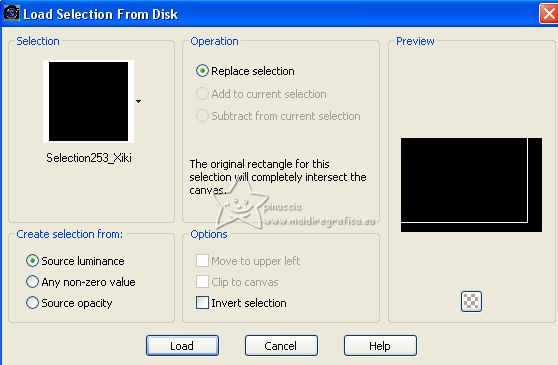 Layers>New Raster Layer. Set your background color with color 3 #bad795. 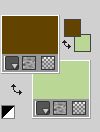 Set your foreground color to a Foreground/Background Gradient, style Linear. 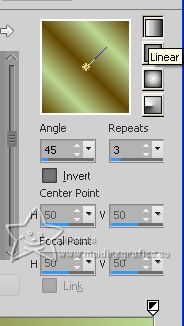 Flood Fill the selection with your Gradient.Selections>Select None. 12. Adjust>Add/Remove Noise>Add Noise. 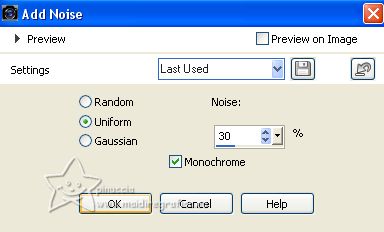 13. Effects>Reflection Effects>Feedback. 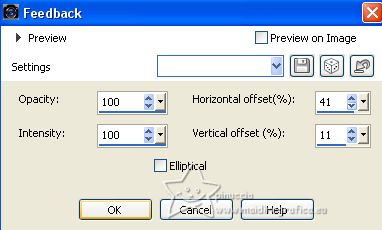 14. Effects>Distortion Effects>Wave. 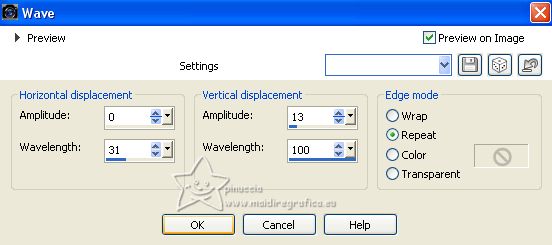 15. Image>Resize, to 50%, resize all layers not checked. Pick Tool and set Position X: 446,00 and Position Y: 282,00. 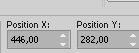 Change the Blend Mode of this layer to Dodge. 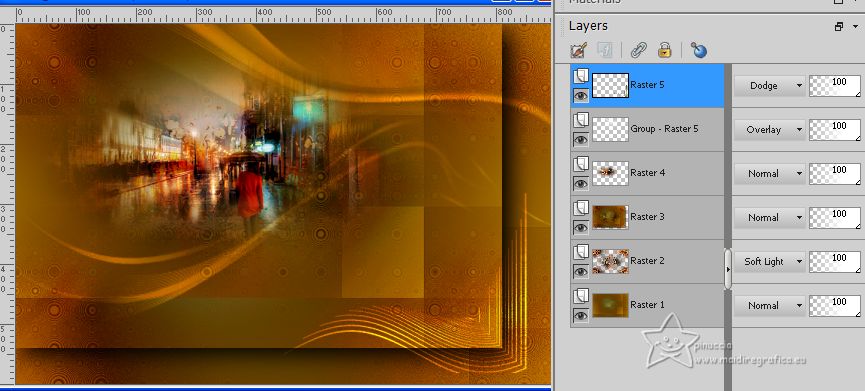 16. Layers>New Raster Layer. Edit>Copy Special>Copy Merged. Selections>Load/Save Selection>Load Selection from Disk. Look for and load the selection Selection253_Xiki2  Edit>Paste into Selection. Adjust>Sharpness>Sharpen. 17. Effects>Plugins>Alien Skin Eye Candy 5 Impact - Glass. Select the preset 253_bySoxikibem.f1s and ok. Here below the settings, in case of problems with the preset. 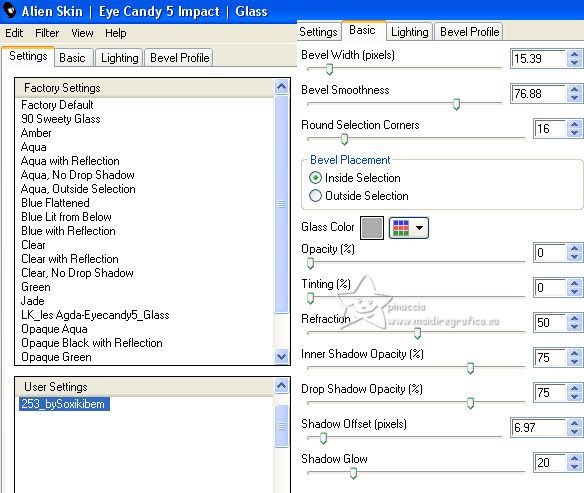 Selections>Select None. 18. Layers>Duplicate. Image>Resize, to 50%, resize all layers not checked. Pick Tool and set Position X: 528,00 and Position Y: 513,00. 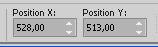 Adjust>Sharpness>Sharpen. 19. Layers>Duplicate. Image>Resize, to 50%, resize all layers not checked. Effects>Plugins>Mura's Meister - Copies.  Set Position X: 794,00 and Position Y: 16,00. 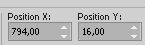 20. Layers>Merge>Merge Down - 2 times. Effects>3D Effects>Drop Shadow, color black. 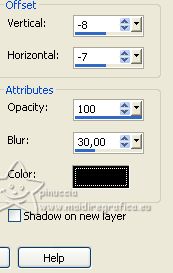 21. Activate your background layer, Raster 1. Edit>Copy. Image>Canvas Size - 1000 x 700 pixels. 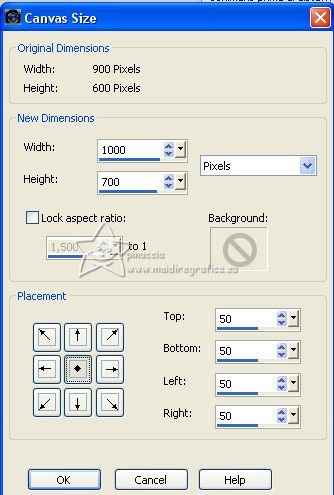 22. Layers>New Raster Layer. Selections>Select All. Edit>Paste into Selection. Layers>Arrange>Move Down. 23. Adjust>Add/Remove Noise>Add Noise. 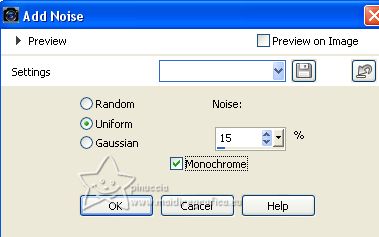 24. Set your background color to color 2 #bf8f00  Layers>New Raster Layer. Flood Fill with your background color.Selections>Modify>Contract - 1 pixels. Press CANC on the keyboard  25. Selections>Modify>Contract - 20 pixels. Flood Fill with your background color.Selections>Modify>Contract - 1 pixel. Press CANC on the keyboard. 26. Selections>Modify>Contract - 5 pixels. Flood Fill with your background color.Selections>Modify>Contract - 1 pixel. Press CANC on the keyboard. 27. Selections>Modify>Contract - 21 pixels. Flood Fill with your background color.Selections>Select None. Effects>3D Effects>Drop Shadow, color black. 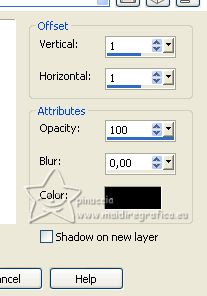 28. Activate your top layer. Open TituloBySoxikibem 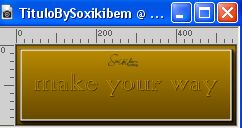 Edit>Copy. Go back to your work and go to Edit>Paste as new layer. Pick Tool and set Position X: 69,00 and Position Y: 520,00. 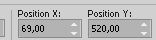 29. Layers>Duplicate. Image>Flip. Keep Position X: 69,00 and set Position Y: 590,00. 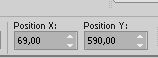 Change the Blend Mode of this layer to Hard Light and reduce the opacity to 30%. 30. Sign your work on a new layer. Layers>Merge>Merge All and save as jpg. The misted of this version is mine 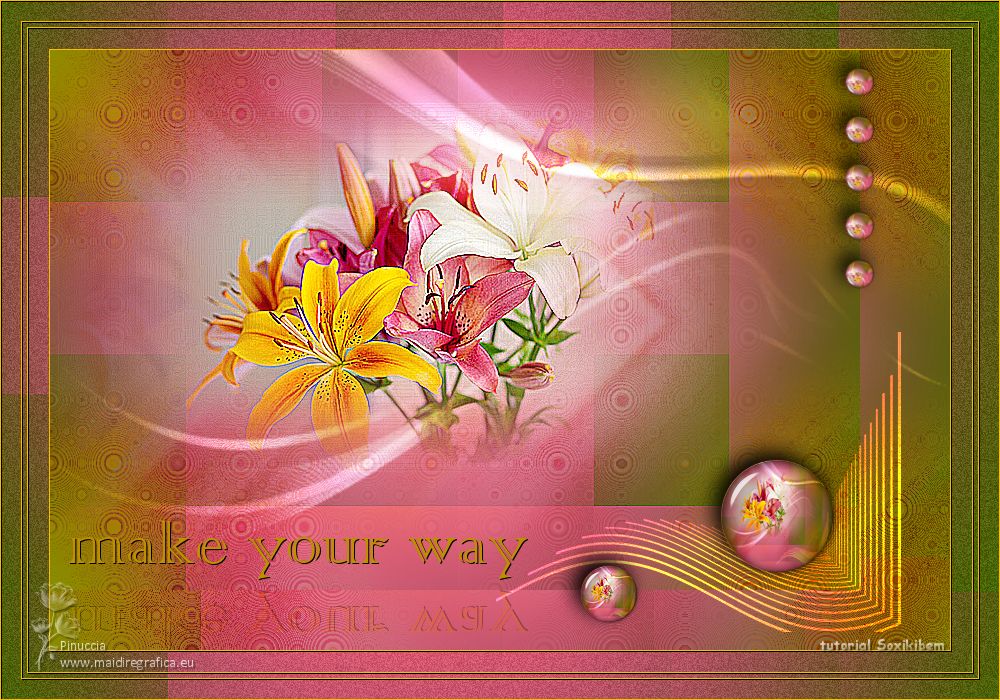   If you have problems or doubts, or you find a not worked link, or only for tell me that you enjoyed this tutorial, write to me. 1 July 2023 |


 it must necessarily be imported into Unlimited