|
MABEL  

This tutorial was written with Psp2022 and translated with PspX17, but it can also be made using other versions of PSP. In the newest versions of PSP, you don't find the foreground/background gradient (Corel_06_029). You can use the gradients of the older versions. The Gradient of CorelX here  Copy the selections in the Selections Folder. 1. Choose 2 colors from your material. Foreground color #2e1a0d, background color #ad883e 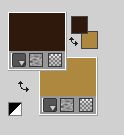 2. Open a new transparent image 900 x 700 pixels. Flood Fill  the transparent image with your foreground color. the transparent image with your foreground color.3. Selections>Select All. Open the flower misted 172FlorByPqnaAlice 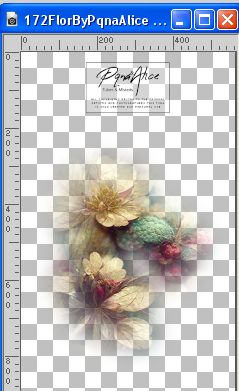 Erase the watermark and go to Edit>Copy. Go back to your work and go to Edit>Paste into Selection. Selections>Select None. 4. Effects>Image Effects>Seamless Tiling, default settings.  Adjust>Blur>Radial Blur. 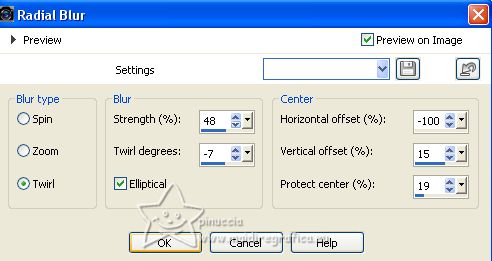 5. Effects>Plugins>Filters Unlimited 2.0 - &<Bkg Designer sf10II> - DIS Refractor 2. 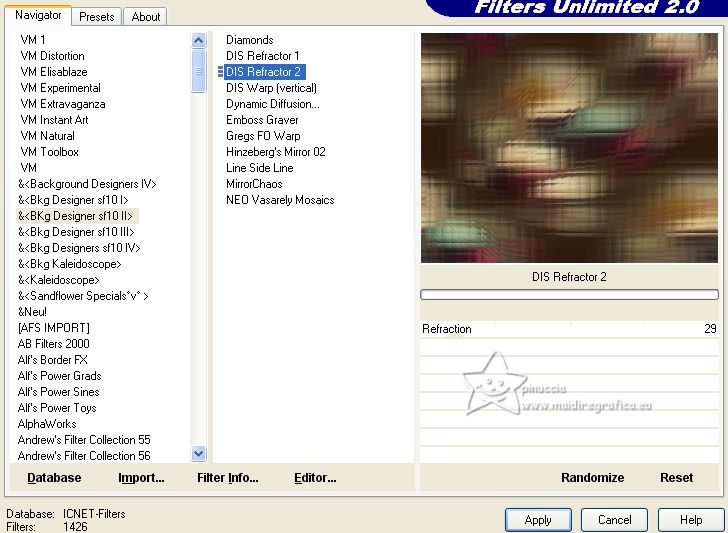 6. Selections>Load/Save Selection>Load Selection from Disk. Look for and load the selection mabelBysoxikibem1 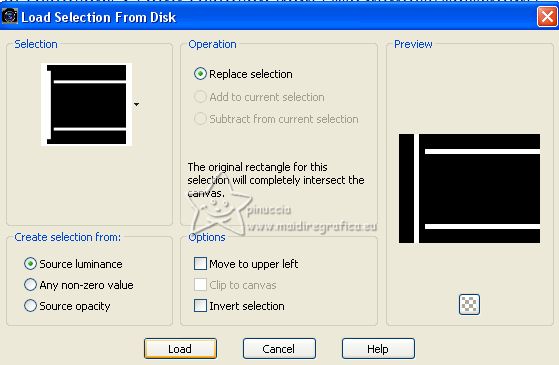 Selections>Promote Selection to Layer. Effects>Texture Effects>Weave - weave color: foreground color. 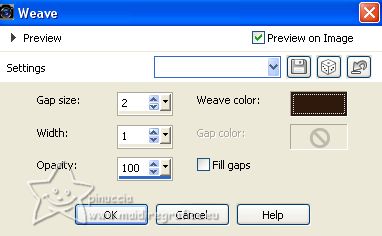 Selections>Select None. 7. Effects>Reflection Effects>Feedback. 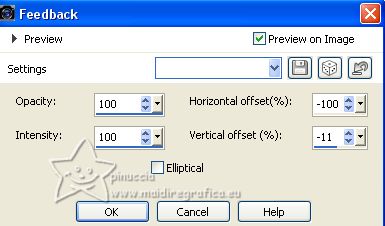 8. Image>Free Rotate - 90 degrees to right.  Pick Tool  and set Position X: 100,00 and Position Y: - 198,00. 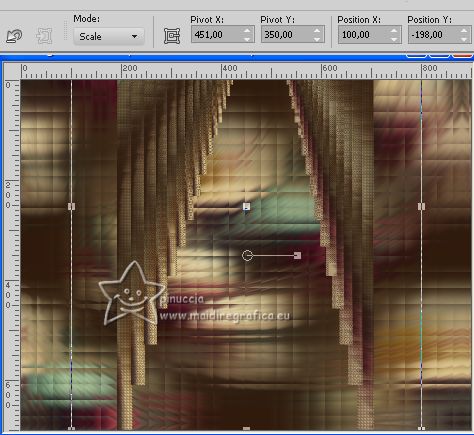 Activate your bottom layer. Selections>Select All. Image>Crop to Selection. Activate again your top layer. 9. Effects>Plugins>Flaming Pear - Flexify 2 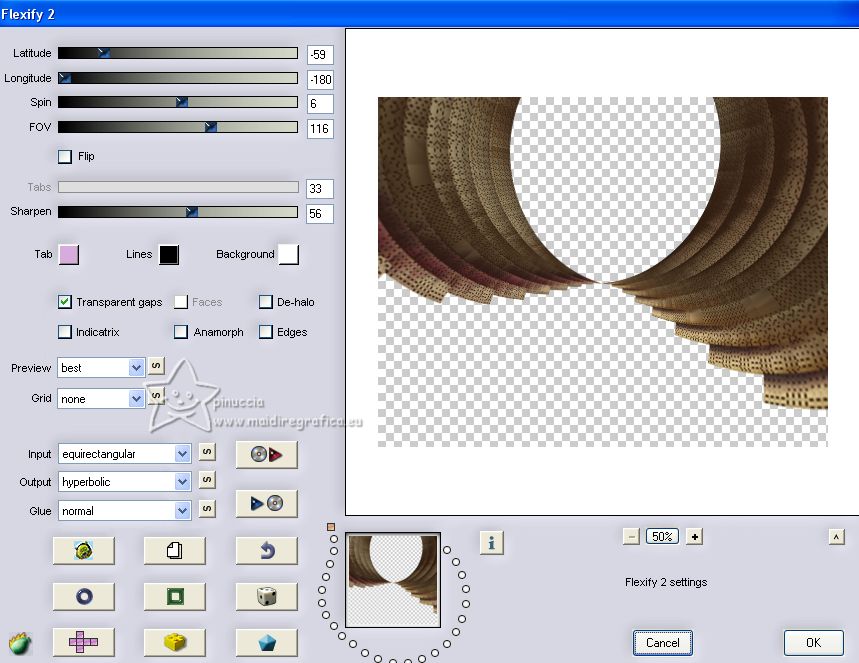 10. Effects>Edge Effects>Enhance. Activate your bottom layer, Raster 1. Selections>Load/Save Selection>Load Selection from Disk. Look for and load the selection mabelBysoxikibem2 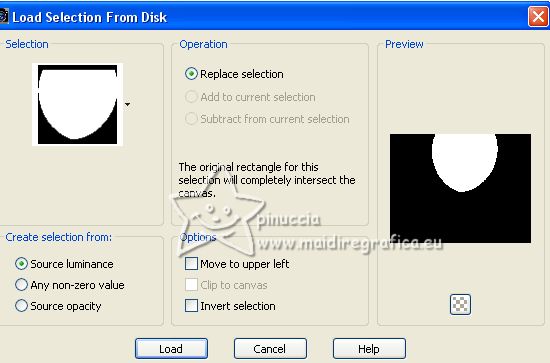 Selections>Promote Selection to Layer. Adjust>Blur>Radial Blur. 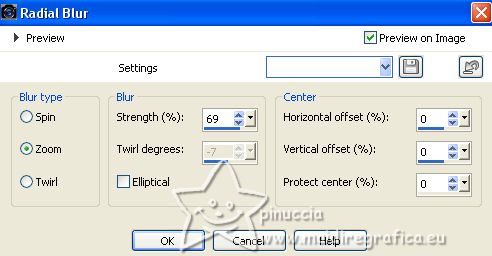 11. Effects>Texture Effects>Fine Leather - background color. 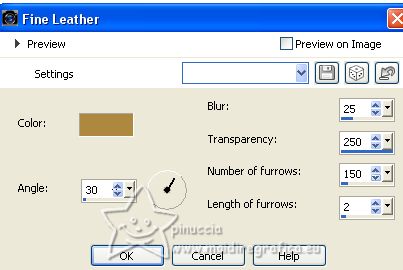 Change the Blend Mode of this layer to Overlay. 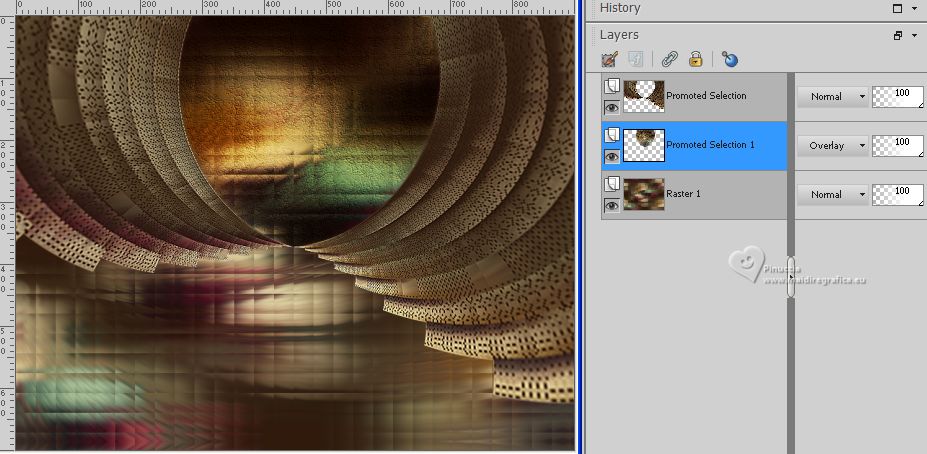 12. Edit>Paste as new layer (the flower misted is still in memory). Place  in the selection a part of your misted in the selection a part of your misted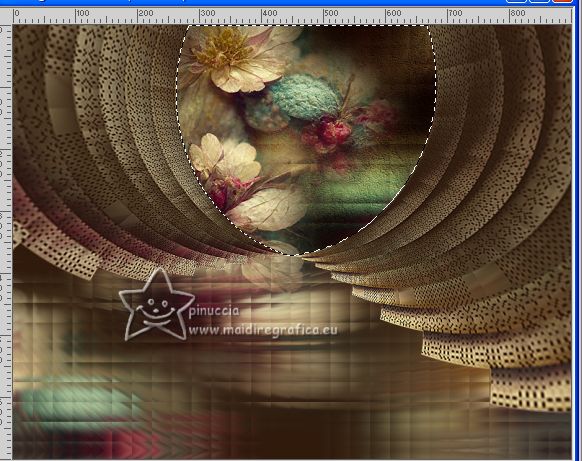 Selections>Invert. Press CANC on the keyboard  Selections>Invert. Layers>Arrange>Move Down. Change the Blend Mode of this layer to Screen. 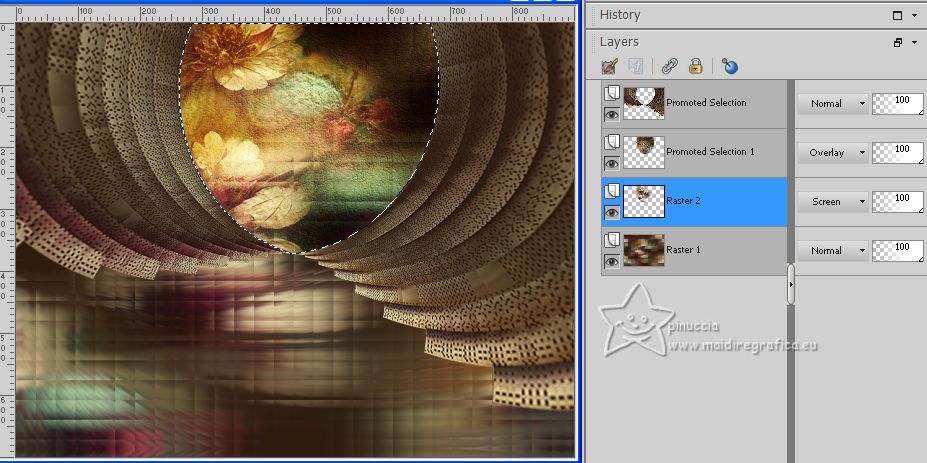 13. Activate the layer above, Promoted Selection 1. Layers>New Raster Layer. Effects>3D Effects>Cutout. 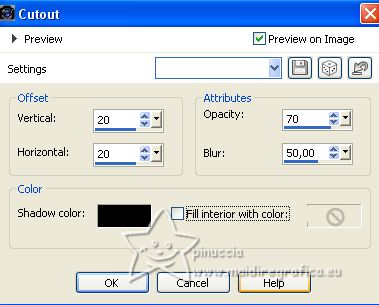 14. Layers>New Raster Layer. Repeat Effects>3D Effects>Cutout, vertical and horizontal -20. 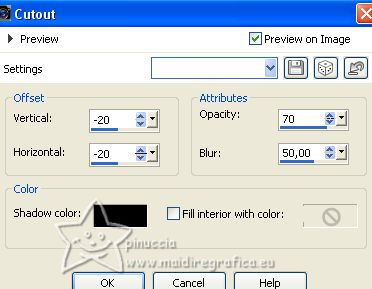 Layers>Merge>Merge Down. Selections>Select None. 15. Activate again the layer Raster 1. Selections>Load/Save Selection>Load Selection from Disk. Look for and load the selection mabelBysoxikibem3 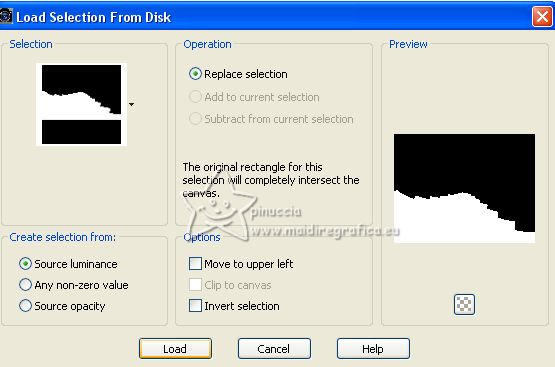 Selections>Promote Selection to Layer. Adjust>Blur>Radial Blur, previous settings  Change the Blend Mode of this layer to Overlay. 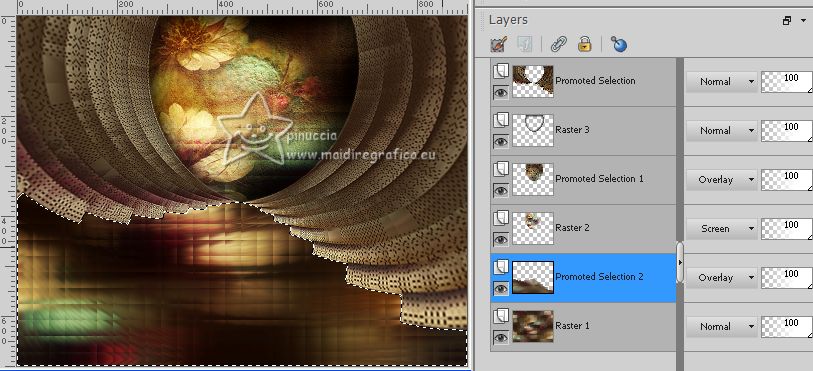 16. Effects>Art Media Effects>Brush Strokes - background color note: in other version of PSP the maximum of lenght is 20. 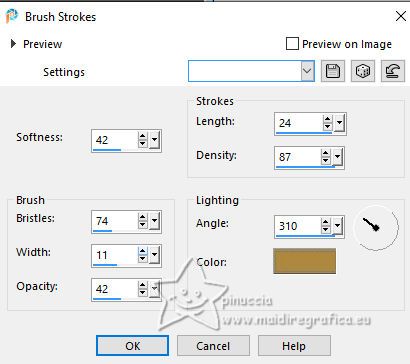 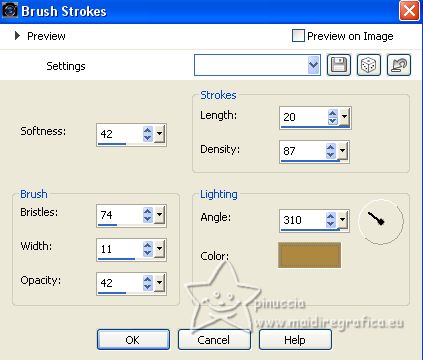 Selections>Select None. 17. Activate your top layer (Promoted Selection). Layers>Duplicate. Adjust>Blur>Gaussian Blur - radius 30.  Change the Blend mode of this layer to Hard Light. 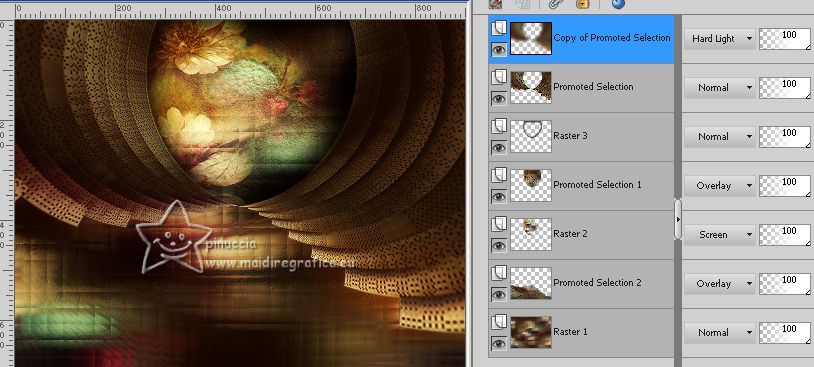 18. Activate the layer Raster 1. Layers>Duplicate. Effects>Plugins>Mura's Meister - Perspective Tiling. 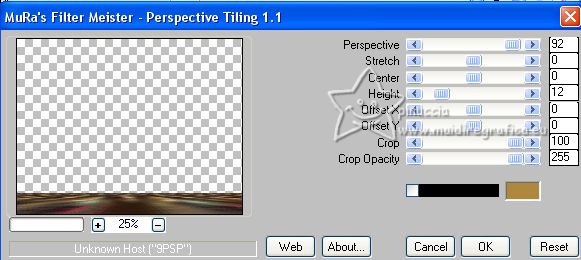 19. Activate your Magic Wand Tool  , Feather 40 , Feather 40 and click in the transparent part to select it. Press 4 times CANC on the keyboard. Selections>Select None. don't forget to set again the Feather to 0 20. Activate again your Top Layer (Copy of Promoted Selection). Edit>Copy Special>Copy Merged. Selections>Load/Save Selection>Load Selection from Disk. Look for and load the selection mabelBysoxikibem4 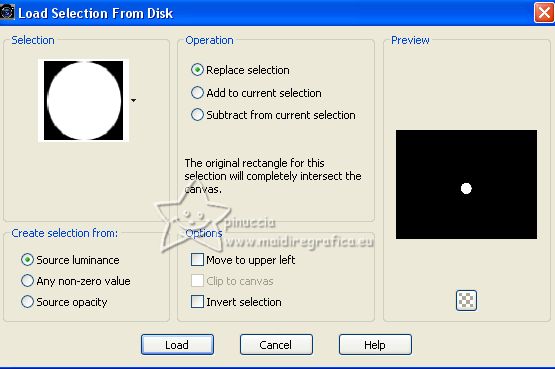 Layers>New Raster layer. Edit>Paste into Selection. Adjust>Sharpness>Sharpen. 21. Effects>Plugins>Alien Skin Eye Candy 5 Impact - Bevel (under Lighting use your background and foreground colors) 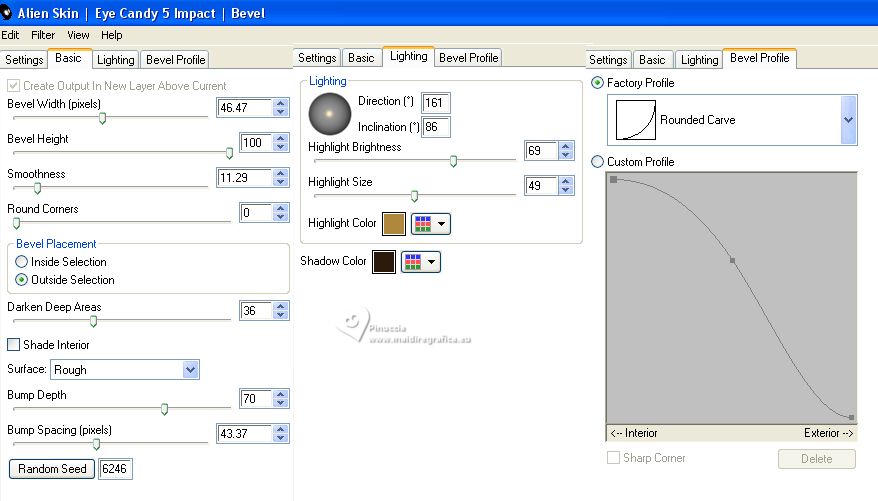 22. Layers>Duplicate. Layers>Merge>Merge Down. 3D Effects>3D Effects>Drop Shadow, color black. 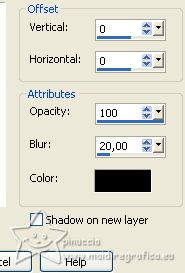 Selections>Select None. Effects>3D Effects>Drop Shadow, color black. 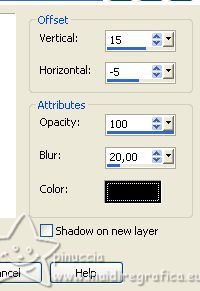 23. Open your woman's tube 745MulherByPqnaAlice 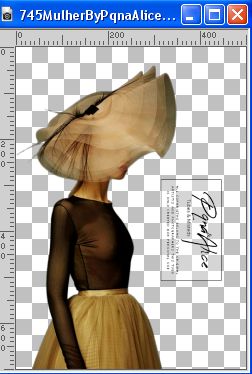 Erase the watermark and go to Edit>Copy. Go back to your work and go to Edit>Paste as new layer. Move  the tube to the left side. the tube to the left side.Effects>3D Effects>Drop Shadow or an effect to your liking. 24. Edit>Copy Special>Copy Merged. Image>Add borders, 1 pixel, symmetric, background color. Selections>Select All. Image>Add borders, 30 pixels, symmetric, whatever color. Selections>Invert. Edit>Paste into Selection. 25. Adjust>Blur>Radial Blur, previous settings.  26. Effects>Art Media Effects>Brush Strokes - background color, still in memory  27. Selections>Invert. Effects>3D Effects>Drop Shadow, color black. 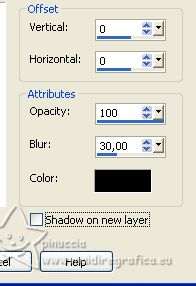 Selections>Select None. 28. Image>Add borders, 1 pixel, symmetric, background color. Selections>Select All. Image>Add borders, 5 pixels, symmetric, whatever color. Selections>Invert. Edit>Paste into Selection (the image of step 24 is still in memory). 29. Adjust>Blur>Radial Blur, previous settings.  Effects>Edge Effects>Enhance More. Selections>Select None. 30. Image>Add borders, 1 pixel, symmetric, background color. Selections>Select All. Image>Add borders, 5 pixels, symmetric, whatever color. Selections>Invert. Edit>Paste into Selection (the image if step 24 is always in memory). 31. Adjust>Blur>Radial Blur, previous settings.  Effects>Edge Effects>Enhance More. Selections>Select None. 32. Image>Add borders, 1 pixel, symmetric, background color. Selections>Select All. Image>Add borders, 45 pixels, symmetric, whatever color. Selections>Invert. Edit>Paste into Selection (the image of step 24 is always in memory). 33. Adjust>Blur>Radial Blur, previous settings.  34. Effects>Art Media Effects>Brush Strokes - background color, still in memory.  35. Selections>Invert. Effects>Drop Shadow, color black.  Edit>Repeat Drop Shadow. Selections>Select None. 36. Selections>Load/Save Selection>Load Selection from Disk. Look for and load the selection mabelBysoxikibem5 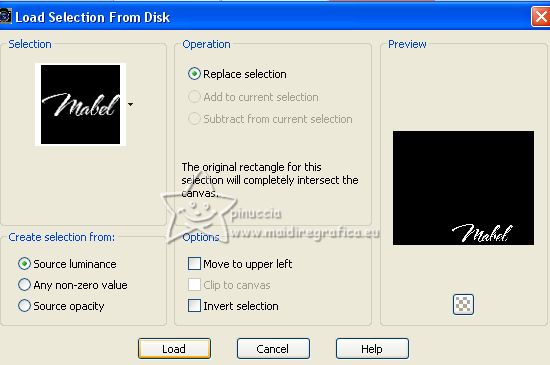 Layers>New Raster Layer. Set your foreground color to a Foreground/Background Gradient, style Linear. 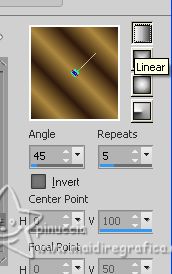 Flood Fill  the selection with your Gradient. the selection with your Gradient.Selections>Select None. 37. Effects>3D Effects>Drop Shadow, background color. 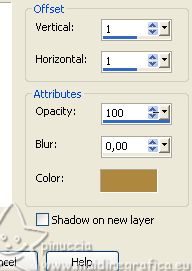 Effects>3D Effects>Drop Shadow, background color. 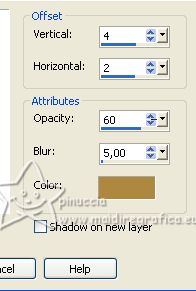 Adjust>Sharpness>Sharpen More. 38. Image>Add borders, 1 pixel, symmetric, background color. 39. Sign your work and save as jpg. For the tube of this version thanks Suizabella. 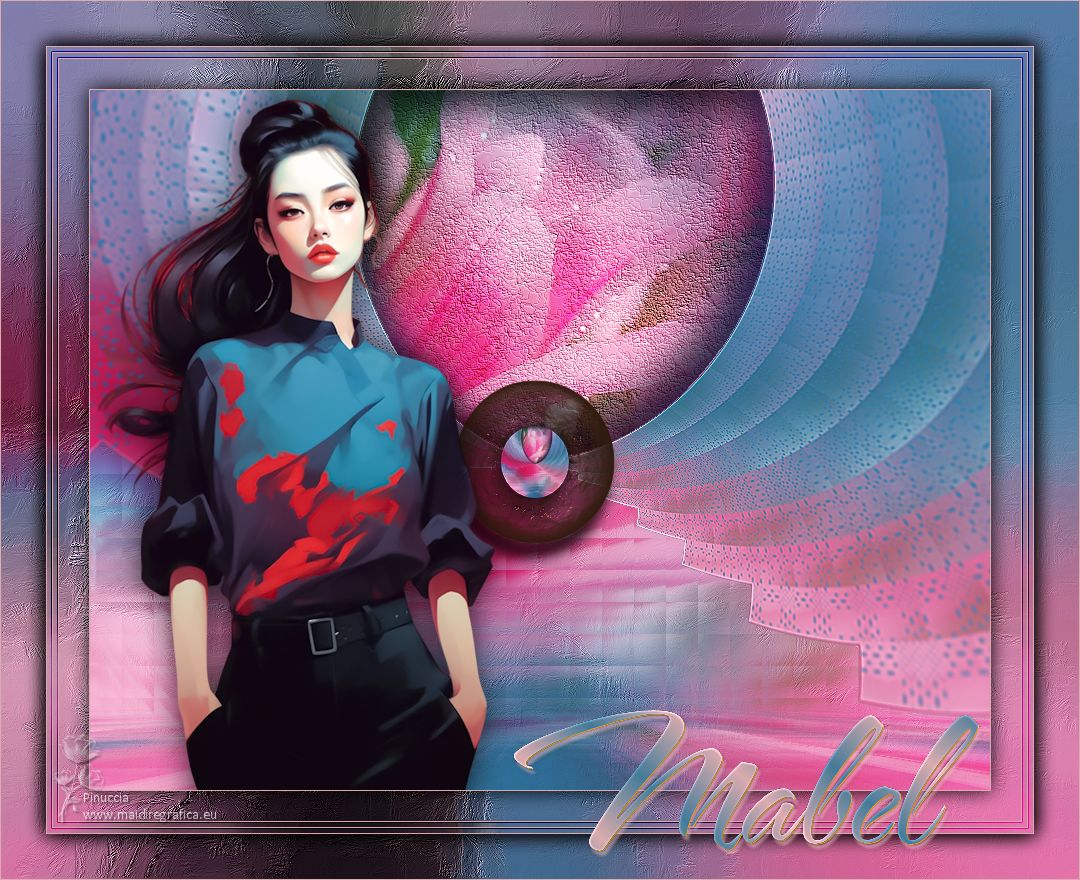  Your versions. Thanks 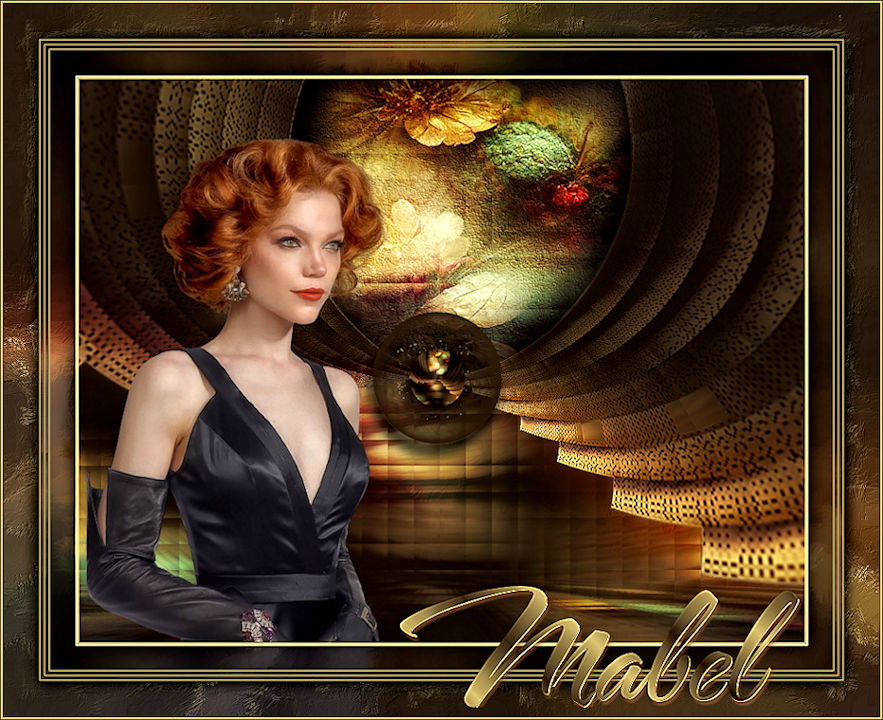 Lynnette 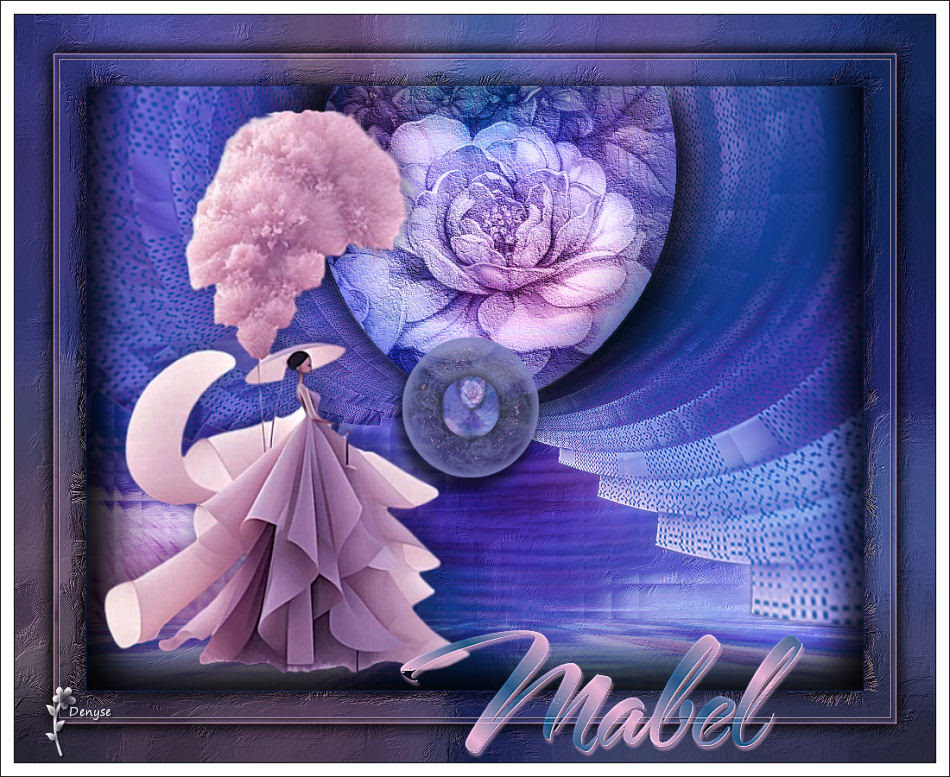 Denyse 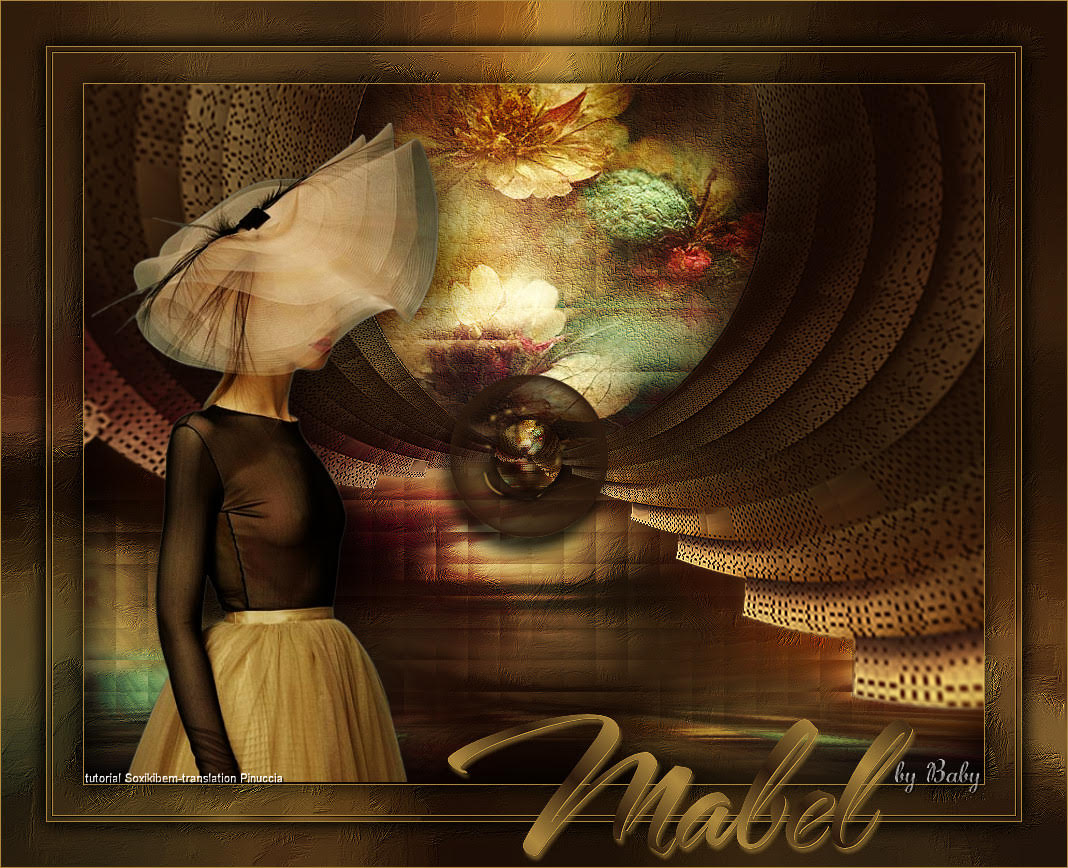 Baby 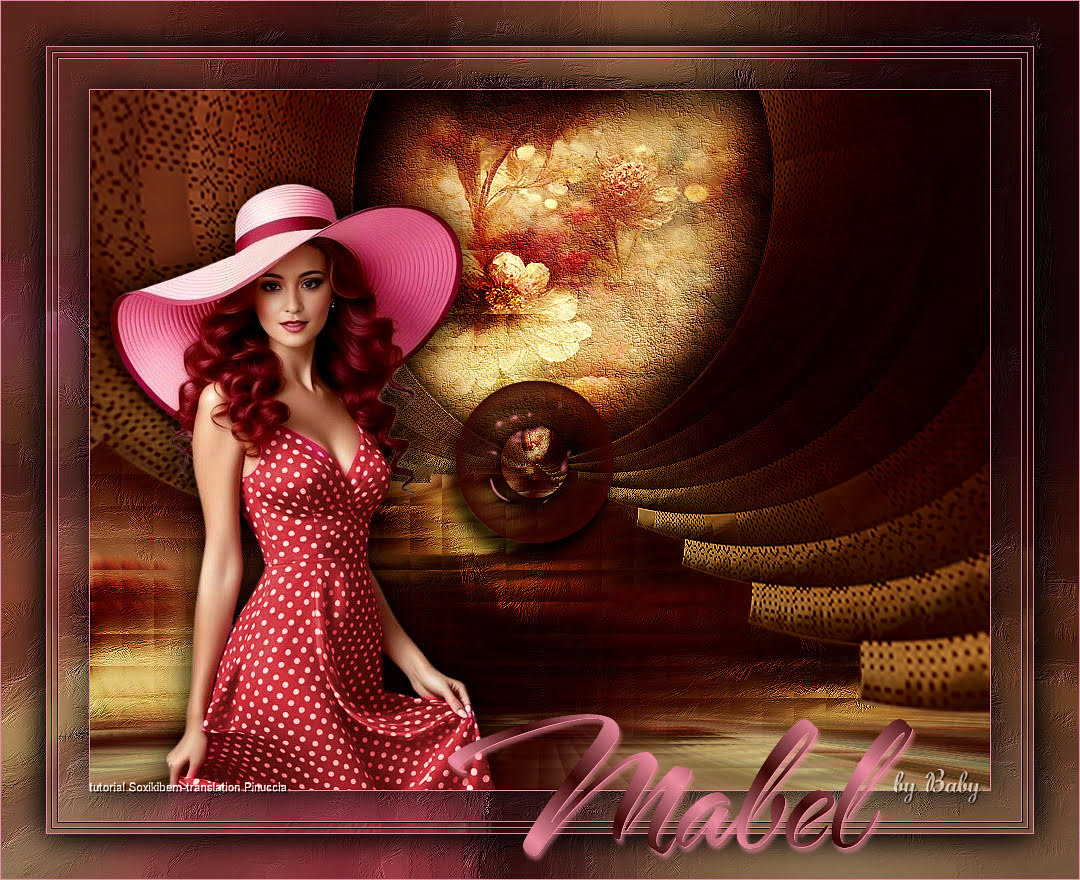 Baby   If you have problems or doubts, or you find a not worked link, or only for tell me that you enjoyed this tutorial, write to me. |