|
CROWNED CRANE  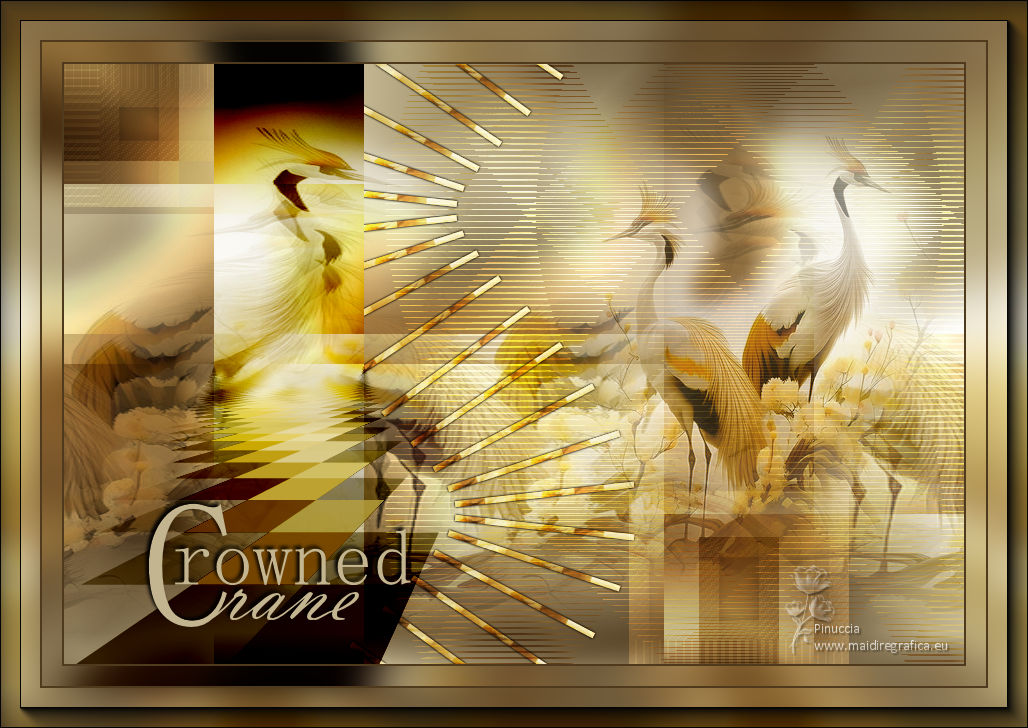

This tutorial was written with Psp2022 and translated with PspX2020, but it can also be made using other versions of PSP.
For this tutorial, you will need:  For the tube thanks PqnaAlice. (The links of the tubemakers here).  consult, if necessary, my filter section here Filters Unlimited 2.0 here &<Bkg Designer sf10I> - Cruncher (to import in Unlimited) here AAA Frames - Foto Frame here Frischluft - Mosaic Plane here Mehdi - Sorting Tiles here Mura's Meister - Copies here Nik Software - Color Efex here  You can change Blend Modes according to your colors. In the newest versions of PSP, you don't find the foreground/background gradient (Corel_06_029). You can use the gradients of the older versions. The Gradient of CorelX here  Copy the Selections in the Selections Folder. 1. Choose 2 colors from your material. Foreground color #4f3a1e, background color #c2b58f 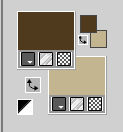 Set your foreground color to a Foreground/Background Gradient, style Sunburst. 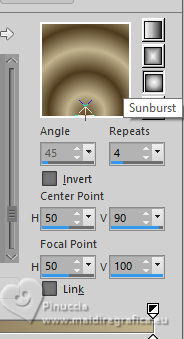 2. Open a new transparent image 900 x 600 pixels. Flood Fill  the transparent image with your Gradient. the transparent image with your Gradient.3. Effects>Plugins>Mehdi - Sorting Tiles. 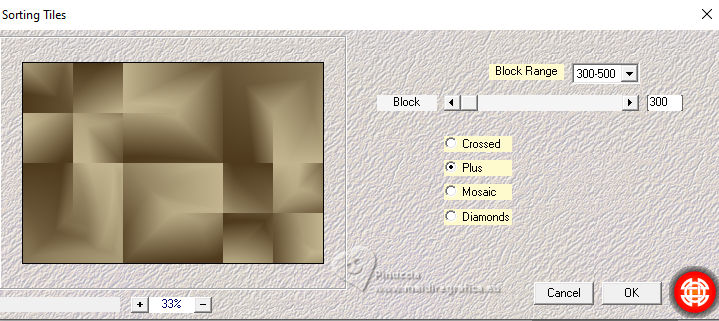 4. Layers>New Raster Layer. Selections>Select All. Open the misted 039AnimaisByPqnaAlice 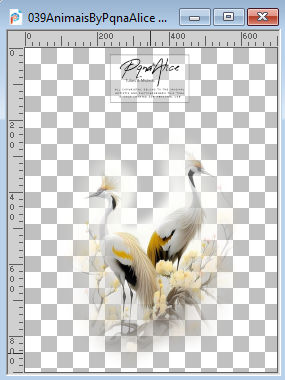 Erase the watermark and go to Edit>Copy. Go back to your work and go to Edit>Paste Into Selection. Selections>Select None. 5. Effects>Image Effects>Seamless Tiling - Side by side.  Change the Blend Mode of this layer to Overlay. 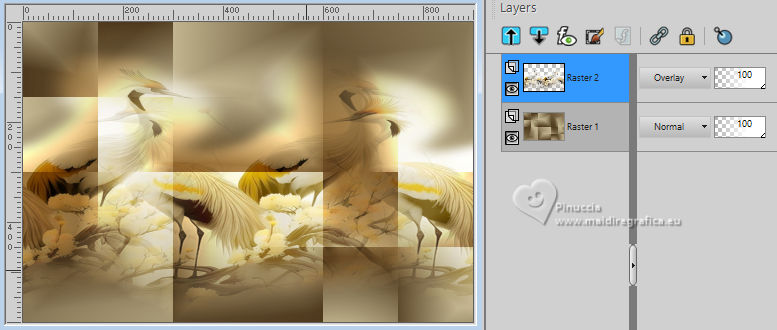 Layers>Merge>Merge Visible. 6. Effects>Image Effects>Seamless Tiling - Stutter vertical. 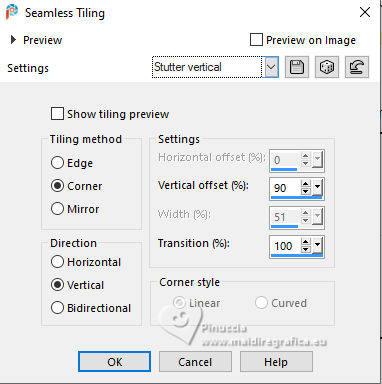 7. Selections>Load/Save Selections>Load Selection from Disk. Look for and load Selection262_Xiki1 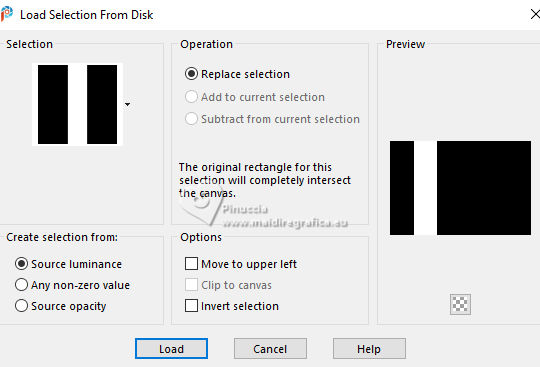 Selections>Promote Selection to Layer. Selections>Select None. 8. Effects>Plugins>Frischluft - Mosaic Plane. 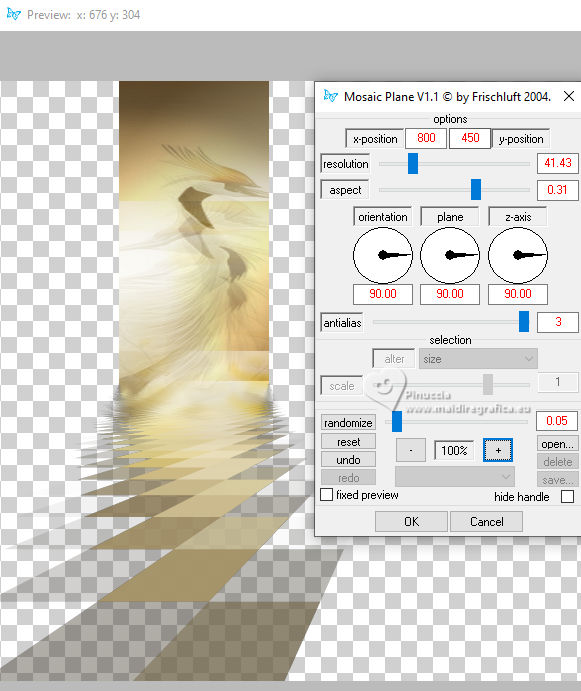 NOTE: On Soxikibem's PSP, this plugin usually closes the program. To solve this, she save the work before applying the effect, and right after applying it she save it again, so her PSP doesn't close. Layers>Duplicate. Change the Blend Mode of this layer to Burn. 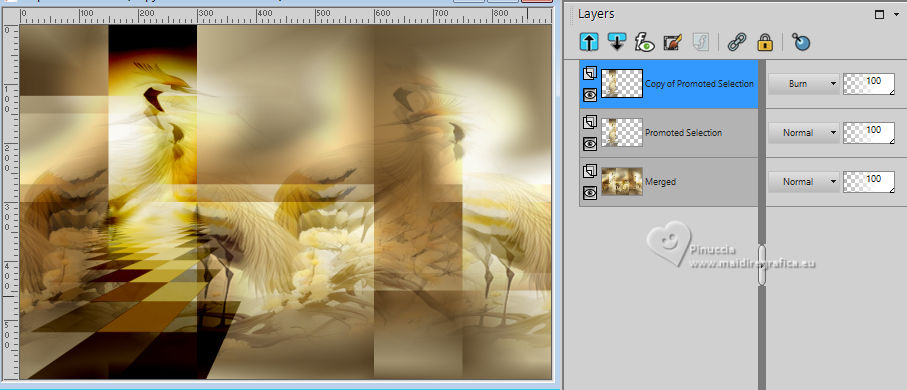 9. Activate the layer Merged. Selections>Load/Save Selections>Load Selection from Disk. Look for and load Selection262_Xiki2 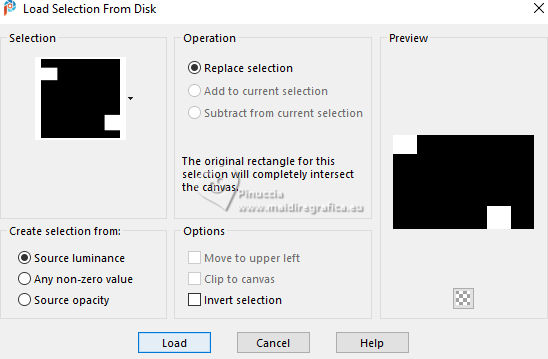 Selections>Promote Selection to Layer. Selections>Modify>Select Selection Borders. 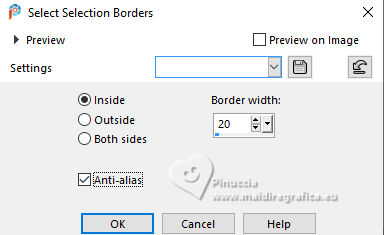 10. Effects>Texture Effects>Weave, wave color: background color. 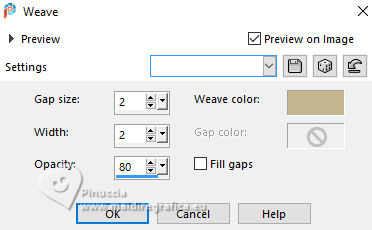 Selections>Select None. 11. Selections>Load/Save Selections>Load Selection from Disk. Look for and load again Selection262_Xiki2  Selections>Modify>Contract - 20 pixels. Layers>New Raster Layer. Effects>3D Effects>Cutout. 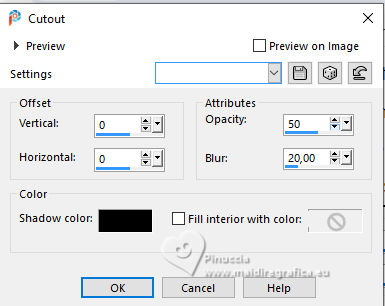 Selections>Select None. Layers>Merge>Merge Down. 12. Effects>Plugins>Filters Unlimited 2.0>&<Bkg Designer sf10 I> - Cruncher. 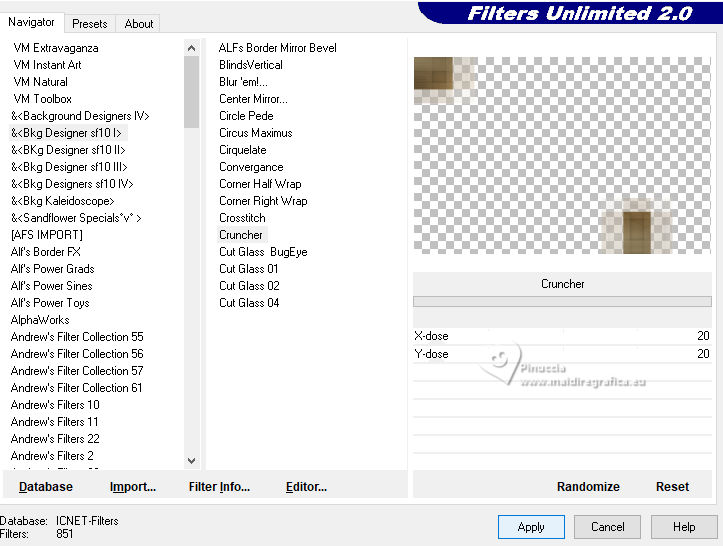 Change the Blend Mode of this layer to Overlay. 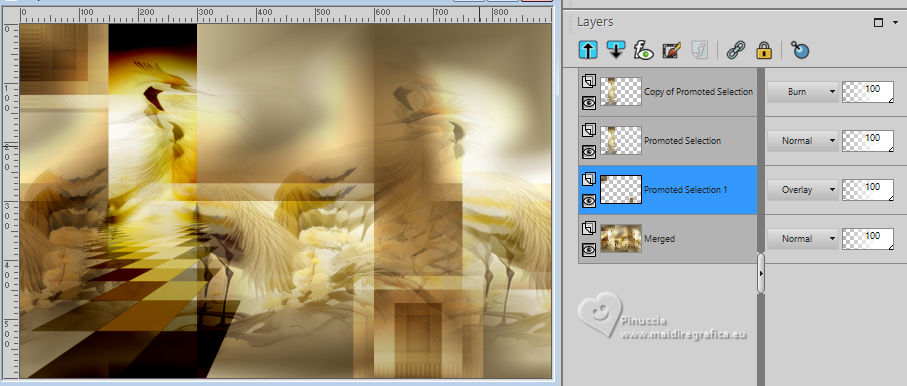 13. Activate the layer Merged. Selections>Load/Save Selections>Load Selection from Disk. Look for and load Selection262_Xiki3 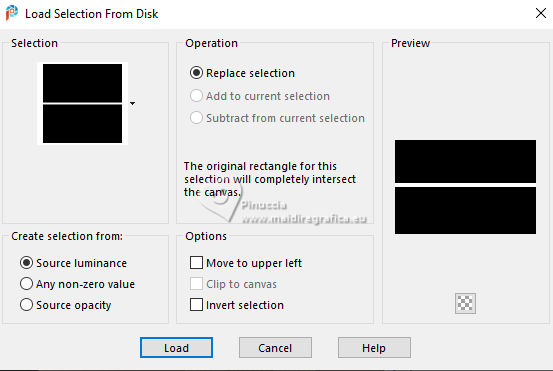 Selections>Promote Selection to Layer. Selections>Select None. Image>Resize, to 20%, resize all layers not checked. 14. Effects>Plugins>Mura's Meister - Copies. 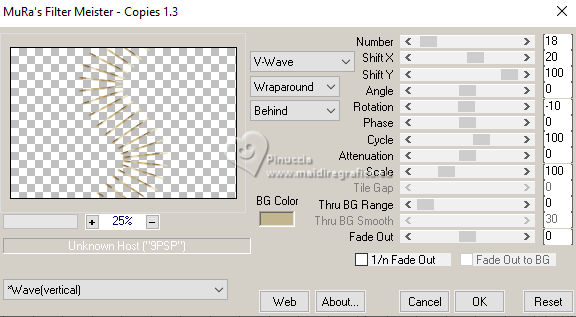 Pick Tool  Position X: 213,00 - Position Y: 0.00. 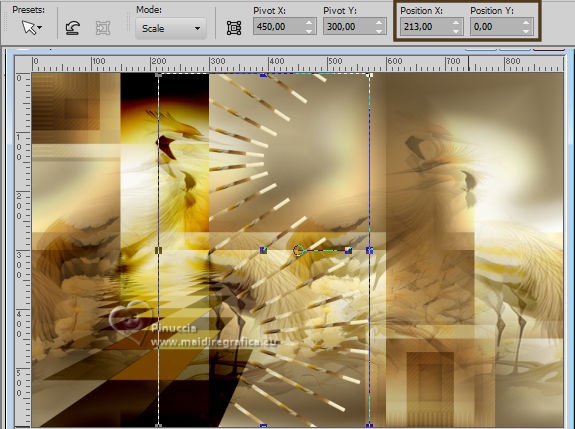 Change the Blend Mode of this layer to Hard Light. Effects>3D Effects>Drop Shadow, color black.  15. Activate the layer Merged. Selections>Load/Save Selections>Load Selection from Disk. Look for and load again Selection262_Xiki1  Selections>Promote Selection to Layer. Selections>Select None. Image>Mirror>Mirror Horizontal. 16. Effects>Distortion Effects>Wave. 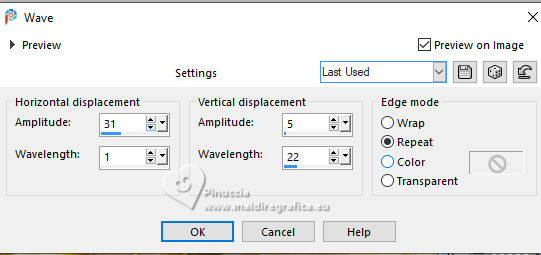 Change the Blend Mode of this layer to Overlay. 17. Your tag and the layer. 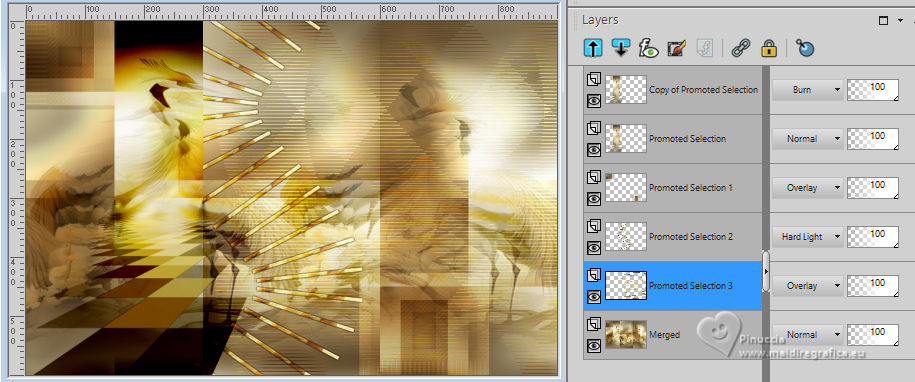 18. Activate your top layer. The misted 039AnimaisByPqnaAlice should be still in memory: Edit>Paste a New Layer. For the supplied tube, Image>Resize to 80%, resize all layers not checked. Move  the tube to the right side. the tube to the right side.Position X: 484,00 and Position Y: -19,00.  Optional: Reduce the opacity of this layer to 70%. 19. Optional: Note of the author: As the misted had a lot of white, I used the plugin: Effects>Plugins>Nik Software - Color Effects Bi-Color User Defined 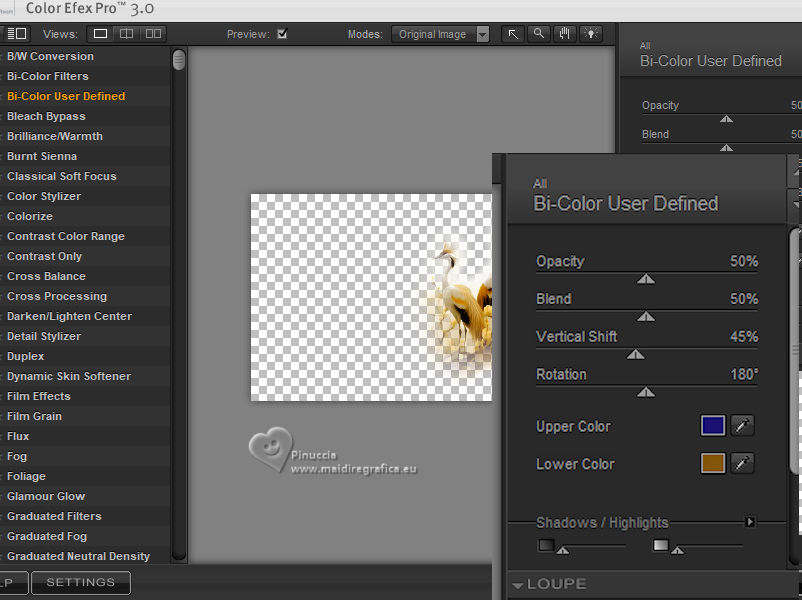 20. Edit>Copy Special>Copy Merged. Image>Add Borders, 2 pixels, symmetric, foreground color. Selections>Select All. Image>Add Borders>, 20 pixels, symmetric, whatever color. Selections>Invert. Edit>Paste Into Selection. 21. Adjust>Blur>Gaussian Blur - 20 pixels.  Selections>Select None. Image>Add Borders - 2 pixels, symmetric, foreground color. Selections>Select All. Image>Add Borders - 40 pixels, symmetric, whatever color. Selections>Invert. Edit>Paste Into Selection. 22. Effects>Reflection Effects>Rotating Mirror, default settings  23. Adjust>Blur>Gaussian Blur - radius 20.  Effects>Plugins>AAA Frames - Foto Frame. 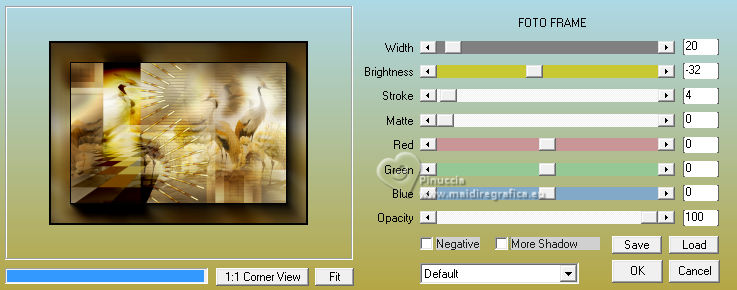 Selections>Select None. 24. Open TituloCrownedCrane  Edit>Copy. Go back to your work and go to Edit>Paste as New Layer. Pick Tool  Position X: 142,00 Position Y: 496.00.  25. Image>Resize, if you want. Sign your work and save as jpg. The misted of this version is mine.   Your versions. Thanks  Franie Margot  Louise 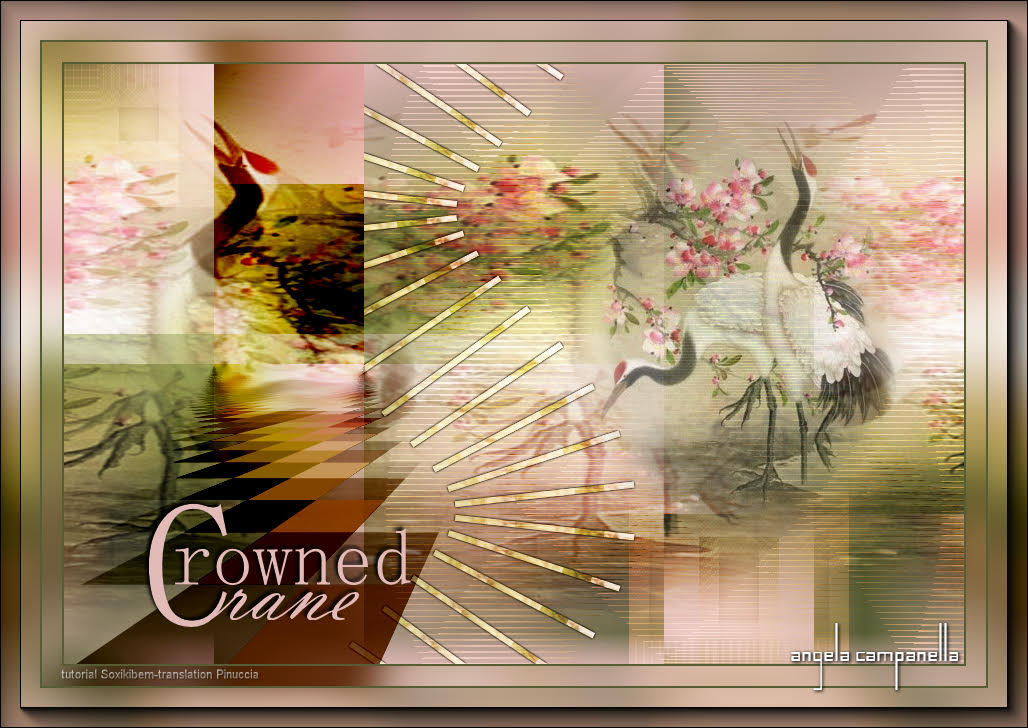 Angela Campanella   If you have problems or doubts, or you find a not worked link, or only for tell me that you enjoyed this tutorial, write to me. |