Home |
Home |

Mappa sito |
Mappa sito |
Tutorial |
Tutorial |
Tut tecnici |
Tut tecnici |
Links-Banner |
Links-Banner |
Regali-Award |
Regali-Award |
Informatica |
Informatica |
Archivio |
Archivio |
Mail |
Mail |
Privacy policy |
Privacy policy |
Novità |
Novità |
Home |
Home |
Mappa sito |
Mappa sito |
Tutorial |
Tutorial |
Tut tecnici |
Tut tecnici |
Links-Banner |
Links-Banner |
Regali-Award |
Regali-Award |
Informatica |
Informatica |
Archivio |
Archivio |
Mail |
Mail |
Privacy policy |
Privacy policy |
Novità |
Novità |
|
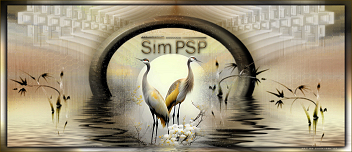
CICA  
This tutorial was written with Psp2022 and translated with PspX17, but it can also be made using other versions of PSP. You can change Blend Modes according to your colors.  Copy the selection in the Selections Folder. Open the mask in PSP and minimize it with the rest of the material. 1. Choose 3 colors from your material. Foreground color #45411c, background color #f7d485 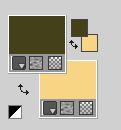 To begin set your foreground color to color 3 #000000. 2. Open a new transparent image 900 x 600 pixels. Flood Fill  the transparent image with color black #ffffff. the transparent image with color black #ffffff.don't forget to set your foreground color to #45411c Layers>New Mask layer>From image Open the menu under the source window and you'll see all the files open. Select the mask NarahsMasks_1745 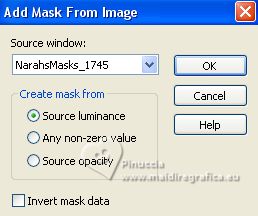 Layers>Invert Mask/Adjustment. Layers>Merge>Merge Group. 3. Effects>Edge Effects>Enhance. Effects>Plugins>FM Tile Tools - Blend Emboss, default settings. 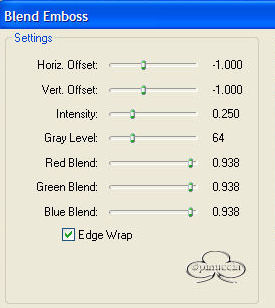 4. Layers>New Raster Layer. Flood Fill the layer with your background color.Selections>Select All. Open the woman's tube 721MulherByPqnaAlice 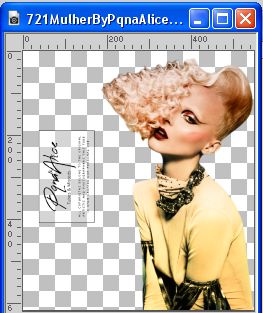 Edit>Copy. Minimize the tube. Go back to your work and go to Edit>Paste into Selection. Selections>Select None. 5. Effects>Image Effects>Seamless Tiling, default settings.  Adjust>Blur>Motion Blur. 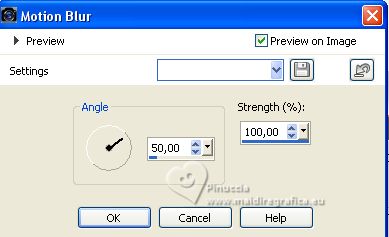 Edit>Repeat Motion Blur. Effects>Edge Effects>Enhance. Edit>Repeat Enhance Edges. 6. Effects>Art Media Effects>Brush Strokes. 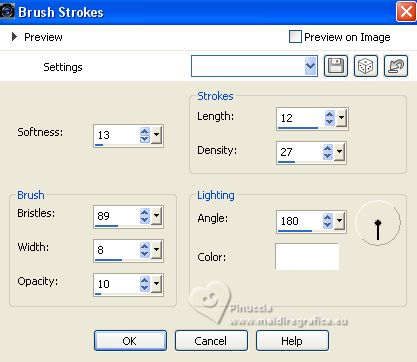 Change the Blend Mode of this layer to Soft Light. 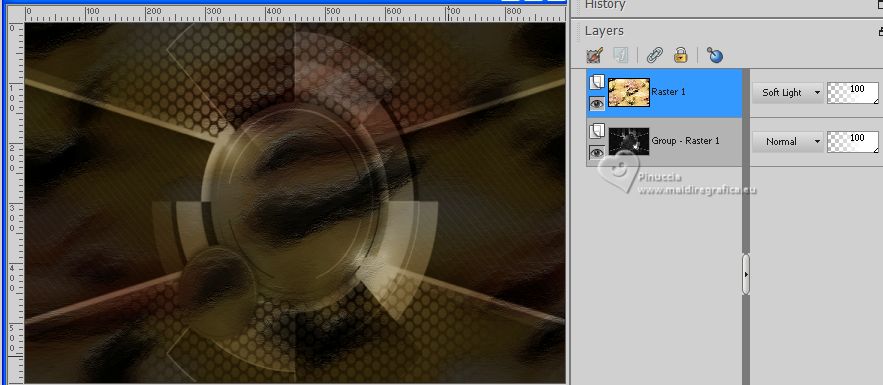 7. Layers>Duplicate - 2 times. Image>Resize, to 80%, resize all layers not checked. Adjust>Blur>Radial Blur. 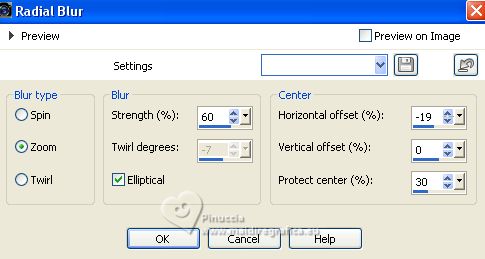 8. Effects>Plugins>AP Lines - Lines - Satin. 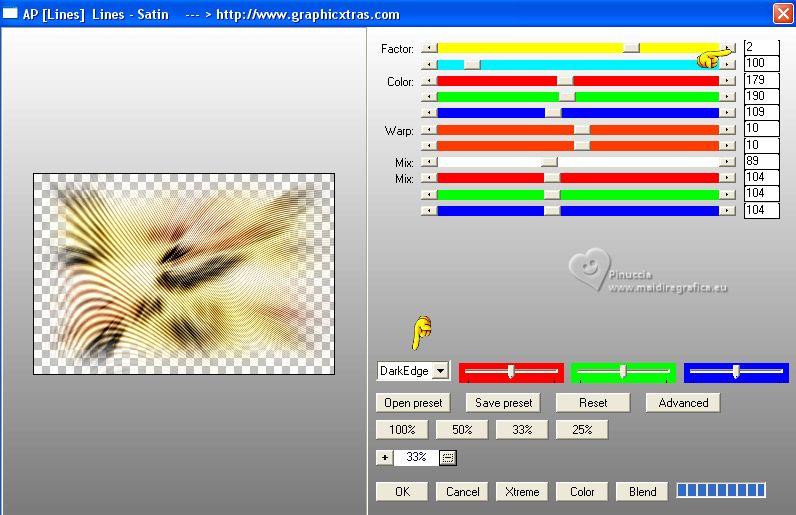 9. Effects>Image Effects>Seamless Tiling. 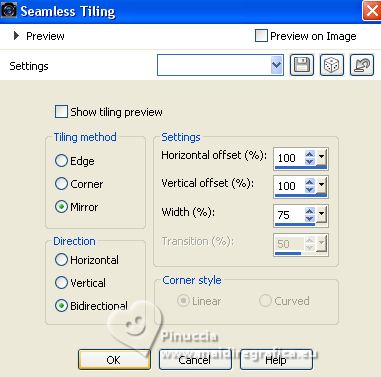 Change the Blend Mode of this layer to Overlay. 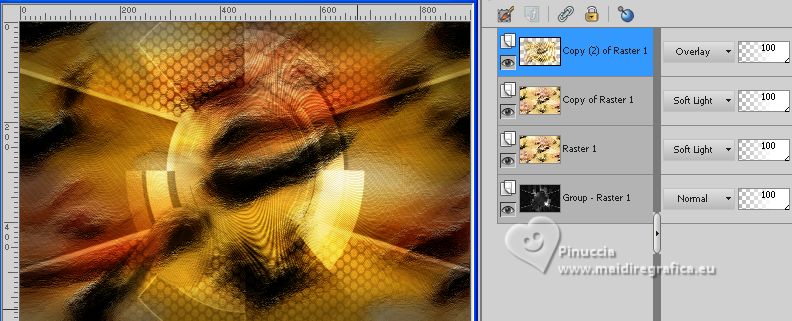 10. Selections>Load/Save Selections>Load Selection From Disk. Look for and load the selection Selection238ByXiki 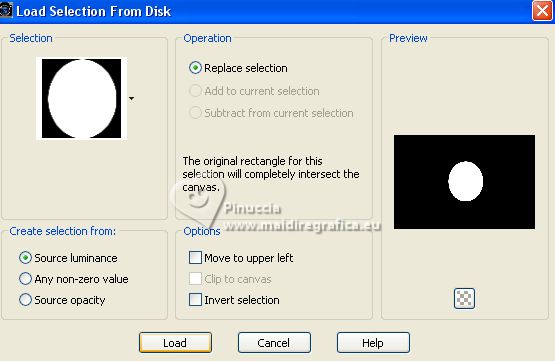 Layers>New Raster Layer. Reduce the opacity of this layer to 50%. Flood Fill the selection with your foreground color #45411c.Set again the opacity of your Flood Fill Tool to 100. 11. Open the flowers tube 123FlorByPqnaAlice 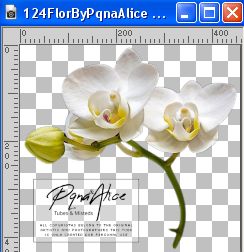 Edit>Copy. Minimize the tube Go back to your work and go to Edit>Paste as new layer. Place  a part of your tube in the selection a part of your tube in the selection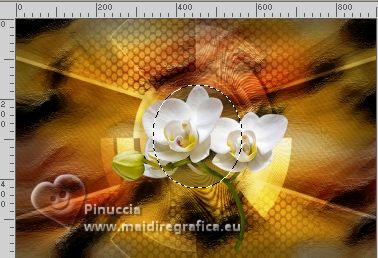 Selections>Invert. Press CANC on the keyboard  Selections>Invert. 11. Layers>Duplicate. Activate the layer below, Raster 3. Adjust>Blur>Motion Blur. Effects>Edge Effects>Enhance. Edit>Repeat Enhance Edges. 12. Activate your Top Layer (Copy of Raster 3). Effects>Edge Effects>Enhance. Effects>Plugins>Alien Skin Eye Candy 5 Impact - Glass. 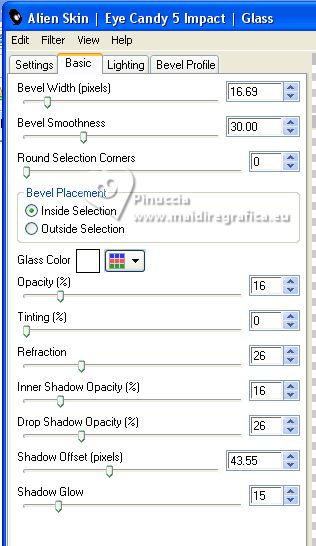 Layers>Merge>Merge Down - 2 times. 13.Effects>3D Effects>Drop Shadow, color black. 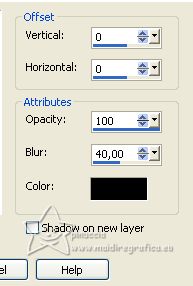 Edit>Repeat Drop Shadow. 14. Layers>New Raster Layer. Effects>Plugins>Alien Skin Eye Candy 5 Impact - Backlight. Under Colors use background color, white and background color. 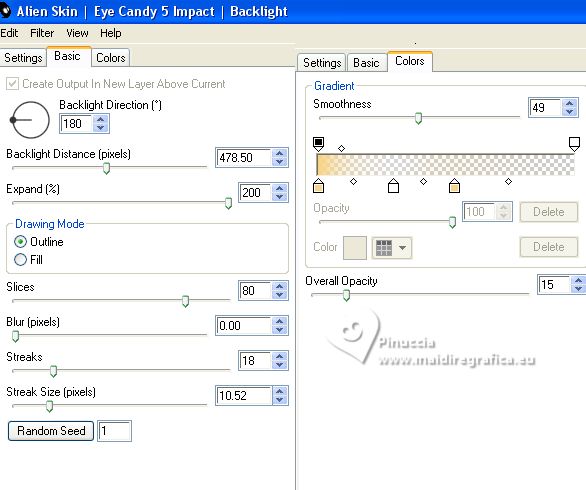 NOTE: Explanatory video on how to set the background color in the Backlight plugin, as above, here Selections>Select None. 15. Effects>Image Effects>Seamless Tiling. 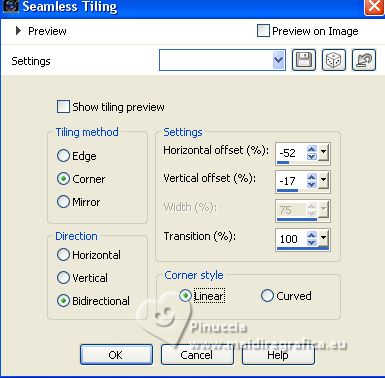 Change the Blend Mode of this layer to Screen. 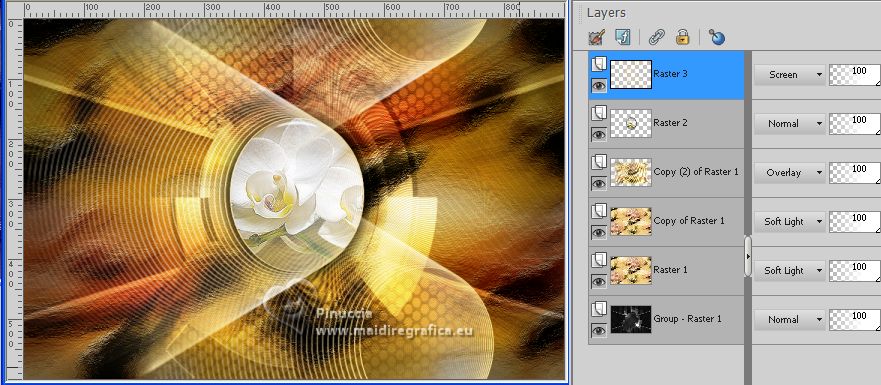 16. Open Decor238BySoxikibem 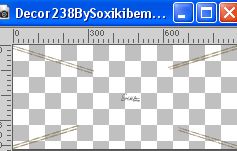 Erase the watermark and go to Edit>Copy. Go back to your work and go to Edit>Paste as New Layer. Pick Tool  keep Position X: 0,00 and set Position Y: 89,00. 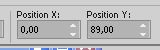 17. Edit>Copy Special>Copy Merged. Image>Add Borders, 1 pixel, symmetric, color 3 #000000. Selections>Select All. Image>Add Borders, 10 pixels, symmetric, whatever color. Selections>Invert. Edit>Paste Into Selection. Adjust>Blur Gaussian Blur - radius 20.  18.Effects>Plugins>Graphics Plus>Cross Shadow, default settings.  Selections>Select None. 19. Image>Add Borders, 1 pixel, symmetric, color 3 #000000. Selections>Select All. Image>Add Borders, 5 pixels, symmetric, whatever color. Selections>Invert. Edit>Paste Into Selection. Adjust>Blur Gaussian Blur - radius 20. 20. Effects>Plugins>Graphics Plus>Cross Shadow, default settings. Selections>Select None. 21. Image>Add Borders, 1 pixel, symmetric, color 3 #000000. Selections>Select All. Image>Add Borders, 40 pixels, symmetric, whatever color. Selections>Invert. Edit>Paste Into Selection. Adjust>Blur Gaussian Blur - radius 20. 22. Effects>Plugins>Graphics Plus>Cross Shadow, default settings. Repeat this Effect another time. 23. Selections>Invert. Effects>3D Effects>Drop Shadow, color black. Selections>Select None. 24. Activate again the flowers tube 123FlorByPqnaAlice and go to Edit>Copy. Go back to your work and go to Edit>Paste as New Layer. For me: Image>Resize, 80%, resize all layers not checked. Image>Mirror. Image>Free Rotate - 40 degrees to left. 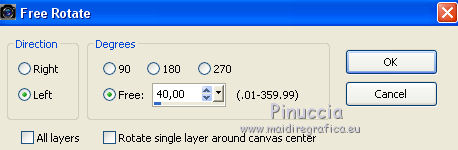 Move the tube to the left.Effects>3D Effects>Drop Shadow or an effect to your liking. 25. Activate again the woman's tube 721MulherByPqnaAlice and go to Edit>Copy. Go back to your work and go to Edit>Paste as New Layer. Move the tube to the right.Effects>3D Effects>Drop Shadow or an effect to your liking. 26. Open TituloCicaBySoxikibem  Erase the watermark and go to Edit>Copy. Go back to your work and go to Edit>Paste as New Layer. Pick Tool and set Position X: 91,00 and Position Y: 496,00. 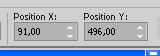 Effects>3D Effects>Drop Shadow. color black. 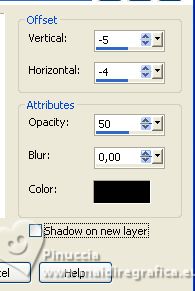 27. Image>Add Borders, 1 pixel, symmetric, color 3 #000000. 28. Sign your work and save as jpg. For the tubes of this version thanks NaiseM and Lana.   Your versions. Thanks  Denise  If you have problems or doubts, or you find a not worked link, or only for tell me that you enjoyed this tutorial, write to me. 20 July 2023 |


 it must necessarily be imported into Unlimited