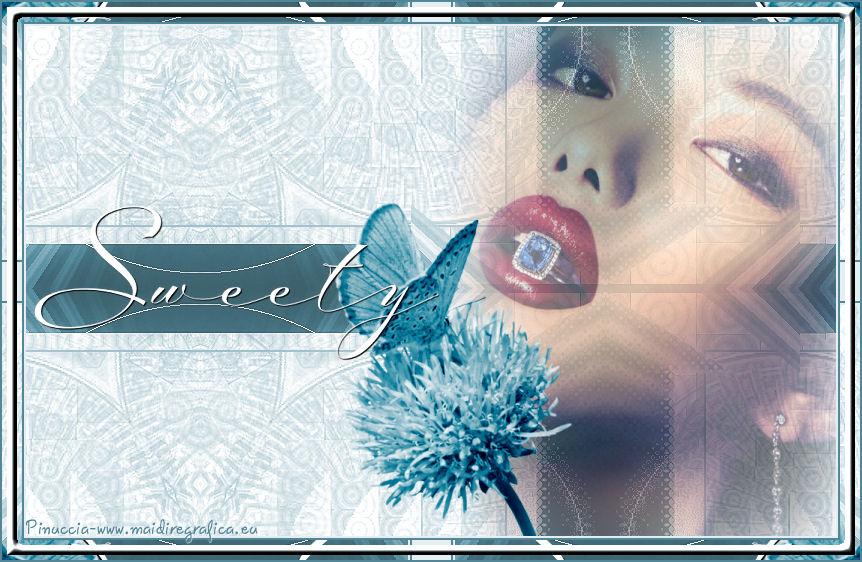
Thank you Rocky for your permission to translate your tutorials.
The site is closed

This tutorial is a personal creation of Rocktambule and it is prohibited to copy or distribute it on the net (forums, groupes.. etc), or to use it on commercials sites.
This tutorial was created and translated with Corel12, but can also be made using other versions of PSP.
Since version PSP X4, Image>Mirror was replaced with Image>Flip Horizontal,
and Image>Flip with Image>Flip Vertical, there are some variables.
In versions X5 and X6, the functions have been improved by making available the Objects menu.
In the latest version X7 command Image>Mirror and Image>Flip returned, but with new differences.
See my schedule here
For this tutorial, you will need:
A person and a fleur.
The rest of material here
For the tubes thanks Mina and Yoka.
According to the colors, the tube, the filters ecc., you may get different results.
Plugins
consult, if necessary, my filter section here
Filters Unlimited 2.0 here
&<Bkg Designer sf10III> - VME Picture in a Picture (to import in Unlimited) here
the single effect is in the material
Kang 1 - Penzilla here
the single effect is in the material
Kang 4 - Bubblecross Waves here
the single effect is in the material
Nik Software - Color Efex Pro here)
Scribe - 4way mirror - in the material.
Filter Factory Gallery B - Button Deluxe here
Déformation - Miroir 4 cadrans, in the material.
Filters Kang, Factory Gallery and Scribe can be used alone or imported into Filters Unlimited.
(How do, you see here)
If a plugin supplied appears with this icon  it must necessarily be imported into Unlimited

You can change Blend Modes according your colors.
Copy the selection in the Selections Folder.
Open the mask in PSP and minimize it with the rest of the material.
1. Open a new transparent image 800 x 500 pixels.

2. Selections>Select All.
Open your background image "fondsweety", Edit>Copy.
Go back to your work and Edit>Paste into Selection.
Selections>Select None.
3. Set your foreground color with #f1d7be,
and your background color with #e0a36a

Set your foreground color to Foreground/background Gradient, style Sunburst.

4. Layers>New raster layer.
Flood fill  the layer with the gradient.
5. Effects>Plugins>Filters Unlimited 2.0 - &<Bkg Designer sf10III> VME picture in picture

6. Change Blend mode of this layer to Multiply.

7. Effects>Edge Effects>Enhance.
Effects>Reflection Effects>Feedback.

8. Effects>Reflection Effects>Rotating Mirror, default settings.

9. Stay on this layer.
Layers>New Mask layer>From image.
Open the menu under the source window and you'll see all the files open.
Select the mask masquesweety

Layers>Merge>Merge group.
10. Effects>3D Effects>Drop Shadow - background color.

I changed Blend mode of this layer to Luminance (decide according your colors).
11. Adjust>Sharpness>Sharpen.
You should have this.

12. Image>Add borders, 5 pixels, symmetric, background color.

13. Layers>Duplicate.
Effects>Plugins>VanDerLee Unplugged-X - Zoomlens.

14. Effects>Reflections Effects>Kaleidoscope.

15. Image>Resize - 75%, resize all layers not checked.

16. Effects>Plugins>Filters Unlimited 2.0 - Deformations - Miroir 4 cadrans.

17. Effects>3D Effects>Drop Shadow - background color.

Repeat Drop Shadow, but vertical and horizontal -2.
Change Blend mode of this layer to Luminance.

18. Layers>Merge>Merge All.
19. Layers>Duplicate.
20. Effects>Plugins>Filter Factory Gallery B - Button Deluxe.

21. Selections>Load/Save Selection>Load Selection from Disk.
Look for and load selection1sweety-rocky.

Selections>Promote Selection to Layer.
Selections>Select None.
22. Effects>Plugins>Kang 1 - Penzilla.

23. Change Blend mode of this layer to Luminance (L).
Activate the middle layer (copy of background layer) and delete it.

24. You remain with two layers
Activate the top layer.

Layers>Duplicate.
25. Image>Free Rotate - 90 degrees to right

26. Edit>Cut - this command cuts, but also keeps in memory.
27. Selections>Select All.
Edit>Paste into Selection.
Selections>Select None.
28. You shoud have this.

29. Effects>Plugins>Kang 4 - Bubblecross waves.

Change Blend mode of this layer to Luminance.

30. Layers>Merge>Merge All.
31. Effects>Plugins>Nik Software - Color Efex Pro - Glamour glow, default settings.

32. Again Effects>Plugins>Nik Software - Color Efex Pro - Tonal Contrast, default settings.

33. Effects>Plugins>Scribe - 4way mirror.

34. Open your tube of the person - Edit>Copy.
Go back to your work and Edit>Paste as new layer.
35. To move the tube, clic key K to activate Pick Tool 
with PSP 9 clic key D to activate Deformation Tool 
mode Scale 
set the layer to positions x: 279 - y: 0 (decide according your tube)

Change the opacity of this layer to 50/60, according to your tube.
36. Open the flower tube - Edit Copy.
Go back to your work and Edit>Paste as new layer.
Image>Resize - 2 times to 75%, resize all layers not checked (according your tube).
Adjust>Sharpness>Sharpen more.
Change Blend mode of this layer to Luminance (L), opacity 90.
To move it, Key K/D to activate Pick Tool /Deformation
set the layer to positions x: 203 - y: 233.

37. Open the wordart, Edit>Copy.
Go back to your work and Edit>Paste as new layer.
To move it, Key K/D to activate Pick Tool /Deformation
set the layer to positions x: 7 - y: 174.

38. Image>Add borders - 2 pixels, symmetric - foreground color #f1d7be.
Image>Add borders - 2 pixels, symmetric - background color #e0a36a.
Image>Add borders - 20 pixels, symmetric - foreground color #f1d7be.
Image>Add borders - 2 pixels, symmetric - background color #e0a36a.
39. Activate the Magic Wand tools 
clic on the 20 pixels bord to select it.
Effects>Plugins>Scribe - 4 way mirror, default settings.

Selections>Modify>Contract - 5 pixels.
Layers>New raster layer.
Set the foreground color to Color.
Flood Fill  with foreground color.
Effects>3D Effects>Inner bevel.

Selections>Select None.
Sign your work and save as jpg.
The tubes of this version are by Mentali and C-Josy.


Your versions. Thanks

Olimpia

If you have problems or doubt, or you find a not worked link, or only for tell me that you enjoyed this tutorial, write to me.
3 May 2014

