Thank you Rocky for your permission to translate your tutorials.
The site is closed

This tutorial is a personal creation of Rocktambule and it is prohibited to copy or distribute it on the net (forums, groupes.. etc), or to use it on commercials sites.
This tutorial was created and translated with Corel12, but can also be made using other versions of PSP.
Since version PSP X4, Image>Mirror was replaced with Image>Flip Horizontal,
and Image>Flip with Image>Flip Vertical, there are some variables.
In versions X5 and X6, the functions have been improved by making available the Objects menu.
In the latest version X7 command Image>Mirror and Image>Flip returned, but with new differences.
See my schedule here
For this tutorial, you will need:
Material here
For the tube thanks Gabry
The rest of the material is by Rocktambule.
Plugins
consult, if necessary, my filter section here
Filters Unlimited 2.0 here
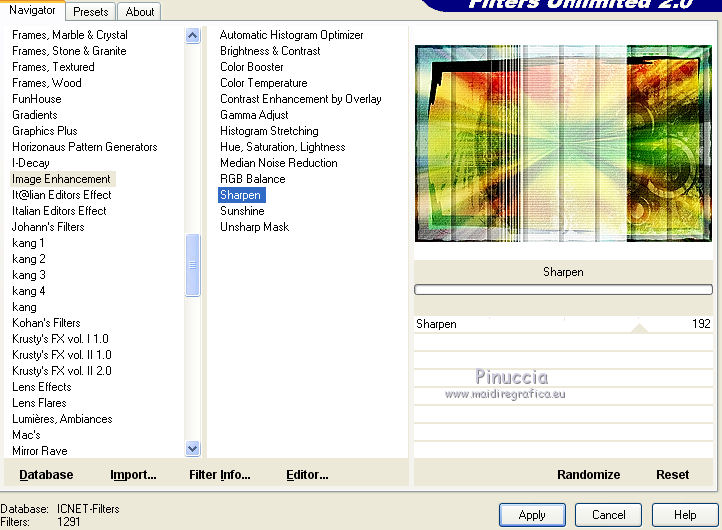
Image Enhancement - Sharpen here
the Image Enhancement are standard in Unlimited;
however, the single effect is in the material
Unplugged Tools - Barcode generator here
the single effect is in the material
Graphics Plus - Panel Stripes here
Nik Software - Color Efex Pro here)
Filters Graphics Plus and Unplugged Tools can be used alone or imported into Filters Unlimited.
(How do, you see here)
If a plugin supplied appears with this icon  it must necessarily be imported into Unlimited

You can change Blend Modes according your colors.
According to the colors, the tube, the blend mode ecc., you may get different results.
Open the mask in PSP and minimize it with the rest of the material.
1. Open a new transparent image 900 x 600 pixels.

2. Selections>Select All.
Open the background image "fondpeps-rocky", Edit>Copy.
Go back to your work and Edit>Paste into Selection.
Selections>Select None.
3. Selections>Select All.
Open your person tube, Edit>Copy.
Go back to your work and Edit>Paste into Selection.
Selections>Select None.
4. Effects>Image Effects>Seamless Tiling, default settings.

5. Adjust>Blur>Radial blur.

Change the Blend mode of this layer to Overlay.

6. Layers>Merge>Merge visible.
7. Set your foreground color to black #000000.
Layer>New Raster layer.
Flood fill  the layer with color black.
8. Layers>New Mask layer>From image.
Open the menu under the source window and you'll see all the files open.
Select the mask masquepeps-rocky.

Layers>Merge>Merge group.
9. Change Blend mode of this layer to Overlay.

Effects>Edge Effects>Enhance.
10. Layers>Merge>Merge All.
11. Layers>Duplicate.
12. Effects>Plugins>Filters Unlimited 2.0 - Unplugged Tools - Barcode Generator
Attention for some will be necessary to adapt the filter
(try different settings, for example 106; 131; 0,0,64,64),
in order to obtain a bar wide enough at the center.
For my plugin, I used the following settings.

Don't worry if your result will be different from mine.
13. Change the Blend mode of this layer to Screen.

14. Effects>Plugins>Filters Unlimited 2.0 - Paper Textures - Striped Paper coarse.

15. Layers>Merge>Merge All.
16. Layers>Duplicate.
17. Effects>Plugins>Graphics Plus - Panel Stripes, default settings.

18. Change the Blend Mode of this layer to Multiply and the opacity to 50.

19. Layers>Merge>Merge All.
20. Layers>Duplicate.
Image>Flip.
Change the Blend mode of this layers to Overlay and the opacity to 50.

21. Layers>Merge>Merge all.
22. Effects>Plugins>Filters Unlimited 2.0 - Image Enhancement - Sharpen.

23. Effects>Plugins>Nik Software - Color Efex Pro - Tonal Contrast.

24. Open the tube "deco" - Edit>Copy.
Go back to your work and go to Edit>Paste as new layer.
Change the Blend mode of this layer to Luminace (L) and the opacity to 55.
24. Image>Add borders, 2 pixels, symmetric, color black.
25. Open again your person tube - Edit>Copy.
Go back to your work and go to Edit>Paste as new layer.
For me: Image>Resize - 75%, resize all layers not checkes.
Adjust>Sharpness>Sharpen - 2 times.
26. To move the tube, clic key K to activate Pick Tool 
with PSP 9 clic key D to activate Deformation Tool 
mode Scale 
set the layer to positions x: 19 - y: -26 (decide according your tube)

27. Activate the bottom layer.
Open the tube "deco2" - Edit Copy.
Go back to your work and Edit>Paste as new layer.
Colorize according to your colors.
28. Image>Add borders - 2 pixels, symmetric - color white.
Sign your work and save as jpg.
The tube of this version is by Azalée


Your versions. Thanks

Rossella

If you have problems or doubt, or you find a not worked link, or only for tell me that you enjoyed this tutorial, write to me.
3 May 2014

