|
LUKA


Thanks SIM PSP Group for your invitation to translate your tutorials into english

This tutorial was written with Psp2022 and translated with PspX7, but it can also be made using other versions of PSP.
Since version PSP X4, Image>Mirror was replaced with Image>Flip Horizontal,
and Image>Flip with Image>Flip Vertical, there are some variables.
In versions X5 and X6, the functions have been improved by making available the Objects menu.
In the latest version X7 command Image>Mirror and Image>Flip returned, but with new differences.
See my schedule here
For this tutorial, you will need:

Thanks for the tubes Luz Cristina and Nena Silva and for the mask Narah.
The rest of the material is by Roberta Maver.
(The links of the tubemakers here).

consult, if necessary, my filter section here
Mehdi - Sorting Tiles here

You can change Blend Modes according to your colors.
In the newest versions of PSP, you don't find the foreground/background gradient (Corel_06_029).
You can use the gradients of the older versions.
The Gradient of CorelX here

Open the mask in PSP and minimize it with the rest of the material.
1. Choose 2 colors from your material.
Foreground color #572a1b
background color #d0b36e
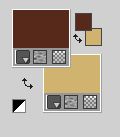
Set your foreground color to a Foreground/Background Gradient, style Linear.
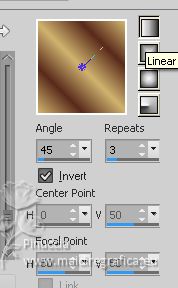
2. Open Alpha_LukabyRobertaMaver
This image, that will be the basis of your work, is not empty,
but contains a selection saved to alpha channel.
Flood Fill  the transparent image with your Gradient. the transparent image with your Gradient.
3. Selections>Select All.
Open the landscape 2001-luzcristina 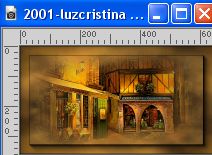
Edit>Copy.
Go back to your work and go to Edit>Paste Into Selection.
Selections>Select None.
4. Effects>Image Effects>Seamless Tiling, default settings.

Adjust>Blur>Gaussian Blur - radius 25

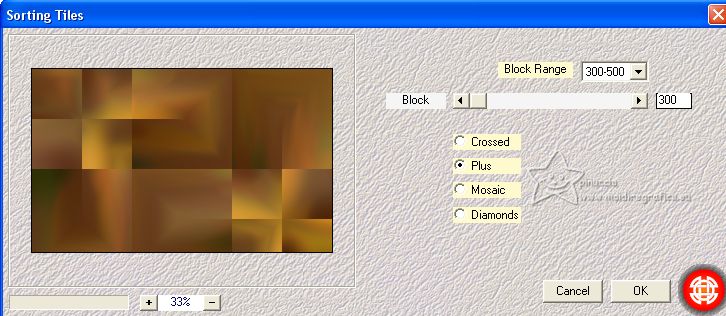
Effects>Plugins>Mehdi>Sorting Tiles
5. Adjust>Sharpness>Sharpen More.
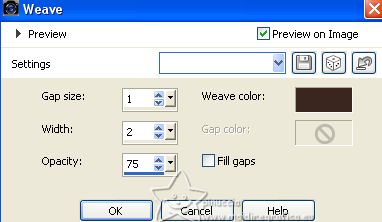
Effects>Texture Effects>Weave
weave color: color 3 #3a271f.
6. Open Decor01_byRobertaMaver 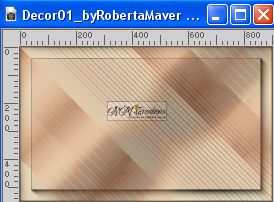
Edit>Copy.
Go back to your work and go to Edit>Paste As New Layer.
Change the Blend Mode of this layer to Multiply
7. Layers>New Raster Layer.
Selections>Load/Save Selection>Load Selection From Alpha Channel.
The selection #1 is immediately available. You just have to click Load.
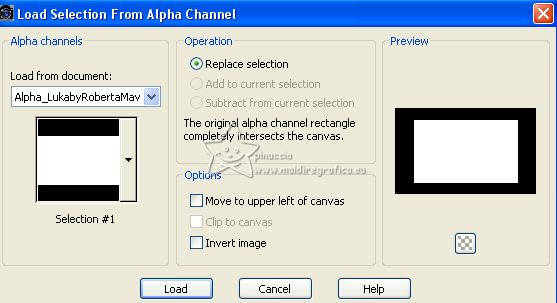
Flood Fill  the selection with your Gradient. the selection with your Gradient.
8. Selections>Modify>Contract - 10 pixels.

Press CANC on the keyboard 
Keep Selected.
9. Selections>Modify>Contract - 10 pixels.

Flood Fill  the selection with your Gradient. the selection with your Gradient.
Selections>Modify>Contract - 8 pixels.

Press CANC on the keyboard.
Keep always selected.
10. Layers>New Raster Layer.
Selections>Modify>Expand - 3 pixels.
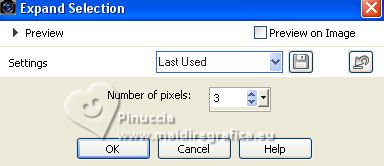
Change the settings of your Gradient, style Sunburst.
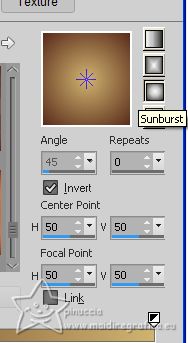
Flood Fill  the selection with your Gradient. the selection with your Gradient.
Layers>Arrange>Move Down.
11. Effects>Art Media Effects>Brush Strokes.
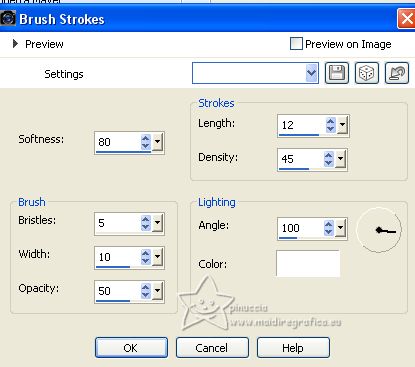
12. Activate again the landscape 2001-luzcristina and go to Edit>Copy.
Go back to your work and go to Edit>Paste into Selection.
Adjust>Sharpness>Sharpen.
Selections>Select None.
13. Activate your top layer.
Layers>Merge>Merge Down.
Effects>3D Effects>Drop Shadow, colore #000000.
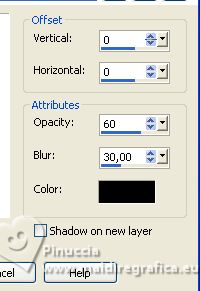
14. Layers>New Raster Layer.
Flood Fill  with your background color #d0b36e. with your background color #d0b36e.
Layers>New Mask layer>From image
Open the menu under the source window and you'll see all the files open.
Select the mask Narah_Mask_1294.
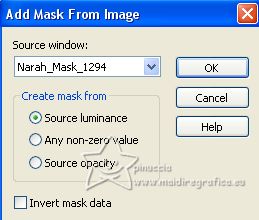
Effects>Edge Effects>Enhance.
Layers>Merge>Merge Group.
Layers>Arrange>Move Down.
15. Edit>Copy Special>Copy Merged.
Image>Add Borders> 1 pixel, symmetric, foreground color #572a1b.
Image>Add borders, 3 pixels, symmetric, background color #d0b36e.
Image>Add borders, 1 pixel, symmetric, foreground color #572a1b.
16. Selections>Select All.
Image>Add Borders>15 pixels, symmetric, whatever color.
Selections>Invert.
Edit>Paste Into Selection.
Adjust>Blur>Gaussian Blur - radius 25.

Selections>Select None.
Image>Add Borders> 1 pixel, symmetric, foreground color #572a1b.
Image>Add borders, 3 pixels, symmetric, background color #d0b36e.
Image>Add borders, 1 pixel, symmetric, foreground color #572a1b.
17. Selections>Select All.
Image>Add Borders>40 pixels, symmetric, whatever color.
Selections>Invert.
Edit>Paste Into Selection.
Adjust>Blur>Gaussian Blur - radius 25.

18. Effects>Art Media Effects>Brush Strokes, same settings

Selections>Invert.
Effects>3D Effects>Drop Shadow, color #000000.
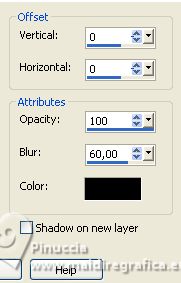
Selections>Select None.
19. Open Deco2_byRobertaMaver 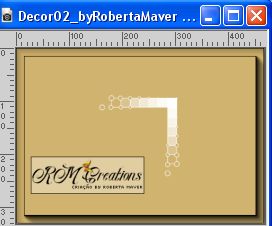
Edit>Copy.
Go back to your work and go to Edit>Paste As New Layer.
Colorize according to your background color or keep it in white color.
I used the Color Changer Tool 
Effects>3D Effects>Drop Shadow, colore #000000.
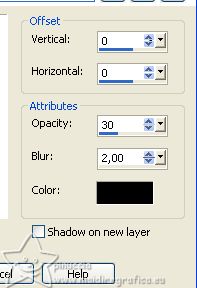
Pick Tool 
and set Position X: 871,00 and Position Y: 5,00.

20. Layers>Duplicate.
Image>Mirror>Mirror Horizontal (Image>Mirror).
Image>Mirror>Mirror Vertical (Image>Flip).
Layers>Merge>Merge Down.
21. Open your main tube ns-kids0148 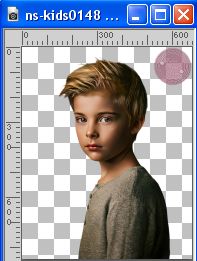
Edit>Copy.
Go back to your work and go to Edit>Paste as new layer.
Image>Resize, if necessary, for this tube 80%, resize all layers not checked.
Adjust>Sharpness Sharpen.
Move  the tube to the right side, or to your liking. the tube to the right side, or to your liking.
Effects>3D Effects>Drop Shadow, at your choice.
22. Open Titulo_LukabyRobertaMaver 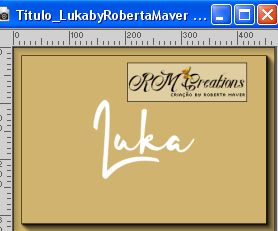
Edit>Copy.
Go back to your work and go to Edit>Paste as new layer.
Colorize according to your background color, or keep it in white color.
I used the Color Changer Tool 
Effects>3D Effects>Drop Shadow, foreground color #572a1b.
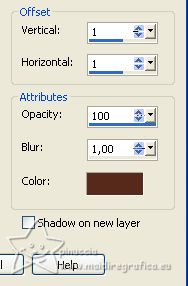
Move  the text to the left, or to you liking. the text to the left, or to you liking.
23. Image>Add borders, 2 pixels, symmetric, background color #d0b36e.
24. Image>Resize, if you want.
Sign your work and save as jpg.
For the tube of this version thanks Lana; the misted is mine.


If you have problems or doubts, or you find a not worked link, or only for tell me that you enjoyed this tutorial, write to me.
31 July 2023

|


