|
THINKING OF YOU


Thanks Gerrie for your invitation to translate your tutorials.

This tutorial was translated with PSP2020 but it can also be made using other versions of PSP.
Since version PSP X4, Image>Mirror was replaced with Image>Flip Horizontal,
and Image>Flip with Image>Flip Vertical, there are some variables.
In versions X5 and X6, the functions have been improved by making available the Objects menu.
In the latest version X7 command Image>Mirror and Image>Flip returned, but with new differences.
See my schedule here
 Italian translation qui Italian translation qui
 French translation here French translation here
 Your versions ici Your versions ici

For this tutorial, you will need:

Thanks for the tubes Colacao, Drevers and Claudia Viza
(you find here the links to the material authors' sites)

consult, if necessary, my filter section here
Filters Unlimited 2.0 here
VM Distortion - Circulator here
FM Tile Tools - Blend Emboss, Blob Carve here
Filters VM Distortion can be used alone or imported into Filters Unlimited.
(How do, you see here)
If a plugin supplied appears with this icon  it must necessarily be imported into Unlimited it must necessarily be imported into Unlimited
Animation Shop here

You can change Blend Modes according to your colors.
In the newest versions of PSP, you don't find the foreground/background gradient (Corel_06_029).
You can use the gradients of the older versions.
The Gradient of CorelX here
Open the font and minimize it. You will find it in the list of available fonts when you need it.
With new operating systems this is no longer possible.
To use a font, you need to copy it to the Windows Fonts folder.

Open the masks in PSP and minimize them with the rest of the material,
except the animation that you'll use in Animation Shop.
1. Set your foreground color to #909479,
and your background color to #360807.

Set your foreground color to a Foreground/Background Gradient, style Linear.

2. Open a new transparent image 10240 x 600.
Flood fill  the transparent image with your Gradient. the transparent image with your Gradient.
3. Effects>Plugins>FM Tile Tools - Blob Carve 1.

4. Window, Duplicate, or on the keyboard shift+X to make a copy.

Minimize the copy and go back to your work.
5. Layers>New Raster Layer.
Set your foreground color to Color
(open the menu of you material palette and select Color).

Flood Fill  the layer with your foreground color. the layer with your foreground color.
6. Layers>New Mask layer>From image
Open the menu under the source window and you'll see all the files open.
Select the mask WSL_Mask154 .

Layers>Merge>Merge Group.
7. Layers>New Raster Layer.
Flood Fill  the layer with your foreground color. the layer with your foreground color.
8. Layers>New Mask layer>From image
Open the menu under the source window
and select the mask tag6dw.

Layers>Merge>Merge Group.
9. Layers>Merge>Merge Down.
10. Effects>Plugins>FM Tile Tools - Blend Emboss, default settings.

11. Activate the image minimized at step 4.
Effects>Image Effects>Seamless Tiling, default settings.

12. Effects>Plugins>VM Distortion - Circulator.

Edit>Copy.
13. Go back to your work and go to Edit>Paste as new layer.

14. Open the tube Drevers_deco_06 
Edit>Copy.
Go back to your work and go to Edit>Paste as new layer.
Place  rightly the tube in the circle. rightly the tube in the circle.

Layers>Arrange>Move Down.
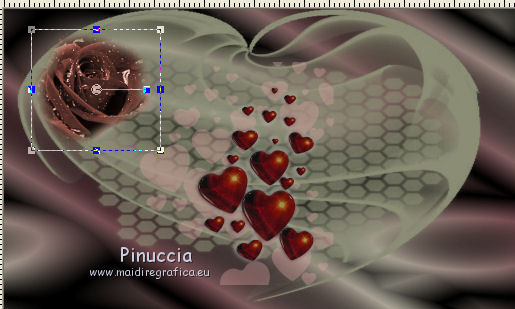
15. Open the tube Roos 
Edit>Copy.
Go back to your work and go to Edit>Paste as new layer.
Place  the tube in the circle. the tube in the circle.
If you want to see better, close the layer above of the circle.

16. Activate your top layer.
Open the tube Element glas 
Edit>Copy.
Go back to your work and go to Edit>Paste as new layer.
Place  the tube at the upper left. the tube at the upper left.

17. Open the couple tube tubeclaudiaviza-parejas46 
Edit>Copy.
Go back to your work and go to Edit>Paste as new layer.
Image>Resize, 1 time to 80% and 1 time to 95%, resize all layers not checked.
Move  the tube at the bottom right. the tube at the bottom right.
18. Effects>3D Effects>Drop Shadow, at your choice.
19. Open the wordart Pspmagnifique Gerrie 
Edit>Copy.
Go back to your work and go to Edit>Paste as new layer.
Place  the tube to your liking. the tube to your liking.
20. Adjust>Hue and Saturation>Colorize.

21. Effects>3D Effects>Drop Shadow, color black.

22. Sign your work on a new layer.
23. Layers>Merge>Merge All.
Edit>Copy.
24. Open Apri Animation Shop and go to Edit>Paste>Paste as new image.
25. Edit>Duplicate, and repeat until you get an animation composed by 9 frames.
Click on the first frame to select it.
Edit>Selection>Select All.
25. Open the animation bellen blazers, also composed by 9 frames.
Selections>Select All.
Edit>Copy.
Activate your work and go to Edit>Paste>Paste into Selected Frame,
and repeat 2-3 times.
26. Activate again the animation.
Animation>Resize animation

Edit>Copy.
To back to your work and go to Edit>Paste>Paste into Selected Frame,
and repeat 2-3 times.
Check the result clicking on View animation 
and save as gif.
For the tubes of this version thanks Tocha


If you have problems or doubts, or you find a not worked link, or only for tell me that you enjoyed this tutorial, write to me.
5 February 2023

|

