|
LANGUAGE OF LOVE

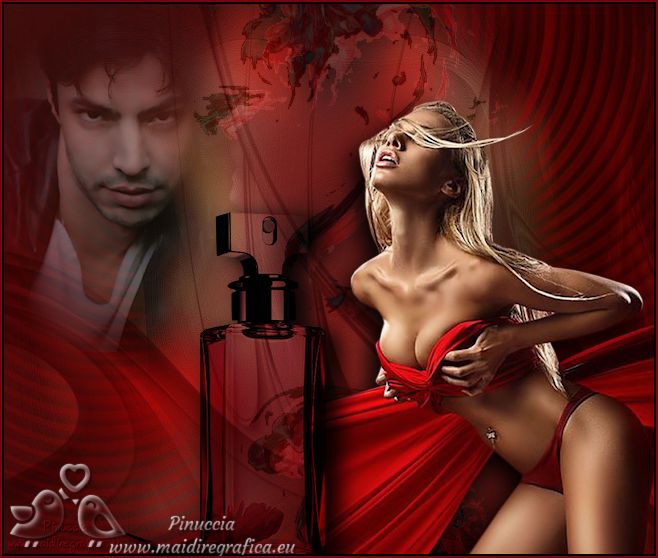
Thanks Gerrie for your invitation to translate your tutorials.

This tutorial was translated with PSP2020 but it can also be made using other versions of PSP.
Since version PSP X4, Image>Mirror was replaced with Image>Flip Horizontal,
and Image>Flip with Image>Flip Vertical, there are some variables.
In versions X5 and X6, the functions have been improved by making available the Objects menu.
In the latest version X7 command Image>Mirror and Image>Flip returned, but with new differences.
See my schedule here
 Italian translation qui Italian translation qui
 French translation here French translation here
 Your versions ici Your versions ici

For this tutorial, you will need:

Thanks for the tubes thanks JHanna, Jet, Marie, Angie and Monique42.
(you find here the links to the material authors' sites)
consult, if necessary, my filter section here
Filters Unlimited 2.0 qui
Kang 2 - X-Cubes qui
Mehdi - Sorting Tiles qui
AAA Frames - Foto Frame qui
Filters Kang can be used alone or imported into Filters Unlimited.
(How do, you see here)
If a plugin supplied appears with this icon  it must necessarily be imported into Unlimited it must necessarily be imported into Unlimited

You can change Blend Modes according to your colors.

Copy the mask in your Masks Folder.
1. Open the tubes and on them:
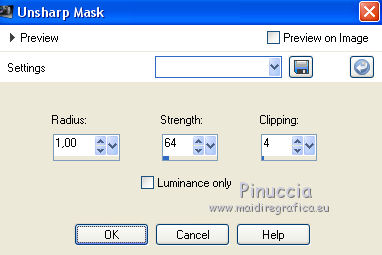
Adjust>Sharpness>Unsharp Mask.
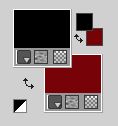
2. Set your foreground color to black #000000,
and your background color to #77050d.
3. Open a new transparent image 650 x 550 pixels.
4. Selections>Select All.
Open the background image JHanna-109bgrond 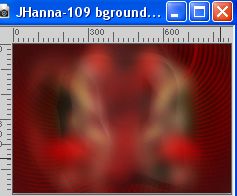
Edit>Copy.
Go back to your work and go to Edit>Paste into Selection.
Selections>Select None.
5. Layers>New Raster Layer.
Flood Fill  the layer with your background color. the layer with your background color.
6. Layers>Load/Save Mask>Load Mask from Disk.
Look for and load the mask Claire_masque-meandres.

Layers>Merge>Merge Group.
7. Change the Blend Mode of this layer to Multiply and reduce the opacity to 76%.
8. Open the tube MarieL_2008_05Mai_smoke01t 
If you are using other colors, take note of Hue and Saturation codes of your background color.

Adjust>Hue and Saturation>Colorize, and set with the noted codes.

Edit>Copy.
Go back to your work and go to Edit>Paste as new layer.
Place  the tube in the center of the image. the tube in the center of the image.
9. Layers>Duplicate.
Layers>Arrange>Move Down.
Move  this tube a bit to the right. this tube a bit to the right.
For my example I change the Blend Mode of the original layer to Difference, opacity 20%,
and of the copy layer to Soft Light, opacity 50.

10. Open the woman tube T2009_angie075 
Edit>Copy.
Go back to your work and go to Edit>Paste as new layer.
Image>Mirror.
Image>Resize, to 80%, resize all layers not checked.
Move  the tube at the bottom right. the tube at the bottom right.
Effects>3D Effects>Drop shadow, at your choice.
11. Open the tube jet-parfum-mei-2007 
Image>Resize, to 300 pixels height.
Edit>Copy.
Go back to your work and go to Edit>Paste as new layer.
Image>Mirror.
Move  the tube down. the tube down.
Change the Blend Mode of this layer to Multiply.

Effects>3D Effects>Drop shadow, at your choice.
12. Open the man tube Tubed_by_monique42_3721
Edit>Copy.
Go back to your work and go to Edit>Paste as new layer.
Image>Resize, to 70%, resize all layers not checked.
Move  the tube at the upper left. the tube at the upper left.
Reduce the opacity of this layer to 55%.

Effects>3D Effects>Drop shadow, at your choice.
13. Sign your work on a new layer.
14. Image>Add borders, 2 pixels, symmetric, background color.
Save as jpg.
For the tubes of this version thanks Beatriz, ClaudiaViza and Yvonne


If you have problems or doubts, or you find a not worked link, or only for tell me that you enjoyed this tutorial, write to me.
5 February 2023

|

