|
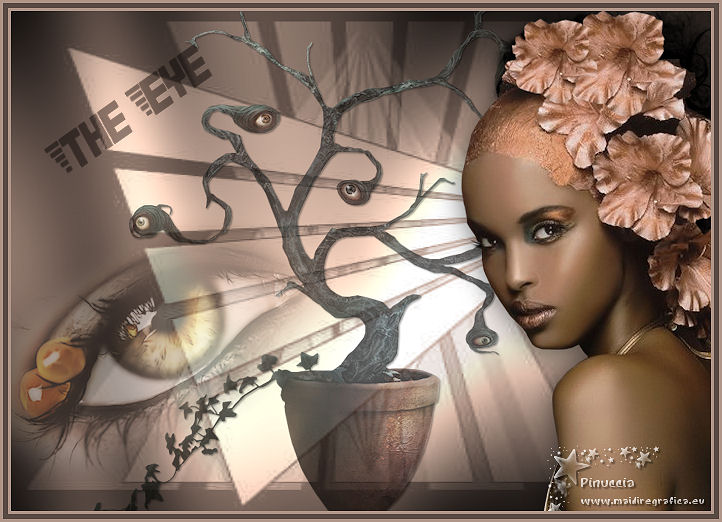
THE EYE


Thanks Gerrie for your invitation to translate your tutorials.

This tutorial was translated with PSP2020 but it can also be made using other versions of PSP.
Since version PSP X4, Image>Mirror was replaced with Image>Flip Horizontal,
and Image>Flip with Image>Flip Vertical, there are some variables.
In versions X5 and X6, the functions have been improved by making available the Objects menu.
In the latest version X7 command Image>Mirror and Image>Flip returned, but with new differences.
See my schedule here
 Italian translation qui Italian translation qui
 French translation here French translation here
 Your versions ici Your versions ici
For this tutorial, you will need:
Material
here
Thanks for the tubes Gerry, Marif and Yoka, for the mask Kris and for the brush Gerrie.
(you find here the links to the material authors' sites)
Plugins
consult, if necessary, my filter section here
Filters Unlimited 2.0 here
Greg's Factory Output vol. 2 - Pool Shadow here
Filters Greg's Factory Output can be used alone or imported into Filters Unlimited.
(How do, you see here)
If a plugin supplied appears with this icon  it must necessarily be imported into Unlimited it must necessarily be imported into Unlimited

You can change Blend Modes according to your colors.
Place the brush in Brush folder. Attention, please, the brush is composed by two files, you must place both the files in the folder.
See my notes about Brushes here
Open the mask in PSP and minimize it with the rest of the material.
1. Choose two colors from your tube.
Set your foreground color to light color, for me #af9587,
and your background color to dark color, for me #594a43.

2. Open a new transparent image 700 x 500 pixels.
Flood Fill  the transparent image with your background color. the transparent image with your background color.
3. Effects>Plugins>Greg's Factory Output vol.II - Pool Shadow, default settings.

4. Layers>New Raster Layer.
Flood Fill  the layer with your foreground color. the layer with your foreground color.
5. Effcts>Plugins>Greg's Factory Output vol.II - Pool Shadow, same settings.
6. Layers>New Mask layer>From image
Open the menu under the source window and you'll see all the files open.
Select the mask 216-kris.

Layers>Merge>Merge Group.
7. Open the tube Yoka-Planten-Ogenplantzilla130807.
Image>Resize, to 550 pixels height, resize all layers checked.
Edit>Copy.
You can close the tube, without saving changes.
Go back to your work and go to Edit>Paste as new layer.
Place  rightly the tube. rightly the tube.
8. Reduce the opacity of this layer to 70%, or according to your colors.
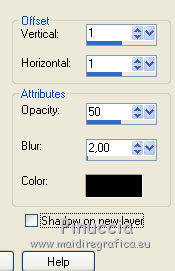
9. Effects>3D Effects>Drop Shadow, color black.

10. Open the tube Marif_2007_03Mars_misted_oeil047 and go to Edit>Copy.
Go back to your work and go to Edit>Paste as new layer.
Image>Resize, to 80%, resize all layers not checked.
11. Image>Free Rotate - 35 degrees to left.

Effects>3D Effects>Drop Shadow, same settings.
Reduce the opacity of this layer to 43%.
Move  the tube at the bottom left. the tube at the bottom left.

12. Open the tube Gerry-faces37-6 april 2008 and go to Edit>Copy.
Go back to your work and go to Edit>Paste as new layer.
Image>Resize, to 78%, resize all layers not checked.
Image>Mirror.
Move  the tube to the right side. the tube to the right side.

Effects>3D Effects>Drop Shadow, at your choice.
13. Layers>New Raster Layer.
Activate your Brush Tool 
Look for and select the brush gerrie.001.PspBrush, size 250 pixels.

14. Apply the brush at the upper left, clicking 2 times with your right mouse button,
to use the background color.

Image>Free Rotate - 35 degrees to left.
Change the Blend Mode of this layer to Multiply.
Layers>Duplicate.
Layers>Merge>Merge Down.
Reduce the opacity of this layer to 50/60%, according to your colors.
if you prefer, you can copy/paste as new layer the jpg image "image7",
you find in the brush folder (don't worry for the white zone).
Image>Resize, to 70%, resize all layers not checked.
Image>Free Rotate, same settings.
Change the Blend Mode of this layer to Multiply (opacity according to your colors).

15. Sign your work on a new layer.
16. Image>Add borders, 3 pixels, symmetric, foreground color.
Image>Add borders, 5 pixels, symmetric, background color.
Image>Add borders, 3 pixels, symmetric, foreground color.
Adjust>Sharpness>Sharpen.
17. Save as jpg.
Version with tubes by Luz Cristina and Nimue la Fée

 Your versions here Your versions here

If you have problems or doubts, or you find a not worked link, or only for tell me that you enjoyed this tutorial, write to me.
25 July 2021
|

