|
BUNNY LOVE

Thanks Gerrie for your invitation to translate your tutorials.

This tutorial was created with PSP19 and translated with PSP07 but it can also be made using other versions of PSP.
Since version PSP X4, Image>Mirror was replaced with Image>Flip Horizontal,
and Image>Flip with Image>Flip Vertical, there are some variables.
In versions X5 and X6, the functions have been improved by making available the Objects menu.
In the latest version X7 command Image>Mirror and Image>Flip returned, but with new differences.
See my schedule here
 Italian translation qui Italian translation qui
 French translation here French translation here
 Your versions ici Your versions ici

For this tutorial, you will need:

For the tubes thanks Riet
(you find here the links to the material authors' sites)

consult, if necessary, my filter section here
Filters Unlimited 2.0 here
Penta.com - Dot and Cross here
Toadies - Weaver here
Filters Penta.com and Toadies can be used alone or imported into Filters Unlimited.
(How do, you see here)
If a plugin supplied appears with this icon  it must necessarily be imported into Unlimited it must necessarily be imported into Unlimited

You can change Blend Modes according to your colors.
In the newest versions of PSP, you don't find the foreground/background gradient (Corel_06_029).
You can use the gradients of the older versions.
The Gradient of CorelX here
Place the brush in Brush folder. Attention, please, the brush is composed by two files, you must place both the files in the folder.
See my notes about Brushes here
Open the masks in PSP and minimize them with the rest of the material.
Colors used

1. Set your foreground color to #fae9d9,
and your background color to #807255.
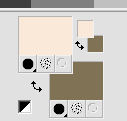
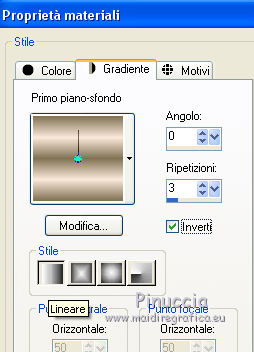
Set your foreground color to a Foreground/Background Gradient, style Linear.
2. Open Alfa_Bunny love.
Window>Duplicate or, on the keyboard, shift+D to make a copy.

**
I created this gif in 2015, after weeks of searching for the right keyboard
and the "right" fingers to place on the keys.
I was very sorry to see it in a tutorial, manipulated to remove my signature
and add that of the person who took it from my site, without asking my permission.
If he had, I wouldn't have denied it.
I hope thes people realize the impropriety and remove the gif from their tutorials.
**
Close the original.
The copy, that will be the basis of your work, is not empty,
but contains the selections saved to alpha channel.
3. Flood Fill  the transparent image with your Gradient. the transparent image with your Gradient.
4. Layers>New Mask layer>From image
Open the menu under the source window and you'll see all the files open.
Select the mask 23021 FIBS Mask by Shereen.

Layers>Merge>Merge Group.
5. Layers>Duplicate.
Change the Blend Mode of this layer to Multiply, or other.
6. Layers>Merge>Merge All.
7. Layers>New Raster Layer.
Flood Fill  the layer with your Gradient. the layer with your Gradient.
8. Layers>New Mask layer>From image
Open the menu under the source window
and select the mask Narah_mask_0180.

Layers>Merge>Merge Group.
9. Effects>Image Effects>Seamless Tiling, Side by Side.

10. Change the Blend Mode of this layer to Multiply, or other.
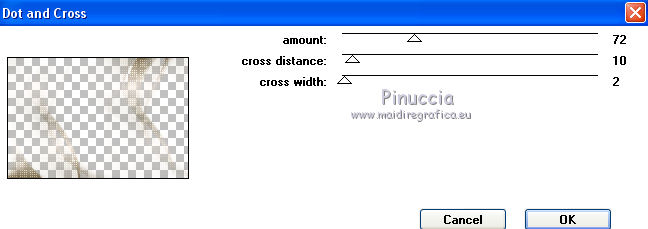
11. Effects>Plugins>Penta.com - Dot and Cross, default settings.
12. Effects>Plugins>Toadies - Weaver, default settings.
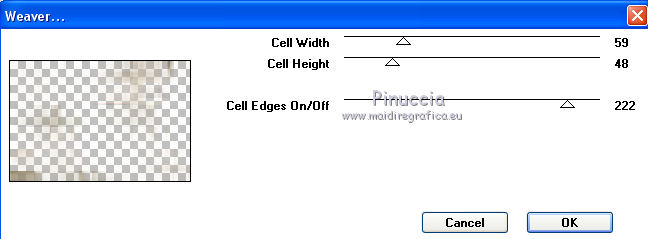
After applying the filters, adjust the blend modes if necessary.
Effects>Edge Effects>Enhance.
13. Layers>New Raster Layer.
Selections>Load/Save Selection>Load Selection from Alpha Channel.
The selection selectie#1 is immediately available. You just have to click Load.

14. Change the Gradient's settings, style Sunburst.

Flood Fill  the selection with your Gradient. the selection with your Gradient.
Selections>Select None.
15. Effects>Distortion Effects>Wind - from left, strength 100.

16. Layers>Duplicate.
Image>Mirror.
Layers>Merge>Merge Down.
17. Change the Blend Mode of this layer to Multiply, or other.
18. Layers>New Raster Layer.
Selections>Load/Save Selection>Load Selection from Alpha Channel.
Open the selections menu and load the selection selectie#2.

Set your foreground color to #715411,
Flood Fill  the selection with your foreground color the selection with your foreground color
Selections>Select None.
19. Layers>New Raster Layer.
Selections>Load/Save Selection>Load Selection from Alpha Channel.
Open the selections menu and load the selection selectie#3.

Flood Fill  the selection with your foreground color. the selection with your foreground color.
Selections>Select None.
20. Activate your Brush Tool 
look for and select the brush Tekst sun, dimensione 200

Layers>New Raster Layer.
Apply the brush to the right, with a color at your choice.
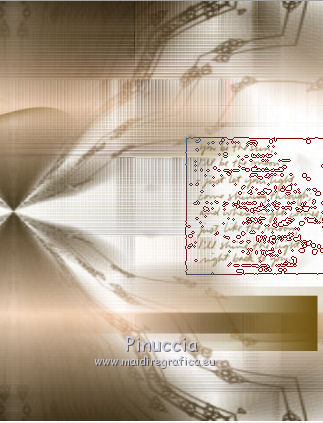
21. Sign your work on a new layer.
22. For the border, set again your foreground color to #fae9d9.
Image>Add borders, 1 pixel, symmetric, foreground color#fae9d9.
Image>Add borders, 15 pixels, symmetric, background color #807255.
Image>Add borders, 1 pixel, symmetric, foreground color#fae9d9.
Image>Add borders, 40 pixels, symmetric, background color #807255.
Image>Add borders, 1 pixel, symmetric, foreground color#fae9d9.
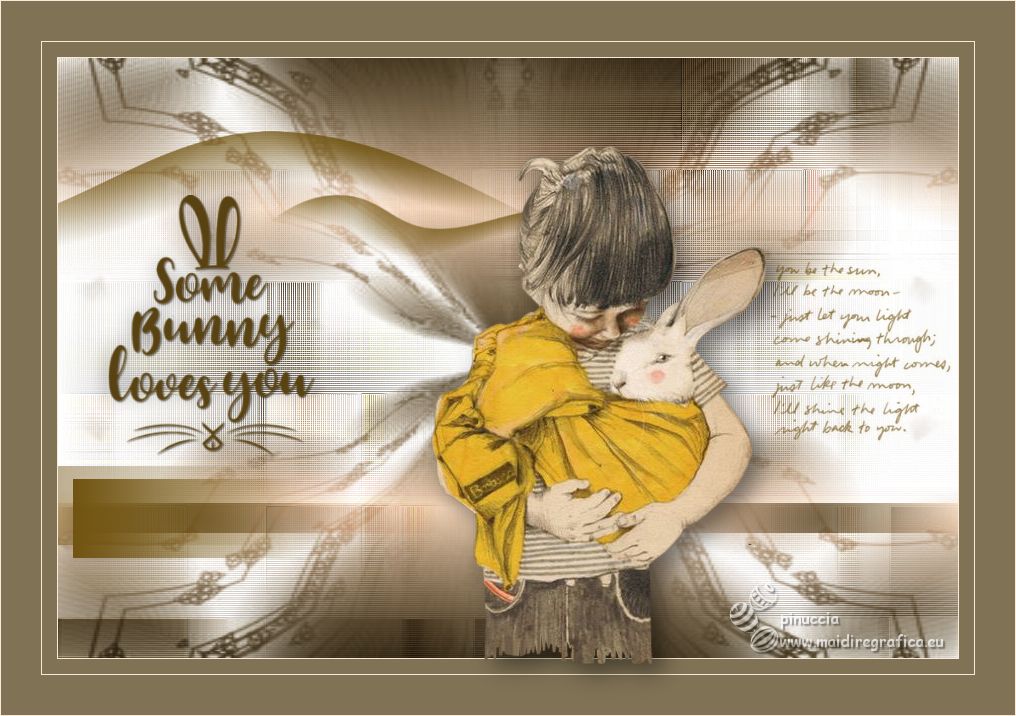
23. Open the main tube Tube Riet_376_010318
Erase the watermark and go to Edit>Copy.
Go back to your work and go to Edit>Paste as new layer.
Place  the tube in the center. the tube in the center.
Effects>3D Effects>Drop Shadow, at your choice.
24. Open the wordart Riet_374_Tekst bunny_220218
Erase the watermark and go to Edit>Copy.
Go back to your work and go to Edit>Paste as new layer.
Place  the wordart to your liking, or see my example. the wordart to your liking, or see my example.
Effects>3D Effects>Drop shadow, at your choice.
25. Adjust>Sharpness>High Pass Sharpen.

26. Layers>Merge>Merge All and save as jpg.
For the tube of this version thanks Riet


If you have problems or doubts, or you find a not worked link, or only for tell me that you enjoyed this tutorial, write to me.
5 Avril 2023

|

