traduzione in italiano/italian translation qui
 traduzione in francese/french translation qui
 Le vostre versioni qui

This tutorial was created using PSP X but it may be esecuted using other versions of PSP.
I created also a french version here
The original italian here
For this tutorial, you will need:
Material here
The brush en english here
For the tubes, thanks to Ket e Syl.
Filtres:
if you have a doubt about plugins, see my section plugins here
AAA Frames - Texture Frame qui
Alien Skin Eye Candy 5 Impact - Glass qui
Filters Unlimited 2.0 qui

Place the mask in Mask folder.
Place the brush in Brush folder. Attention, please, the brush is composed by two files, you must place both the files in the folder.
See my notes about Brushes here
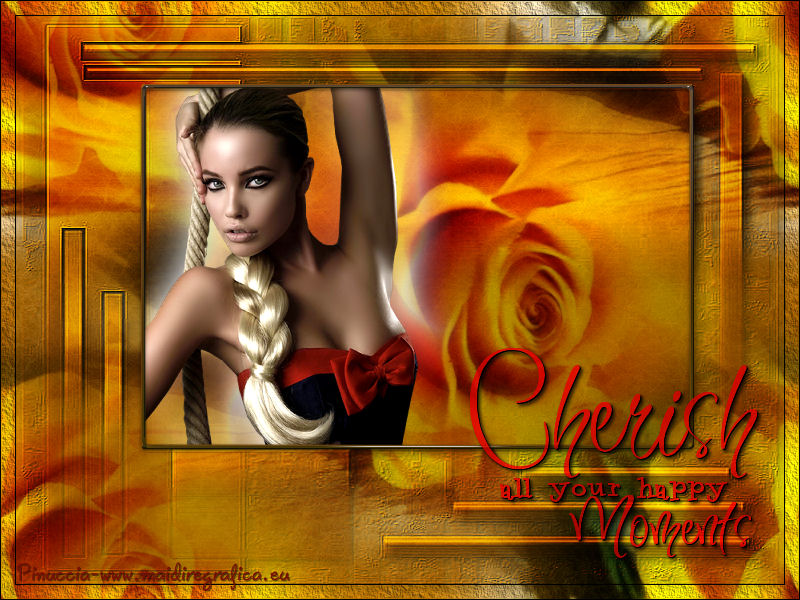
1. Set the Foreground color on #d28722,
and the Background color on #992f00.
Open a new transparent image 800 x 600 pixels.
Selections>Select all.
Open the tube SvB Herfstbloem and go to Edit>Copy.
Back to your tag and Edit>Paste into Selection.
Selections>Select none.
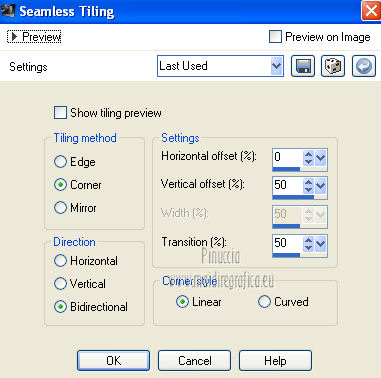
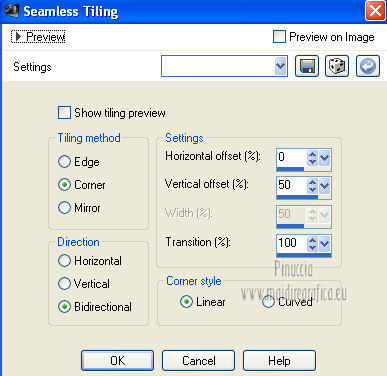
Effects>Image Effects>Seamless Tiling, default.
Adjust>Blur>Radial Blur.
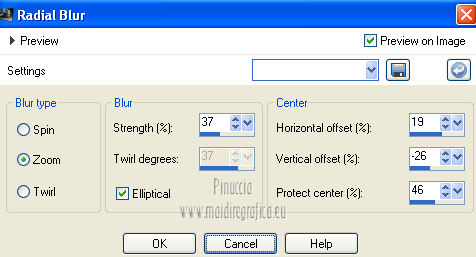
Edit>Repeat Radial Blur.
2. Layers>New Raster Layer.
Layers>Arrange>Move Down.
Set Foreground color up Gradient, Sunburst.
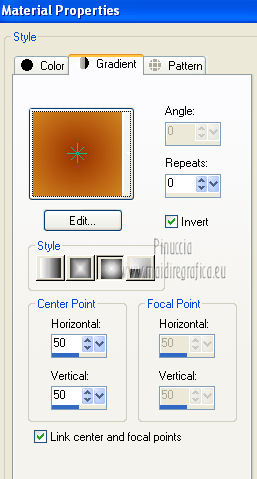
Flood fill  the layer with gradient.
Layers>Merge>Merge visible.
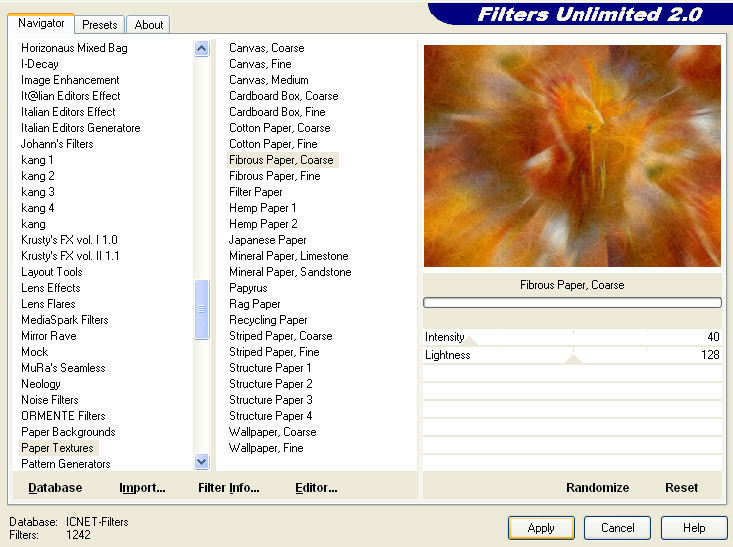
Effetti>Plugins>Filters Unlimited 2.0 - Paper Textures - Fibrous Paper,Coarse.
Selections>Select all.
Layers>New Raster Layer.
Edit>Paste into Selection (the tube is always in your memory).
Selections>Select none.
Effects>Image Effects>Seamless Tiling.
Blend Mode on Soft Light.
3. Layers>New Raster Layer.
Flood fill the layer with foreground color.
Layers>Load/Save Mask>Load Mask from Disk.
Choose 92MaskkelsWWA, settings as below.

Effects>Edge Effects>Enhance.
Layers>Merge>Merge group.
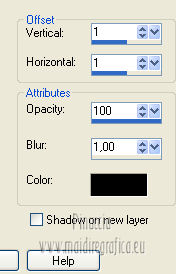
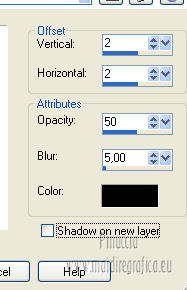
Effects>3D Effects>Drop Shadow.
Effects>3D Effects>Drop Shadow.
Blend Mode on Hard Light.
4. Activate Selection tool 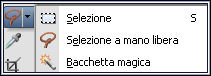 , rectangle,
and selecter the inner of the mask.
Open the tube ketwoman370 and go to Edit>Copy.
Back to your tag and go to Edit>Paste as new layer.
Image>Resize - 80%, resize all layers not checked.
Layer>Duplicate.
Activate the original layer.
Adjust>Blur>Gaussian blur - radius 20.

Blend Mode on Screen.
Selections>Invert.
Press delete key on your keyboard.
5. Activate top layer (the original tube layer).
Press delete key on your keyboard.
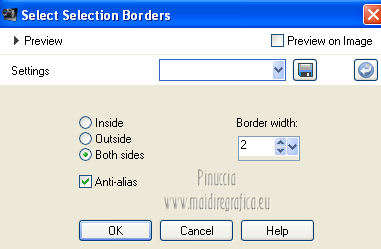
Selections>Invert.
Selections>Modify>Select Selection Borders.
Layers>New raster layer.
Flood fill with background color.
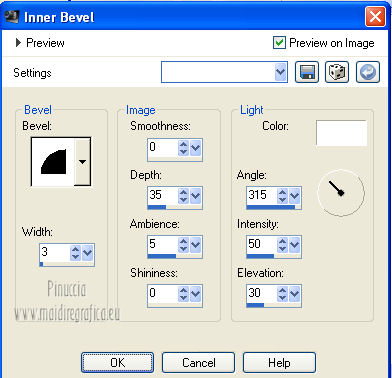
Effects>3D Effect>Inner bevel.
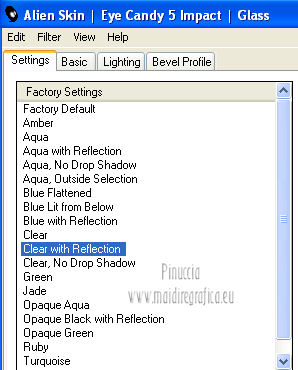
Effects>Plugins>Alien Skin Eye Candy 5 Impact - Glass.
Select preset Clear with Reflection and ok.
Selections>Select None.
6. Set foreground color with #df8408.
Layers>New Raster Layer.
Activate Brush tool 
select the brush "pinucciapennellocherish", size 250.

and apply the brush with foreground color.
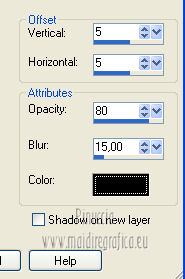
Effects>3D Effects>Drop Shadow.
Effects>3D Effects>Drop Shadow.
Blend mode on Hard light.
Layers>Duplicate.
Layers>Arrange>Move down.
Blend mode on Screen.
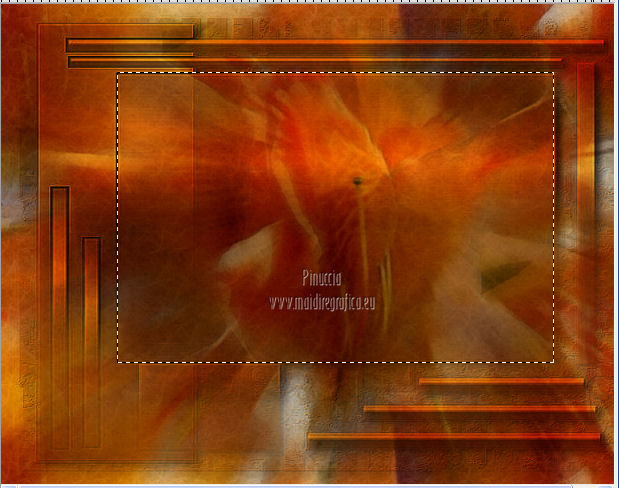
7. Layers>Merge>Merge visible.
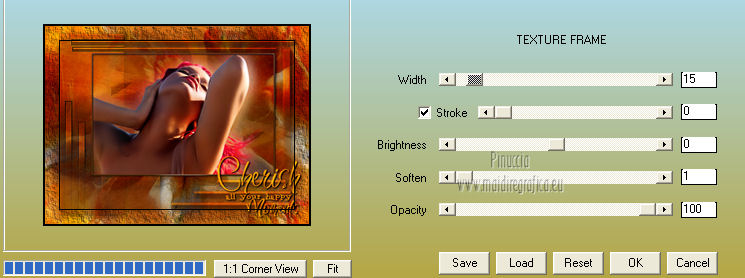
Effetti>Plugins>AAA Frames - Texture Frame.
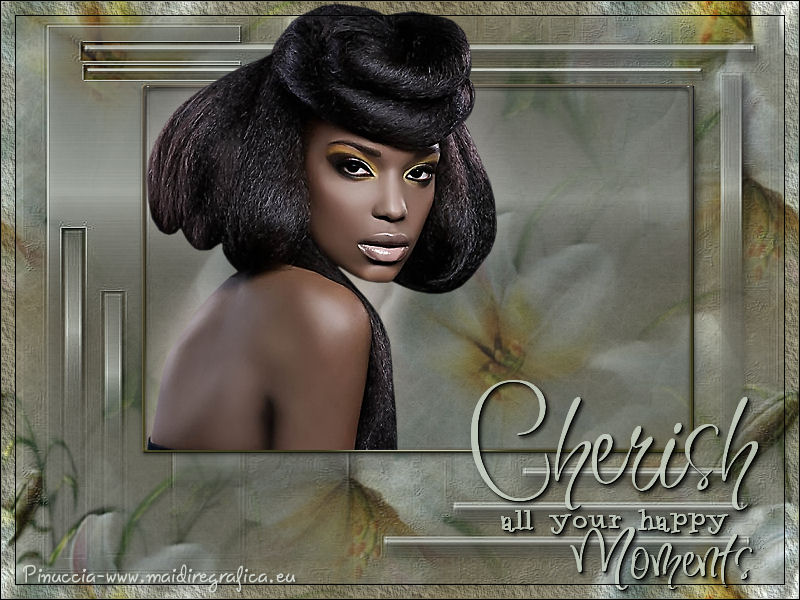
Sign your tag.
Layers>Merge>Merge All.
Save as jpg.
Les tubes are by
Thafs
Mary

If you have problems or doubt, or you find a not worked link, or only for tell me that you enjoyed this tutorial, write to me.
24 October 2012