|
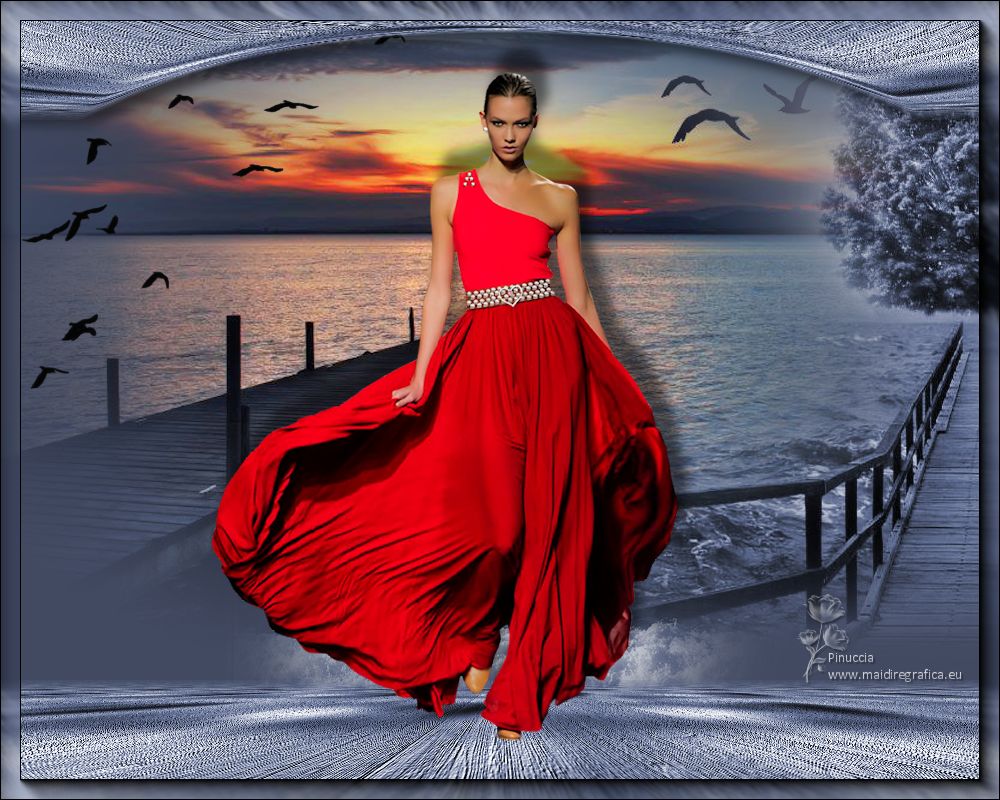
TOP PASARELA


This tutorial was translated with PSPX7 but it can also be made using other versions of PSP.
Since version PSP X4, Image>Mirror was replaced with Image>Flip Horizontal,
and Image>Flip with Image>Flip Vertical, there are some variables.
In versions X5 and X6, the functions have been improved by making available the Objects menu.
In the latest version X7 command Image>Mirror and Image>Flip returned, but with new differences.
See my schedule here
 French translation here French translation here
 Your versions ici Your versions ici
For this tutorial, you will need:
Material
here
Tube ketwomen275exclusiveTQT by Ket
Tube NP 1266 by Nara Pamplona
Tube calguismisted 9012012 by Guismo
Tube 1250147533 by Nikita
Tube pássaros
Textura Tex-3-LC (adjunta)
(you find here the links to the material authors' sites)
Plugins
consult, if necessary, my filter section here
Mura's Meister - Perspective Tiling here
AAA Frames - Foto Frame here

You can change Blend Modes according to your colors.
Copy the texture in the Textures Folder.
1. Open a new transparent image 1000 x 700 pixels.
2. Set your foreground color to #424a62.
Flood Fill  the transparent image with your foreground color. the transparent image with your foreground color.
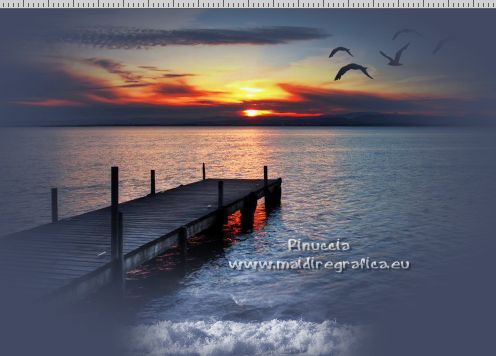
3. Open the tube 1250147533_Nikita and go to Edit>Copy.
Go back to your work and go to Edit>Paste as new layer.
Image>Resize, to 80%, resize all layers not checked.
Move  the tube down, in the center. the tube down, in the center.
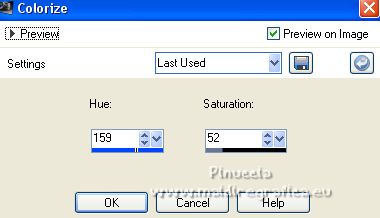
4. Adjust>Hue and Saturation>Colorize.
5. Open the tube NP-1266 and go to Edit>Copy.
Go back to your work and go to Edit>Paste as new layer.
Image>Resize, to 120%, resize all layers not checked.
Move  the tube to the left side. the tube to the left side.
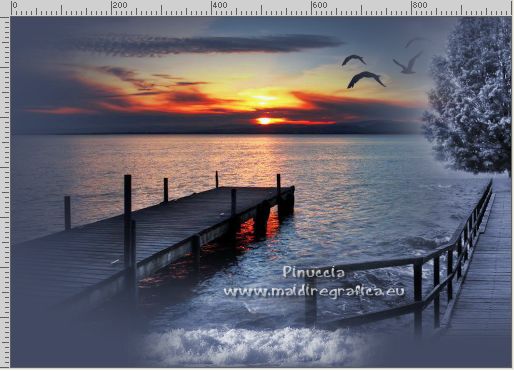
6. Open the tube calguismisted09012012, keep selected and go to Edit>Copy.
Go back to your work and go to Edit>Paste as new layer.
7. Adjust>Hue and Saturation>Colorize, same settings.

Move  the tube to the right side. the tube to the right side.
8. Open the tube passaros and go to Edit>Copy.
Go back to your work and go to Edit>Paste as new layer.
Move  the tube to the left side. the tube to the left side.
9. Layers>Merge>Merge visible.
10. Layers>Duplicate.
11. Effects>Image Effects>Seamless Tiling, default settings.

12. Adjust>Blur>Gaussian Blur - radius 25.

13. Effects>Texture Effects>Texture - select the texture Tex-3-LC, color #ffffff.
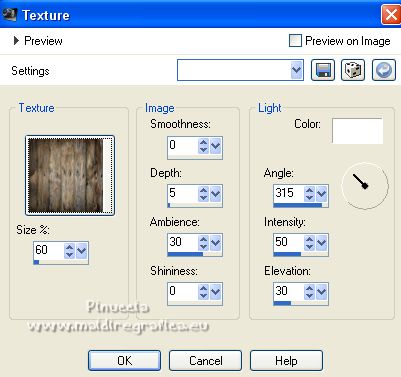
14. Image>Canvas Size - 1000 x 800 pixels.
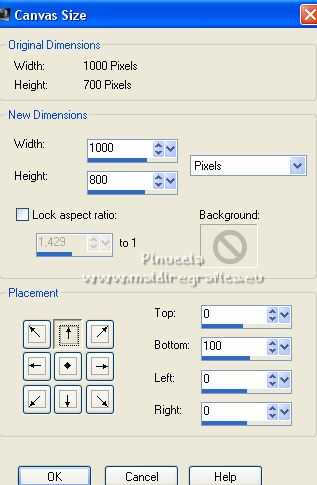
15. Effects>Plugins>Mura's Meister - Perspective Tiling.
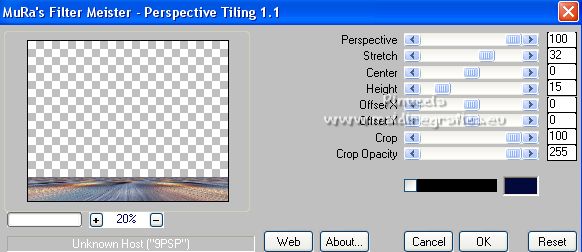
16. Activate your Magic Wand Tool 

and click on the transparent part to select it.
Press 3 times CANC on the keyboard 
Selections>Select None.
17. Adjust>Hue and Saturation>Colorize, same settings

18. Layers>Duplicate.
Image>Flip.
19. Effects>Distortion Effects>Warp.
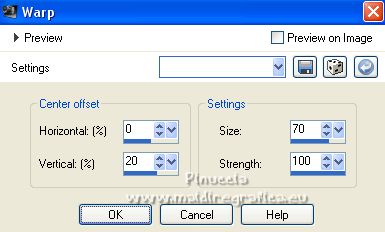
20. Effects>Geometric Effects>Cylinder vertical.
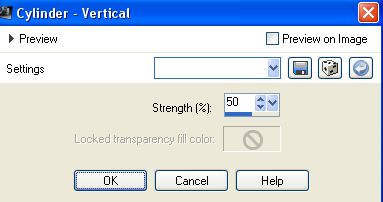
21. Effects>3D Effects>Drop Shadow, color black.
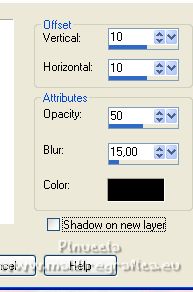
22. Open the tube ketwomen275exclusiveTQT and go to Edit>Copy.
Go back to your work and go to Edit>Paste as new layer.
Image>Resize, 1 time to 80% and 1 time to 90%, resize all layers not checked.
Place  correctly the tube. correctly the tube.
23. Effects>3D Effects>Drop Shadow, color black.
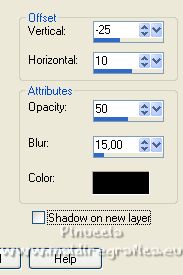
24. Layers>Merge>Merge visible.
25. Effects>Plugins>AAA Frames - Foto Frame.
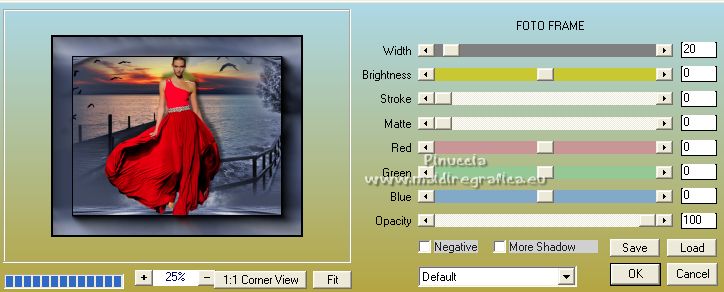
26. Sign your work and save as jpg.
For the tube of this version thanks Luz Cristina; the landscapes are mine
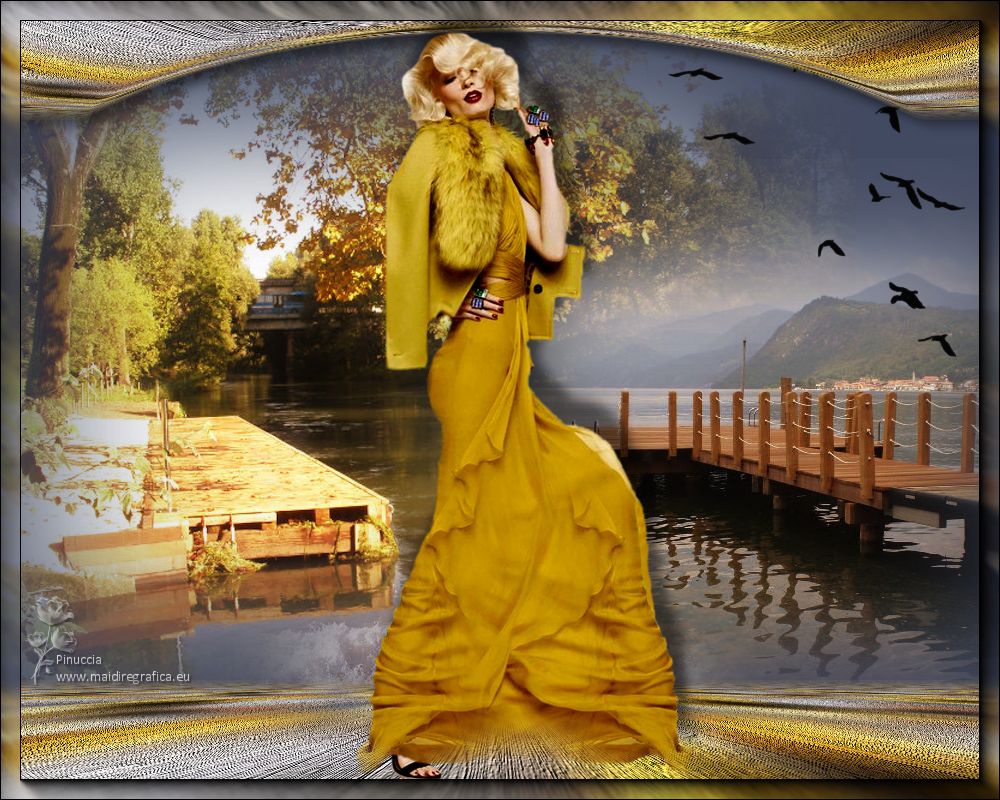
 Your versions here Your versions here

If you have problems or doubts, or you find a not worked link, or only for tell me that you enjoyed this tutorial, write to me.
15 July 2022

|

