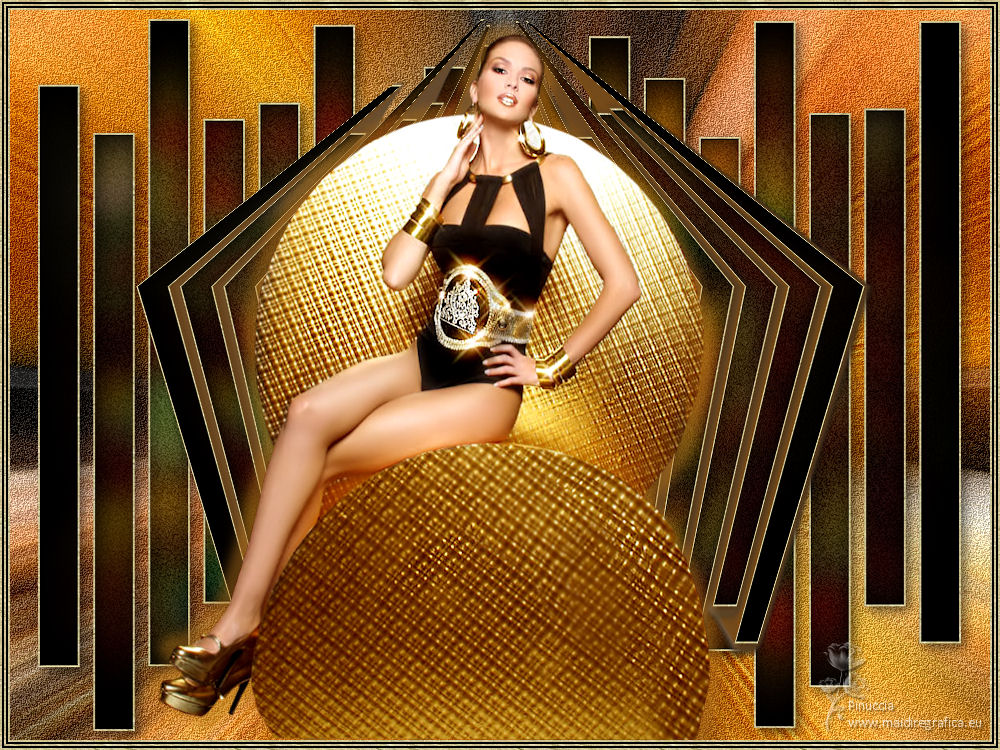
|
TOP NIRIA


This tutorial was translated with PSPX7 but it can also be made using other versions of PSP.
Since version PSP X4, Image>Mirror was replaced with Image>Flip Horizontal,
and Image>Flip with Image>Flip Vertical, there are some variables.
In versions X5 and X6, the functions have been improved by making available the Objects menu.
In the latest version X7 command Image>Mirror and Image>Flip returned, but with new differences.
See my schedule here
 French translation here French translation here
 Your versions ici Your versions ici
For this tutorial, you will need:
Material
here
Tube ketwoman2013048 by Ket
Tube ketmisted_031 by Ket
(you find here the links to the material authors' sites)
Plugins
consult, if necessary, my filter section here
Filters Unlimited 2.0 here
VM Extravaganza - Shoutin here
Transparency - Eliminate White here
FM Tile Tools - Saturation Emboss here
Alien Skin Eye Candy 5 Impact - Extrude here
Filters VM Extravaganza and Transparency can be used alone or imported into Filters Unlimited.
(How do, you see here)
If a plugin supplied appears with this icon  it must necessarily be imported into Unlimited it must necessarily be imported into Unlimited

You can change Blend Modes according to your colors.
Copy the preset Emboss 3 in the Presets Folder.
Copy the pattern Arguld10 in the Patterns Folder.
1. Placer en avant plan le motif Arguld10
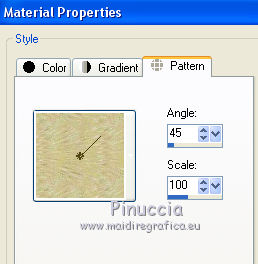
Set your background to #000000.
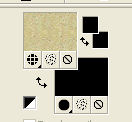
2. Open a new transparent image 1000 x 750 pixels.
Flood Fill  the transparent image with color black #000000. the transparent image with color black #000000.
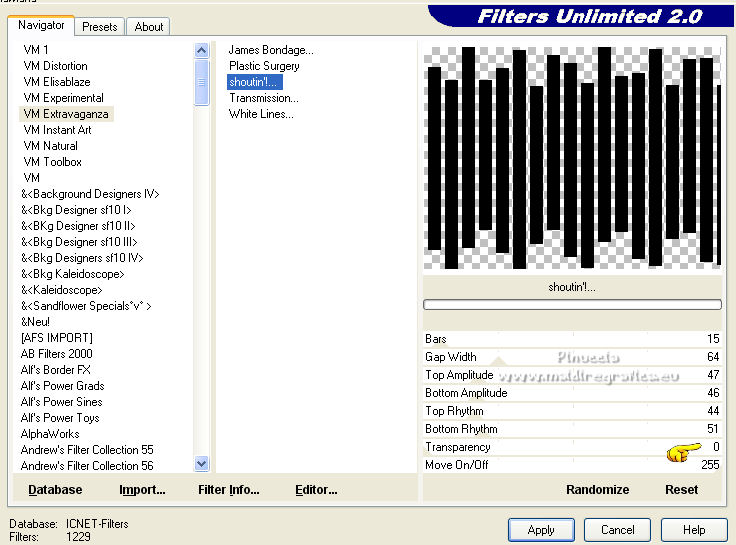
3. Effects>Plugins>Filters Unlimited 2.0 - VM Extravaganza - Shoutin
Set Transparence to 0 and ok.
(in this way you won't need to use the filter Eliminate White to remove the white background created by Shoutin')
4. Selections>Select All.
Selections>Float.
Selections>Defloat.
5. Layers>New Raster Layer.
Flood Fill  the layer with the golden pattern. the layer with the golden pattern.
6. Selections>Select All.
Selections>Modify>Contract - 2 pixels.
Press CANC on the keyboard 
7. Layers>New Raster Layer.
Open the tube ketmisted_031 and go to Edit>Copy.
Go back to your work and go to Edit>Paste into Selection.
Keep selected.
8. Adjust>Blur>Gaussian Blur - radius 15.

9. Adjust>Add/Remove Noise>Add Noise.
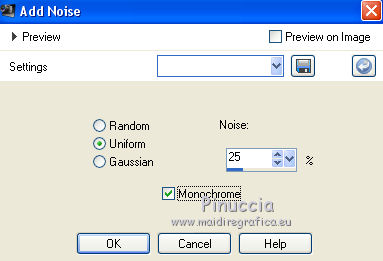
Selections>Select None.
10. Layers>Merge>Merge visible.
11. Image>Resize, to 95%, resize all layers not checked.
12. Effects>3D Effects>Drop Shadow, color black.
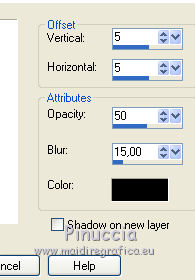
13. Layers>Duplicate, and close this layer for a moment.
Activate the layer below of the original.
Effects>Plugins>Alien Skin Eye Candy 5 Impact - Extrude.
Solid Color: #ec8d21
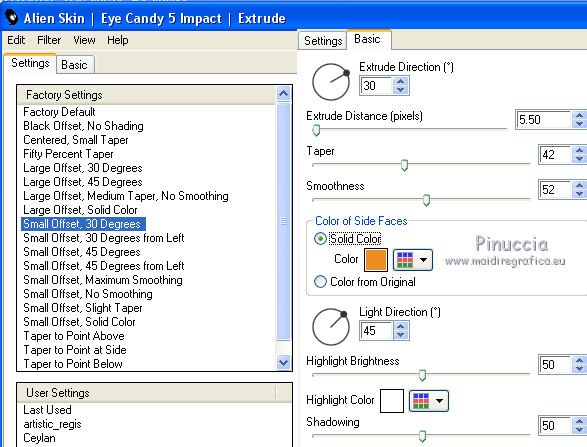
14. Open and activate the layer above of the copy.
Effects>Geometric Effects>Pentagon.
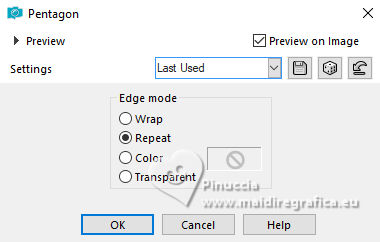
15. Layers>New Raster Layer.
Layers>Arrange>Send to Bottom.
Flood Fill  with the golden pattern. with the golden pattern.
16. Selections>Select All.
Selections>Modify>Contract - 2 pixels.
Press CANC on the keyboard.
17. Flood Fill  with color black. with color black.
Selections>Select All.
Selections>Modify>Contract - 2 pixels.
Press CANC on the keyboard.
18. Flood Fill  with the golden pattern. with the golden pattern.
Selections>Select All.
Selections>Modify>Contract - 2 pixels.
Press CANC on the keyboard.
19. Flood Fill  with color black. with color black.
Selections>Select All.
Selections>Modify>Contract - 2 pixels.
Press CANC on the keyboard.
20. Flood Fill  with the golden pattern. with the golden pattern.
Selections>Select All.
Selections>Modify>Contract - 2 pixels.
Press CANC on the keyboard.
21. Layers>New Raster Layer.
Flood Fill  with color black. with color black.
22. Activate the top layer.
Open the tube ketwoman2013048 and go to Edit>Copy.
Go back to your work and go to Edit>Paste into Selection.
Selections>Select None.
23. Effects>Image Effects>Seamless Tiling, default settings.

24. Adjust>Blur>Gaussian Blur - radius 15.

25. Adjust>Blur>Radial Blur.
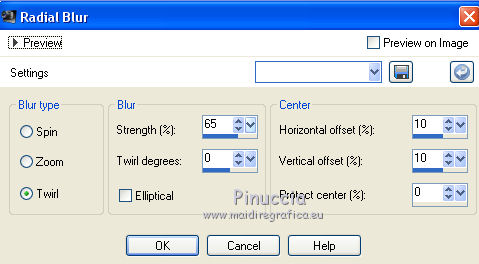
26. Effects>User Defined Filter - select the preset Emboss 3 and ok.

27. Adjust>Add/Remove Noise>Add Noise, same settings.

28. Effects>Plugins>FM Tile Tools - Saturation Emboss, default settings.

29. Edit>Paste as a new layer (the tube ketwoman2013048 is still in memory).
Image>Resize, to 80%, resize all layers not checked.
Place  correctly the tube. correctly the tube.
30. Effects>3D Effects>Drop Shadow, color #b17019.
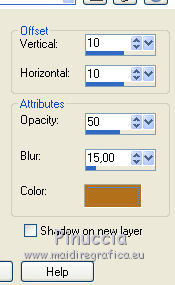
Repeat Drop Shadow, vertical and horizontal -10.
31. Activate the bottom layer (the borders)
Layers>Arrange>Bring to Top.
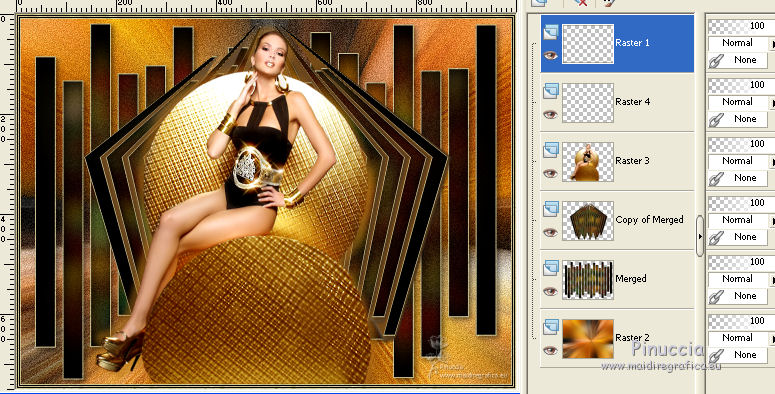
32. Sign your work on a new layer.
Layers>Merge>Merge All and save as jpg.
 Your versions here Your versions here

If you have problems or doubts, or you find a not worked link, or only for tell me that you enjoyed this tutorial, write to me.
18 January 2022

|

