|
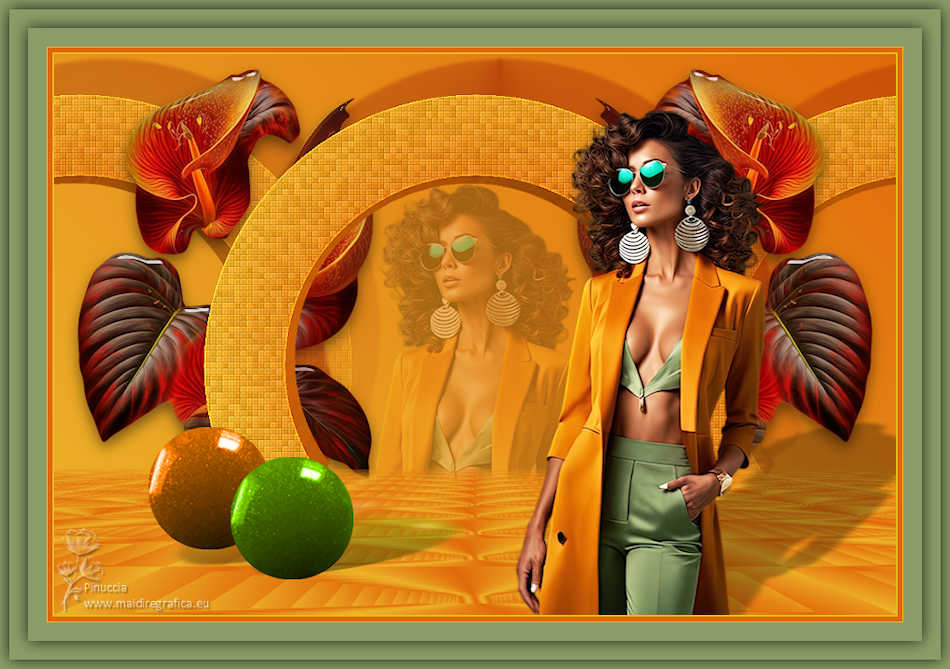
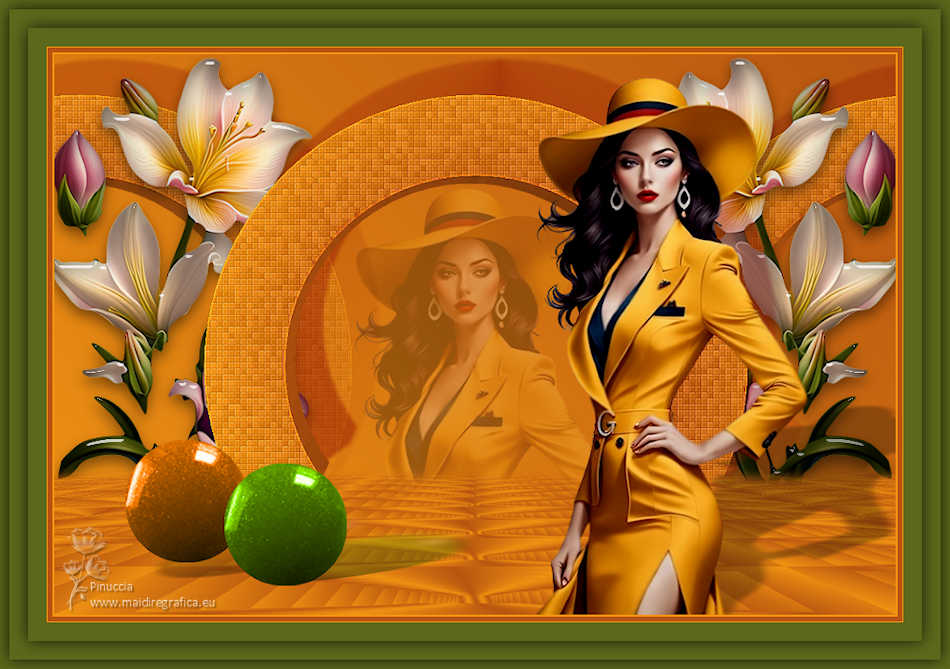
TOP NARANJA
 TOP ORANGE TOP ORANGE


This tutorial was translated with PSPX9 and PSP2020, but it can also be made using other versions of PSP.
Since version PSP X4, Image>Mirror was replaced with Image>Flip Horizontal,
and Image>Flip with Image>Flip Vertical, there are some variables.
In versions X5 and X6, the functions have been improved by making available the Objects menu.
In the latest version X7 command Image>Mirror and Image>Flip returned, but with new differences.
See my schedule here
 French translation here French translation here
 Your versions here Your versions here
For this tutorial, you will need:

Thanks for the tubes Kamil, Renée and Logane.
(you find here the links to the material authors' sites)

consult, if necessary, my filter section here
Xero - Fritillary here
Mura's Meister - Pole Transform here
Mura's Meister - Perspective Tiling here
Eye Candy 3.1 - Perspective Shadow here
Alien Skin Eye Candy 5 Impact - Extrude, Glass, Perspective Shadow here

You can change Blend Modes according to your colors.
In the newest versions of PSP, you don't find the foreground/background gradient (Corel_06_029).
You can use the gradients of the older versions.
The Gradient of CorelX here

1. Open a new transparent image 900 x 600 pixels.
Set your foreground color to #edb52a,
and your background color to #e06a0a.
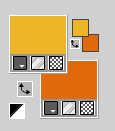
2. Set your foreground color to a Foreground/Background Gradient, style Linear.
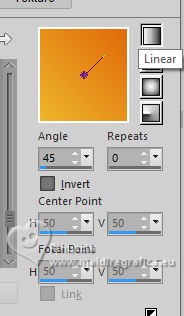
Flood Fill  the transparent image with your Gradient. the transparent image with your Gradient.
3. Layers>Duplicate.
Image>Resize, to 70%, resize all layers not checked.
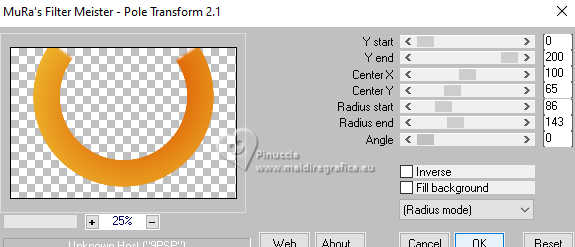
4. Effects>Plugins>Mura's Meister - Pole Transform.
5. Image>Mirror>Mirror Vertical (Image>Flip).
Effects>Plugins>Xero - Fritillary.
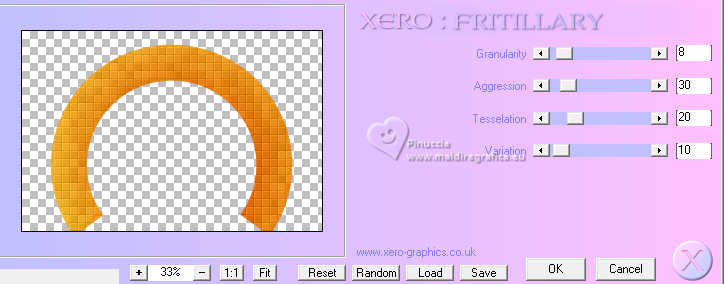
Adjust>Sharpness>Sharpen More.
6. Effects>Plugins>Alien Skin Eye Candy 5 Impact - Extrude
both colors: background color #e06a0a.
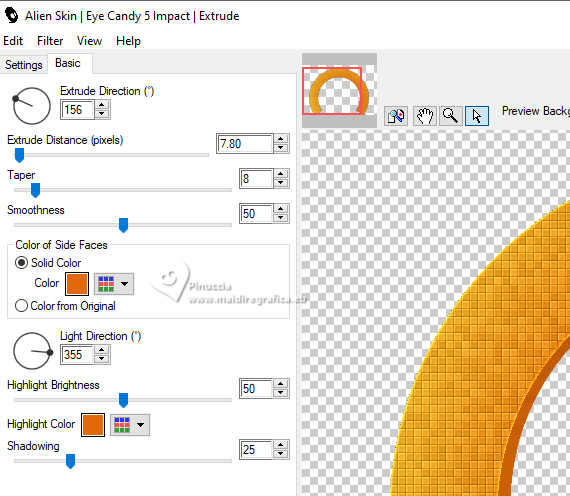
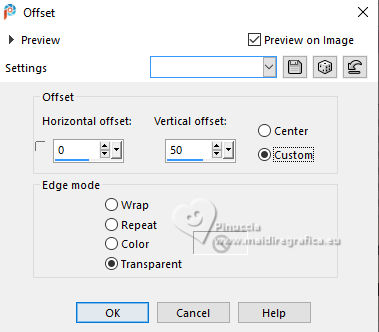
7. Image>Resize, to 80%, resize all layers not checked.
Effects>Image Effects>Offset.
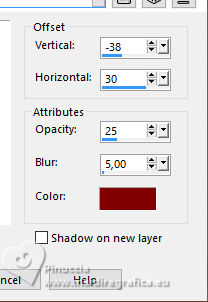
8. Effects>3D Effects>Drop Shadow, color #800000.
9. Layers>Duplicate.
Layers>Arrange>Move Down.
10. Effects>Image Effects>Seamless Tiling, Side by Side.

Stay on this layer.
11. Open the tube Renee-TUBES-Novembre-2023 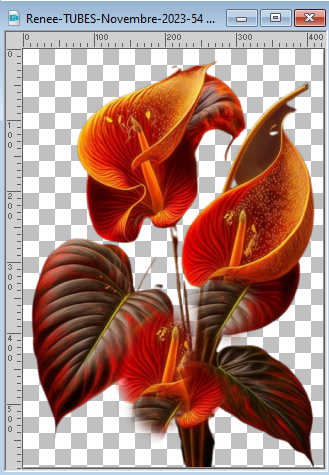
Edit>Copy.
Go back to your work and go to Edit>Paste as new layer.
Image>Resize, to 80%, resize all layers not checked.
12. Effects>Plugins>Alien Skin Eye Candy 5 Impact - Glass.
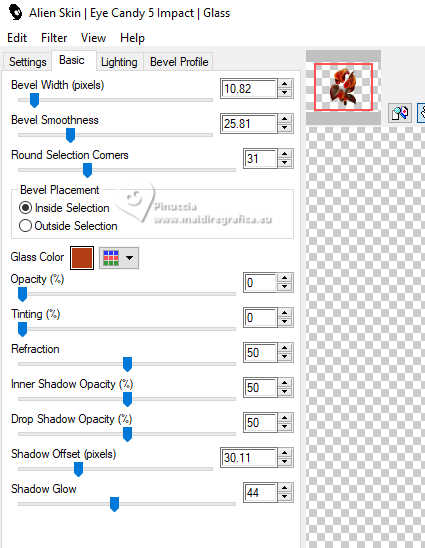
13. Move  the tube at the upper left. the tube at the upper left.
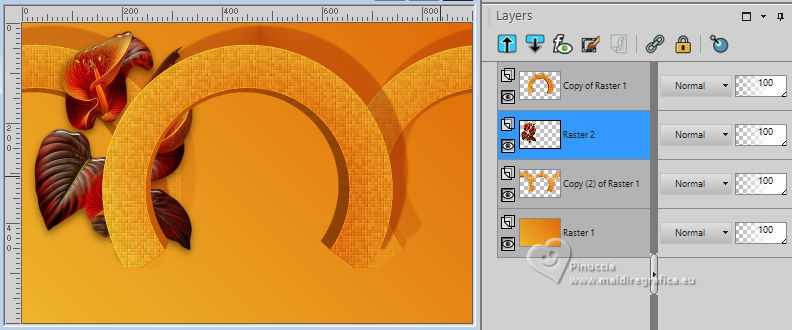
Layers>Duplicate.
Image>Mirror>Mirror Horizontal (Image>Mirror).
14. Activate your top layer.
Selection Tool 
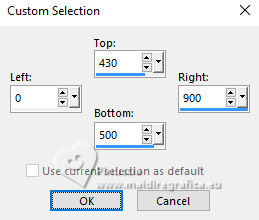
(no matter the type of selection, because with the custom selection your always get a rectangle)
clic on the Custom Selection 
and set the following settings.
15. Layers>New Raster Layer.
Change the settings of your Gradient
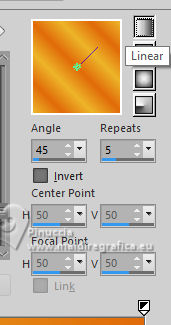
Flood Fill  the selection with your Gradient. the selection with your Gradient.
16. Effects>Reflection Effects>Feedback.
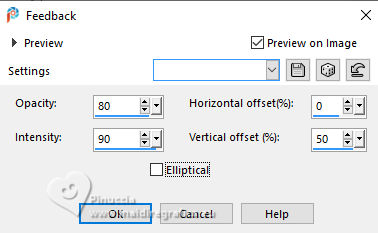
Selections>Select None.
17. Effects>Plugins>Mura's Meister - Perspective Tiling.
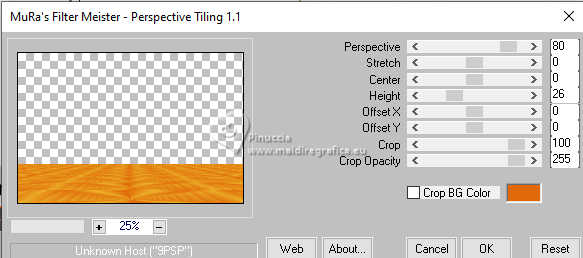
18. Activate your Magic Wand Tool  , feather 20 , feather 20

Click on the transparent part to select it.
Press 2 times CANC on the keyboard 
Selections>Select None.
19. Open logane_boulespalettel_10mars2012 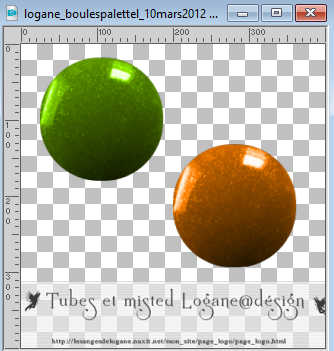
The tube has 2 layers: a green ball and a golden ball.
Activate the layer of the golden ball and go to Edit>Copy.
Go back to your work and go to Edit>Paste as new layer.
Image>Resize, 2 times to 90%, resize all layers not checked.
20. Activate again the ball's tube and activate the layer of the green ball.
Edit>Copy.
Go back to your work and go to Edit>Paste as new layer.
Image>Resize, 2 times to 90%, resize all layers not checked.
Move  the balls to the left. the balls to the left.
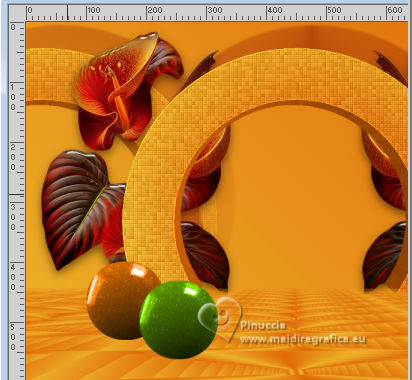
Activate the top layer: Layers>Merge>Merge Down.
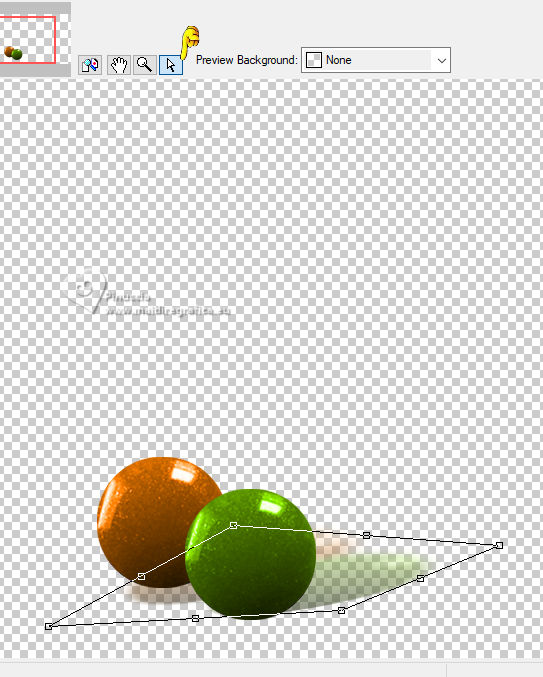
21. Effects>Plugins>Alien Skin Eye Candy 5 Impact - Perspective Shadow
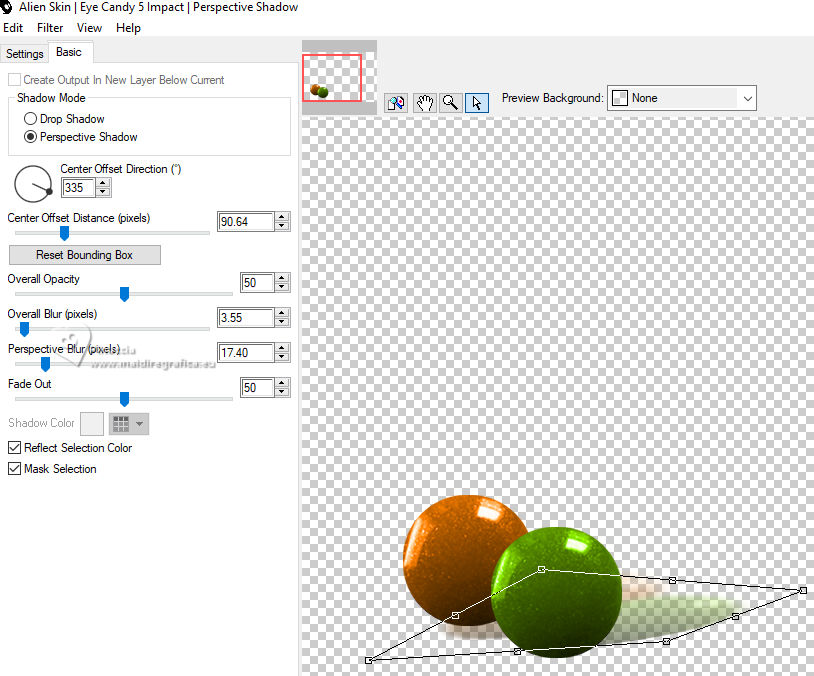
If necessary, use the tool of the filter to adapt the shadow to your tube.
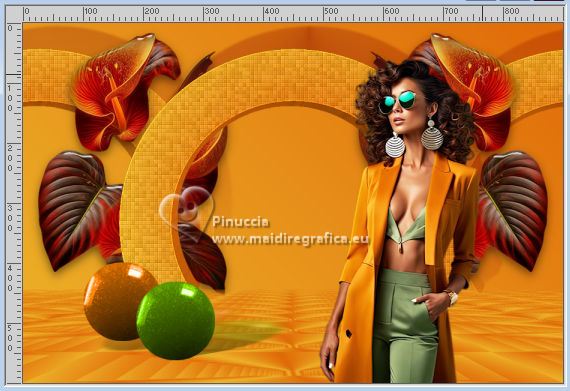
22. Open the tube KamilTube-939 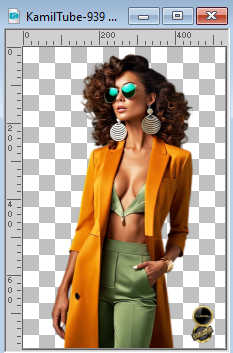
Erase the watermark and go to Edit>Copy.
Go back to your work and go to Edit>Paste as new layer.
Image>Resize, 1 times to 80% and 1 time to 90%, resize all layers not checked.
Move  the tube to the right. the tube to the right.
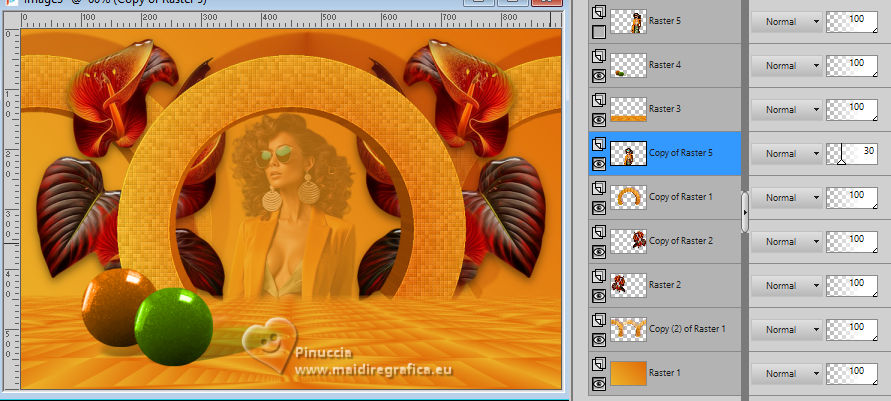
Layers>Duplicate.
close the original layers, if you want to see better
Move the copy's layer under the circle's layer.
Place  the tube in the center of the circle. the tube in the center of the circle.
Reduce the opacity of this layer to 30%.
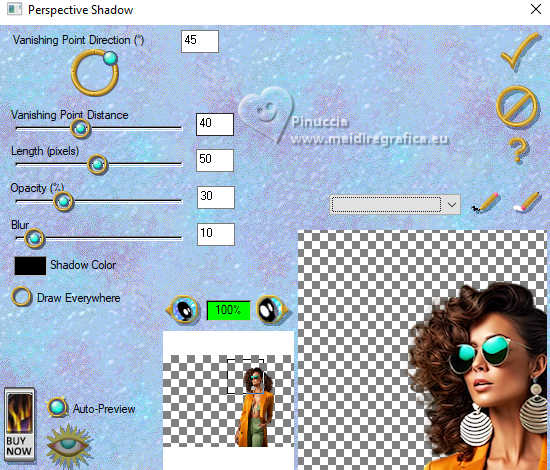
23. Open and activate the top layer of your tube.
Effects>Plugins>Eye Candy 3.1. - Perspective Shadow - Shadow Color #000000.
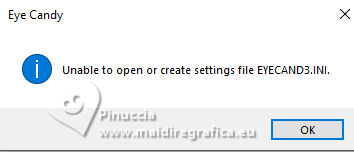
don't worry for this message; click ok and go on
24. Sig your work.
Add the author's and translator's watermarks.
25. Layers>Merge>Merge All.
26. Image>Add borders, 2 pixels, symmetric, foreground color #edb52a.
Image>Add borders, 5 pixels, symmetric, background color #e06a0a.
Image>Add borders, 1 pixel, symmetric, foreground color #edb52a.
Image>Add borders, 50 pixels, symmetric, green color #8b9d67.
27. Selections>Select All.
Selections>Modify>Contract - 10 pixels.
Effects>3D Effects>Drop Shadow, color #000000.

28 Selections>Modify>Contract - 20 pixels.
Effects>3D Effects>Drop Shadow, same settings.

Selections>Selec None.
29. Save as jpg.
For the tubes of this version thanks Luz Cristina and Laurette.
 Your versions here Your versions here

If you have problems or doubts, or you find a not worked link, or only for tell me that you enjoyed this tutorial, write to me.
17 July 2024

|
 TOP ORANGE

 TOP ORANGE