|
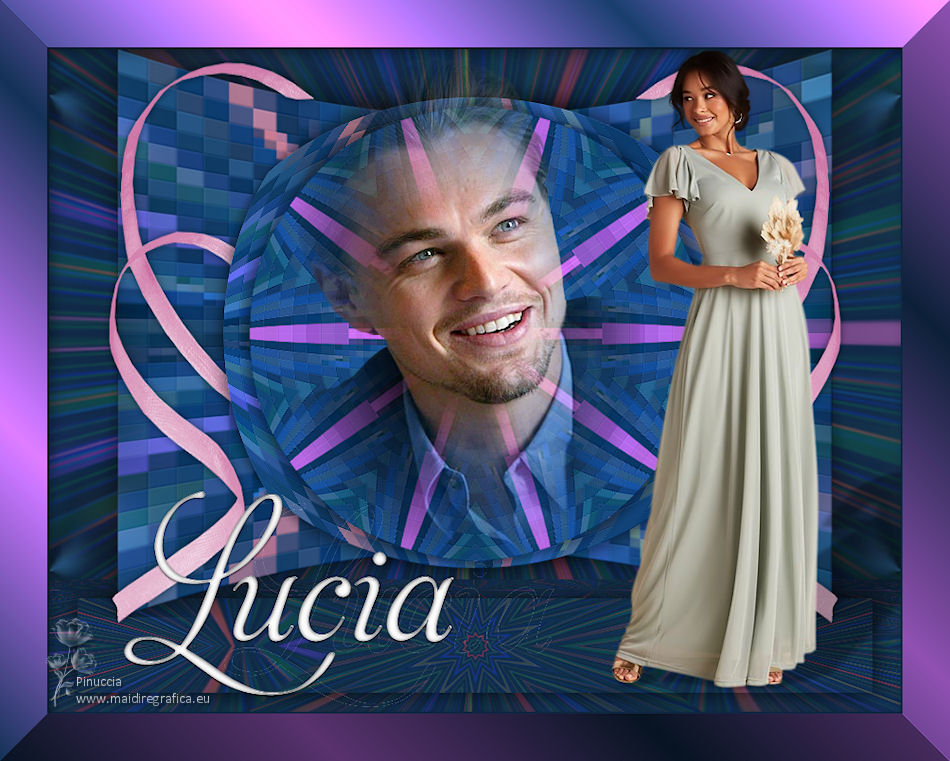
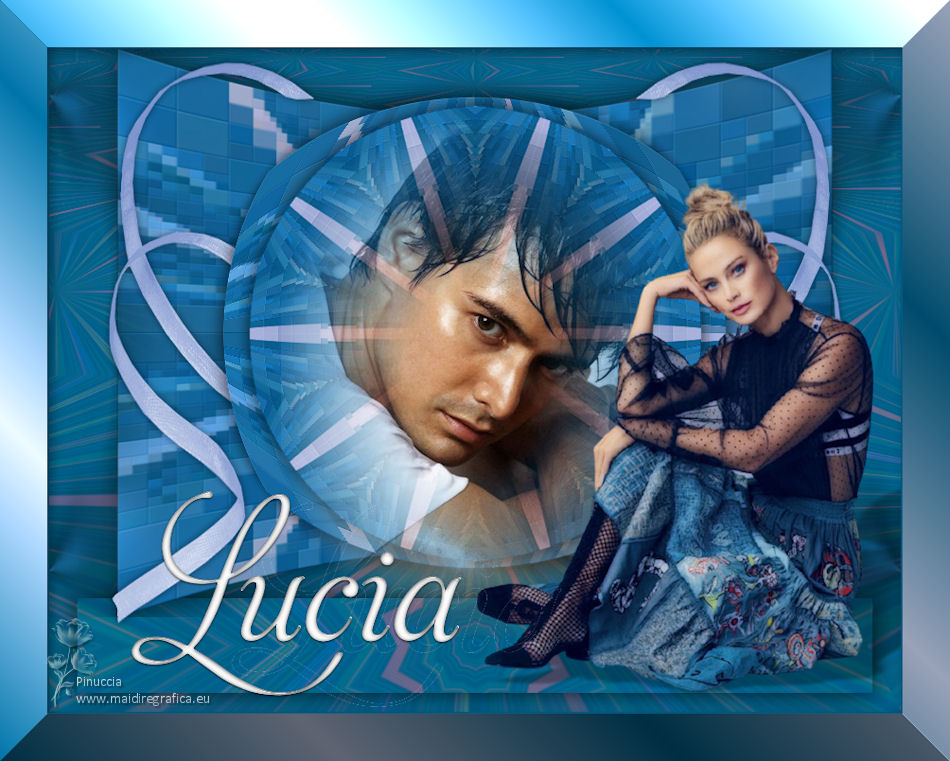
TOP LUCIA


This tutorial was translated with PSPX7 but it can also be made using other versions of PSP.
Since version PSP X4, Image>Mirror was replaced with Image>Flip Horizontal,
and Image>Flip with Image>Flip Vertical, there are some variables.
In versions X5 and X6, the functions have been improved by making available the Objects menu.
In the latest version X7 command Image>Mirror and Image>Flip returned, but with new differences.
See my schedule here
 French translation here French translation here
 Your versions ici Your versions ici
For this tutorial, you will need:
Material
here
3601-woman-LB TUBES
Mist Leonardo di Caprio
Belscrap_Christmas_El 5 Free2
Texto-Lucia-nines
(you find here the links to the material authors' sites)
Plugins
consult, if necessary, my filter section here
Filters Unlimited 2.0 here
Andrew's Filter Collection 62 - Time Tunnel here
Virtual Painter 4 here
Flaming Pear - Make Cube Tile here
Eye Candy 3.1 - Perspective Shadow here
Mura's Meister - Perspective Tiling here
Filters Italian Editors and Penta.com can be used alone or imported into Filters Unlimited.
(How do, you see here)
If a plugin supplied appears with this icon  it must necessarily be imported into Unlimited it must necessarily be imported into Unlimited

You can change Blend Modes according to your colors.
In the newest versions of PSP, you don't find the foreground/background gradient (Corel_06_029).
You can use the gradients of the older versions.
The Gradient of CorelX here
1. Set your foreground color to #102947.
2. Open a new transparent image 900 x 600 pixels.
Flood Fill  the transparent image with your foreground color #102947. the transparent image with your foreground color #102947.
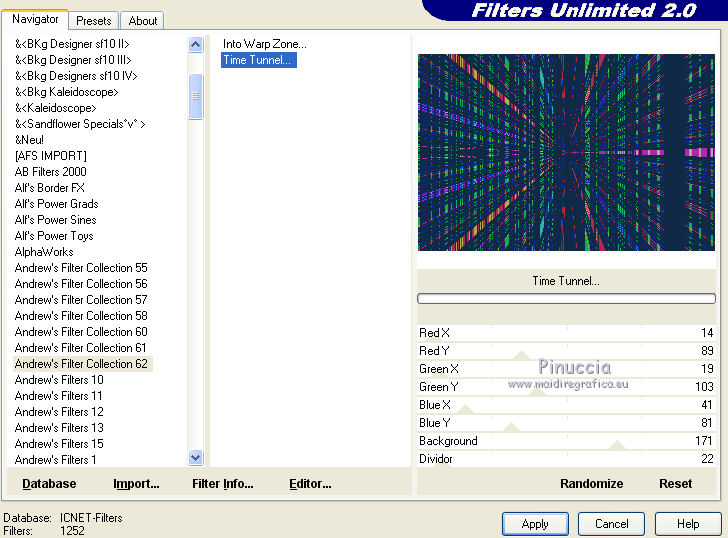
3. Effects>Plugins>Filter Unlimited 2.0 - Andrew's Filter Collection 62 - Time Tunnel, default settings
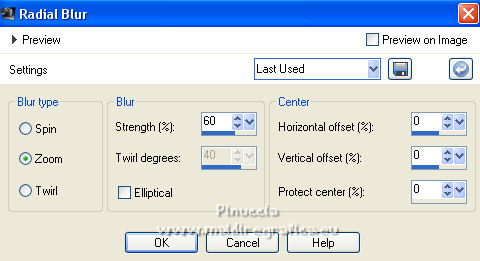
4. Adjust>Blur>Radial Blur
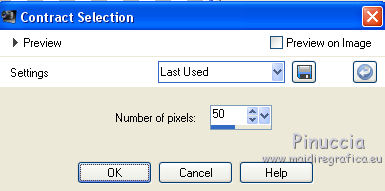
5. Selections>Select All.
Selections>Modify>Contract - 50 pixels.
6. Selections>Promote Selection to Layer.
Effects>Plugins>Virtual Painter 4 - Virtual Painter
Filter: Rectangles - Material: Paper (Smooth)
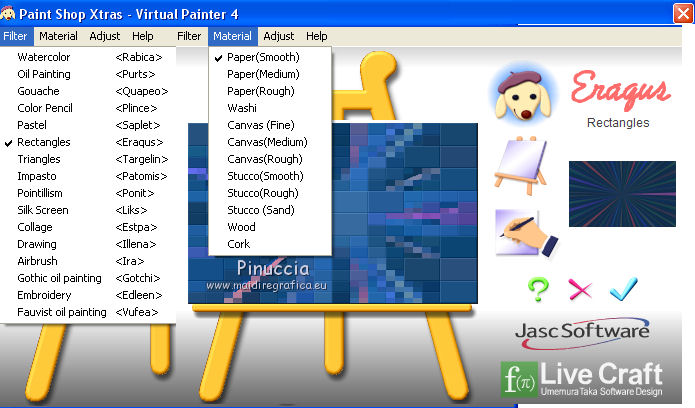
Selections>Select None.
7. Effects>3D Effects>Drop Shadow, color #000000.
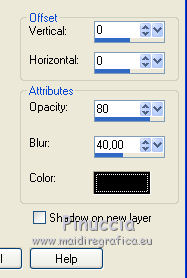
8. Layers>Duplicate.
Effects>Geometric Effects>Circle.

9. Layers>Duplicate.
Image>Resize, to 90%, resize all layers not checked.
10. Effects>Reflection Effects>Kaleidoscope.
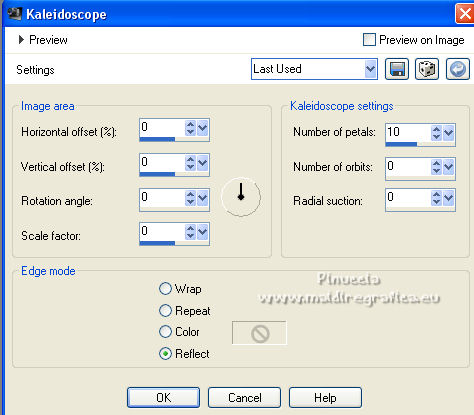
11. Activate the layer Promoted Selection.
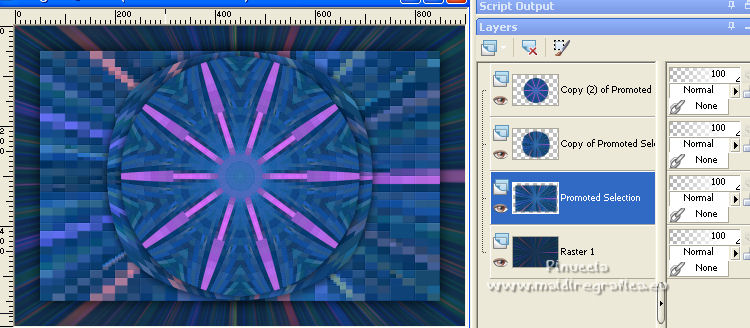
12. Effects>Plugins>Flaming Pear - Make Cube Tile.
This effect works without window; result
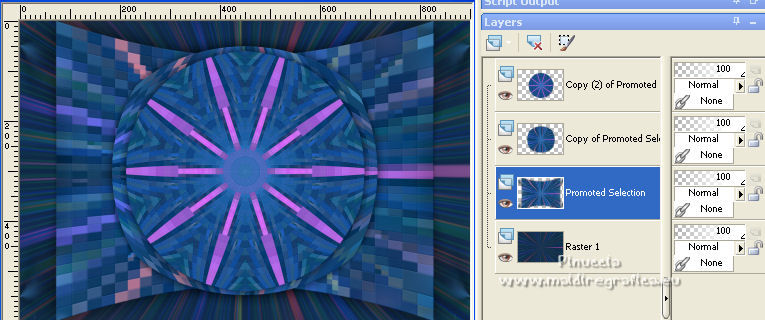
13. Activate your bottom layer.
Layers>Duplicate.
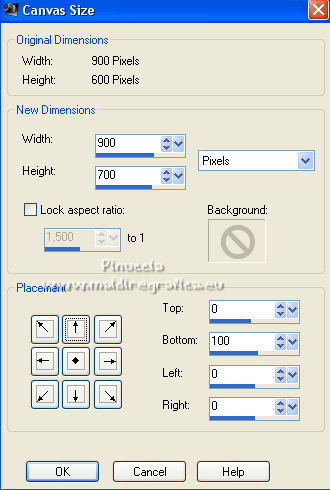
14. Image>Canvas Size - 900 x 700 pixels.
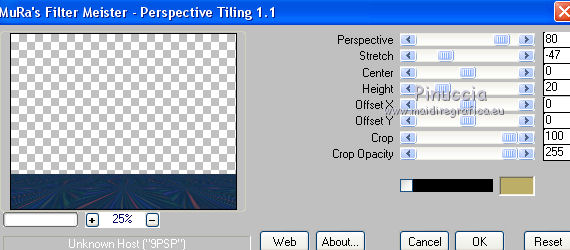
15. Effects>Plugins>Mura's Meister - Perspective Tiling.
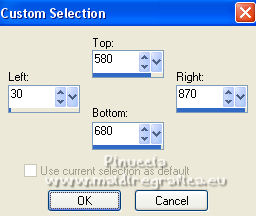
16. Selection Tool 
(no matter the type of selection, because with the custom selection your always get a rectangle)
clic on the Custom Selection 
and set the following settings.
17. Effects>3D Effects>Drop Shadow, same settings.

18. Effects>Reflection Effects>Kaleidoscope, same settings.

Selections>Select None.
19. Activate your top layer.
Open the misted Leonardo di Caprio and go to Edit>Copy.
Go back to your work and go to Edit>Paste as new layer.
Place  the tube in the center. the tube in the center.
20. Open the tube 3601-woman-LB TUBES and go to Edit>Copy.
Go back to your work and go to Edit>Paste as new layer.
Image>Resize, to 90%, resize all layers not checked.
Move  the tube to the right side. the tube to the right side.
21. Effects>Plugins>Eye Candy 3.1. - Perspective Shadow, color #000000.
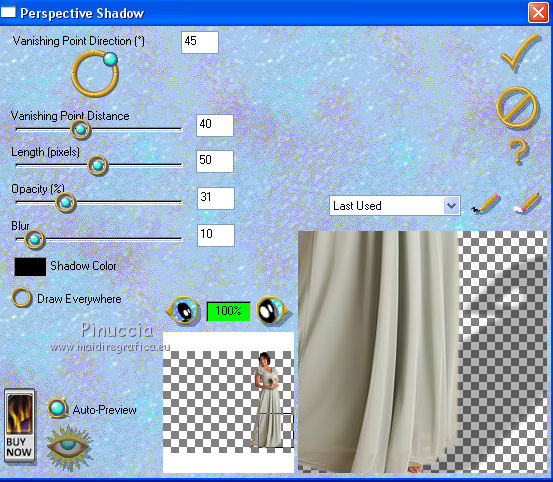
22. Open the tube Belscrap_Christmas_El 5 Free2 and go to Edit>Copy.
Go back to your work and go to Edit>Paste as new layer.
23. Effects>Image Effects>Offset.
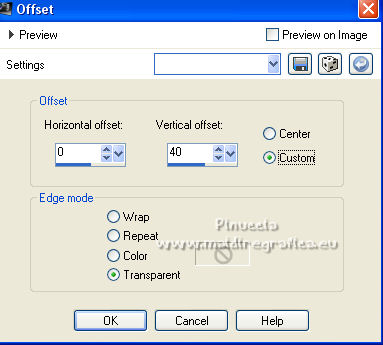
Move this layer over the layer of the Make Cube Tile effect.
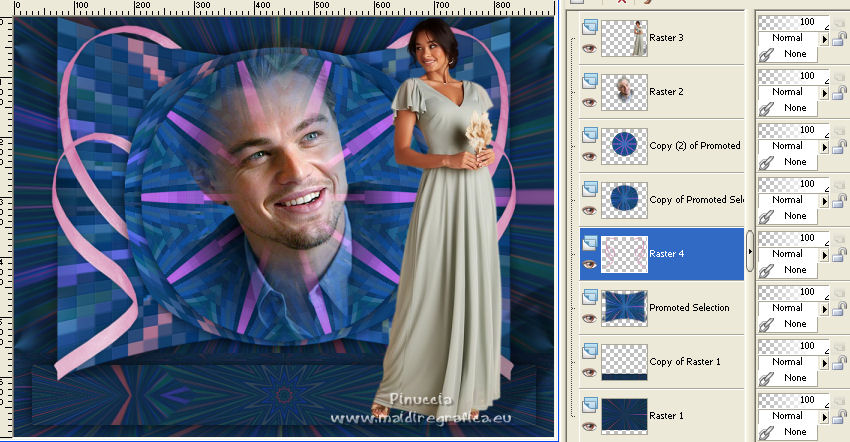
24. Effects>3D Effects>Drop Shadow, color #000000.
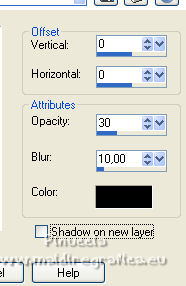
25. Activate your top layer.
Open the text Texto-Lucia-nines and go to Edit>Copy.
Go back to your work and go to Edit>Paste as new layer.
Move  the tube at the bottom left. the tube at the bottom left.
26. Layers>Merge>Merge All.
27. Keep your foreground color to #102947,
and set your background color to #ffffff.
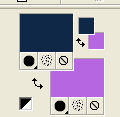
Set your foreground color to a Foreground/Background Gradient, style Linear.
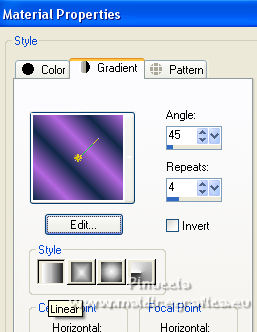
28. Image>Add borders, 2 pixels, symmetric, color #102947.
Image>Add borders, 50 pixels, symmetric, color #ffffff.
Activate your Magic Wand Tool 
and click on the white border to select it.
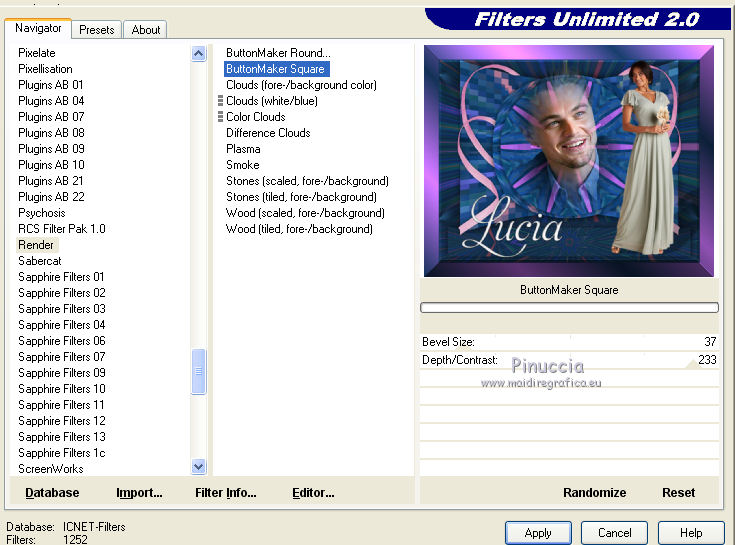
29. Effects>Plugins>Filters Unlimited 2.0 - Render - ButtonMaker Square, default settings
30. Selections>Invert.
Layers>New Raster Layer.
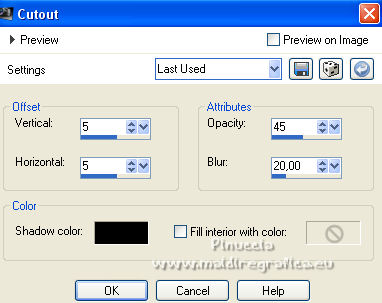
Effects>3D Effects>Cutout, color #000000.
Selections>Select None.
31. Sign your work and save as jpg.
For the tube of this version thanks Calligraphy.
 Your versions here Your versions here

If you have problems or doubts, or you find a not worked link, or only for tell me that you enjoyed this tutorial, write to me.
27 February 2022

|

