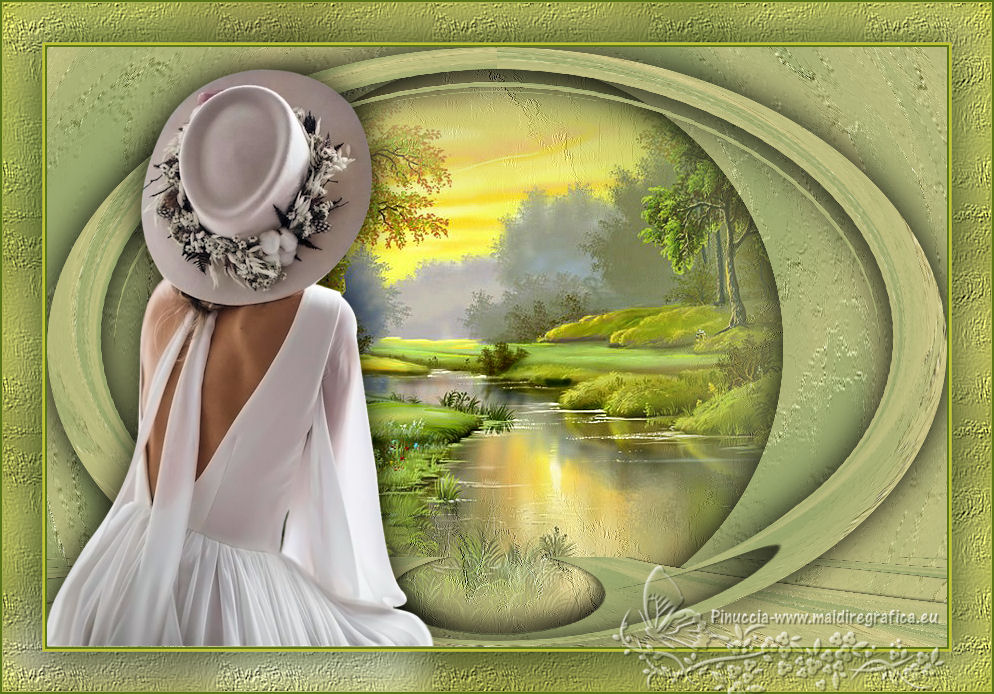
|
TOP LAURETTE


This tutorial was translated with PSPX7 but it can also be made using other versions of PSP.
Since version PSP X4, Image>Mirror was replaced with Image>Flip Horizontal,
and Image>Flip with Image>Flip Vertical, there are some variables.
In versions X5 and X6, the functions have been improved by making available the Objects menu.
In the latest version X7 command Image>Mirror and Image>Flip returned, but with new differences.
See my schedule here
 French translation here French translation here
 Your versions ici Your versions ici
For this tutorial, you will need:
Material
here
Tube_laurette_25
Misted_paisaje_imagen-1 by Rooskes
Silvie_Mask_Magical_Woman
Texture 1108RR
(you find here the links to the material authors' sites)
Plugins
consult, if necessary, my filter section here
Mura's Meister - Pole Transform here
Mura's Meister - Perspective Tiling here

You can change Blend Modes according to your colors.
Copy the texture in the Textures Folder.
Open the mask in PSP and minimize it with the rest of the material.
1. Open a new transparent image 900 x 600 pixels.
2. Set your foreground color to #9aa96e,
and your background color to #e4d496.
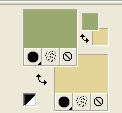
Flood Fill  the transparent image with your foreground color #9aa96e. the transparent image with your foreground color #9aa96e.
3. Layers>New Raster Layer.
Flood Fill  the layer with your background color #e4d496. the layer with your background color #e4d496.
4. Layers>New Mask layer>From image
Open the menu under the source window and you'll see all the files open.
Select the mask Silvie_Mask_Magical_Woman.
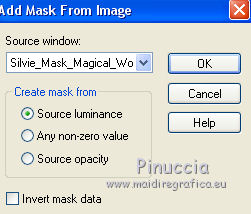
Layers>Merge>Merge Group.
5. Layers>Duplicate.
Effects>Image Effects>Seamless Tiling, default settings.

6. Layers>Merge>Merge visible.
7. Effects>Art Media Effects>Brush Strokes,
color #c0c0c0.
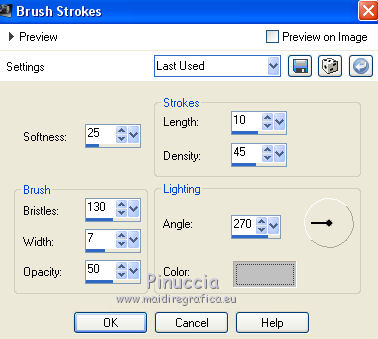
8. Adjust>Sharpness>Sharpen More.
9. Layers>Duplicate.
Effects>Plugins>Mura's Meister - Pole Transform.
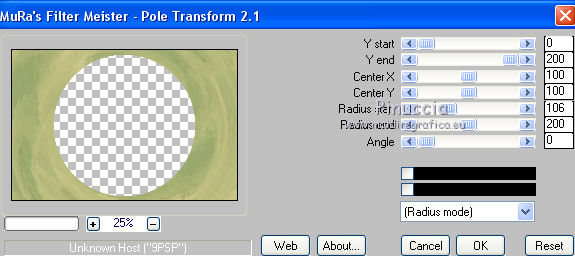
10. Effects>3D Effects>Drop Shadow, color #000000.
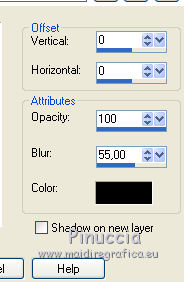
11. Layers>Duplicate.
Effects>Plugins>Mura's Meister - Perspective Tiling.
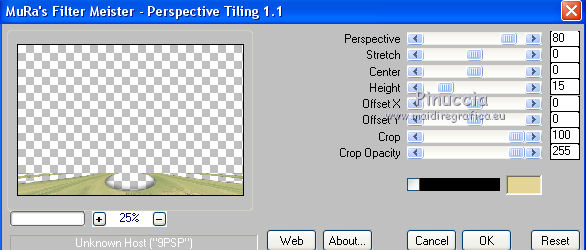
12. Layers>Duplicate.
Effects>Distortion Effects>Polar Coordinates.
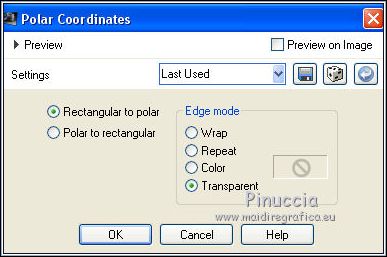
13. Effects>3D Effects>Drop Shadow, same settings.

14. Activate the bottom layer.
Open the tube paisaje_imagen-1 by Rooskes and go to Edit>Copy.
Go back to your work and go to Edit>Paste as new layer.
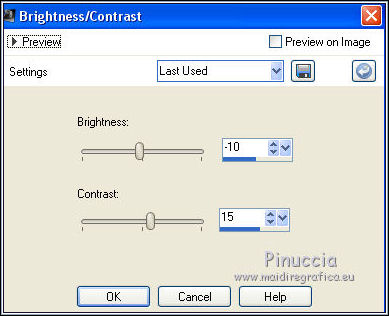
15. Adjust>Brightness and Contrast>Brightness and Contrast.
16. Activate the top layer.
Open the tube Tube_laurette_25, erase the watermark and go to Edit>Copy.
Go back to your work and go to Edit>Paste as new layer.
Image>Resize, 2 times to 80%, resize all layers not checked.
Move  the tube to the left side. the tube to the left side.
17. Effects>3D Effects>Drop Shadow, same settings.

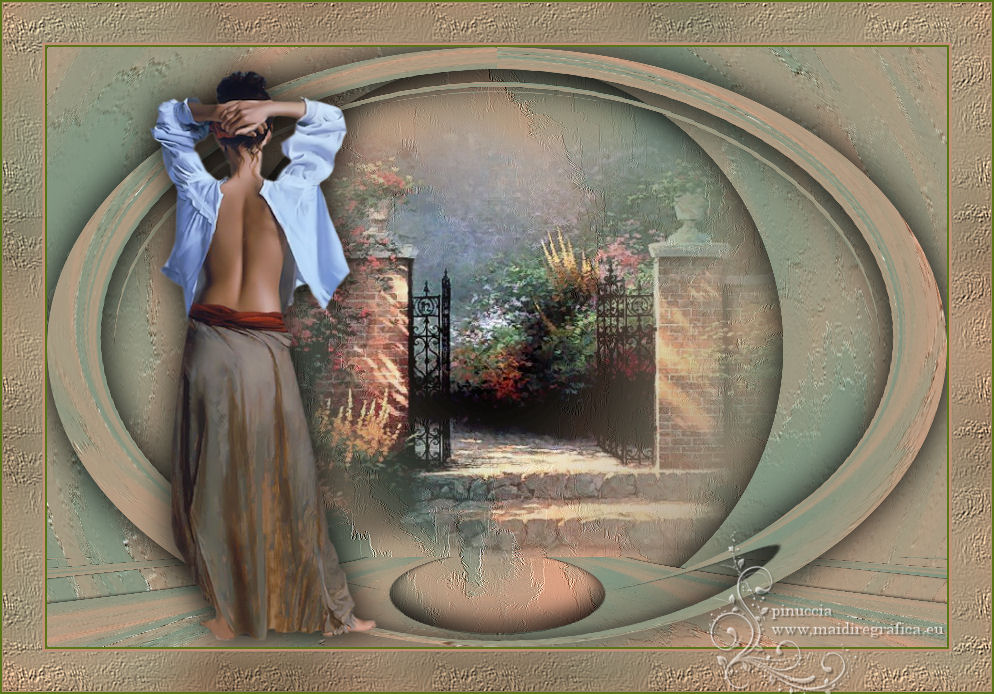
18. Layers>Merge>Merge All.
19. Image>Add borders, 2 pixels, symmetric, color #5a7517.
Image>Add borders, 3 pixels, symmetric, color #c0c435.
20. Edit>Copy.
21. Image>Add borders, 40 pixels, symmetric, color #ffffff.
Activate your Magic Wand Tool 
and click on the white border to select it.
Edit>Paste into Selection.
22. Adjust>Blur>Gaussian Blur, radius 20.

23. Effects>Texture Effects>Texture - select the 1108RR.
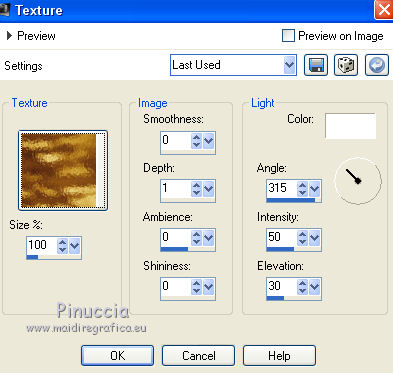
Adjust>Sharpness>Sharpen More.
24. Selections>Invert.
Effects>3D Effects>Drop Shadow, same settings, but color #455611.
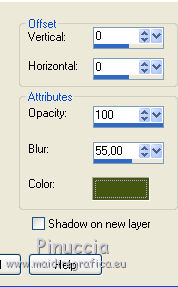
Selections>Select None.
25. Image>Add borders, 2 pixels, symmetric, color #5a7517.
26. Sign your work and save as jpg.
Version with tubes by Luz Cristina and CibiBijoux
 Your versions here Your versions here

If you have problems or doubts, or you find a not worked link, or only for tell me that you enjoyed this tutorial, write to me.
19 July 2021
|

