|
TOP EVANGELISTA


This tutorial was translated with PSPX7 but it can also be made using other versions of PSP.
Since version PSP X4, Image>Mirror was replaced with Image>Flip Horizontal,
and Image>Flip with Image>Flip Vertical, there are some variables.
In versions X5 and X6, the functions have been improved by making available the Objects menu.
In the latest version X7 command Image>Mirror and Image>Flip returned, but with new differences.
See my schedule here
 French translation here French translation here
 Your versions ici Your versions ici
For this tutorial, you will need:

3813 - Linda Evangelista-LB TUBES
Adorno069d25a2_nines
Adorno FlowerAccentCorners7-07-LM
Silvie_Mask_Deco3d4
(you find here the links to the material authors' sites)

consult, if necessary, my filter section here
Filters Unlimited 2.0 here
&<Background Designer IV> - sf10 Shades of Shadow (à importer dans Unlimited) here
&<Bkg Designer sf10III> - Sierpenski's Mirror (à importer dans Unlimited) here
AAA Frames - Foto Frame here
Alien Skin Eye Candy5 Impact - Glass here
AP [Lines] - Lines SilverLining here

You can change Blend Modes according to your colors.
In the newest versions of PSP, you don't find the foreground/background gradient (Corel_06_029).
You can use the gradients of the older versions.
The Gradient of CorelX here

Copy the preset Emboss 6 in the Presets Folder.
Copy the Selection in the Selections Folder.
Open the mask in PSP and minimize it with the rest of the material.
1. Open a new transparent image 900 x 600 pixels.
2. Set your foreground color to #b0aeb3,
and your background color to #747475.

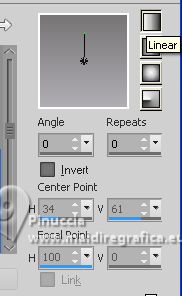
Set your foreground color to a Foreground/Background Gradient, style Linear.
Flood Fill  the transparent image with your gradient. the transparent image with your gradient.
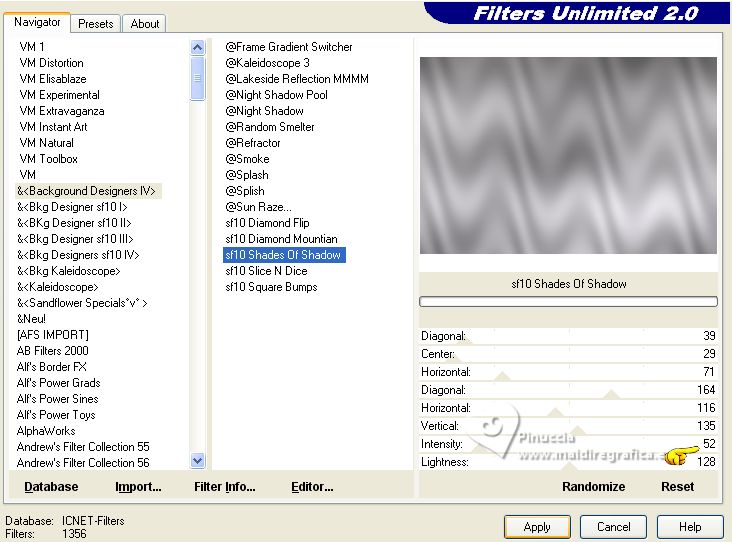
3. Effects>Plugins>Filters Unlimited 2.0 - &<Background Designer IV> - sf10 Shades of Shadow.
4. Set your foreground color to #ffffff.
Layers>New Raster Layer.
Flood Fill the layer with color white #ffffff.
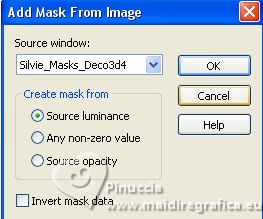
5. Layers>New Mask layer>From image
Open the menu under the source window and you'll see all the files open.
Select the mask Silvie_Mask_Deco3d4.
Layers>Merge>Merge Group.
Adjust>Sharpness>Sharpen More.
6. Layers>Duplicate.
Effects>Image Effects>Seamless Tiling, default settings.

7. Change the Blend Mode of this layer to Screen.
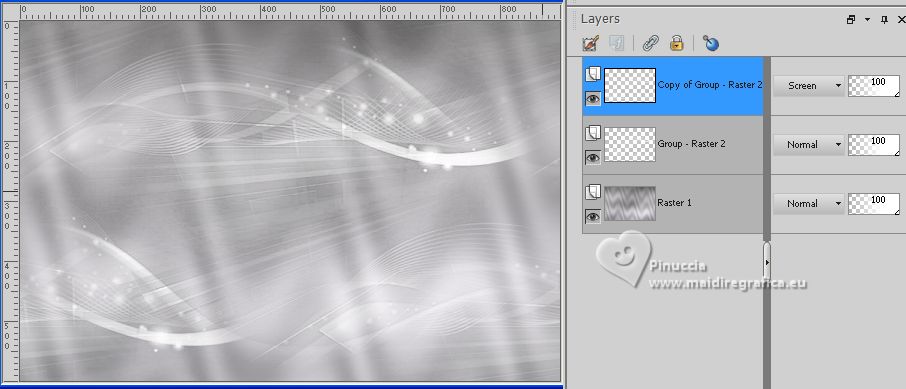
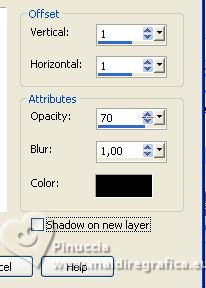
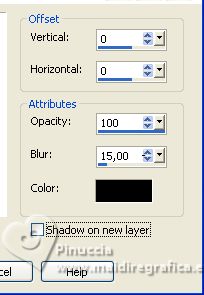
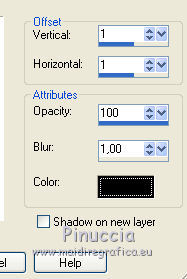
8. Effects>3D Effects>Drop Shadow, color #000000.
9. Open the tube 3813-Linda Evangelista-LB TUBES 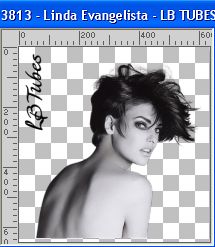
Edit>Copy.
Go back to your work and go to Edit>Paste as new layer.
Layers>Arrange>Move Down - 2 times (under the masks' layers).
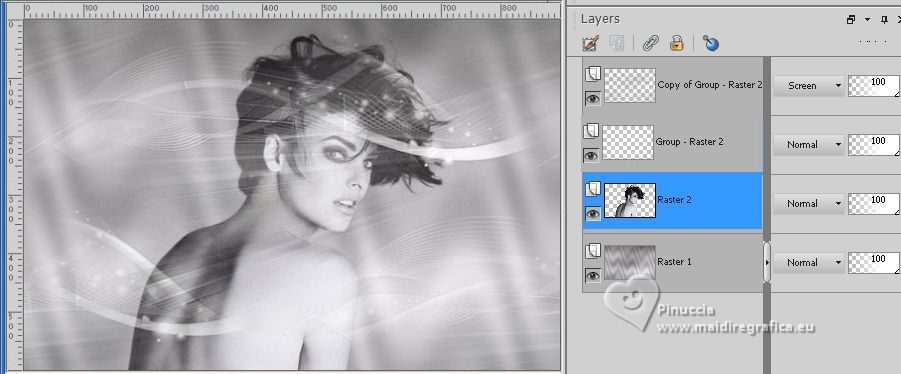
10. Activate again your top layer.
Open the tube Adorno069d25a2_nines 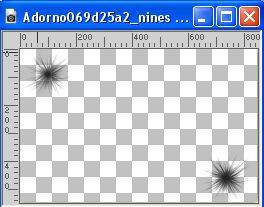
Edit>Copy.
Go back to your work and go to Edit>Paste as new layer.
Don't move it.
11. Layers>Merge>Merge visibles.
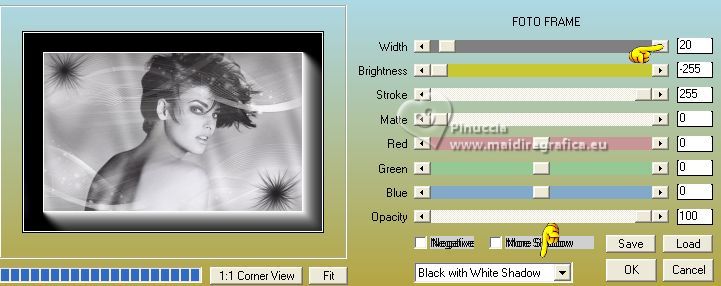
12. Effects>Plugins>AAA Frames - Foto Frame
select Black with White Shadow and set Width to 20
13. Edit>Copy .
14. Image>Resize, to 85%, resize all layers not checked.
15. Layers>New Raster Layer.
Layers>Arrange>Send to Bottom.
16. Selections>Select All.
Edit>Paste into Selection.
Selections>Select None.
17. Adjust>Blur>Gaussian Blur - radius 30.

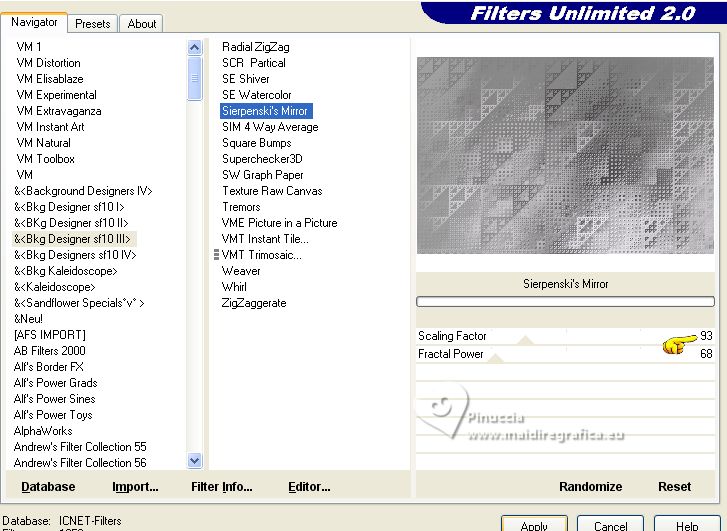
18. Effects>Plugins>Filters Unlimited 2.0 - &<Bkg Designer sf10III> - Sierpenski's Mirror.
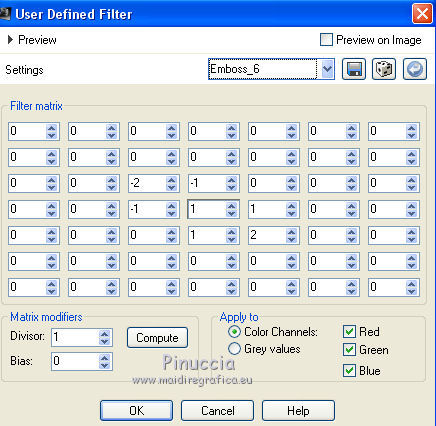
19. Effects>User Defined Filter - select the preset Emboss 6 and ok.
20. Selections>Load/Save Selection>Load Selection from Disk.
Look for and load the selection sel.522.nines
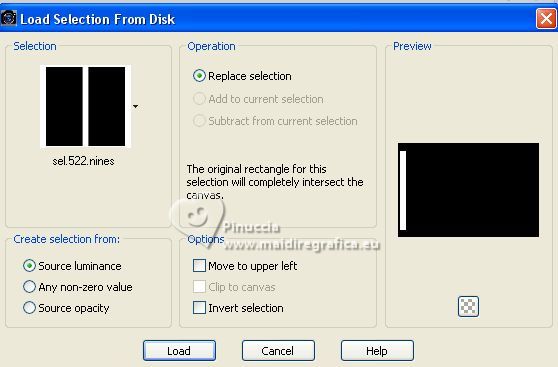
Selections>Promote Selection to Layer.
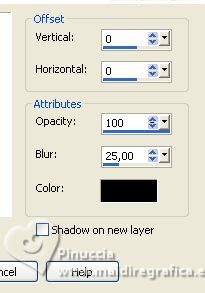
21. Effects>3D Effects>Drop Shadow, colore #000000.
22. Selections>Modify>Contract - 10 pixels.

23. Set again your foreground to the initial color (#b0aeb3) and Gradient.
Layers>New Raster Layer.
Flood Fill the layer with your Gradient.
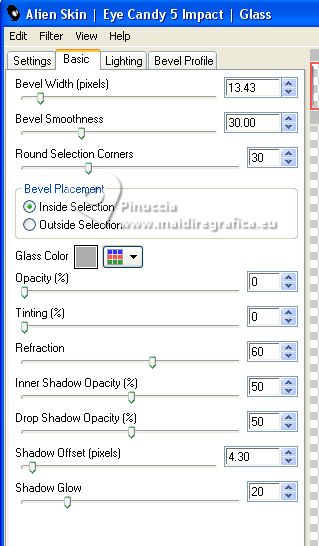
24. Effects>Plugins>Alien Skin Eye Candy 5 Impact - Glass.
Selections>Select None.
25. Layers>Merge>Merge Down.
26. Layers>Duplicate.
Image>Mirror.
Image>Flip.
27. Open the tube FlowerAccentCorners7-07-LM 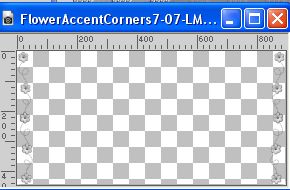
Edit>Copy.
Go back to your work and go to Edit>Paste as new layer.
28. Effects>3D Effects>Drop shadow, color #000000.
29. Layers>Merge>Merge All.
30. Image>Add borders, 2 pixels, symmetric, background color #767475.
Image>Ajouter des bordures, 40 pixels, symétrique, couleur #ffffff.
31. Activate your Magic Wand Tool 
and click on the last border to select it.
Flood Fill the selection with your background color #767475.
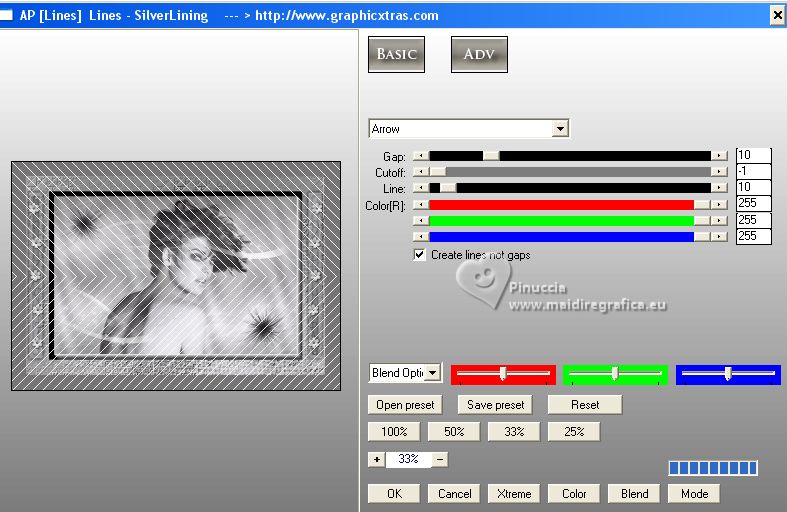
32. Effects>Plugins>AP Lines - Lines SilverLining.
33. Selections>Invert.
Effects>3D Effects>Drop Shadow, color #000000.
Selections>Select None.
34. Image>Add borders, 2 pixels, symmetric, color #000000.
35. Sign your work on a new layer.
Add the author and the translator's watermarks.
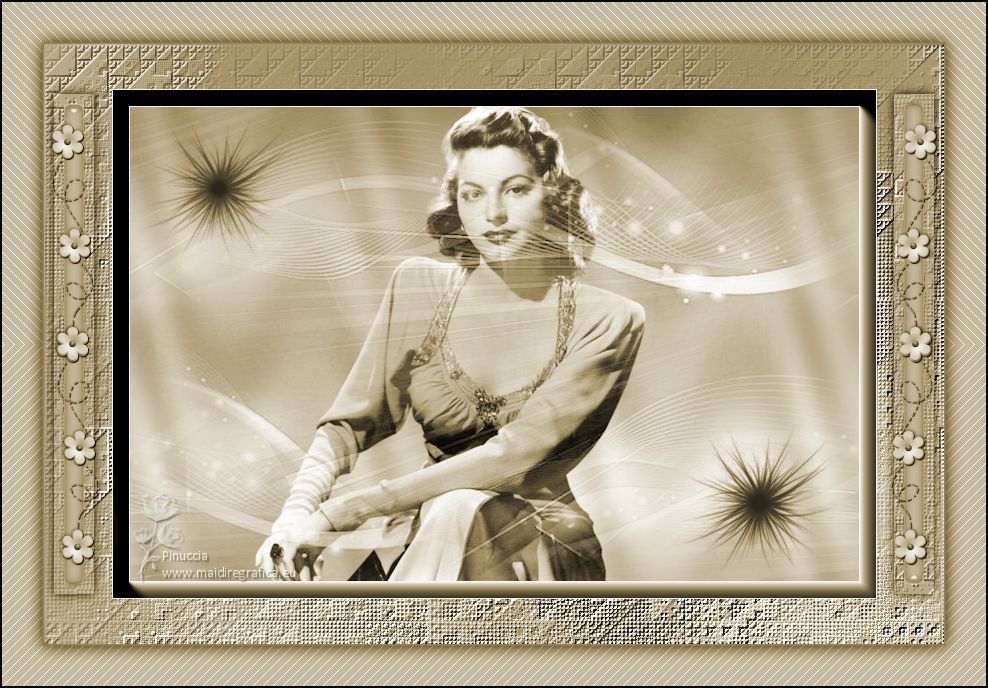
36. Layers>Merge>Merge All and save as jpg.
For the tube of this version thanks Patries
 Your versions here Your versions here

If you have problems or doubts, or you find a not worked link, or only for tell me that you enjoyed this tutorial, write to me.
18 April 2023

|


