|
TOP BALLET
 ENGLISH VERSION ENGLISH VERSION

Thanks Nines for the invitation to translate your tutorials

This tutorial was translated with PSPX7 but it can also be made using other versions of PSP.
Since version PSP X4, Image>Mirror was replaced with Image>Flip Horizontal,
and Image>Flip with Image>Flip Vertical, there are some variables.
In versions X5 and X6, the functions have been improved by making available the Objects menu.
In the latest version X7 command Image>Mirror and Image>Flip returned, but with new differences.
See my schedule here
 French translation here French translation here
 Your versions ici Your versions ici
For this tutorial, you will need:
Material here
Tube Grisi_Ballet_04
Tube Grisi_Ballet_03
Tube 1Patries_2801stravinksky piano pieces Bob Shomler
Tube Graça_Macêdo_BR_3296
Tube petits elfes de la nuit-by-Asako by 0dette
BULLE-BLUE-BLANC-AC
LF-Brush-MusicNotes
Font_Amelia-0rnaments
(you find here the links to the material authors' sites)
Plugins
consult, if necessary, my filter section here
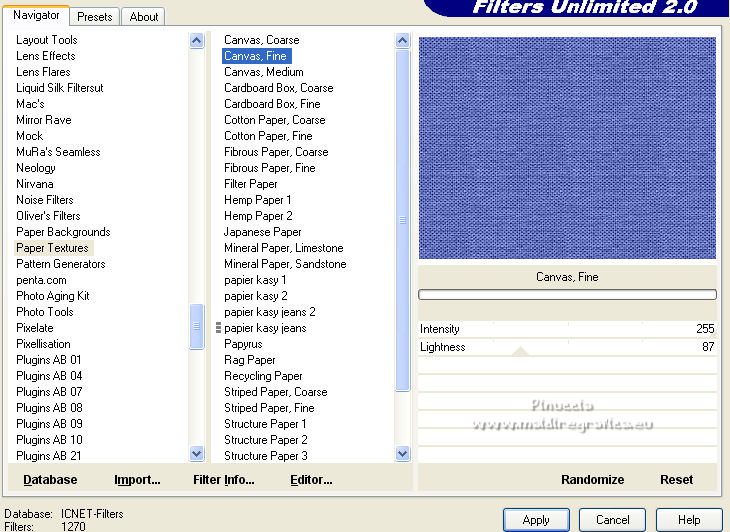
Filters Unlimited 2.0 here
Alien Skin Eye Candy 5 Impact - Extrude here
AAA Frames - Foto Frame here
Animation Shop here

You can change Blend Modes according to your colors.
1. Set your background color to #6471bb.
2. Open a new transparent image 1000 x 750 pixels.
Flood Fill  the transparent image with your background color #6471bb. the transparent image with your background color #6471bb.
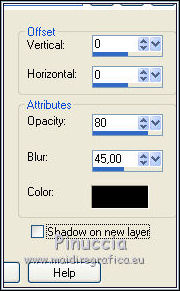
3. Effects>Filters Unlimited 2.0 - Paper Texture - Canvas Fine.
4. Open the tube calguismisted05032014 and go to Edit>Copy.
Go back to your work and go to Edit>Paste as new layer.
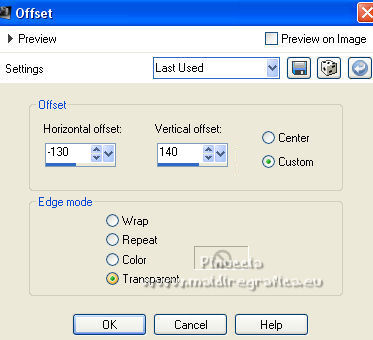
5. Effects>Image Effects>Offset.
6. Layers>Duplicate.
Image>Mirror.
7. Layers>Merge>Merge visible.
8. Effects>Plugins>AAA Frames - Foto Frame.

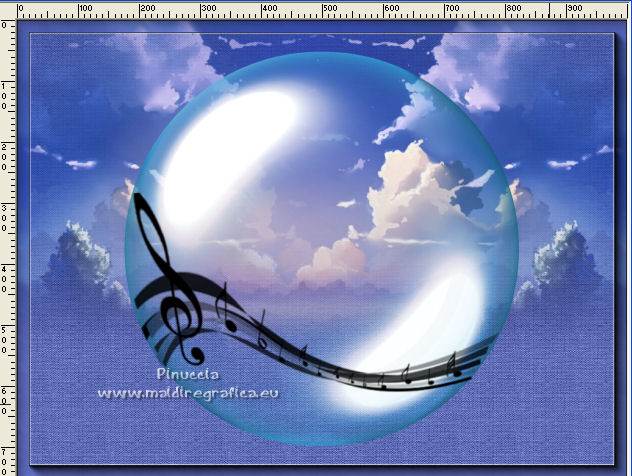
9. Open BULLE-BLUE-BLANC-AC and go to Edit>Copy.
Go back to your work and go to Edit>Paste as new layer.
10. Open LF-Brush-MusicNotes and go to Edit>Copy.
Go back to your work and go to Edit>Paste as new layer.
Place  the tube as below. the tube as below.
11. Activate your Text Tool 
with the supplied font Amelia-0rnaments, background color #6471bb,
size to set according to your PSP version; for me 400
write the lettre a (minuscule)

For the screen, I closed the 2 layers below.

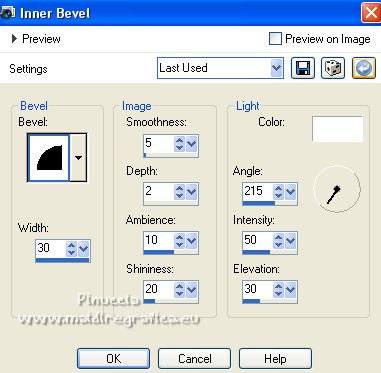
12. Effects>3D Effects>Inner Bevel, color white.
13. Selections>Promote Selection to Layer.
Selections>Select None.
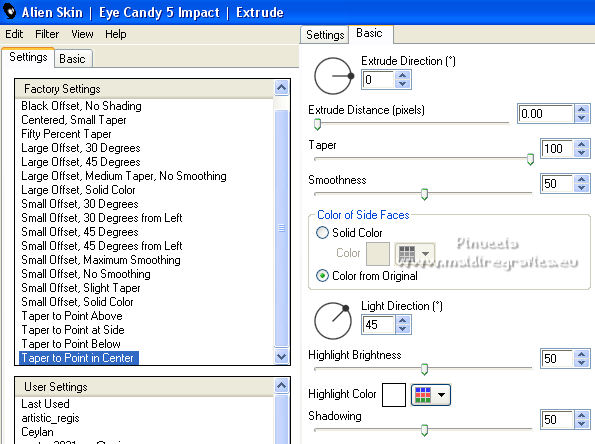
14. Effects>Plugins>Alien Skin Eye Candy 5 Impact - Extrude.
Select the preset Taper to Point in Center and ok.
15. Activate your Selection Tool  , rectangle, , rectangle,
and select the top part as below

Press CANC on the keyboard 
Selections>Select None.
16. Image>Resize, to 90%, resize all layers not checked.
Move the image down, as below.

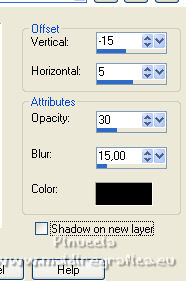
17. Effects>3D Effects>Drop Shadow, color black.
18. Copy/Paste as new layer the two little elves of the tube petits_elfes_de_la_nuit by-Asako.
Move the two tubes at the top

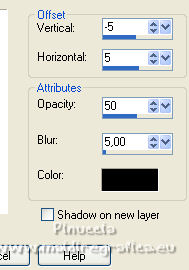
19. On the two layers: Effects3D Effects>Drop Shadow, color black.
20. Open the tube 1Patries_2801stravinksky ... and go to Edit>Copy.
Go back to your work and go to Edit>Paste as new layer.
Image>Resize, to 110%, resize all layers not checked.
Place the tube in the center.

Rename the layer "couple 1".
21. Effects>3D Effects>Drop Shadow, color black.
22. Open the tube Grisi_Ballet_04 and go to Edit>Copy.
Go back to your work and go to Edit>Paste as new layer.
Image>Resize, 1 time to 80% and 1 time to 90%, resize all layers not checked.
Effects>3D Effects>Drop Shadow, same settings.
Move the tube in the center, see my example.
Rename the layer "couple 2".
23. Open the tube Grisi_Ballet_03 and go to Edit>Copy.
Go back to your work and go to Edit>Paste as new layer.
Image>Resize, 1 time to 80% and 1 time to 90%, resize all layers not checked.
Effects>3D Effects>Drop Shadow, same settings.
Move also this tube in the center.
Rename this layer "couple 3".
24. Open the tube Graça_Macêdo_BR_3296 and go to Edit>Copy.
Go back to your work and go to Edit>Paste as new layer.
Image>Resize, to 80%, resize all layers not checked.
Effects>3D Effects>Drop Shadow, same settings.
Place correctly the tube as the previous.
Rename this layer "couple 4".
25 Sign your work on a new layer.
26. Animation.
1. Close the layers couple 2, couple 3 and couple 4.
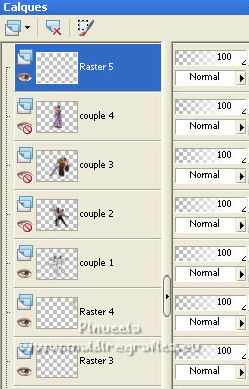
2. Edit>Copy Special>Copy Merged.
Open Animation Shop and go to Edit>Paste>Paste as new animation.
3. Go back go PSP.
Close the layer couple 1 and open the layer couple 2.

4. Edit>Copy Special>Copy Merged.
Go back to Animation Shop and go to Edit>Paste>Paster after current frame.
5. On PSP.
Close the layer couple 2 and open the layer couple 3.

6. Edit>Copy Special>Copy Merged.
On Animation Shop go to Edit>Paste>Paste after current frame.
7. On PSP.
Close the layer couple 3 and open the layer couple 4.

8. Edit>Copy Special>Copy Merged.
On Animation Shop go to Edit>Paste>Paste after current frame.
And you'll get an animation composed by 4 frames.
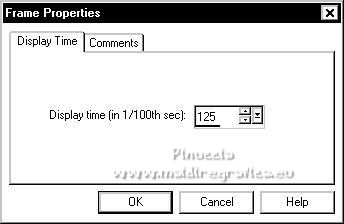
9. Edit>Select All.
Animation>Frame Properties and set to 125.
10. Animation>Resize animation, to 95%.
Check your result clicking on View Animation 
and save as gif.
Your versions here

If you have problems or doubts, or you find a not worked link, or only for tell me that you enjoyed this tutorial, write to me.
23 May 2022

|


