|
TOP BAILANDO


This tutorial was translated with PSPX7 but it can also be made using other versions of PSP.
Since version PSP X4, Image>Mirror was replaced with Image>Flip Horizontal,
and Image>Flip with Image>Flip Vertical, there are some variables.
In versions X5 and X6, the functions have been improved by making available the Objects menu.
In the latest version X7 command Image>Mirror and Image>Flip returned, but with new differences.
See my schedule here
 French translation here French translation here
 Your versions ici Your versions ici
For this tutorial, you will need:
Material
here
Tube SkyCance-moon
Tube paisaje JBL_122006Moon0verlake
Mask_ket.fadesuave
(you find here the links to the material authors' sites)

You can change Blend Modes according to your colors.
In the newest versions of PSP, you don't find the foreground/background gradient (Corel_06_029).
You can use the gradients of the older versions.
The Gradient of CorelX here
1. Open a new transparent image 1000 x 250 pixels.
2. Set your foreground color to #4a76a7,
and your background color to #1f2a58.

Set your foreground color to a Foreground/Background Gradient, style Linear.
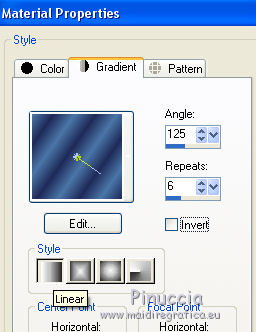
3. Selections>Select All.
Selections>Modify>Contract - 70 pixels.
Flood Fill  the selection with your Gradient. the selection with your Gradient.
Selections>Select None.
4. Effects>Distortion Effects>Polar Coordinates.

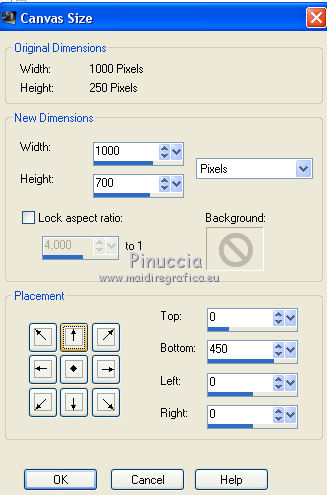
5. Image>Canvas Size - 1000 x 700 pixels.
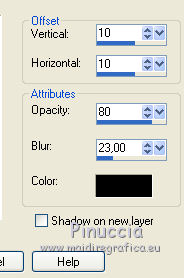
6. Effects>3D Effects>Drop Shadow, color black.
7. Change the settings of your Gradient.
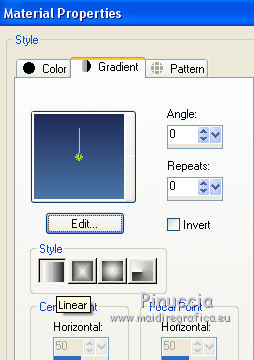
8. Layers>New Raster Layer.
Flood Fill  the layer with your Gradient. the layer with your Gradient.
9. Layers>New Raster Layer.
Selections>Select All.
10. Open the tube paisaje JBL_122006 Moon0verlake and go to Edit>Copy.
Go back to your work and go to Edit>Paste into Selection.
Selections>Select None.
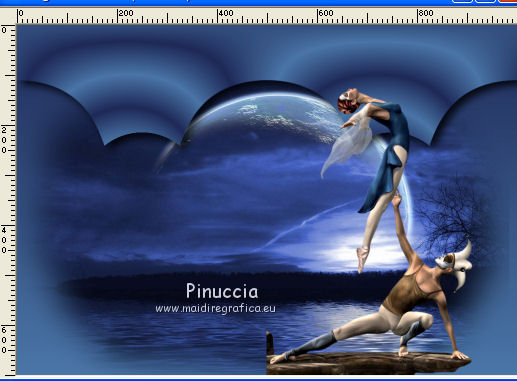
Move  the tube down, on the border. the tube down, on the border.
11. Activate your top layer.
Open the tube SkyDance_moon and go to Edit>Copy.
Go back to your work and go to Edit>Paste as new layer.
Move  the tube at the bottom right. the tube at the bottom right.
My settings with the Pick Tool 

12. Layers>Duplicate.
Image>Mirror.
Layers>Merge>Merge Down.
13. Effects>3D Effects>Drop Shadow, color black.

14. Layers>Merge>Merge visible.
15. Image>Canvas Size - 1000 x 800 pixels.
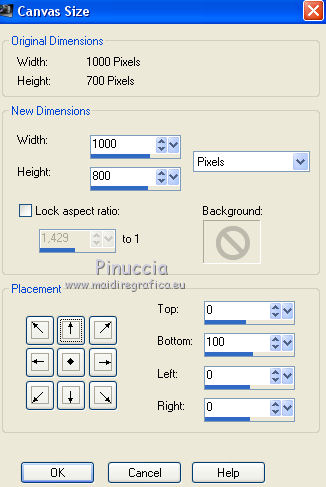
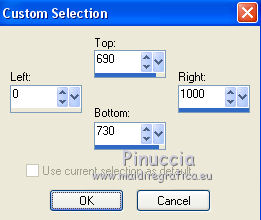
16. Selection Tool 
(no matter the type of selection, because with the custom selection your always get a rectangle)
clic on the Custom Selection 
and set the following settings.
17. Layers>New Raster Layer.
Change again the setting of your Gradient, as at step 3.

Flood Fill  the layer with your Gradient. the layer with your Gradient.
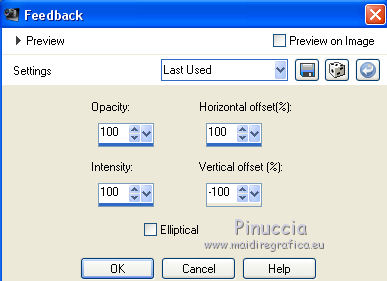
18. Effects>Reflection Effects>Feedback.
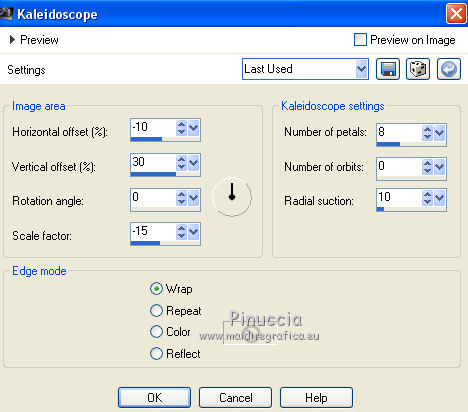
19. Effects>Reflection Effects>Kaleidoscope.
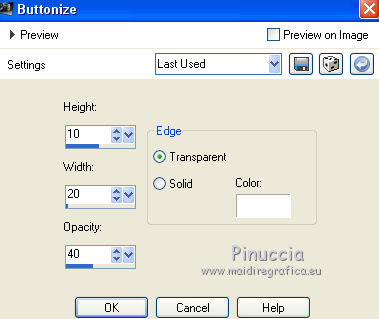
20. Effects>3D Effects>Buttonize - color white.
21. Effects>3D Effects>Drop Shadow, color black.

22. Layers>New Raster Layer.
Layers>Arrange>Send to Bottom.
Flood Fill  the layer with your background color #1f2a58. the layer with your background color #1f2a58.
23. Sign your work on a new layer.
24. Layers>Merge>Merge All.
Save as jpg.
 Your versions here Your versions here

If you have problems or doubts, or you find a not worked link, or only for tell me that you enjoyed this tutorial, write to me.
28 June 2021
|


