|
TAG TABLA FLOR


This tutorial was translated with PSPX7 but it can also be made using other versions of PSP.
Since version PSP X4, Image>Mirror was replaced with Image>Flip Horizontal,
and Image>Flip with Image>Flip Vertical, there are some variables.
In versions X5 and X6, the functions have been improved by making available the Objects menu.
In the latest version X7 command Image>Mirror and Image>Flip returned, but with new differences.
See my schedule here
 French translation here French translation here
 Your versions ici Your versions ici
For this tutorial, you will need:
Material
here
Femme 695 by Lily
Untitled-Tablo 4 FERD
(you find here the links to the material authors' sites)
Plugins
consult, if necessary, my filter section here
Texture - Placage de texture here

You can change Blend Modes according to your colors.
In the newest versions of PSP, you don't find the foreground/background gradient (Corel_06_029).
You can use the gradients of the older versions.
The Gradient of CorelX here
Copy the Preset Emboss 3 in the Presets Folder.
1. Open a new transparent image 900 x 600 pixels.
2. Set your foreground color to #d6d3d3,
and your background color to #90504f.

Set your Foreground color to a Foreground/Background Gradient, style Linear.
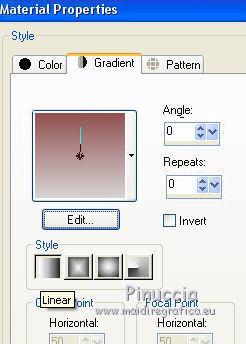
Flood Fill  the transparent image with your Gradient. the transparent image with your Gradient.
3. Effects>Plugins>Textures - Placage de texture

4. Open the tube Femme 695 by Lily, erase the watermark and go to Edit>Copy.
Minimize the tube.
Go back to your work and go to Edit>Paste as new layer.
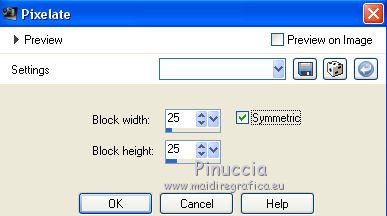
5. Effects>Distortion Effects>Pixelate.
6. Effects>User Defined Effects - select the preset Emboss 3 and ok.

7. Effects>Image Effects>Seamless Tiling, side by side

8. Layers>Merge>Merge Down.
9. Selections>Load/save Selections>Load Selection from Disk.
Look for and load the selection sel.366.nines.
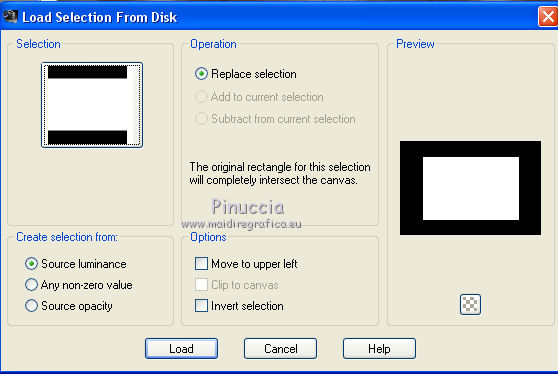
Selections>Promote Selection to Layer.
10. Adjust>Blur>Radial Blur.
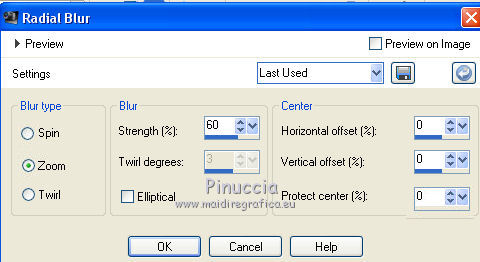
Keep selected.
11. Layers>New Raster Layer.
Open UNtitled-Tablo 4 FERD, erase the watermark and go to Edit>Copy.
Go back to your work and go to Edit>Paste into Selection.
Image>Resize, to 90%, resize all layers not checked.
Place  correctly the tube in the selection. correctly the tube in the selection.
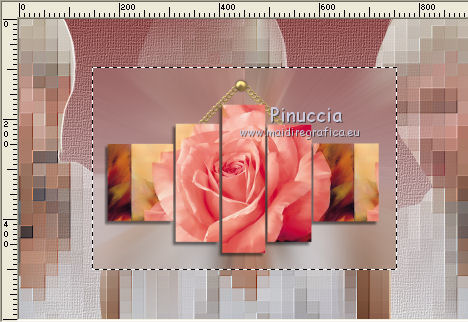
Keep always selected.
12. Layers>New Raster Layer.
Set your foreground color to Color.
Flood Fill  the layer with your foreground color #d6d3d3. the layer with your foreground color #d6d3d3.
13. Selections>Modify>Contract - 10 pixels.
Press CANC on the keyboard 
Selections>Select None.
14. Activate your Magic Wand Tool 
and click on the border to select it.
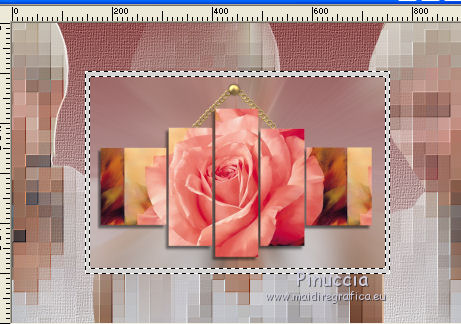
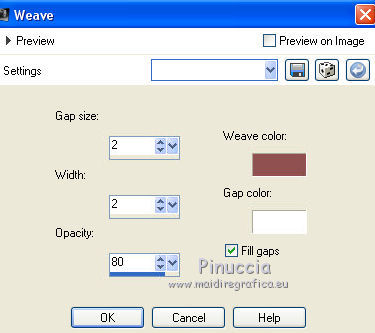
15. Effects>Texture Effects>Weave
weave color: background color #90504f
Gap Color: #ffffff.
16. Layers>Duplicate.
Effects>Image Effects>Seamless Tiling, default settings.

17. Layers>Merge>Merge All.
18. Image>Add borders, 2 pixels, symmetric, background color #90504f.
Image>Add borders, 2 pixels, symmetric, foreground color #d6d3d3,
Image>Add borders, 30 pixels, symmetric, background color #90504f.
Select the 30 pixels' border with your Magic Wand Tool 
19. Effects>Texture Efffects>Weave, same settings.

Selections>Invert.
20. Effects>3D Effects>Drop Shadow, color #000000.
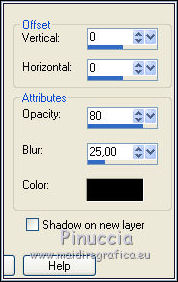
Selections>Select None.
21. Activate again the tube Femme 695 by Lily and go to Edit>Copy.
Go back to your work and go to Edit>Paste as new layer.
Image>Resize, to 80%, resize all layers not checked.
Move  the tube to the right side. the tube to the right side.
22. Layers>Duplicate.
Activate the layer below of the original.
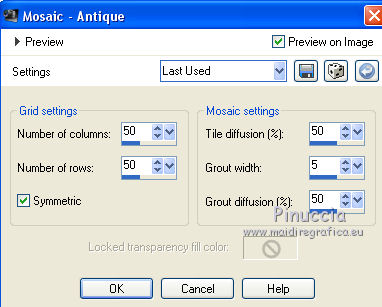
23. Effects>Texture Effects>Mosaic Antique
24. Activate the layer above of the original.
Effects>3D Effects>Drop Shadow, same settings.

25. Open the image "media cara de la femme" and go to Edit>Copy.
Go back to your work and go to Edit>Paste as new layer.
Move  the image at the bottom left. the image at the bottom left.

(I made it with the Clone tools 
you can do the clonage before copying the image ou after copying the tube,
in the last case:
activate your Clone tool 
click with your right mouse button on the face of the woman.
Layers new raster layer,
apply the brush with your left mouse button, about as below

26. Sign your work on a new layer.
Layers>Merge>Merge All.
27. Image>Add borders, 2 pixels, symmetric, dark color.
Save as jpg.
Version with tube by Elaine
![]()
 Your versions here Your versions here

If you have problems or doubts, or you find a not worked link, or only for tell me that you enjoyed this tutorial, write to me.
16 November 2020
|


