|
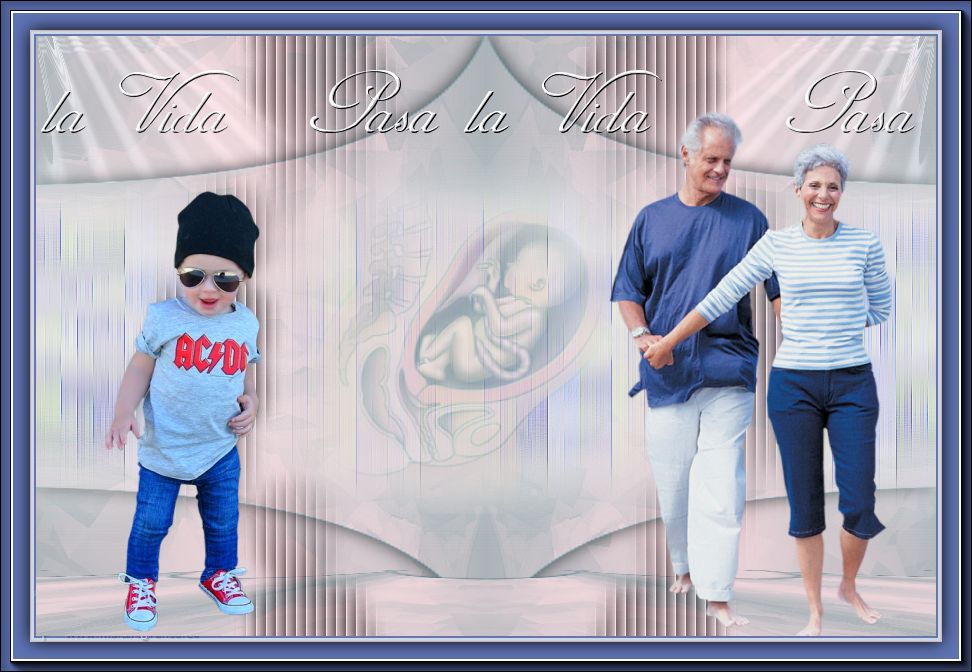
TAG PASA LA VIDA


This tutorial was translated with PSPX7 but it can also be made using other versions of PSP.
Since version PSP X4, Image>Mirror was replaced with Image>Flip Horizontal,
and Image>Flip with Image>Flip Vertical, there are some variables.
In versions X5 and X6, the functions have been improved by making available the Objects menu.
In the latest version X7 command Image>Mirror and Image>Flip returned, but with new differences.
See my schedule here
 French translation here French translation here
 Your versions ici Your versions ici
For this tutorial, you will need:

Thanks for the tubes Luz Cristina, Syl and Nena Silva.
(you find here the links to the material authors' sites)

consult, if necessary, my filter section here
Filters Unlimited 2.0 here
Andrew's Filter Collection 56 - Bit of A Mess here
Mura's Meister - Perspective Tiling here
Alien Skin Eye Candy 5 Impact - Perspective Shadow here
AAA Frames - Foto Frame here
Filters Andrew's can be used alone or imported into Filters Unlimited.
(How do, you see here)
If a plugin supplied appears with this icon  it must necessarily be imported into Unlimited it must necessarily be imported into Unlimited

You can change Blend Modes according to your colors.

1. Open a new transparent image 900 x 600 pixels.
2. Selections>Select All.
Ouvrir l'image fondo 413.nines 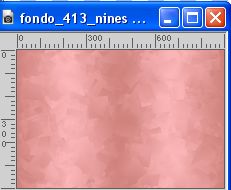
Edit>Copy.
Go back to your work and go to Edit>Paste into Selection.
Selections>Select None.
3. Layers>Duplicate.
Effects>Geometric Effects>Perspective Horizontal.
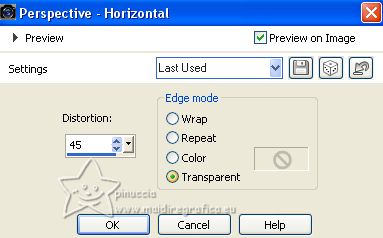
4. Effects>Image Effects>Offset.
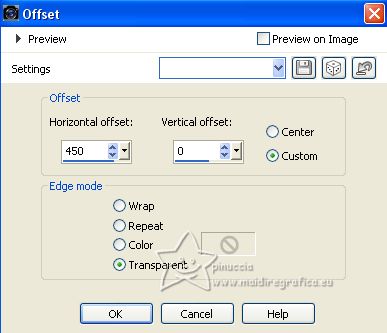
5. Layers>Duplicate.
Image>Mirror.
Layers>Merge>Merge Down.
6. Effects>Distortion Effects>Pinch

for my version (see under the tutorial the version withour my variations),
I repeated this Effect strength 50
7. Effects>3D Effects>Drop Shadow, color #000000.
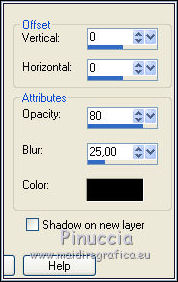
8. Layers>Duplicate.
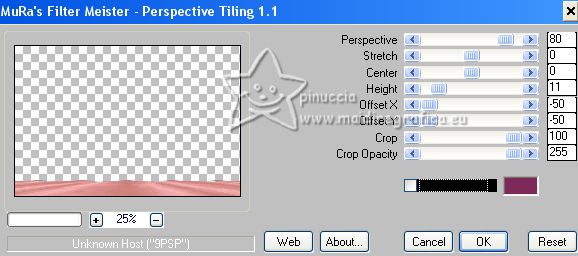
Effects>Plugins>Mura's Meister - Perspective Tiling.
9. Open Adorno_413_nines 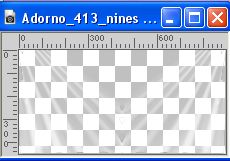
Edit>Copy.
Go back to your work and go to Edit>Paste as new layer.
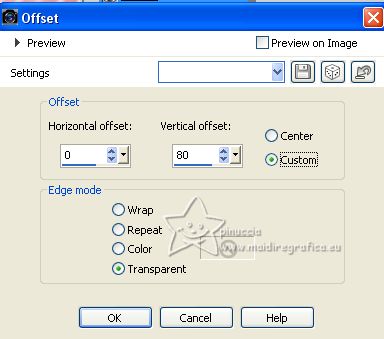
10. Effects>Image Effects>Offset.
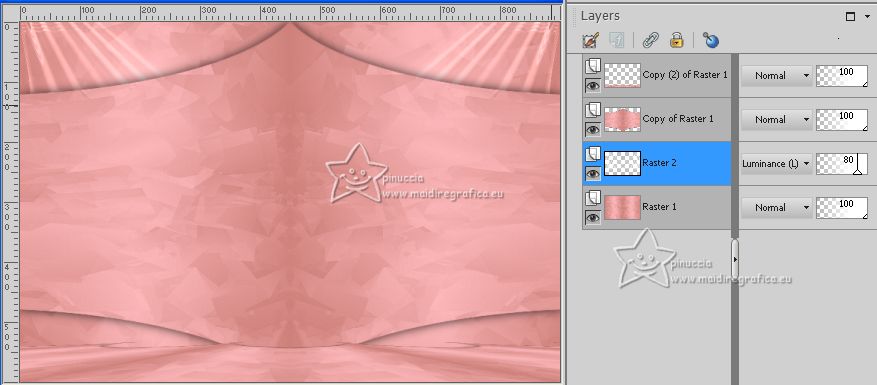
11. Change the Blend Mode of this layer to Luminance (legacy) and reduce the opacity to 80%.
Layers>Arrange>Move Down - 2 times (the layer is above the background layer, Raster 1)
12. Activate the top layer.
Open the tube ns-paisagem0829 by Nena Silva 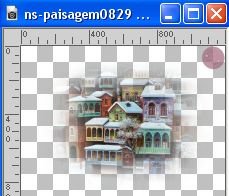
Edit>Copy.
Go back to your work and go to Edit>Paste as new layer.
Image>Resize, 3 times to 80%, resize all layers not checked.
13. Layers>Duplicate.
Change the Blend Mode of this layer to Hard Light.
14. Layers>Merge>Merge Down.
15. Adjust>Blur>Gaussian Blur - radius 15.

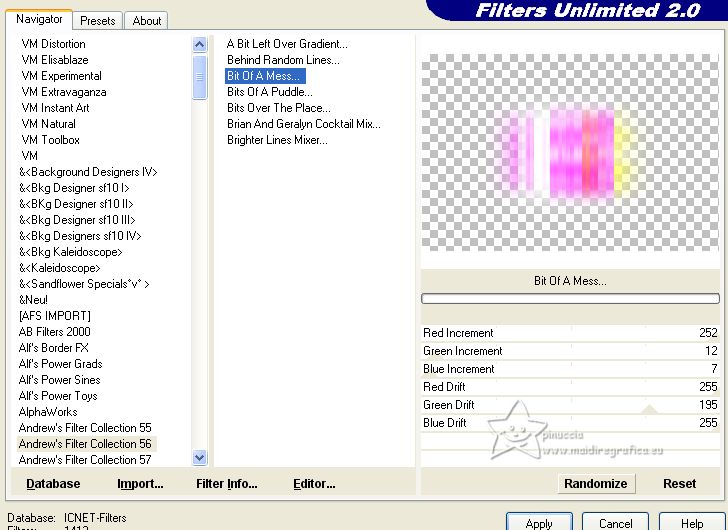
16. Effects>Plugins>Andrew's Filter Collection 56 - Bit Of A Mess.
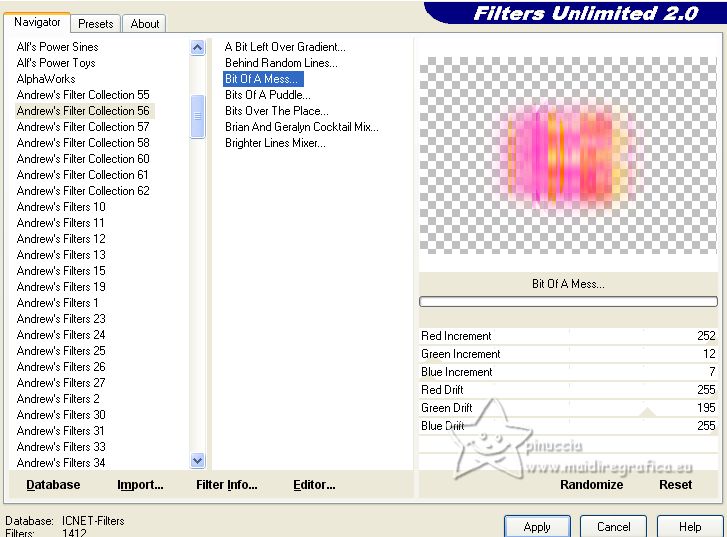
If you are using the version of Unlimited that doesn't require installation,
you will have a slightly different result, but it is not important for the final result
17. Effects>Edge Effects>Enhance More.
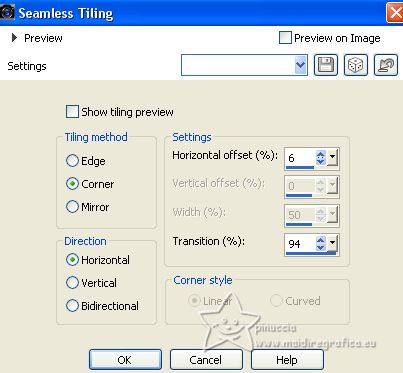
18. Effects>Image Effects>Seamless Tiling.
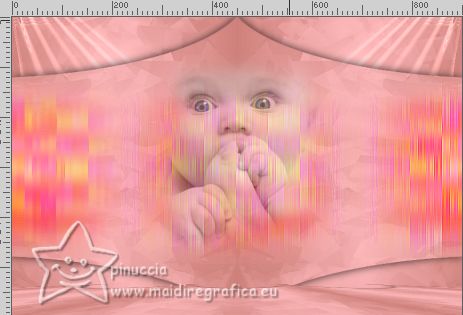
19. Open the tube rw_Tasty-2-12-08 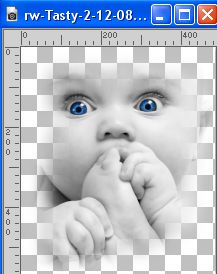
Edit>Copy.
Go back to your work and go to Edit>Paste as new layer.
Image>Resize, to 70%, resize all layers not checked.
Place  the tube in the center. the tube in the center.
Reduce the opacity of this layer to 50%.
20. Open the tube by Syl SvB Manneke 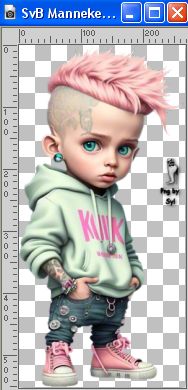
Erase the watermark and go to Edit>Copy.
Go back to your work and go to Edit>Paste as new layer.
Image>Resize, 1 time to 80% and 1 time to 90%, resize all layers not checked.
Move  the tube to the left. the tube to the left.
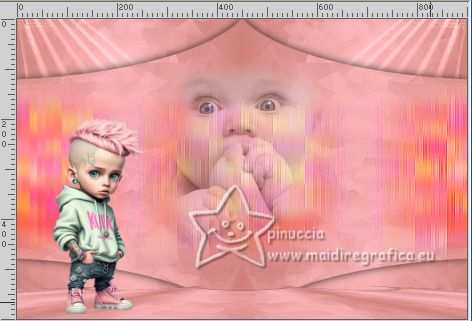
21. Effects>3D Effects>Drop Shadow, color #000000, shadow on a new layer checked.
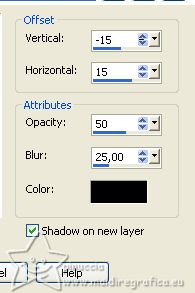
22. Stay on the shadow's layer.
Effects>Texture Effects>Blinds, color #e4f1e3.
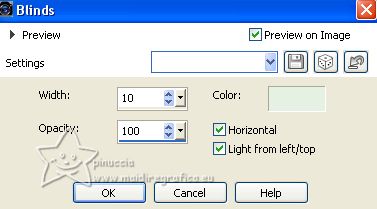
for my version I unchecked Horizontal
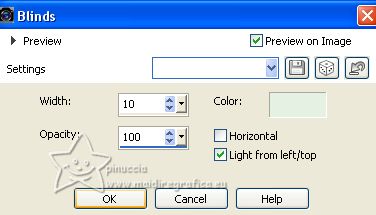
Effects>Edge Effects>Enhance More.
23. Effects>Image Effects>Seamless Tiling, default settings.

for my example I changed the Blend Mode to Luminance (legacy)
24. Layers>Duplicate.
Image>Mirror.
25. Activate the layer above of the tube.
Effects>3D Effects>Drop Shadow, color #000000,
don't forget to unchecked Shadow on a new layer.
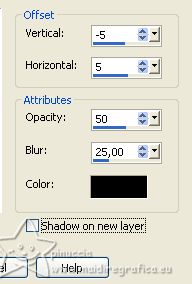
26. Open the tube 7899-Luz Cristina 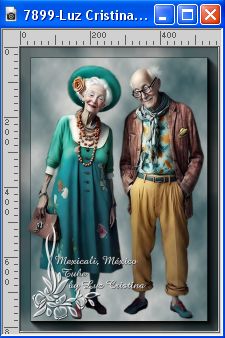
Edit>Copy.
Go back to your work and go to Edit>Paste as new layer.
Image>Resize, 2 times to 80%, resize all layers not checked.
Move  the tube to the right. the tube to the right.
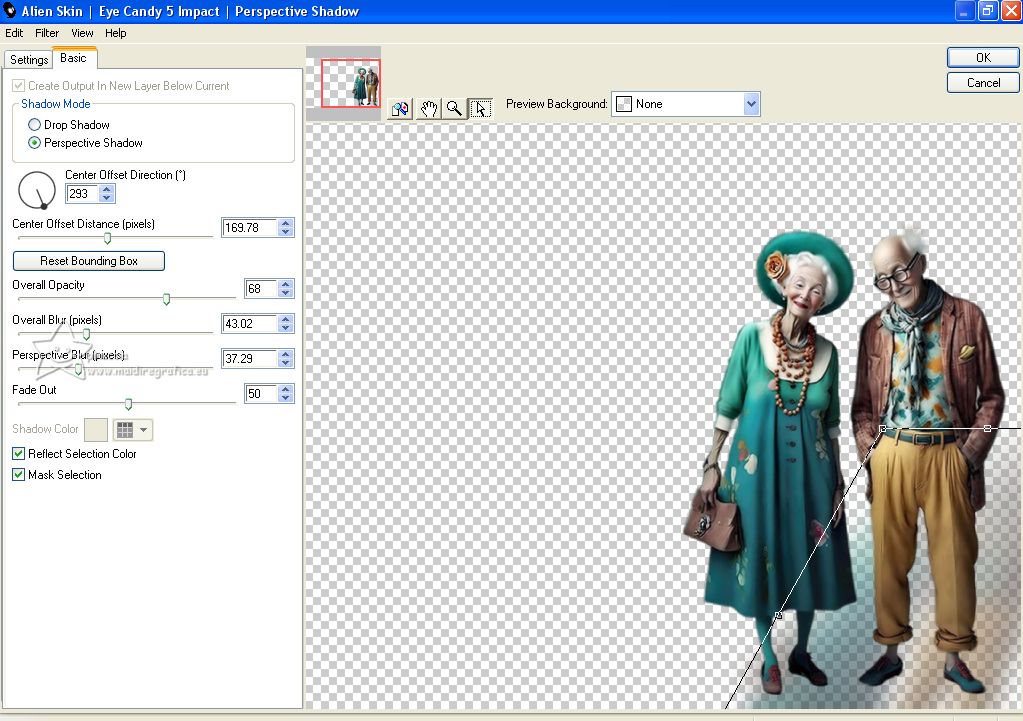
27. Effects>Plugins>Alien Skin Eye Candy 5 Impact - Perspective Shadow.
If you like, use the nodes to adapt the shadow to your tube
28. Open the texte Texto_Pasa la Vida_nines 
Edit>Copy.
Go back to your work and go to Edit>Paste as new layer.
Move  the text up. the text up.
29. Layers>Duplicate.
Effects>Image Effects>Seamless Tiling, side by side.

30. Sign your work on a new layer.
Add the author and the translator's watermarks.
31. Layers>Merge>Merge All.
32. Image>Add borders, 2 pixel, symmetric, color #cd807b.
Image>Add borders, 2 pixel, symmetric, color #35a08c.
Image>Add borders, 5 pixel, symmetric, color #ecfee0.
Image>Add borders, 30 pixel, symmetric, color #cd807b.
33. Activate your Magic Wand Tool 
and click in the last border to select it.
34. Selections>Invert.
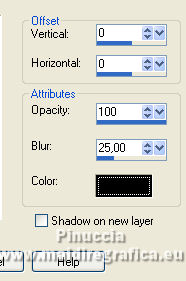
Effects>3D Effects>Drop Shadow, color #000000.
Selections>Select None.
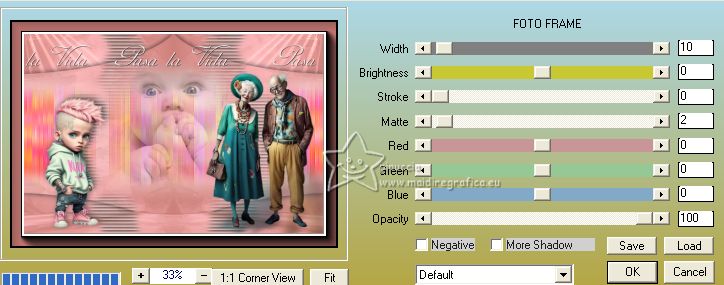
35. Effects>Plugins>AAA Frames - Foto Frame.
36. Save as jpg.
Version without my variations

For the tubes of this version thanks Mina, Rosy and Irene

If you have problems or doubts, or you find a not worked link, or only for tell me that you enjoyed this tutorial, write to me.
3 July 2023

|

