|
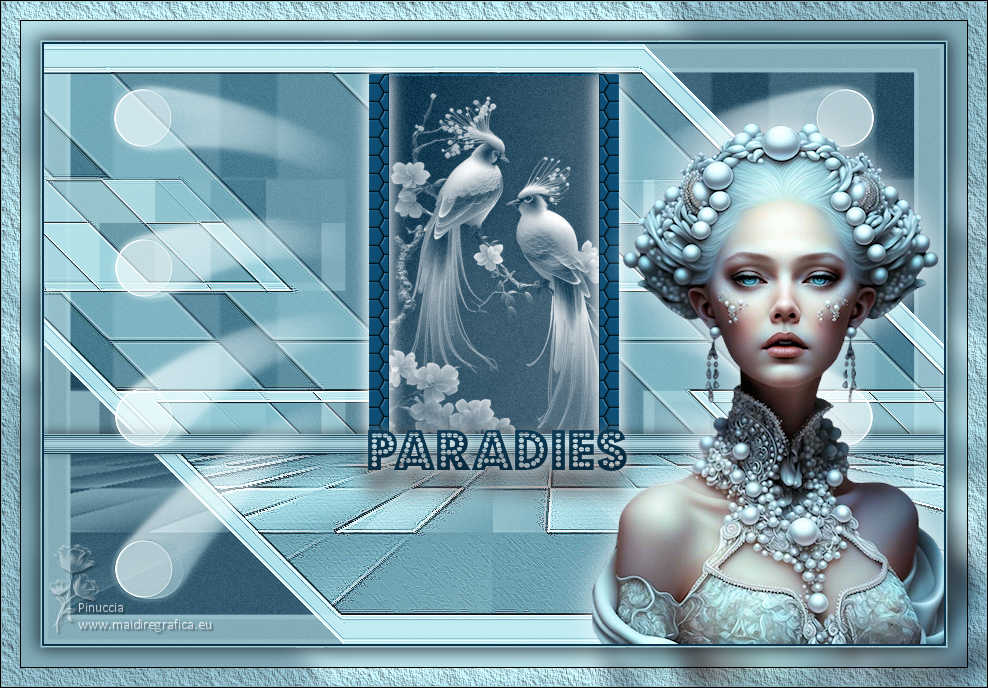
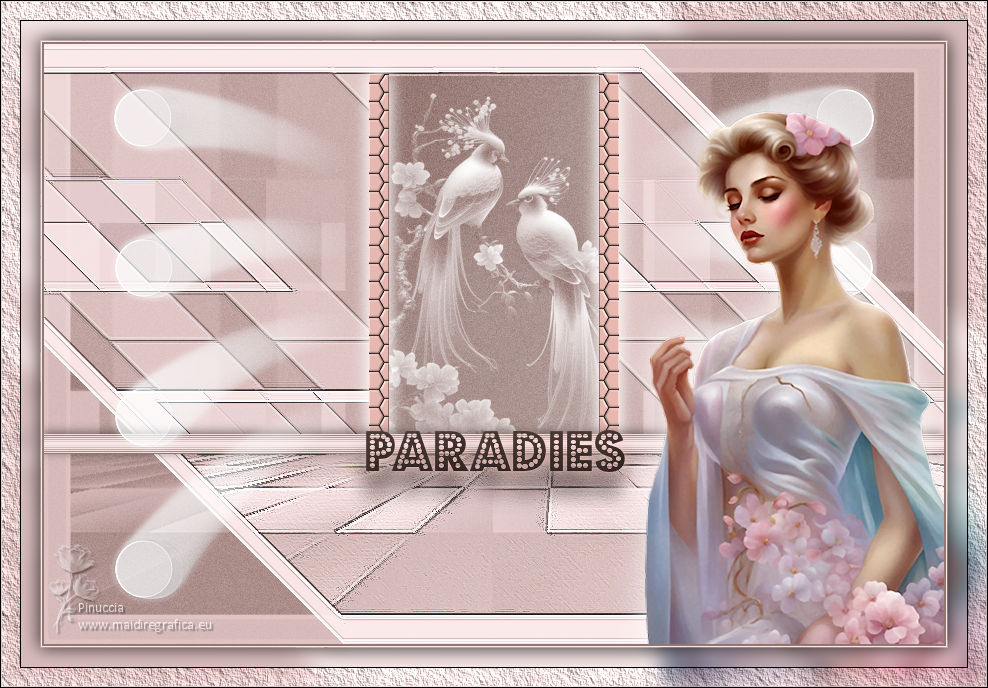
TAG PARADIES


This tutorial was translated with PSP09 but it can also be made using other versions of PSP.
Since version PSP X4, Image>Mirror was replaced with Image>Flip Horizontal,
and Image>Flip with Image>Flip Vertical, there are some variables.
In versions X5 and X6, the functions have been improved by making available the Objects menu.
In the latest version X7 command Image>Mirror and Image>Flip returned, but with new differences.
See my schedule here
 French translation here French translation here
 Your versions here Your versions here
For this tutorial, you will need:

Thanks for the tube Renée and for a mask Silvie.
(you find here the links to the material authors' sites)

consult, if necessary, my filter section here
Alien Skin Eye Candy 5 Impact - Extrude, Motion Trail here
AAA Frames - Texture Frame here

You can change Blend Modes according to your colors.
In the newest versions of PSP, you don't find the foreground/background gradient (Corel_06_029).
You can use the gradients of the older versions.
The Gradient of CorelX here

Open the mask in PSP and minimize it with the rest of the material.
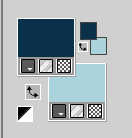
Set your foreground color to #0a334b,
and your background color to #abd3dc.
2. Open a new transparent image 900 x 600 pixels.
Flood Fill  the transparent image with your foreground color #0a334b. the transparent image with your foreground color #0a334b.
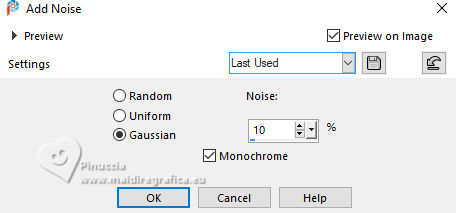
3. Adjust>Add/Remove Noise>Add Noise.
4. Layers>New Raster Layer.
Flood fill  the layer with your background color #abd3dc. the layer with your background color #abd3dc.
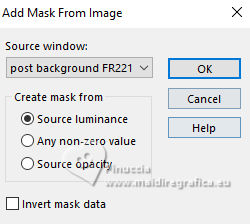
5. Layers>New Mask layer>From image
Open the menu under the source window and you'll see all the files open.
Select the mask Mask post background FR221021
Layers>Merge>Merge Group.
6. Layers>Duplicate.
Effects>Geometric Effects>Skew.
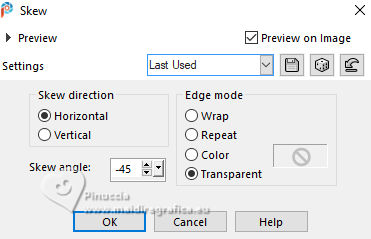
Effects>Edge Effects>Enhance.
7. Layers>Duplicate.
Change the Blend Mode of this layer to Hard Light.
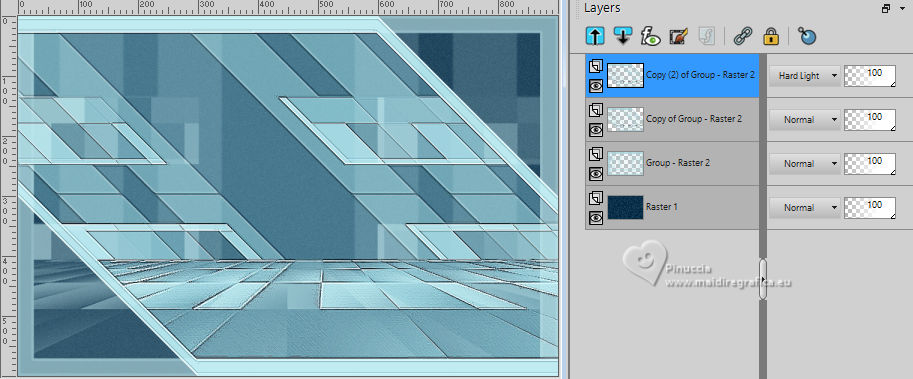
8. Activate your background layer, Raster 1.
Selection Tool 
(no matter the type of selection, because with the custom selection your always get a rectangle)
clic on the Custom Selection 
and set the following settings.
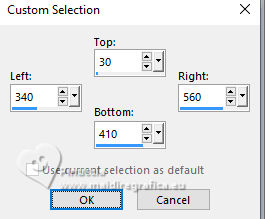
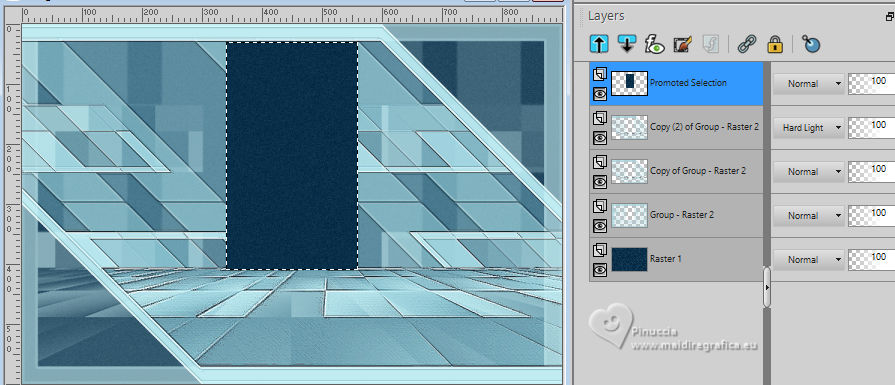
Selections>Promote Selection to Layer.
Layers>Arrange>Bring to Top.
Activate the layer of the mask.
Press CANC on the keyboard 
Activate the layer above of the first copy and repeat CANC.
Activate the layer above of the second copy and repeat CANC.
Activate again your top layer.
9. Selections>Modify>Contract - 2 pixels.
Press CANC on the keyboard 
10. Layers>New Raster Layer.
Set your background color to #ac3429.
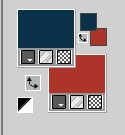
Flood fill  the layer with your background color #ac3429. the layer with your background color #ac3429.
11. Open Silvie_Mask_Paradies_Birds74 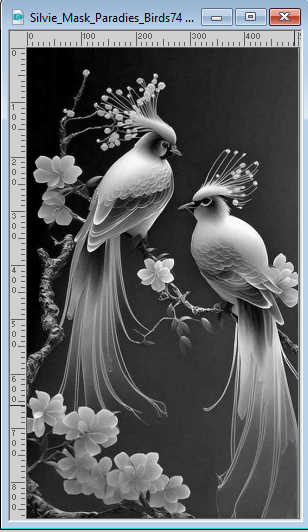
Edit>Copy.
Go back to your work and go to Edit>Paste into Selection.
Selections>Select None.
12. Change the Blend Mode of this layer to Screen.
Layers>Arrange>Move Down (under the frame's layer).
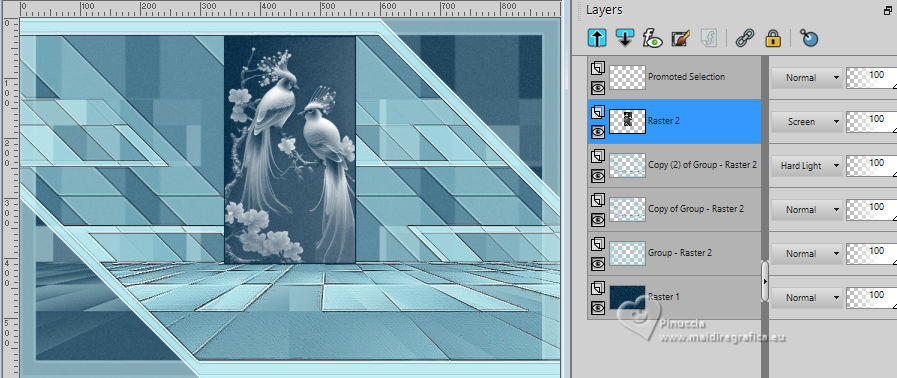
13. Activate the layer above.
Layers>Merge>Merge Down (frame and mask).
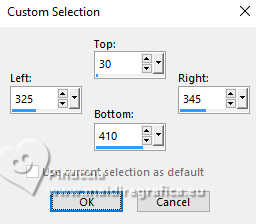
14. Custom Selection 
15. Layers>New Raster Layer.
Flood fill  with your foreground color #a0334b. with your foreground color #a0334b.
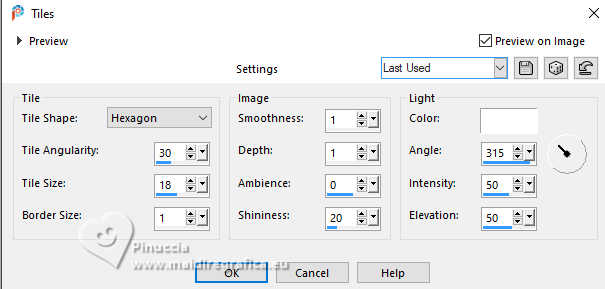
16. Effects>Texture Effects>Tiles - color #ffffff.
17. Effects>3D Effects>Drop Shadow, color #ffffff.
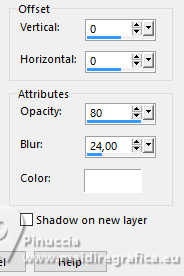
Edit>Repeat Drop Shadow.
18. Layers>Duplicate.
Image>Mirror>Mirror horizontal.
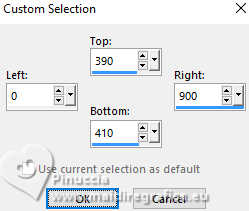
19. Custom Selection 
20. Keep your foreground color #0a334b,
and set again your background color to #abd3dc.

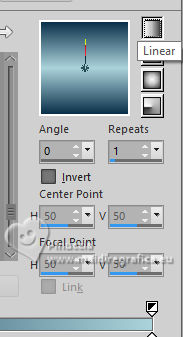
Set your foreground color to a Foreground/Background Gradient, style Linear.
21. Layers>New Raster Layer.
Flood fill  the layer with your Gradient. the layer with your Gradient.
22. Effects>Texture Effects>Blind - background color #abd3dc.
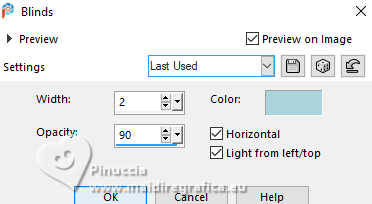
Selections>Select None.
23. Effects>3D Effects>Drop Shadow, color #000000.
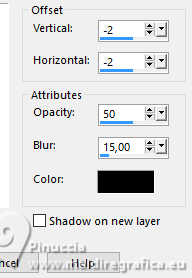
24. Open Adorno_paradies_nines 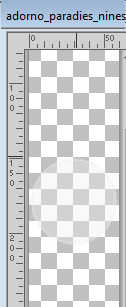
Edit>Copy.
Go back to your work and go to Edit>Paste as new layer.
25. Effects>Image Effects>Offset.
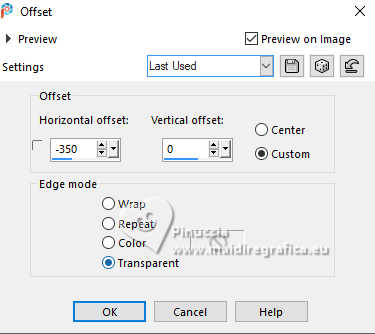
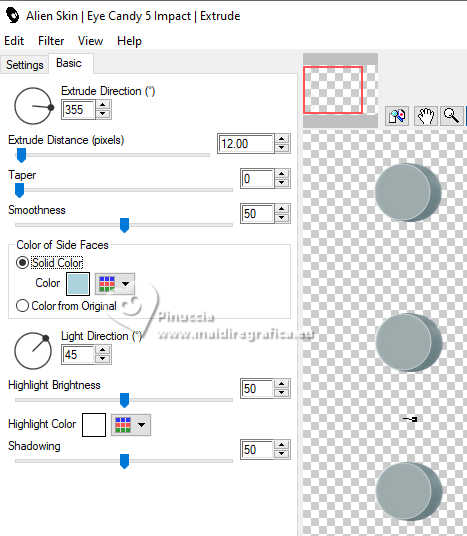
26. Effects>Plugins>Alien Skin Eye Candy 5 Impact - Extrude
Solid Color: background color #abd3dc.
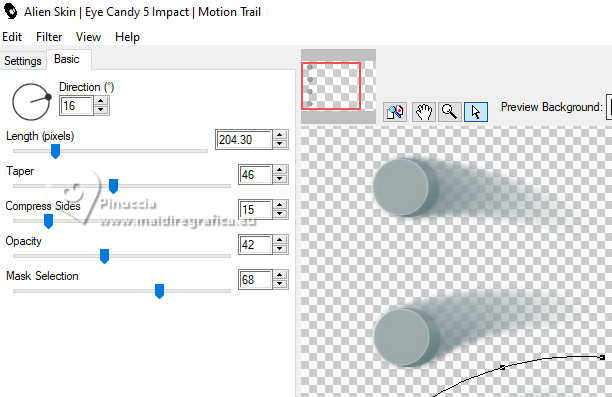
27. Effects>Plugins>Alien Skin Eye Candy 5 Impact - Motion Trail
28. Change the Blend Mode of this layer to Screen.
Adjust>Sharpness>Sharpen More.
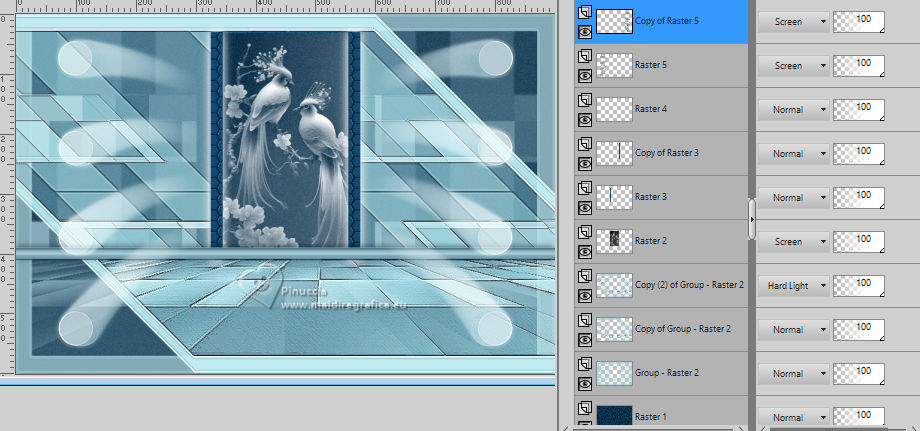
29. Layers>Duplicate.
Image>Mirror>Mirror horizontal.
30. Open the tube Renee-TUBES-Juin-8 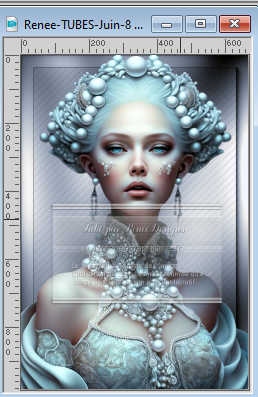
Edit>Copy.
Go back to your work and go to Edit>Paste as new layer.
Image>Resize, 1 time to 70% and 1 time to 80%, resize all layers not checked.
Move  the tube to the right side. the tube to the right side.
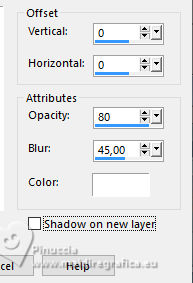
31. Effects>3D Effects>Drop Shadow, color #ffffff.
32. Open Texto_Paradies_nines 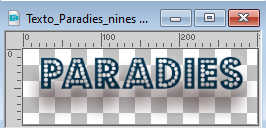
Edit>Copy.
Go back to your work and go to Edit>Paste as new layer.
Place  the text in the center. the text in the center.
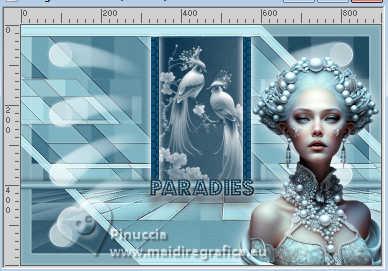
33. Sign your work on a new layer.
Add the author and the translator's watermarks.
34. Layers>Merge>Merge All.
35. Image>Add borders, 2 pixels, symmetric, foreground color #0a334b.
Image>Add borders, 2 pixels, symmetric, background color #abd3dc.
36. Edit>Copy
37. Image>Add borders, 40 pixels, symmetric, color #ffffff.
Activate your Magic Wand Tool 
and click in this border to select it.
38. Edit>Paste into Selection
39. Adjust>Blur>Gaussian Blur - radius 10.

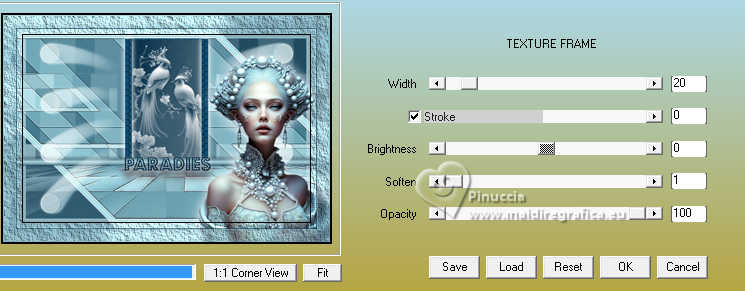
40. Effects>Plugins>AAA Texture Frame.
41. Selections>Invert.
Effects>3D Effects>Drop Shadow, color #000000.

Selections>Select None.
42. Save as jpg.
For the tubes of this version thanks Silvie

If you have problems or doubts, or you find a not worked link, or only for tell me that you enjoyed this tutorial, write to me.
5 June 2024

|

